# WinterNode Full Content Index
> Concatenated WinterNode help center and blog corpus for AI ingestion. Operated by HostVenom LLC. 131 blog posts and 262 help articles included; canonical URLs accompany each section so citations can resolve back to the live page.
Generated: 2026-09-18T17:16:19.099Z
---
# Help Center
# Account Suspension
> Understanding automatic and manual account suspensions at WinterNode, and how to resolve them.
Source: https://winternode.com/help/accounting-and-billing/account-suspension
If your account or service has been suspended, you'll receive an email explaining why. Most suspensions are resolved quickly once the underlying issue is addressed.
## Automatic Suspension
Automatic suspensions occur when a service is overdue or has exhausted its limits (e.g., bandwidth). This process is fully automated, including reactivation after payment or upgrades.
**How it works:**
1. You receive warning emails before suspension
2. If payment isn't received, the service is suspended
3. Once you pay the overdue invoice, the service reactivates automatically
To resolve: Log into the [Client Area](https://clients.winternode.com), find the overdue invoice, and submit payment.
## Manual Suspension
In rare cases, our team may manually suspend an account. You'll receive a notice from us explaining the reason.
We take all possible steps to avoid manual suspension unless absolutely necessary. If your account has been manually suspended, the notice will include instructions for next steps.
---
# Link Your Discord Account
> Link your Discord account to your WinterNode Client Account to verify your identity in support tickets and unlock client-only channels.
Source: https://winternode.com/help/accounting-and-billing/claim-discord-role
We ask that clients link their Discord account to their Client Account as an additional verification step when we provide support in Discord tickets. This also grants you access to additional channels in the Discord Server and lets everyone know that you have a Client Account with us.
Log into the [Client Portal](https://clients.winternode.com/clientarea.php) and find the Connect Discord button in the left sidebar under the Shortcuts panel.
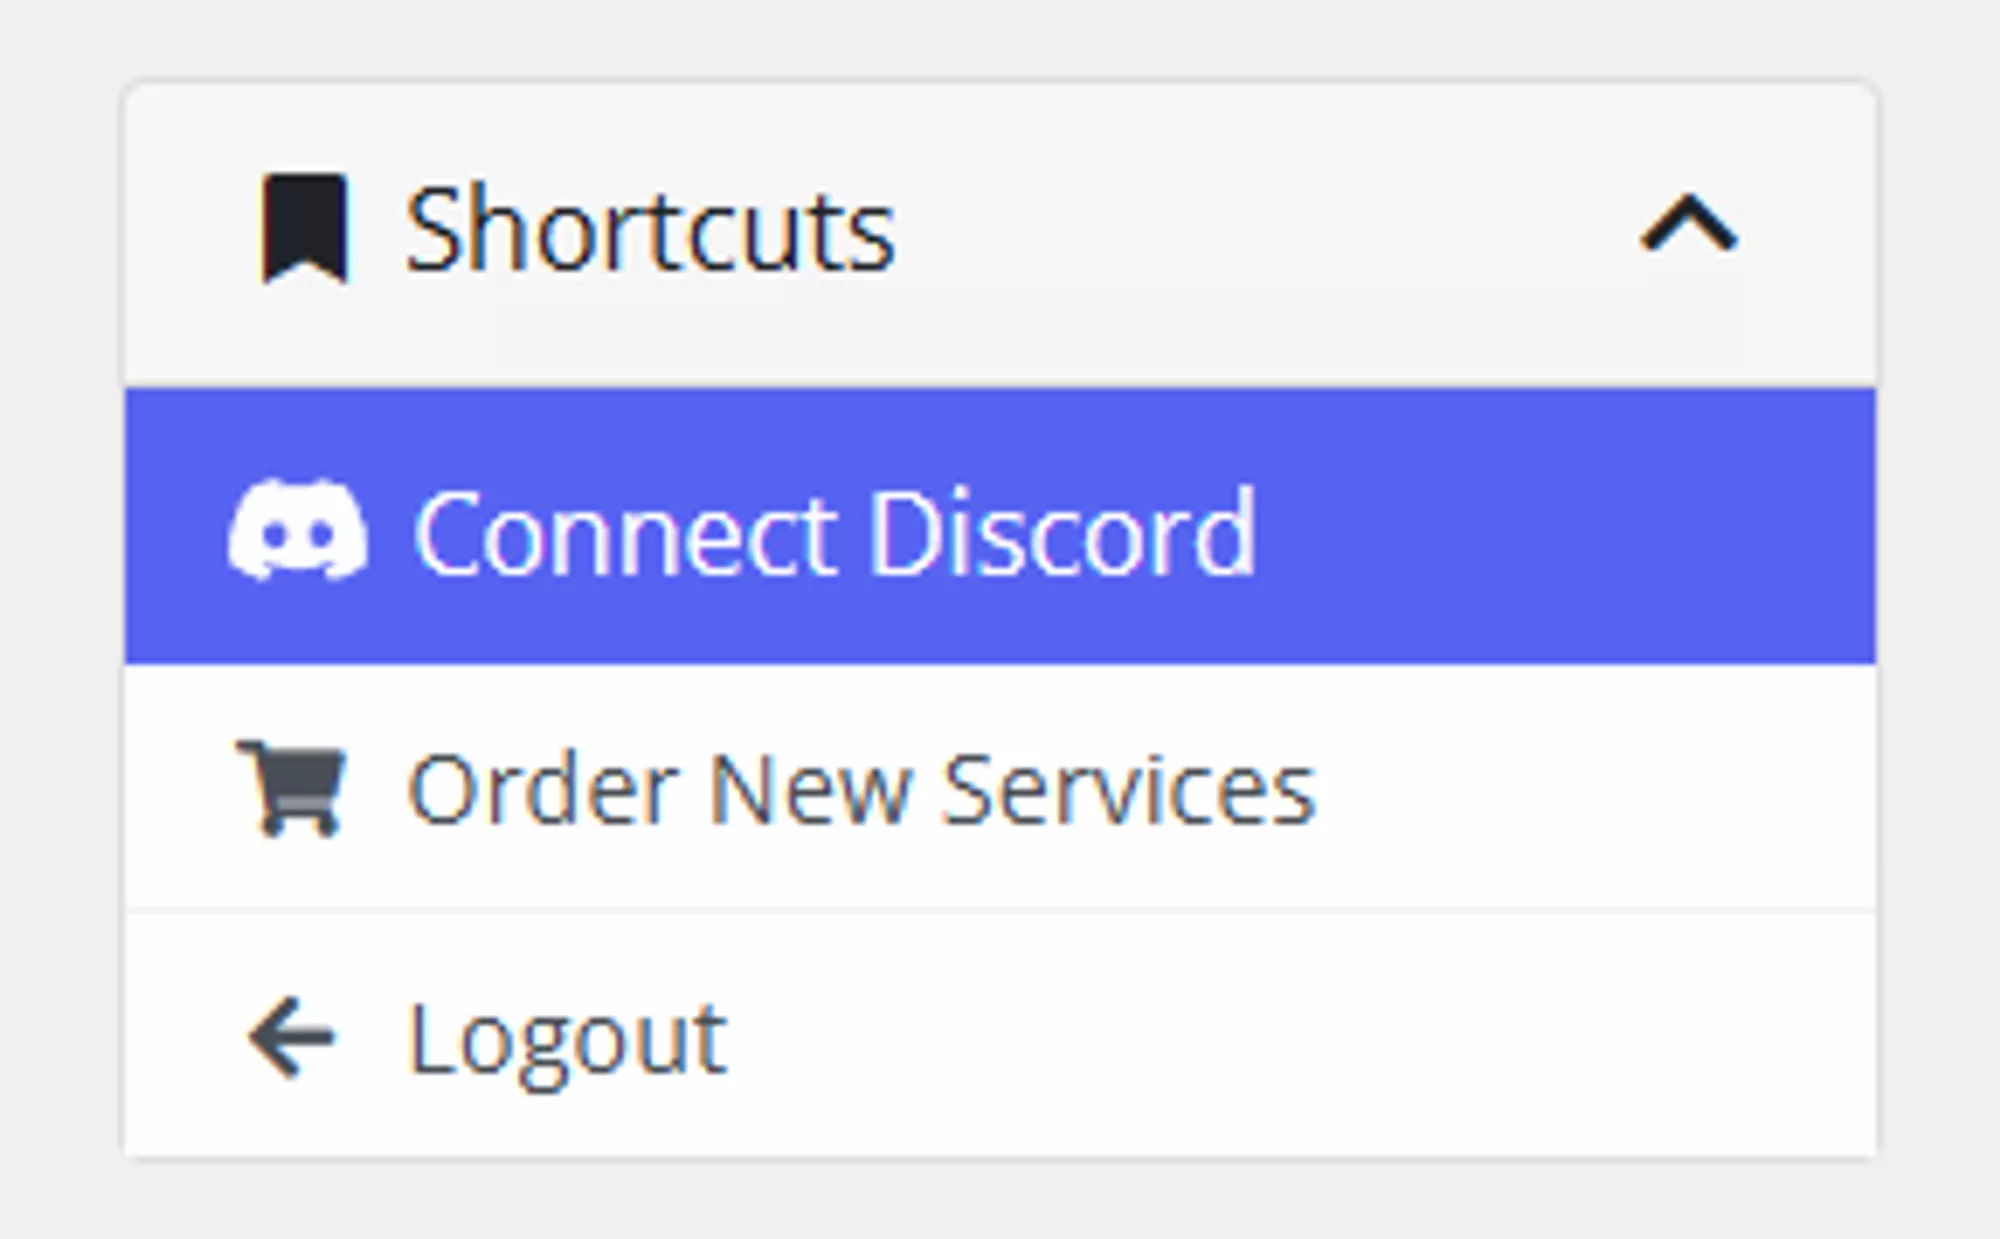
Click Connect Discord and Authorize the connection.
## Client Role Perks
Once linked, you get access to:
- Advertise your WinterNode-powered server in #servers
- Discuss with fellow clients in #clients-chat
- Participate in client-only events, giveaways, and discussions
- A shiny blue name in Discord
---
# Billing and Payments FAQ
> Common questions about WinterNode billing, payments, and account management.
Source: https://winternode.com/help/accounting-and-billing/faq
Quick answers to common billing and account questions.
## Refunds
Your **first purchase** with WinterNode has a **48-hour refund window**. If you are not satisfied, request the refund by opening a [Billing Ticket](https://winterno.de/billing-ticket) within 48 hours of the purchase.
The limits, from our [refund policy](/legal#refunds):
- Only one 48-hour refund is approved per account. Purchases after your first are not refundable.
- Cryptocurrency payments (for example Bitcoin) are excluded.
- If a backup restoration request has been processed on your account, the service is no longer refund eligible.
- The 2GB Gravel and 3GB Stone plans, Web Hosting, Dedicated Servers, VPS, and custom services are strictly non-refundable.
- WinterNode account credit is non-refundable, and no refunds or credit are issued for premature cancellations.
If you just want to stop paying rather than get money back, see [Cancel Your Service](/help/accounting-and-billing/manage-your-service/cancel-your-service).
---
# Cancel Your Service
> Cancel your WinterNode plan from the Client Area, including PayPal billing agreement notes and a Cold Storage alternative if you only want to pause.
Source: https://winternode.com/help/accounting-and-billing/manage-your-service/cancel-your-service
We're sorry to see you go. If there is anything our team can do to keep you as an active client please let us know, we will do our best to work with you on any issues! Remember we are available via [Support Tickets](https://clients.winternode.com/submitticket.php) and [Discord](https://winternode.com/discord?utm_source=help&utm_medium=article&utm_campaign=cancel-your-service)!
To cancel your services with WinterNode you will need to:
Log-in to the [Client Area](https://clients.winternode.com).
Click on the **"Services"** button on the navigation bar.

Select the Service you wish to cancel.
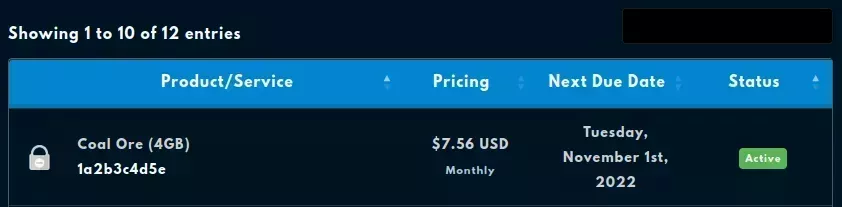
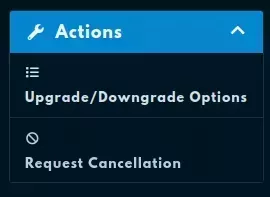
Select **"Request Cancellation"** from the **"Actions"** tab.
Provide a reason for the cancellation and confirm your request.
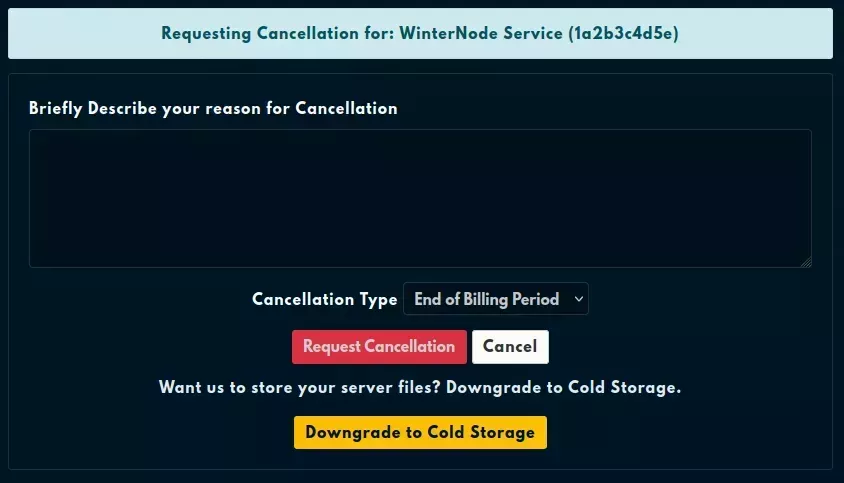
Once you've clicked on the Request Cancellation button, you'll see the following message. Your cancellation request will be fulfilled at the end of your Billing Cycle, depending on when our automatic processing begins.
You'll receive an email titled WinterNode Cancellation Request Confirmation, providing details on when your service will be cancelled and any further steps that may be required.
---
# Pause Your Server with Cold Storage
> Keep your WinterNode Game Server files and settings safe with the Cold Storage Plan. Freeze and unfreeze your server anytime for a low quarterly fee.
Source: https://winternode.com/help/accounting-and-billing/manage-your-service/cold-storage
If you have a Game Server service at WinterNode that you aren't going to be using for awhile but you want to keep all of your settings and files, you can change the plan to our Cold Storage Plan instead of canceling.
The Cold Storage Plan costs a few dollars **per quarter** and retains your files, settings, and service until you ["upgrade"](/help/accounting-and-billing/manage-your-service/upgrade-downgrade-your-service) to a regular plan again. This allows you to have access to your files using the File Manager and "unfreeze" your server at a later date with no setup time.
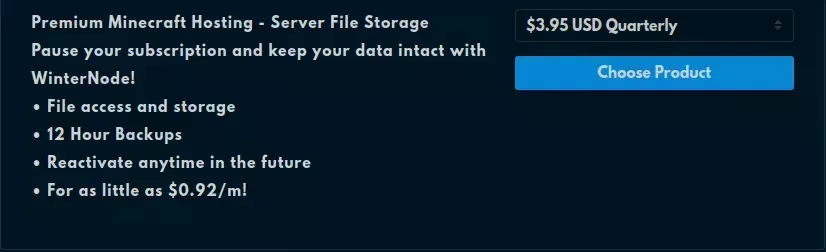
## Freezing
If your Game Server Service is currently active and you want to "freeze" it so that you can [Unfreeze](#unfreezing) it when you're ready to play again, you just need to go through the [Upgrade/Downgrade](/help/accounting-and-billing/manage-your-service/upgrade-downgrade-your-service) process and select **"Cold Storage"** as the plan you're "upgrading" to.
With your service on the Cold Storage plan, you won't be able to start your server, but everything will be left as it is for when you need it! Just [Unfreeze](#unfreezing) the server and you'll be good to go!
## Unfreezing
If your Game Server Service is *currently* on the cold storage plan, you can go through the [Upgrade/Downgrade](/help/accounting-and-billing/manage-your-service/upgrade-downgrade-your-service) process and select any of the plans available for your game.
---
# Upgrade or Downgrade Your Service
> Upgrade or downgrade your WinterNode service plan at any time. Learn how pro-rata pricing works and how to increase RAM, storage, or other resources.
Source: https://winternode.com/help/accounting-and-billing/manage-your-service/upgrade-downgrade-your-service
Upgrade your WinterNode plan to increase your server's resources, or downgrade to a lower tier. Both can be done at any time from the Client Area. When upgrading mid-billing-cycle, you only pay the difference for the remaining days, not the full new plan price.
## Upgrading a Free Trial
If you're on a free trial and want to keep your server after the trial ends, upgrade it from the Client Area using the [step-by-step instructions](#step-by-step-instructions) below. This converts your trial into a paid plan and keeps all your server files, world data, and configuration intact.
If you don't upgrade before the trial expires, the trial server is suspended automatically and stops running. The service stays on your account, so you can still upgrade it to a paid plan later. You don't need to cancel it manually.
## How Pro-Rata Pricing Works
Upgrades are pro-rated based on where you are in your billing cycle. The system calculates the price difference between your current plan and the new plan, then charges you only for the days remaining until your next renewal.
Here's a quick example. Say you're on a $10/mo plan and want to upgrade to a $20/mo plan, with 15 days left in your billing cycle:
- **Price difference:** $20 - $10 = $10/mo
- **Remaining days:** 15 out of 30
- **Upgrade invoice:** $10 × (15/30) = **$5.00**
You pay $5.00 now, and your next full renewal bills at the new $20/mo rate.
Want more storage space?
- **Game Servers:** Storage is unmetered. If you need more space, contact our support team and we'll increase your allocation at no extra cost. You don't need to upgrade your plan. See [Unmetered Storage & Requesting Increases](/help/getting-started/unmetered-storage) for details. Storage is disk space, not memory: if the panel's **Memory** bar is what is running out, that is RAM, and [upgrading your plan](#upgrading-for-more-ram) is the fix.
- **VPS:** Each VPS package includes a storage range you can adjust independently using the **"Upgrade/Downgrade Options"** button in the Client Area sidebar (separate from **"Upgrade/Downgrade"**, which changes your full package). If you need more storage than what's available within your current package's range, you'll need to upgrade to a higher VPS package. _Note: storage cannot be downgraded once your upgrade has been processed._
- **Discord Bot Hosting:** Upgrade your plan to get more storage allocation.
Need more CPU resources?
- **Game Servers:** Game server plans use a fair usage CPU model. Your server can burst above its baseline when needed; there is no hard per-server CPU cap. Upgrading your game server plan does not change your CPU allocation. See [How CPU Fair Usage Works](/help/getting-started/fair-usage) for details.
- **VPS:** CPU core allocation on a VPS can be adjusted independently of the full package. In the Client Area, use the **"Upgrade/Downgrade Options"** button in the sidebar (separate from the **"Upgrade/Downgrade"** package button) to change your CPU core count.
## Step-by-Step Instructions
Log into our [Billing Client Area](https://clients.winternode.com).
Click on the the `Services` tab.

Select the service you wish to upgrade, downgrade, or change.

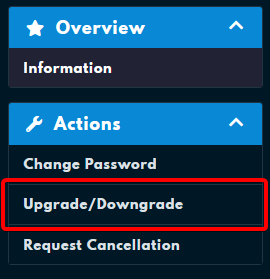
Select **"Upgrade/Downgrade"** from the left hand sidebar.
_If you do not see this button, you may have an exclusive package. However, all publicly listed plans should have an upgrade button._
_If the button is **greyed out**, you most likely have an unpaid invoice on this service. Navigate to **Invoices** in the Client Area, pay or cancel any outstanding invoices for this service, and then try again._
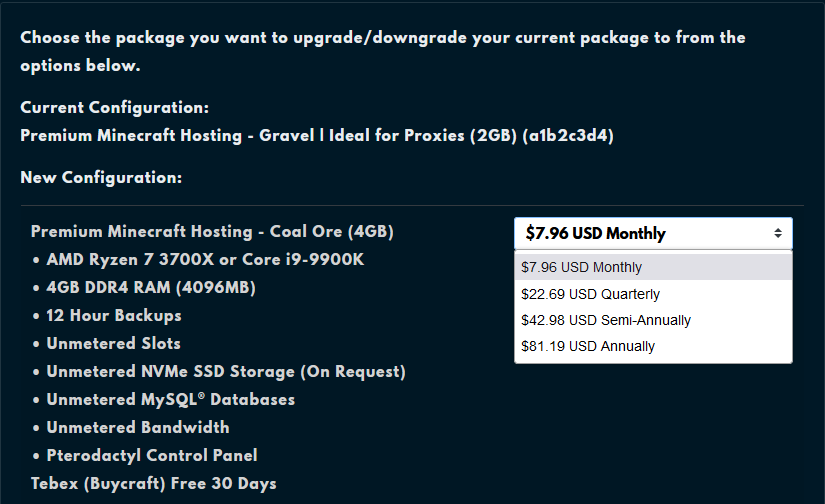
Select the package and cycle you wish to change to by pressing **"Choose Product"**.
You will see all available upgrade options from your current plan. Higher tiers provide more allocated RAM.
Pay the new invoice.
If you lost the invoice or aren't sure where to find it, follow the steps below:
Navigate to the Client Area home.
Click on the **"Invoices"** button on the top right of the page.
Select the most recent unpaid invoice.
Restart your server to apply the new resource limits.
## Upgrading for More RAM
Game server plans are tiered by RAM allocation. Upgrading to a higher plan increases the memory available to your server. After upgrading and restarting, the new limit applies automatically. No changes to your server configuration are needed.
Signs your server may need more RAM:
- **Out-of-memory crashes:** your console shows errors like `java.lang.OutOfMemoryError`
- **Lag with few players:** performance degrades even at low player counts
- **Modpack instability:** heavily modded servers frequently require 8 GB or more
- **World loading failures:** large worlds take excessively long to load or fail to load entirely
---
# PayPal Payments
> How WinterNode handles PayPal payments with Billing Agreements, what happens when you cancel, and information for legacy subscription customers.
Source: https://winternode.com/help/accounting-and-billing/paypal-payments
When you pay with PayPal, WinterNode creates a Billing Agreement with your PayPal account. This allows us to charge your PayPal automatically when invoices are due, similar to having a card on file.
## What Happens When You Cancel Your Service
When you [cancel your WinterNode service](/help/accounting-and-billing/manage-your-service/cancel-your-service), all future billing stops automatically. You don't need to cancel anything in PayPal. The Billing Agreement only charges when we send it an invoice, and we stop sending invoices when your service is canceled.
## Legacy PayPal Subscriptions
Before Billing Agreements, WinterNode used PayPal Subscriptions. If you signed up several years ago, you may have a subscription instead of a billing agreement.
### How to Tell Which You Have
- **Billing Agreement:** Shows as "WinterNode" under PayPal's Automatic Payments with no set recurring amount
- **Subscription:** Shows a specific recurring amount (e.g., "$5.97/month")
### If You Have a Legacy Subscription
Subscriptions send payments on a fixed schedule regardless of whether you have an active service. If you cancel your WinterNode service but still have an active subscription, you'll receive account credit for any payments sent after cancellation.
To cancel a legacy subscription:
1. Log in to your PayPal account
2. Click the gear icon, then go to **Payments** > **Manage automatic payments**
3. Find WinterNode and click **Cancel**
---
# Enable 2FA on Your Billing Account
> Secure your WinterNode Client Account with two-factor authentication.
Source: https://winternode.com/help/accounting-and-billing/securing-access/billing-account-2fa
We highly recommend using 2 factor authentication to secure your account.
Log into the [Client Area](https://clients.winternode.com)
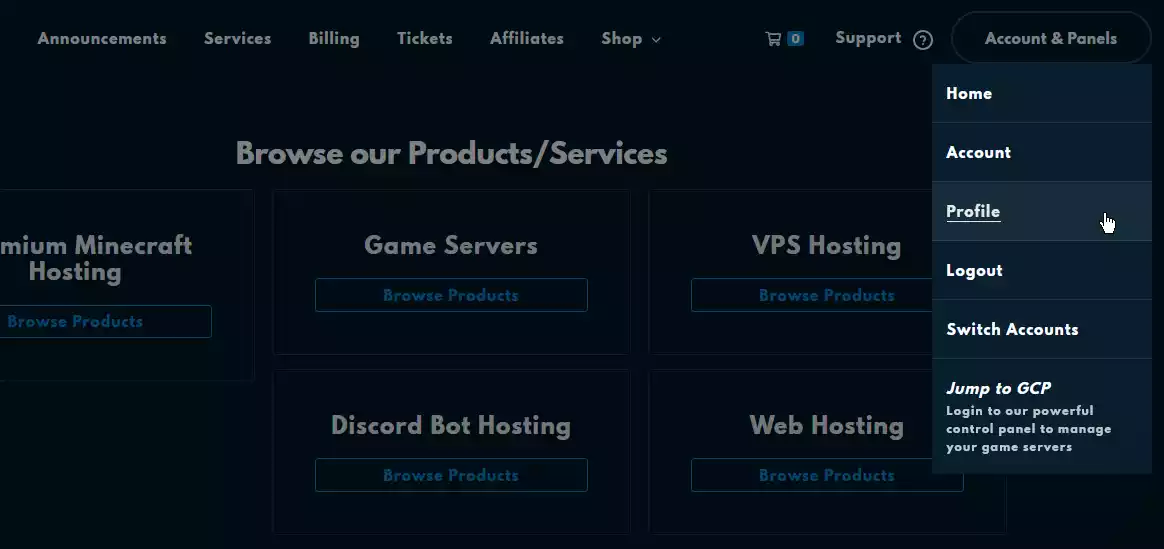
Select **"Profile"** from the **"Account & Panels"** dropdown
This is located on the upper right of the page next to the navbar, after logging into the [Client Area](https://clients.winternode.com).
Open the **"Security Settings"**.
This is located on the left side of the **"Your Profile"** page.
Click the green **"Click here to Enable"** button.
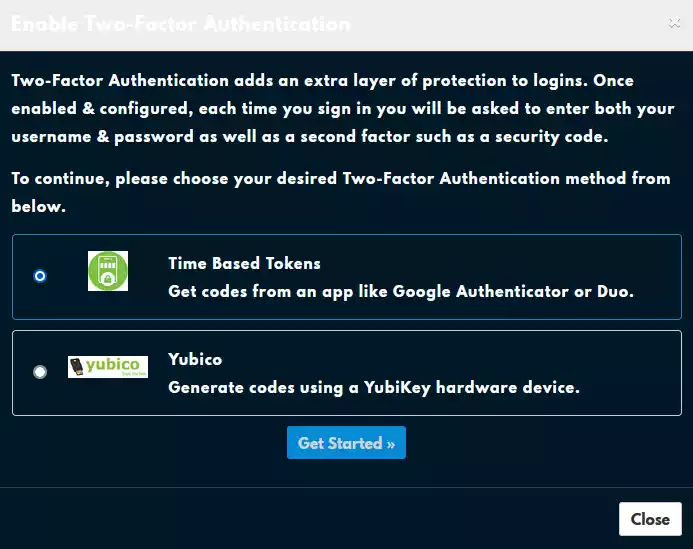
Select **"Time Based Tokens**" and click **"Get Started"**.
You'll be presented with two options, "Time Based Tokens", which is what we've covered so far, and "Yubikey, which is an entirely different kind of 2FA that requires a specialized device.
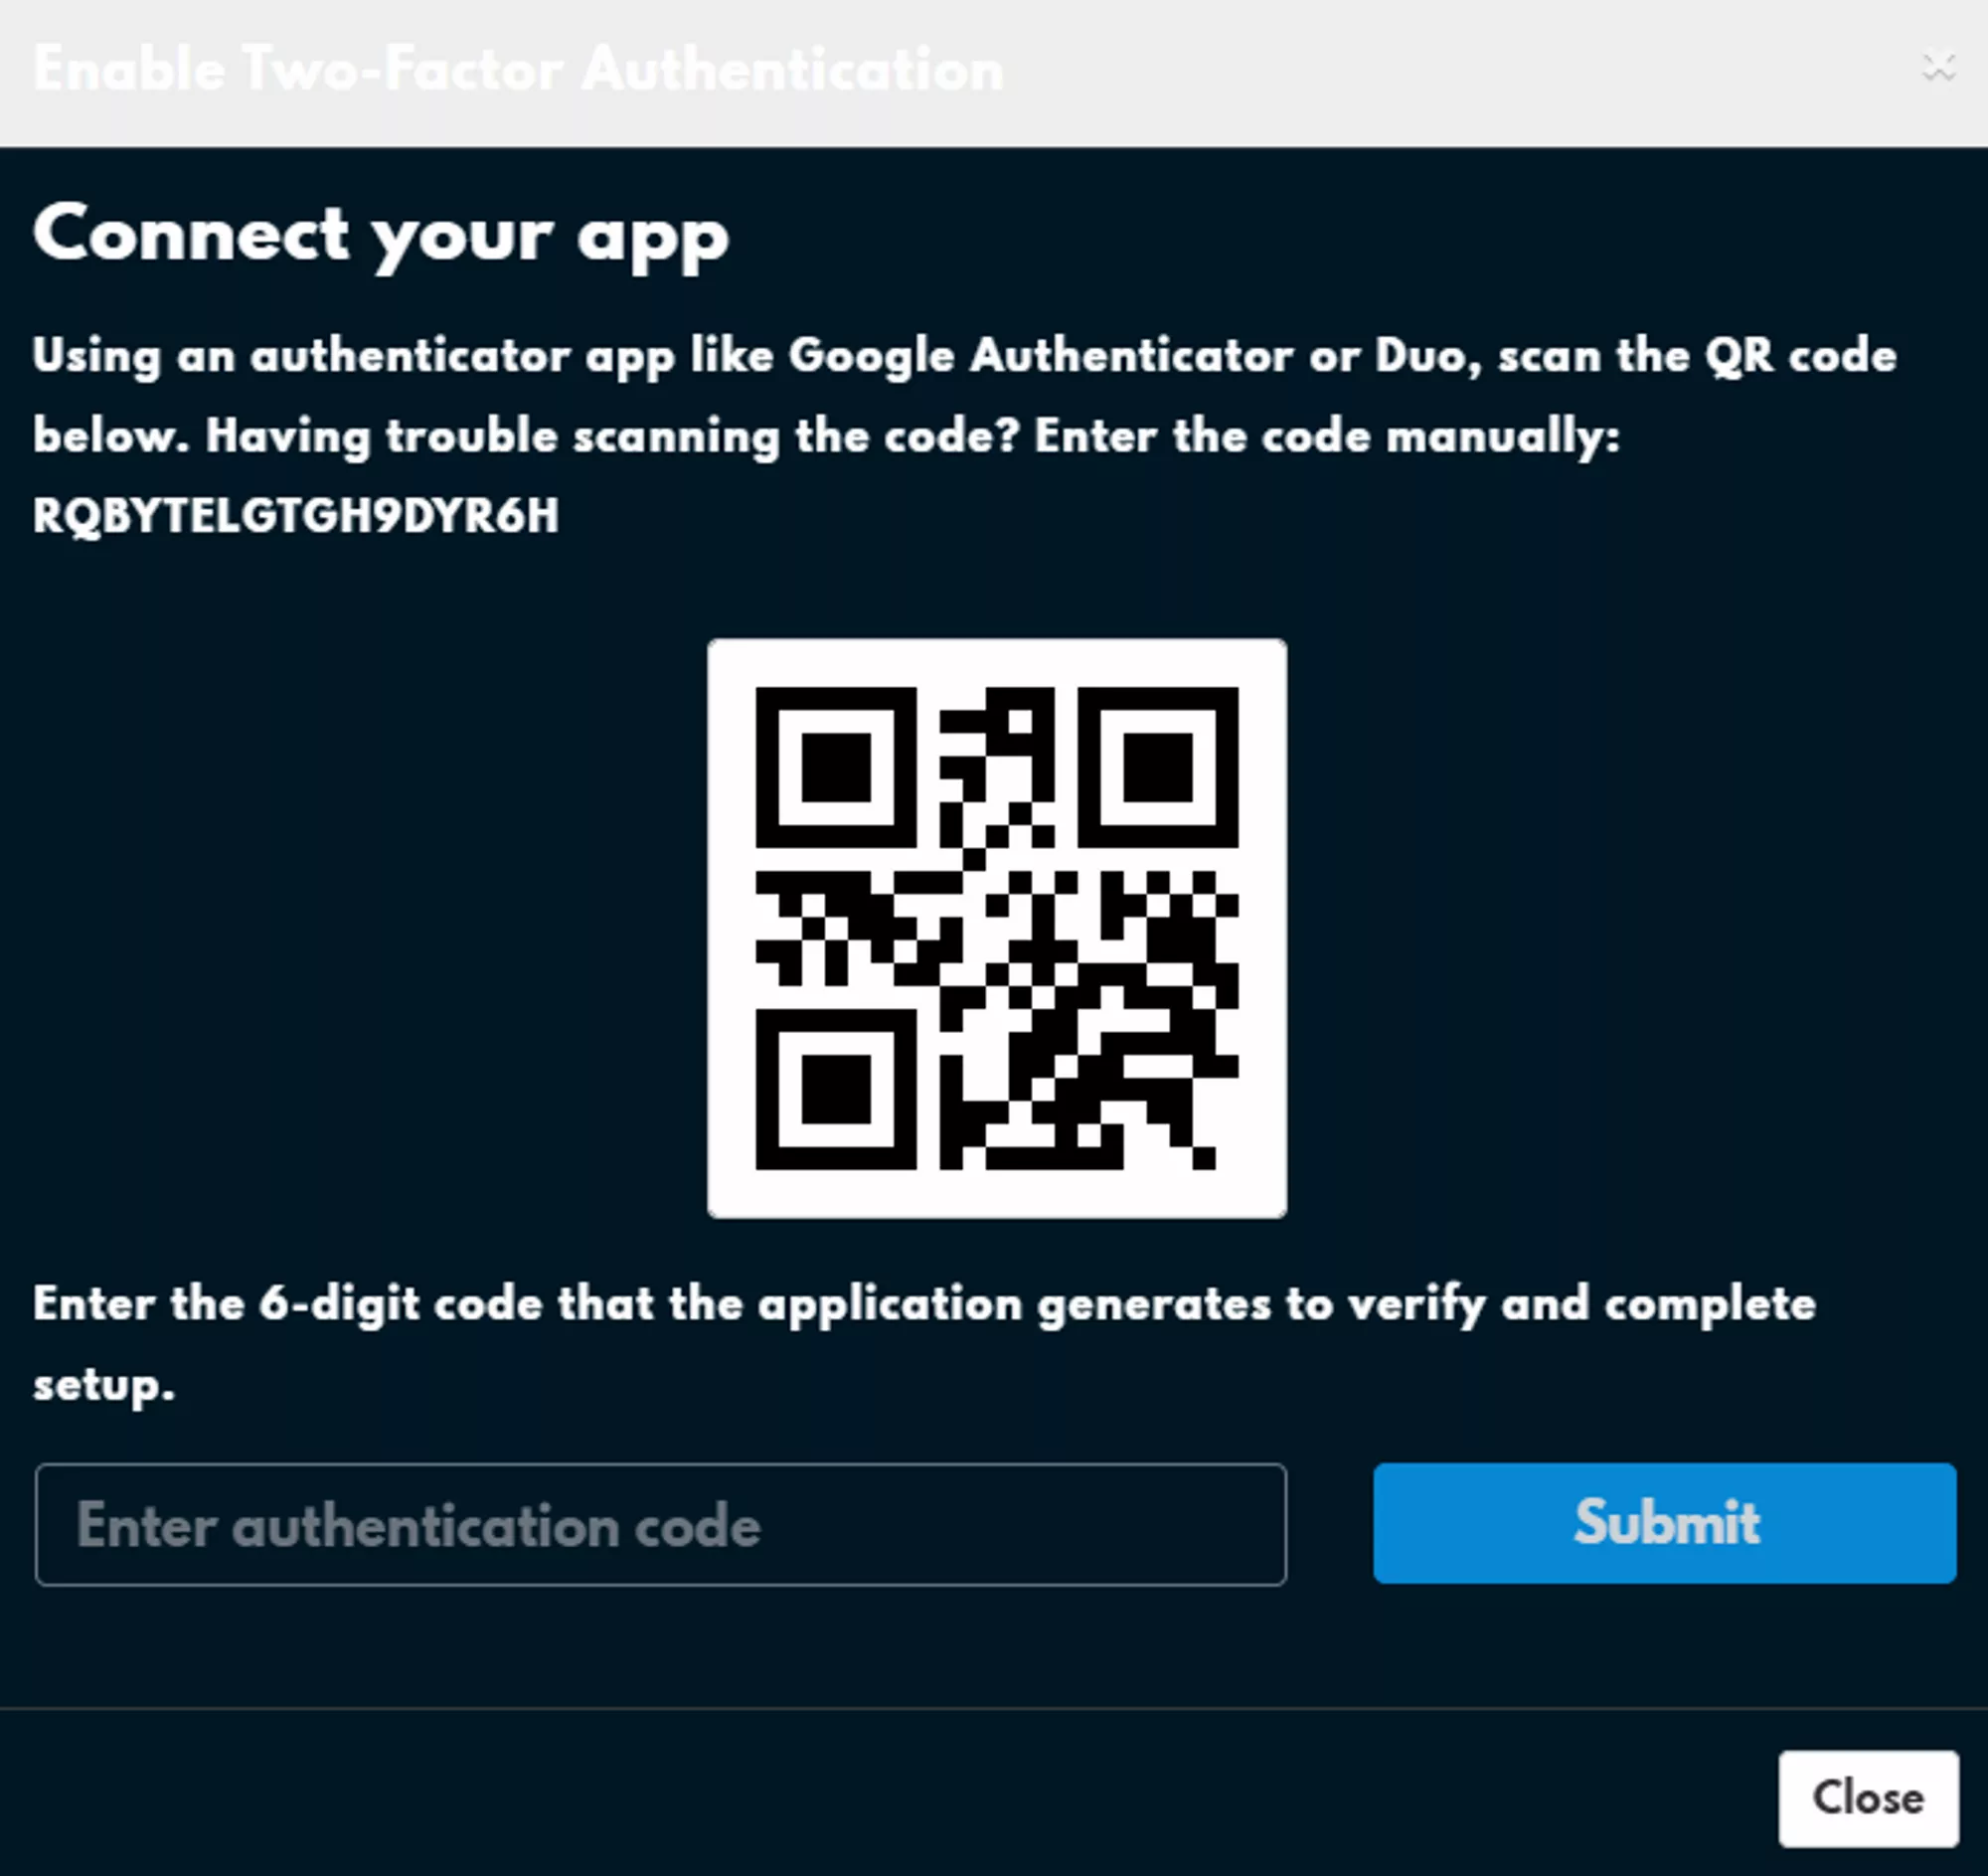
Scan the QR code with your authenticator app or enter the code directly.
You can scan the QR code using an app like Google Authenticator or Authy or you can enter the code manually into either of the two apps.
## What is 2FA?
2-Factor Authentication is an extra step added to logging into an account that helps prevent unauthorized access. If you've enabled 2-Factor Authentication, or 2FA, then you’ll be required to provide a token provided by an Authenticator application when you log into your account. The token is cryptographically generated from a private code only shared between WinterNode and the Authenticator application.
The goal of this is to provide a second authentication requirement for accessing your account, in particular one that is tied to a physical device like your cell phone. As long as you don’t share the 2FA tokens and a third party doesn’t have physical access to the authenticator device/app, this is a nearly foolproof method of authenticating.
For redundancies sake, you can even save the original code, often shown in-tandem with a 2D QR code, in a password manager or other safe location, in case you lose your device or have multiple devices set up with an Authenticator application ready to go.
---
# Billing Sub-Users & Contacts
> Grant team members access to your WinterNode Client Account and add additional contact emails.
Source: https://winternode.com/help/accounting-and-billing/securing-access/billing-contacts-sub-users
If you need to grant access to your server’s console or your billing account then you'll want to use a Panel Sub-User or a Billing Sub-User, respectively. In either case, the new user will have their own account with their own password and 2FA separate from yours. This allows you to grant your team access to what they need without compromising the security of your account or theirs.
As the owner of the service, you can even limit what the Game Panel Sub-Users or Billing Sub-Users can do on the respective parts of our website. This is mostly accomplished by both the Game Panel and the Client Area providing a permissions system for each individual Panel Sub-User or Billing Sub-User.
## Billing Sub-Users
A Billing Sub-User has access to the Client Area and as such can manage things like your Invoices, Services and Support Tickets. With the built in permissions system you can control what each user has access to, so it's easy to ensure that your team can handle their respective roles effectively.
### Create a Billing Sub-User
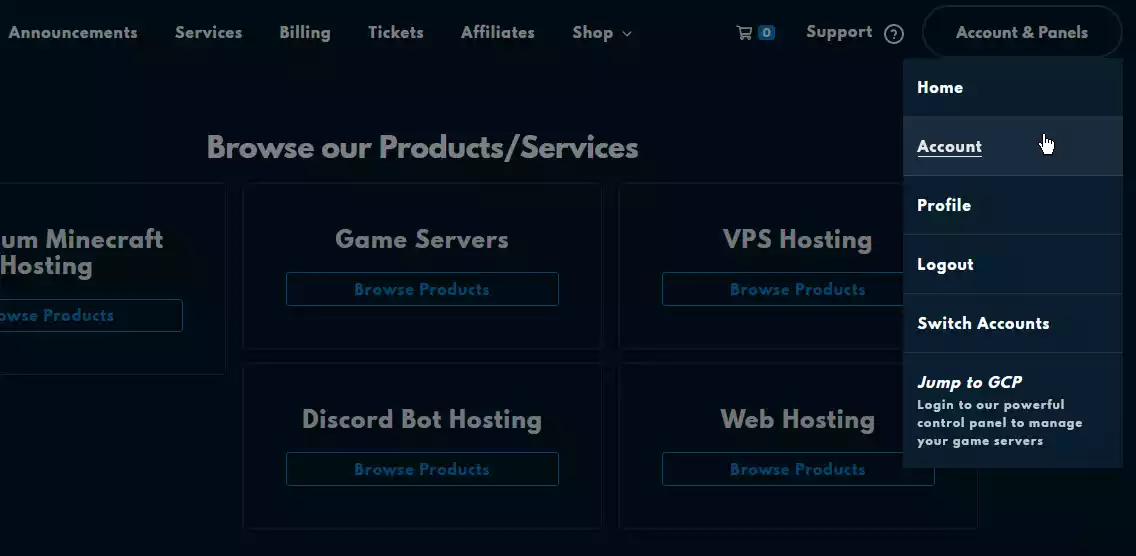
Log into the Client Area and navigate to **"Account & Panel"** -> **"Account"** -> **"User Management"**.
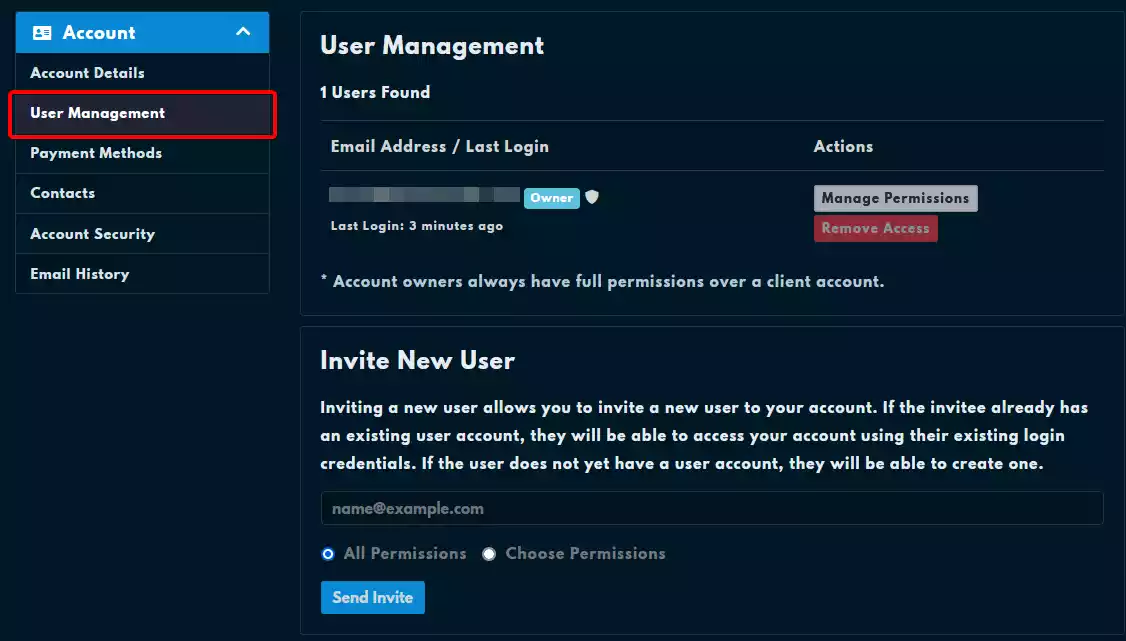
Click **"Invite New User"**.
Enter the user's email address.
By entering their email address and sending an invite, you’ll be sending them an email notifying them and giving them the option to accept the invite or ignore it.
Select the permissions you want the user to have
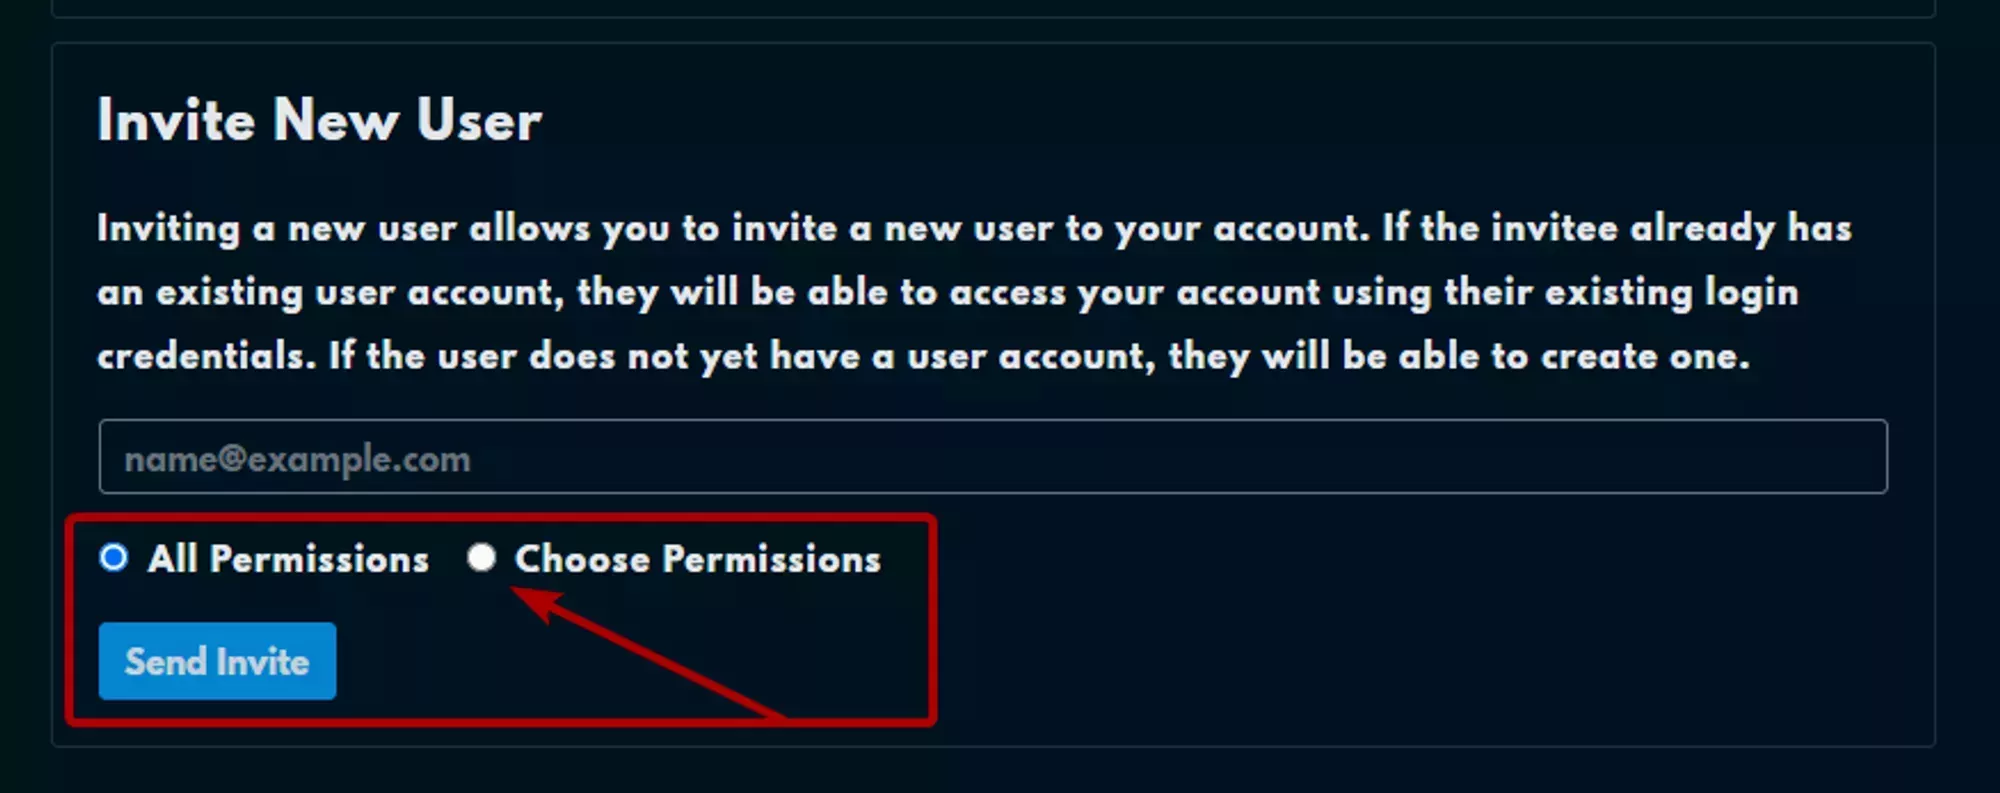
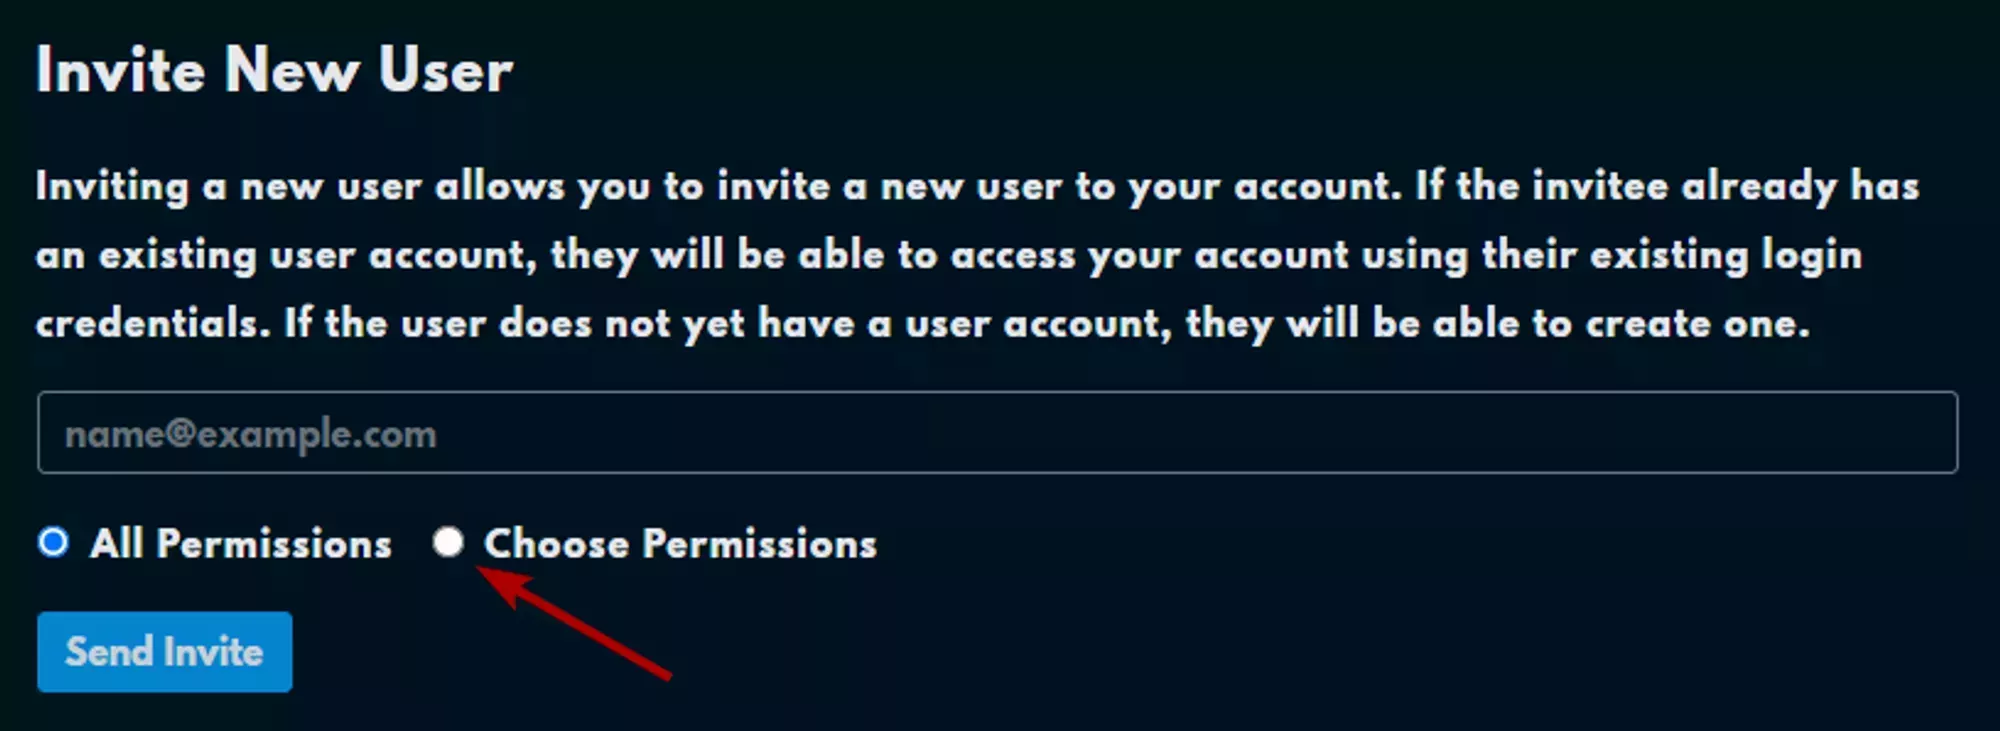
Before sending the invite you also have the option to grant them every permission available for a Billing Sub-User, or specifically select the permissions you want by selecting the `Choose Permissions` radio button instead of the `All Permissions` radio button as demonstrated in the image below.
Click **"Send Invite"**.
### Billing Sub-User Verification
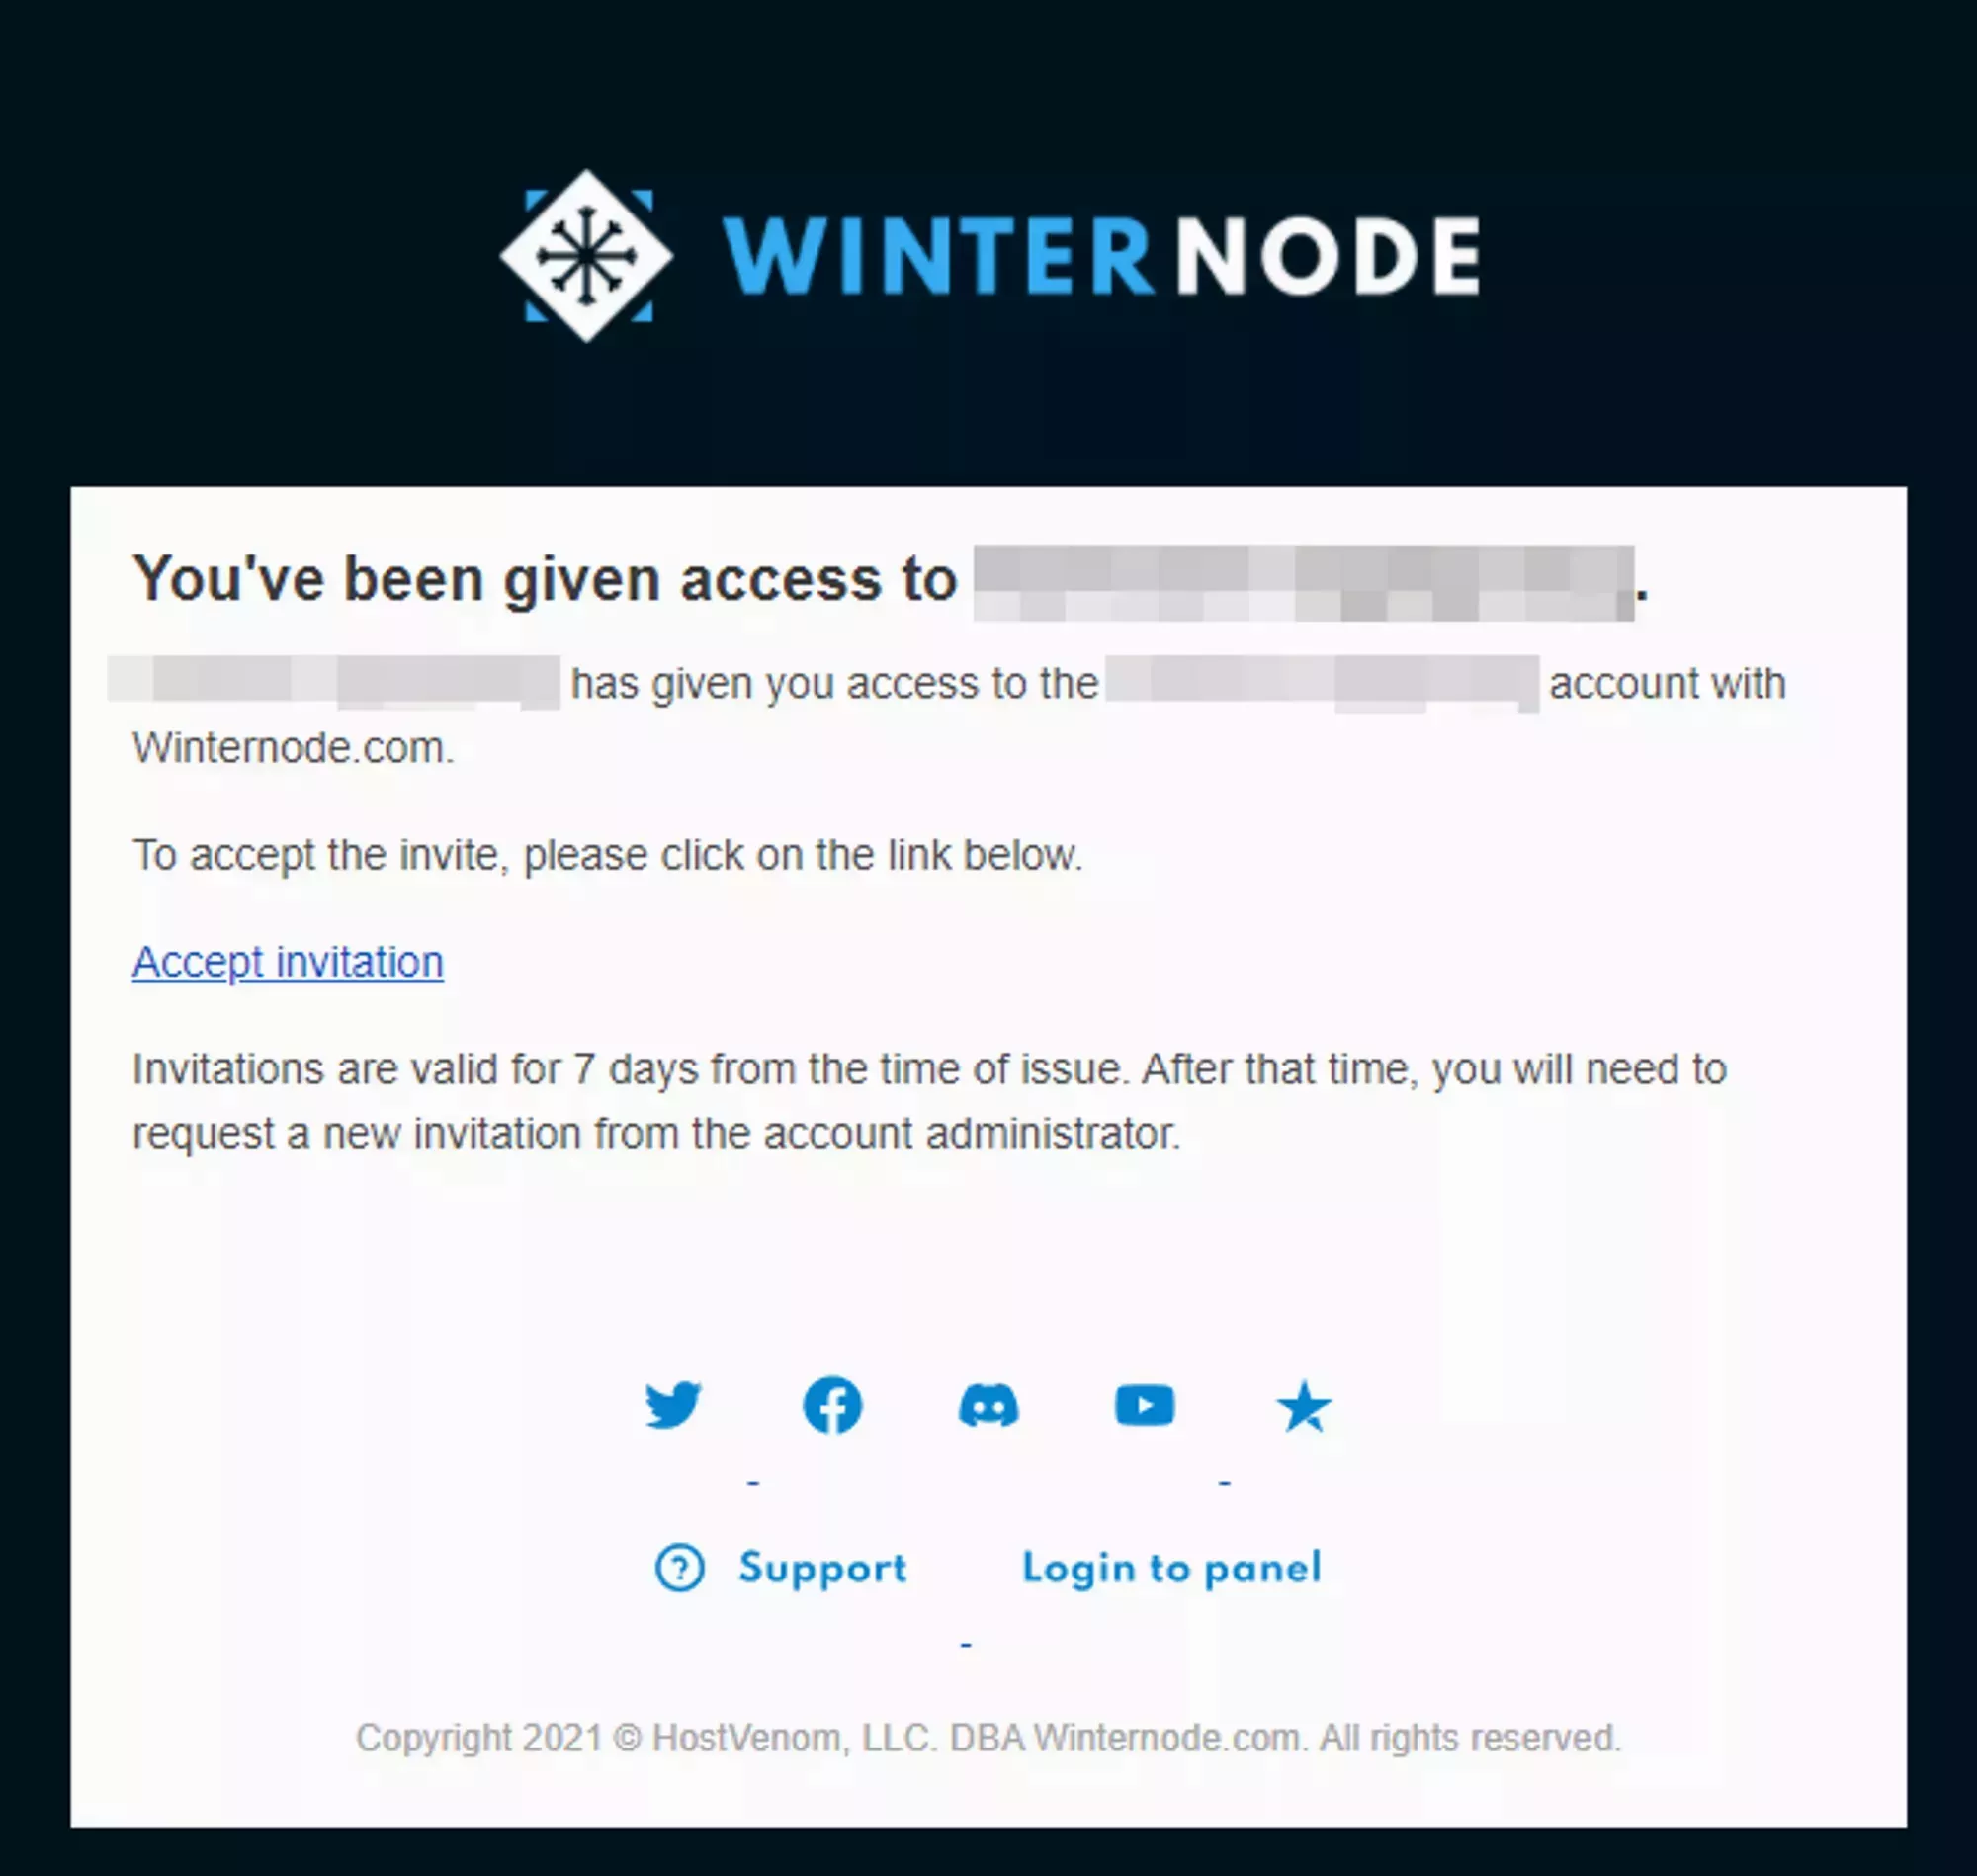
When you invite a new Billing Sub-User they will receive an email that looks similar to the example shown to the right and will have 7 days to accept the invite. If they choose not to accept your invite then the link included in the email will expire and they won’t have any access to your Billing Account.
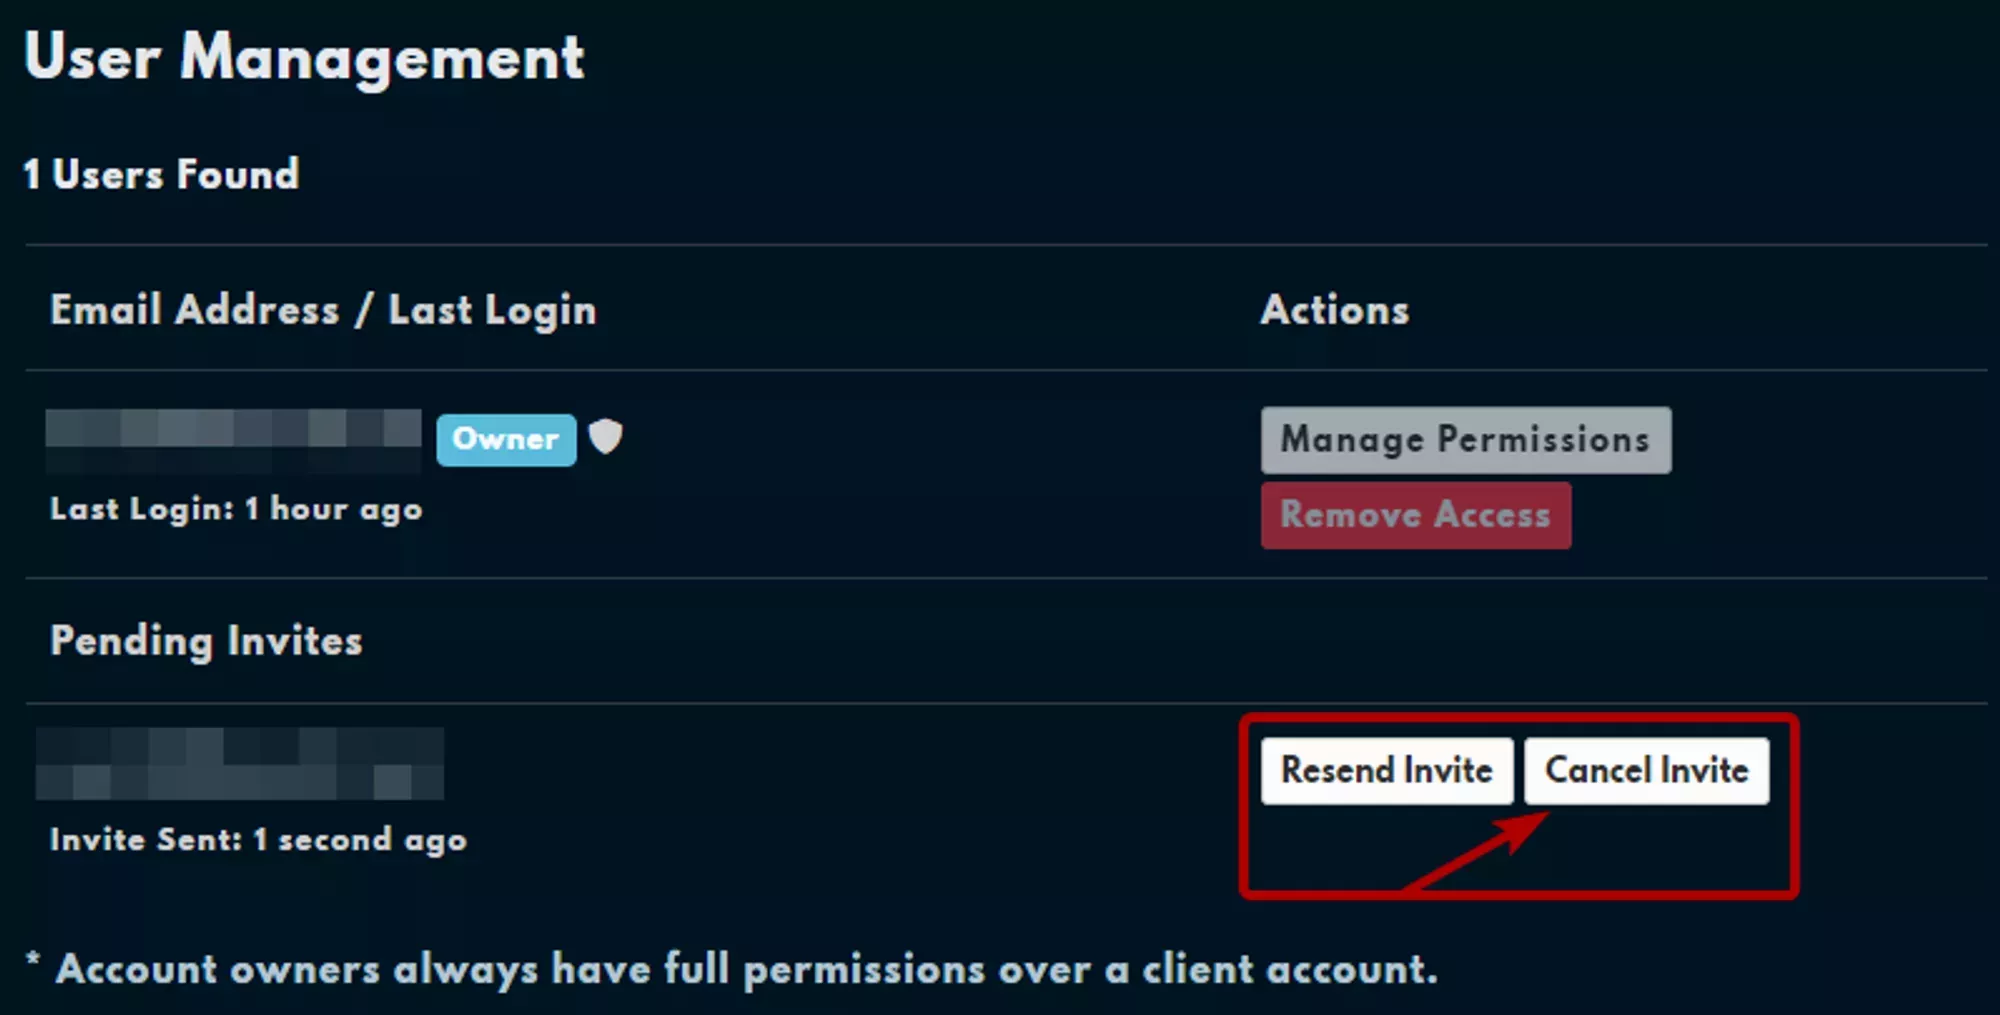
If they didn’t receive the email for whatever reason, you can resend the the invite from the `User Management` page by clicking on the `Resend Invite` button under the `Pending Invites` header as noted in the image to the right.
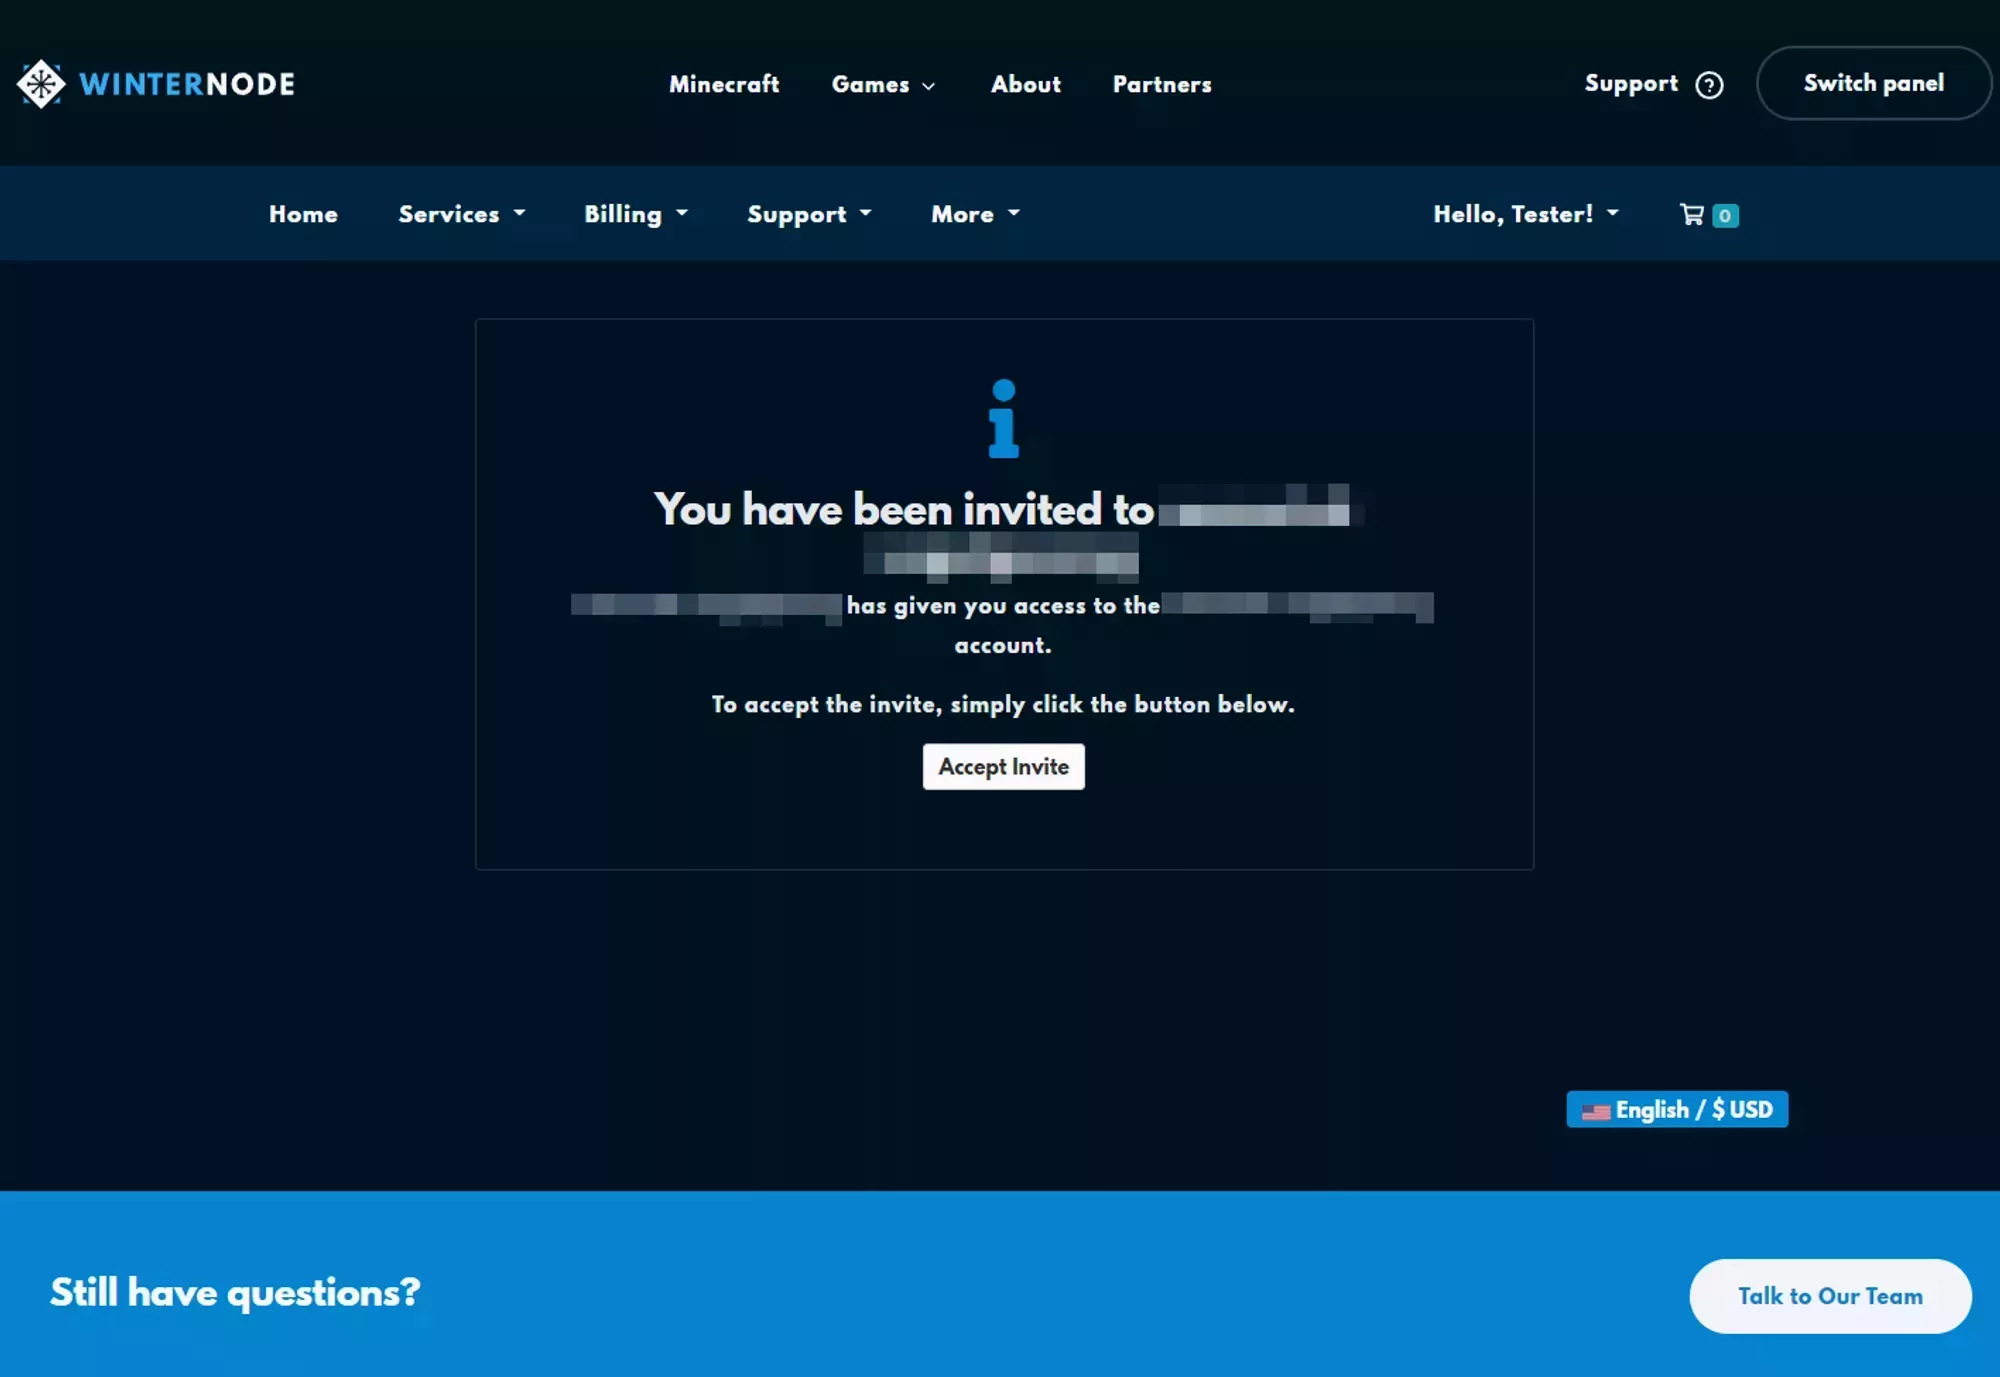
After clicking on the accept invitation link, the Billing Sub-User will see a page similar to the one shown on the right and after accepting the invite from this page they will have access to your Billing Account with the permissions you assigned to them.
### Removing an existing Billing Sub-User
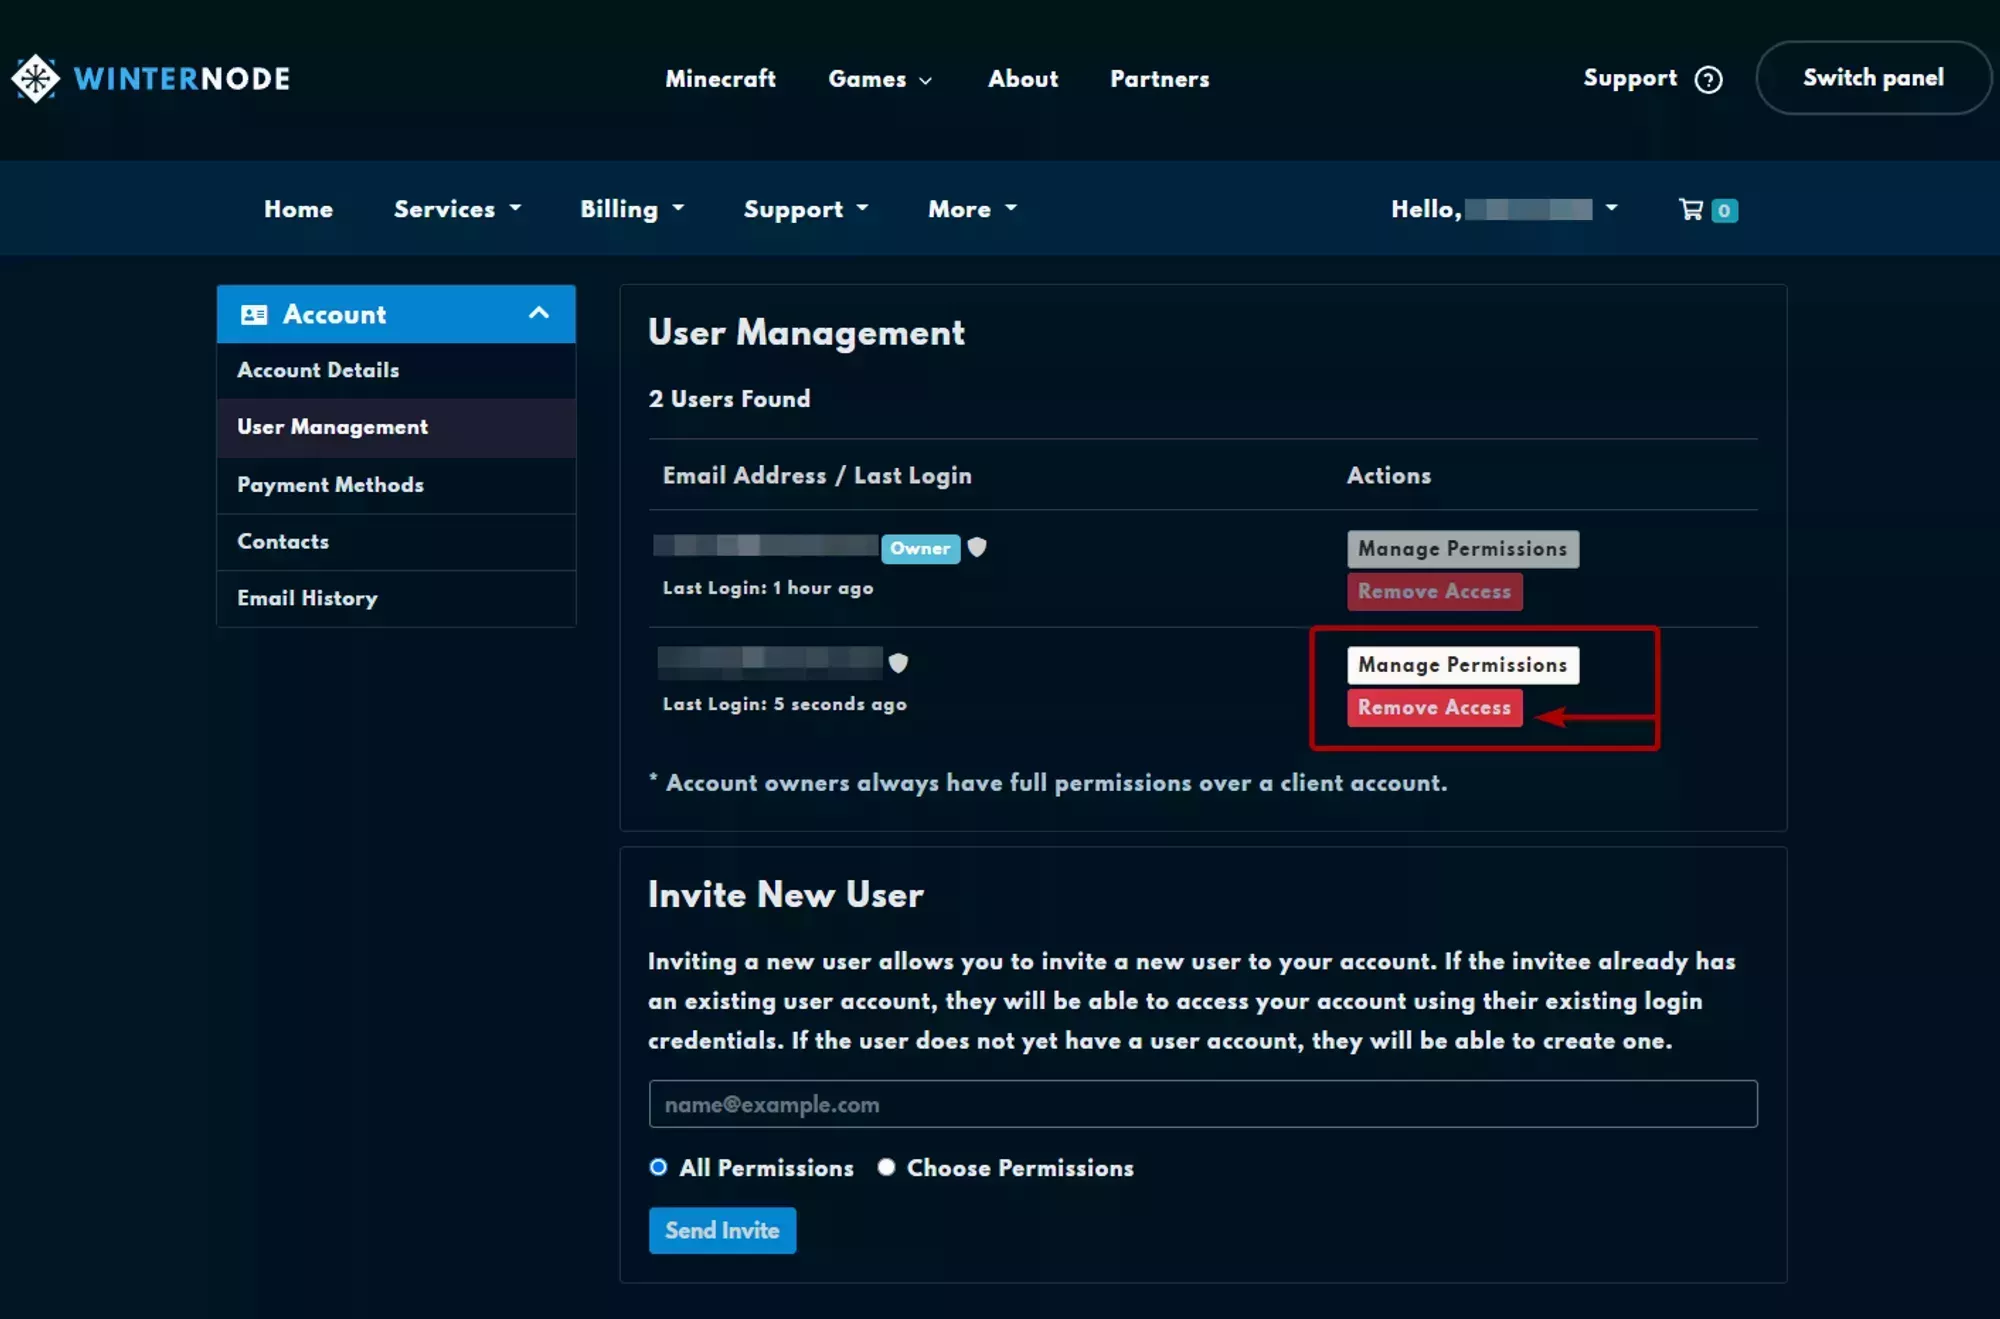
To remove an existing Billing Sub-User navigate to the User Management page and click on the `Remove Access` button and then confirm your choice in the confirmation popup. This will permanently remove this Billing Sub-User from your Billing account unless you re-invite them.
### Securing a Billing Sub-User Account
Billing Sub-Users use separate authentication methods than the primary account, which is it’s own protection against unwanted actions taking place on your service, but to take full advantage of the protection of a Sub-User you’ll want to make sure you enable 2-Factor Authentication for the Sub-User and grant them only the Permissions they need.
#### Permissions
You can limit what a Billing Sub-User can do either when you send the invite or after by selecting specific permissions from a list. We go over the list of permissions, what they do, and their limitations below, as well as where you can modify the Billing Accounts Sub-User's permissions.
##### Before the invite
You can select the permissions a Billing Sub-User before you invite them by selecting the `Choose Permisions` radio button under the email input as shown in the image below.
##### After Invite Acceptance
You can manage the permissions of an existing Billing Sub-User by navigating to the `User Management` page and selecting the `Manage Permissions` button next to the user you want to edit as shown in the image below.

#### Permissions List
This is a list of all of the permissions provided by the panel, brief descriptions of them, and whether or not their relevant to services provided by WinterNode.
Modify Master Account Profile
> _Access and modify the client profile information_
Ability to access, view, and modify the Account Details for the primary client client profile that invited the Billing Sub-User.
View & manage Contacts
> _Access and manage contacts_
Ability to View and Manage all details of [Billing Contacts](#billing-contacts).
View Products & Services
> _View access to products, services and addons_
Ability to view all products, services, and addons currently purchased.
View & Modify Product Passwords
> _Allow password resets and other actions_
Ability to reset passwords for all products.
> _View and payment access to invoices_
Ability to view all current and past invoices and pay outstanding ones.
View & Open Support Tickets
> _Access to open, respond and manage support tickets_
Ability to open, view, and respond to, support tickets under `Support -> Tickets`.
View & Manage Affiliate Affiliate Account
> _Access to view and request withdrawals_
View Emails
> _Access to view account email history_
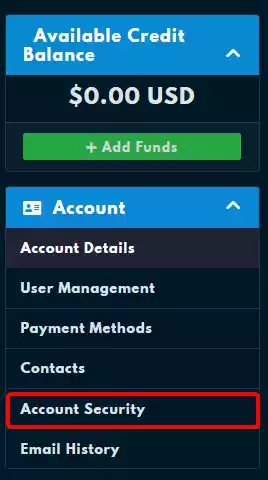
Ability to view email history by selecting Email History from the Account side bar on the Account page (Shown in the Images below).

Place New Orders/Upgrades/Cancellations
> _Allow placing of new orders_
Ability to place new orders for products or services on the Billing Account using the payment methods on the account.
#### 2-Factor Authentication
If you want a sub-user to use 2FA, they'll need to follow the steps outlined below in order to enable 2FA on their own Client Area account. There's currently no way for you to verify or enforce that they enable 2FA.
---
Log into the [Client Area](https://clients.winternode.com)
Select **"Profile"** from the **"Account & Panels"** dropdown
This is located on the upper right of the page next to the navbar, after logging into the [Client Area](https://clients.winternode.com).

Open the **"Security Settings"**.
This is located on the left side of the **"Your Profile"** page.
Click the green **"Click here to Enable"** button.
Select **"Time Based Tokens**" and click **"Get Started"**.
You'll be presented with two options, "Time Based Tokens", which is what we've covered so far, and "Yubikey, which is an entirely different kind of 2FA that requires a specialized device.

Scan the QR code with your authenticator app or enter the code directly.
You can scan the QR code using an app like Google Authenticator or Authy or you can enter the code manually into either of the two apps.

## Billing Contacts
### What is a Billing Contact
Contacts provide a way for you to add additional contact details to your Billing Account and select preferences for what those details should be used for. These details can be additional emails that need copies of your invoices, a personal email where you’d like to be notified of your support tickets, or an entirely separate contact where you’d like to receive all communication about your account.
### Adding a new Billing Contact
Log into the Client Area and navigate to **"Add New Contact"** from the **"Contacts"** box on the left side of the Client Area Home.
This is where you add new, or manage existing Contacts to your Billing Account.
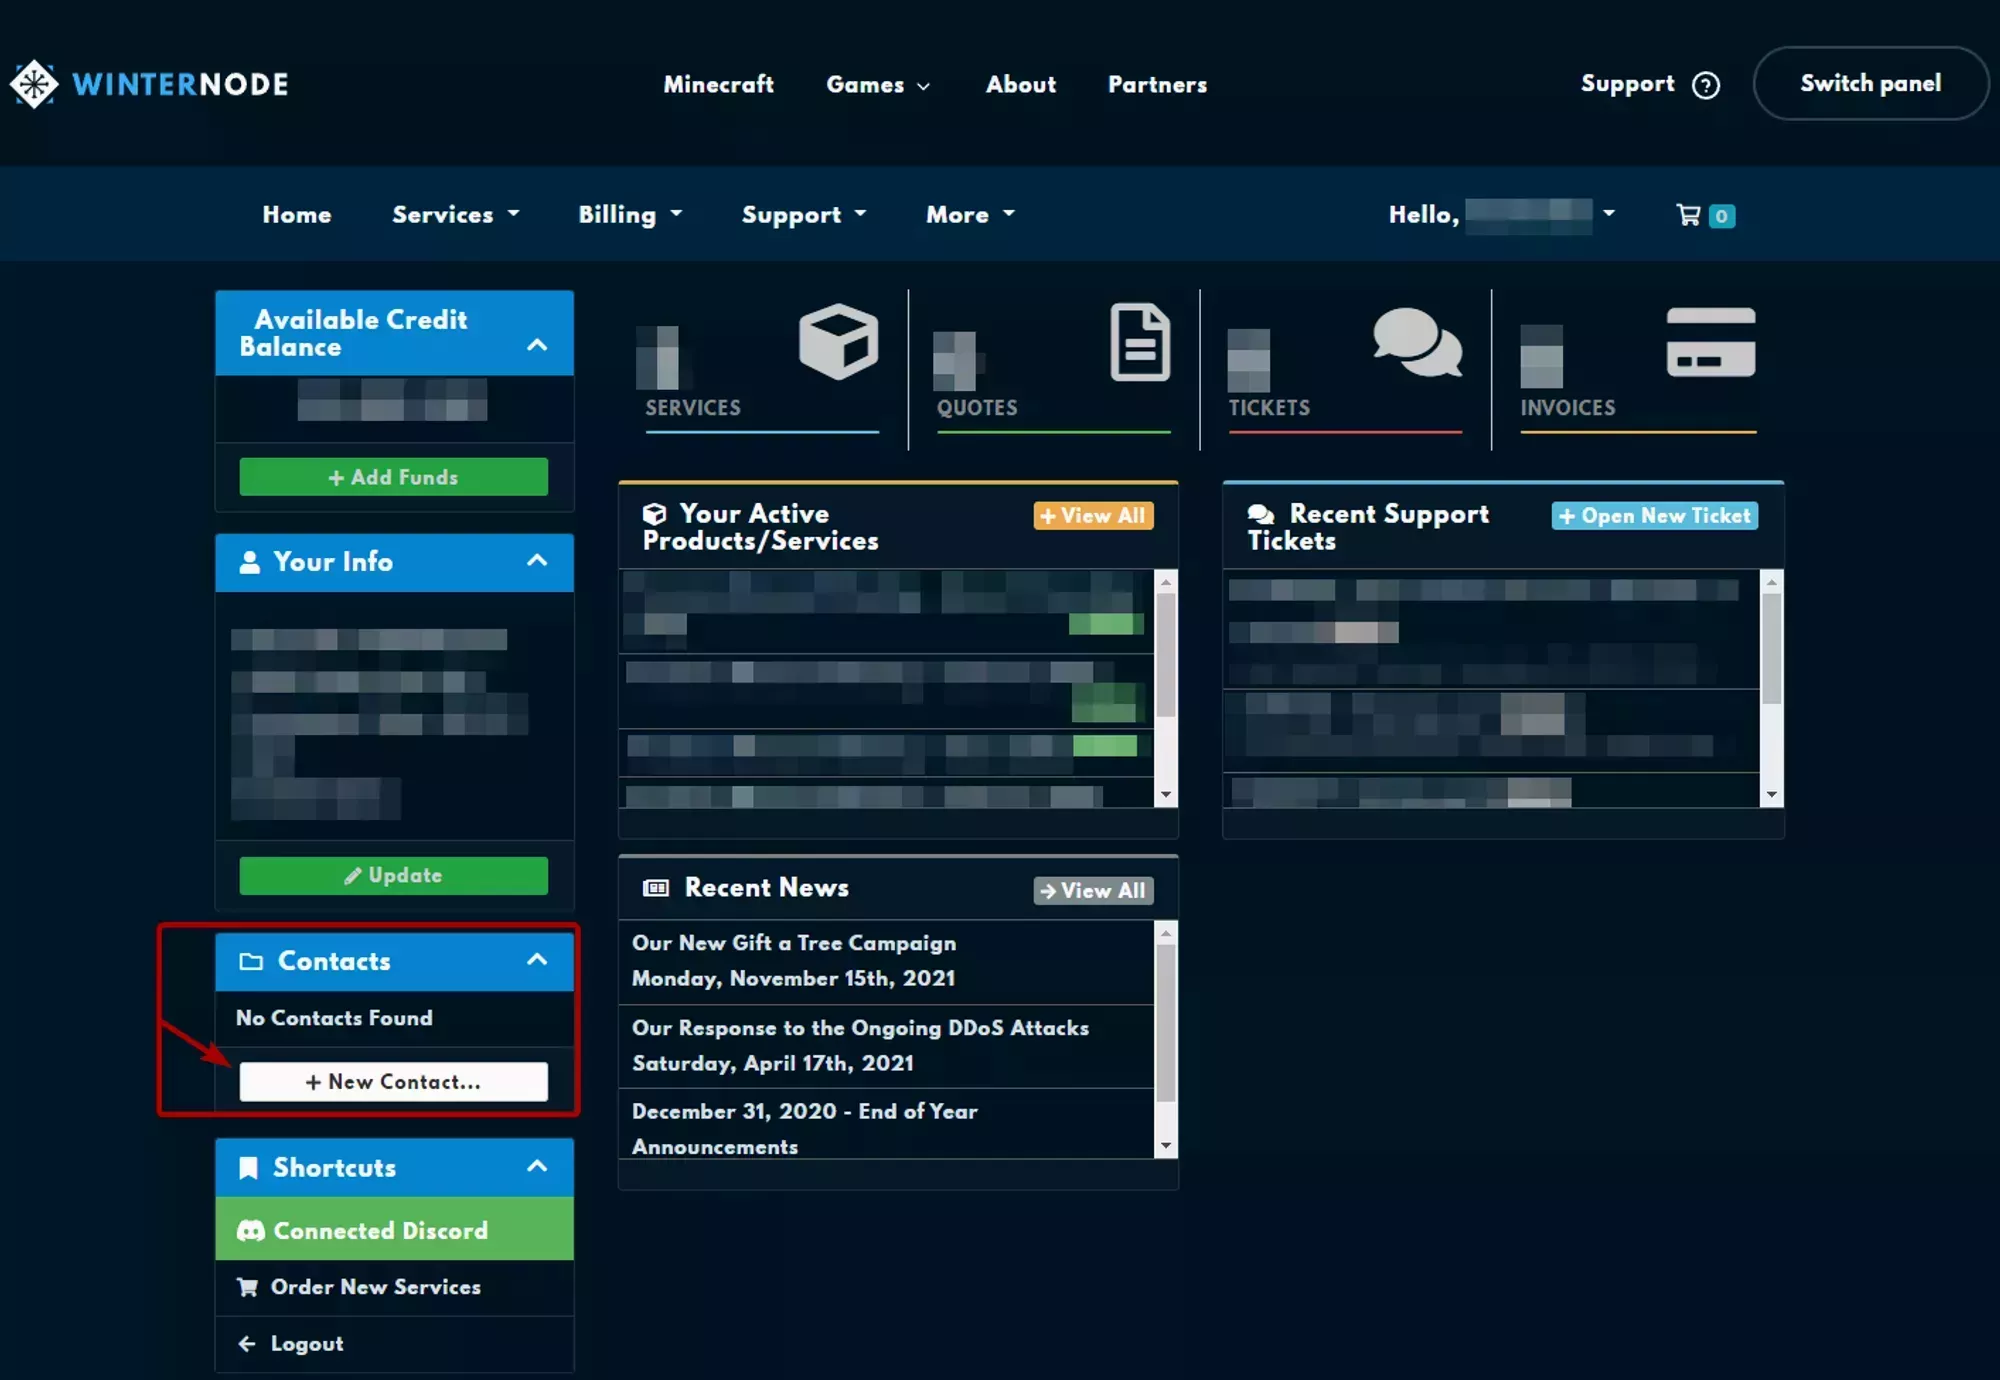
Change the **"Choose Contact"** dropdown to **"New Contact"**.
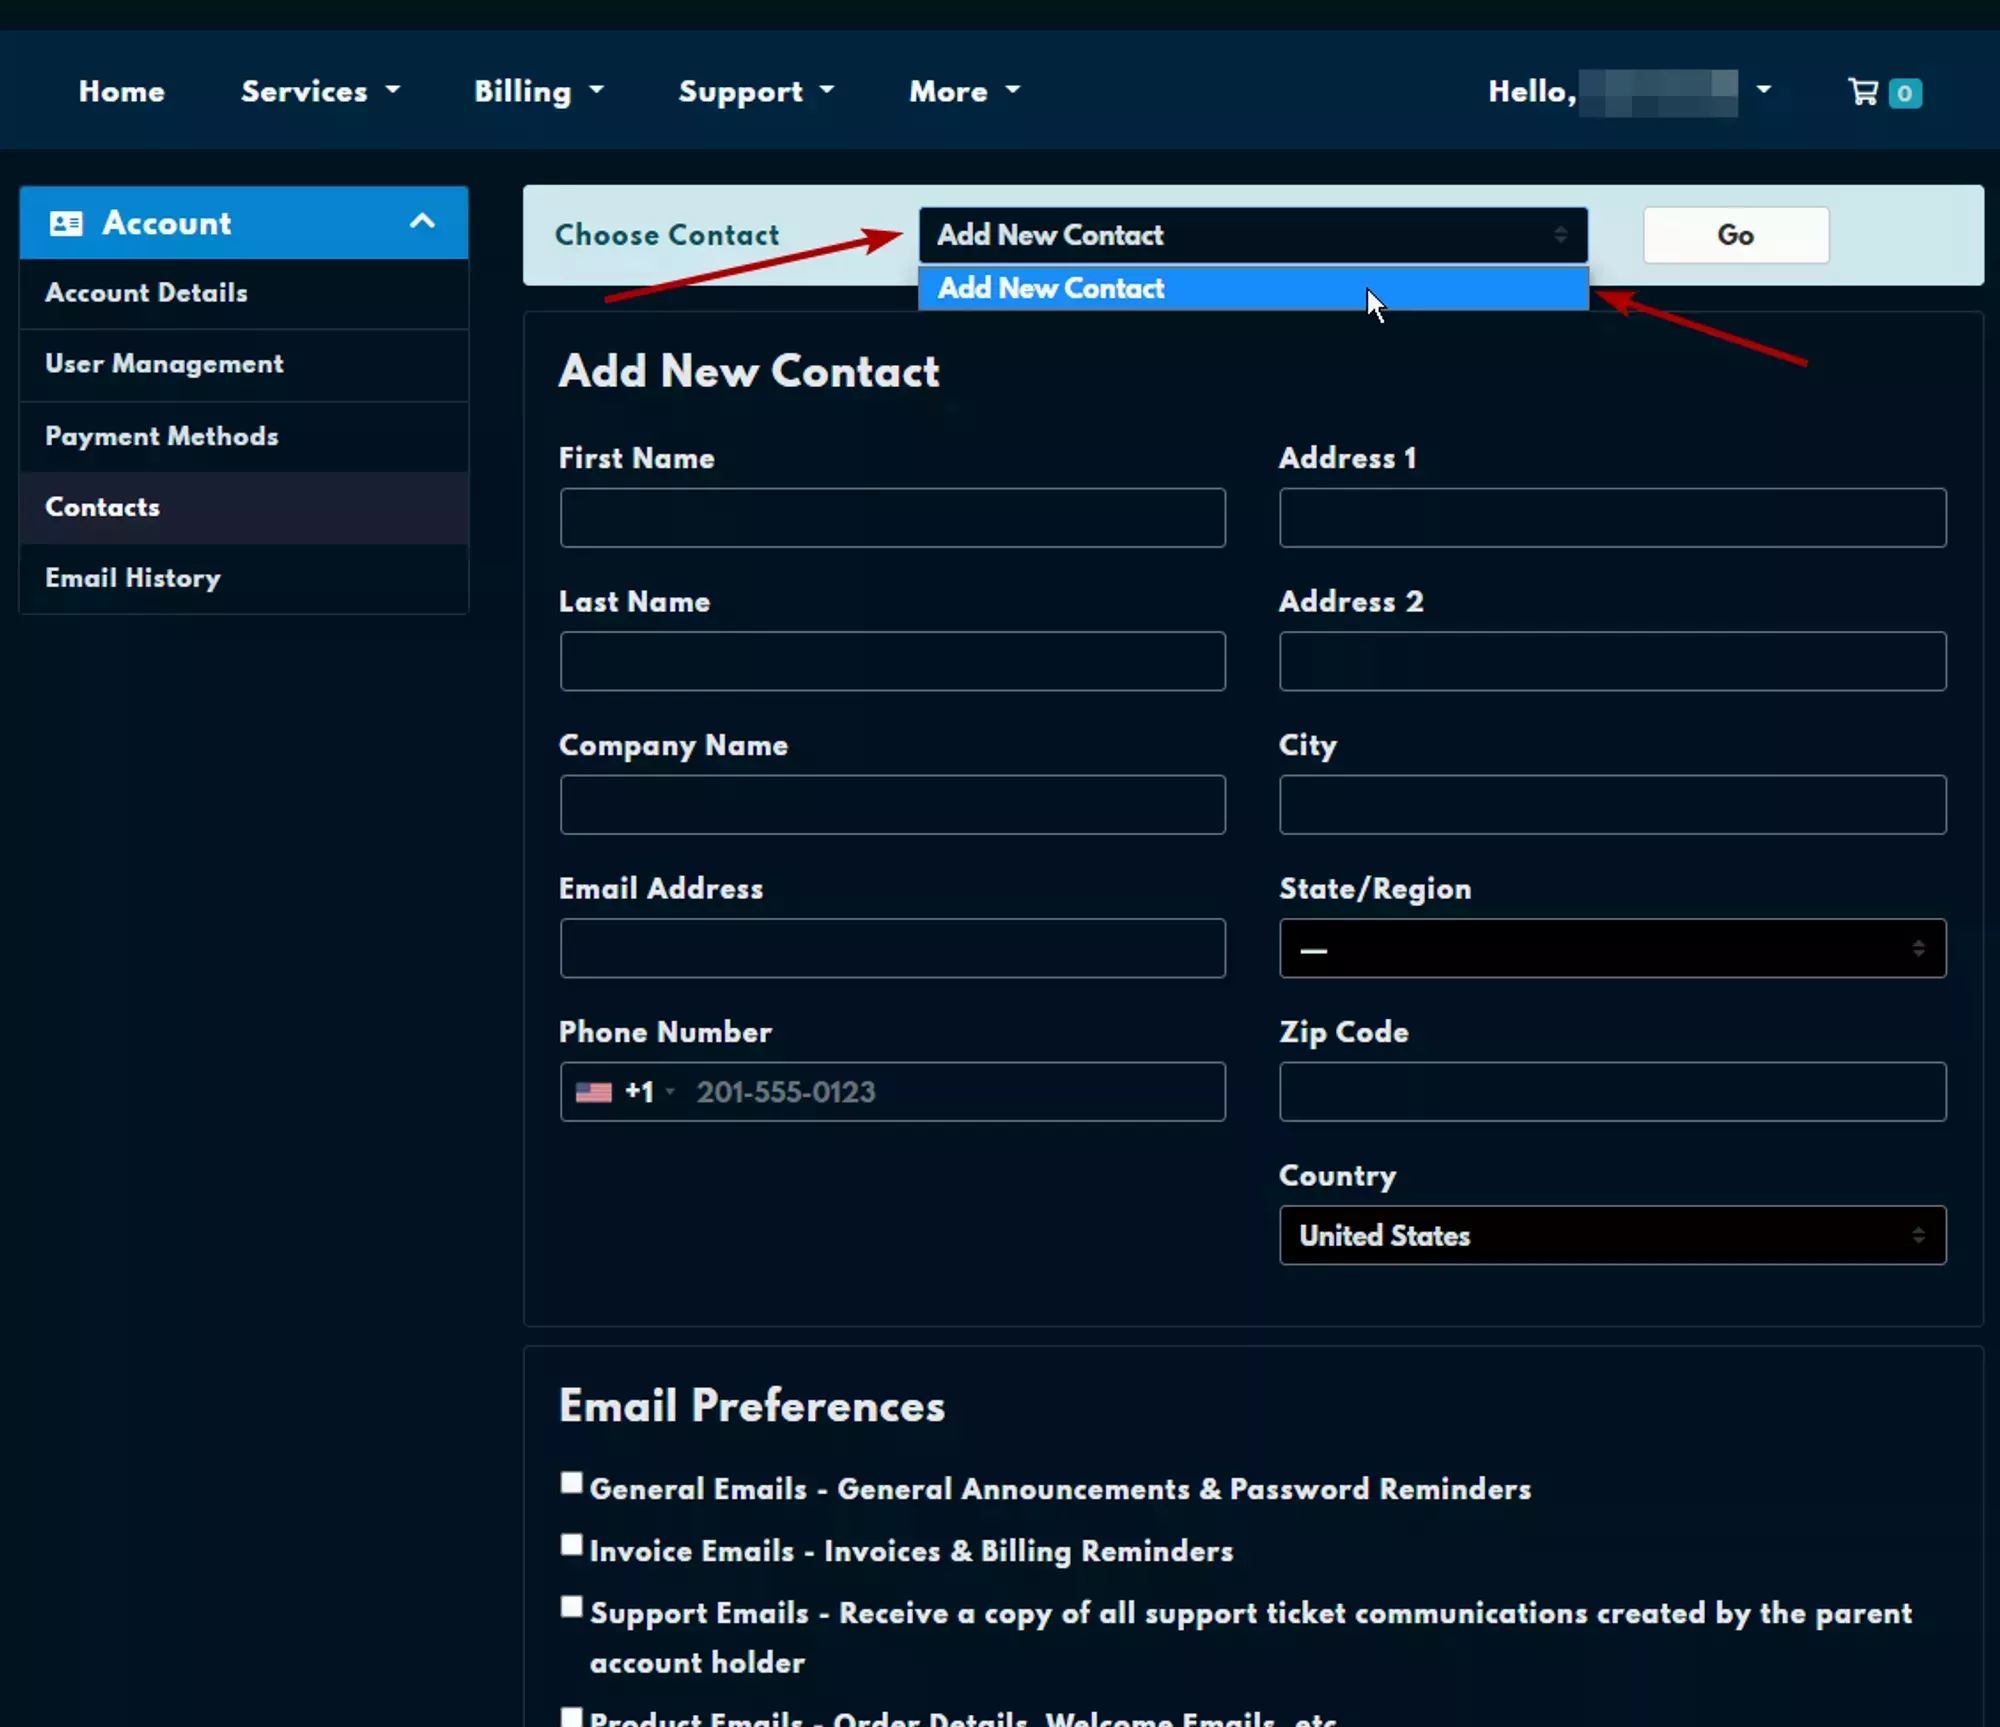
Fill out the contact information.
Every field is required except for `Company Name` and `Address 2`. While this is less than ideal for most use cases, it’s a limitation of the current system.
Set the email preferences using the categories at the bottom of the form.
Click **"Save Changes"** to create the contact.
### Removing an Existing Billing Contact
You can remove an existing Billing Contact using the steps below:
Log into the Client Area and navigate to **"Add New Contact"** from the **"Contacts"** box on the left side of the Client Area Home.
This is where you add new, or manage existing Contacts to your Billing Account.

Select the contact you wish to remove from the dropdown at the top of the form.
Click **"Go"** to load the contact and its details.
Click the **"Delete Contact"** button.
Click the **"Confirm"** button if you're sure you want to permanently delete the contact.
### Modifying an Existing Contact
You can modify an existing contact by following the steps below:
Log into the Client Area and navigate to **"Add New Contact"** from the **"Contacts"** box on the left side of the Client Area Home.
This is where you add new, or manage existing Contacts to your Billing Account.

Select the contact you want to modify from the dropdown at the top of the form.
Click **"go"** to load the contact's details.
Edit the now populated fields.
Click **"Save Changes"** to update the details.
Once the new information is validated and saved, the page will be refreshed and you’ll see a green box telling you that the

---
# Accessing the Game Control Panel
> Learn how to log in to the WinterNode Game Control Panel.
Source: https://winternode.com/help/game-control-panel/accessing-the-gcp
{/* This is a cross-reference entry - the sidebar links to the main article */}
---
# How to Use a Custom Domain with Your Game Server
> Point a domain you own at your WinterNode game server using A and SRV DNS records so players can connect with a clean address.
Source: https://winternode.com/help/game-control-panel/connecting-your-domain
Point a domain you own at your WinterNode game server so players can connect with a clean address like `play.example.com` instead of a numeric IP and port.
## What You Need
- A domain you own (purchased from a registrar like [Cloudflare](https://www.cloudflare.com/), [Porkbun](https://porkbun.com), etc.)
- Access to your domain's DNS settings
- Your server's IP address and port from the Game Panel (under **Management** → **Allocations**)
## Create an A Record
The A record points your subdomain to your server's IP address.
1. Open your domain's DNS management page
2. Click **Add Record** and set:
- **Type:** `A`
- **Name:** The subdomain you want (e.g. `play`, `mc`, `vs`)
- **IPv4 address:** Your server's IP address **without** the port
- **TTL:** `Auto`
- **Proxy status** (if available)**:** `DNS Only`
Your A record should look something like this:

## Create an SRV Record
If your server uses a shared IP (i.e. it has a non-default port), you need an SRV record so players don't have to type the port. This only works for games that support SRV. See the table below.
1. Click **Add Record** and set:
- **Name:** `._tcp.` - replace `` with the prefix from the table below and `` with the subdomain from your A record. For the root domain, use `@` instead of a subdomain.
- **Priority:** `0`
- **Weight:** `0`
- **TTL:** `Auto`
- **Port:** Your server's port (from **Management** → **Allocations**)
- **Target:** The full A record subdomain (e.g. `play.example.com`)
**Example for Minecraft:** To make `play.example.com` work, with an A record named `play`, the SRV record name would be `_minecraft._tcp.play`.
Your SRV record should look something like this:
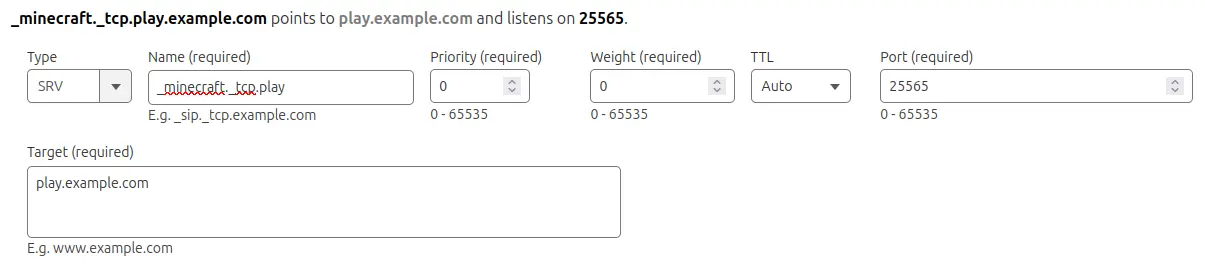
After DNS propagates, players can connect using just your subdomain (e.g. `play.example.com`).
## Games with Known SRV Support
| Game | SRV Service Prefix | Example SRV Name |
|------|-------------------|-------------------|
| Minecraft: Java Edition | `_minecraft` | `_minecraft._tcp.play` |
| Vintage Story | `_vintagestory` | `_vintagestory._tcp.play` |
## Verify DNS Propagation
DNS changes can take anywhere from a few minutes to 72 hours to propagate worldwide.
1. Go to [dnschecker.org](https://dnschecker.org)
2. Enter your subdomain (e.g. `play.example.com`) to check the A record
3. To check an SRV record, prepend the service prefix: e.g. `_minecraft._tcp.play.example.com`
Once propagation is complete, players can connect using your domain.
---
# Creating a MySQL Database
> Step-by-step instructions for creating and managing MySQL databases in the WinterNode Game Panel, including password and connection info.
Source: https://winternode.com/help/game-control-panel/creating-a-mysql-database
We provide MySQL databases with our Game Servers that are managed through our Game Panel. You can follow the steps below to create a MySQL database.
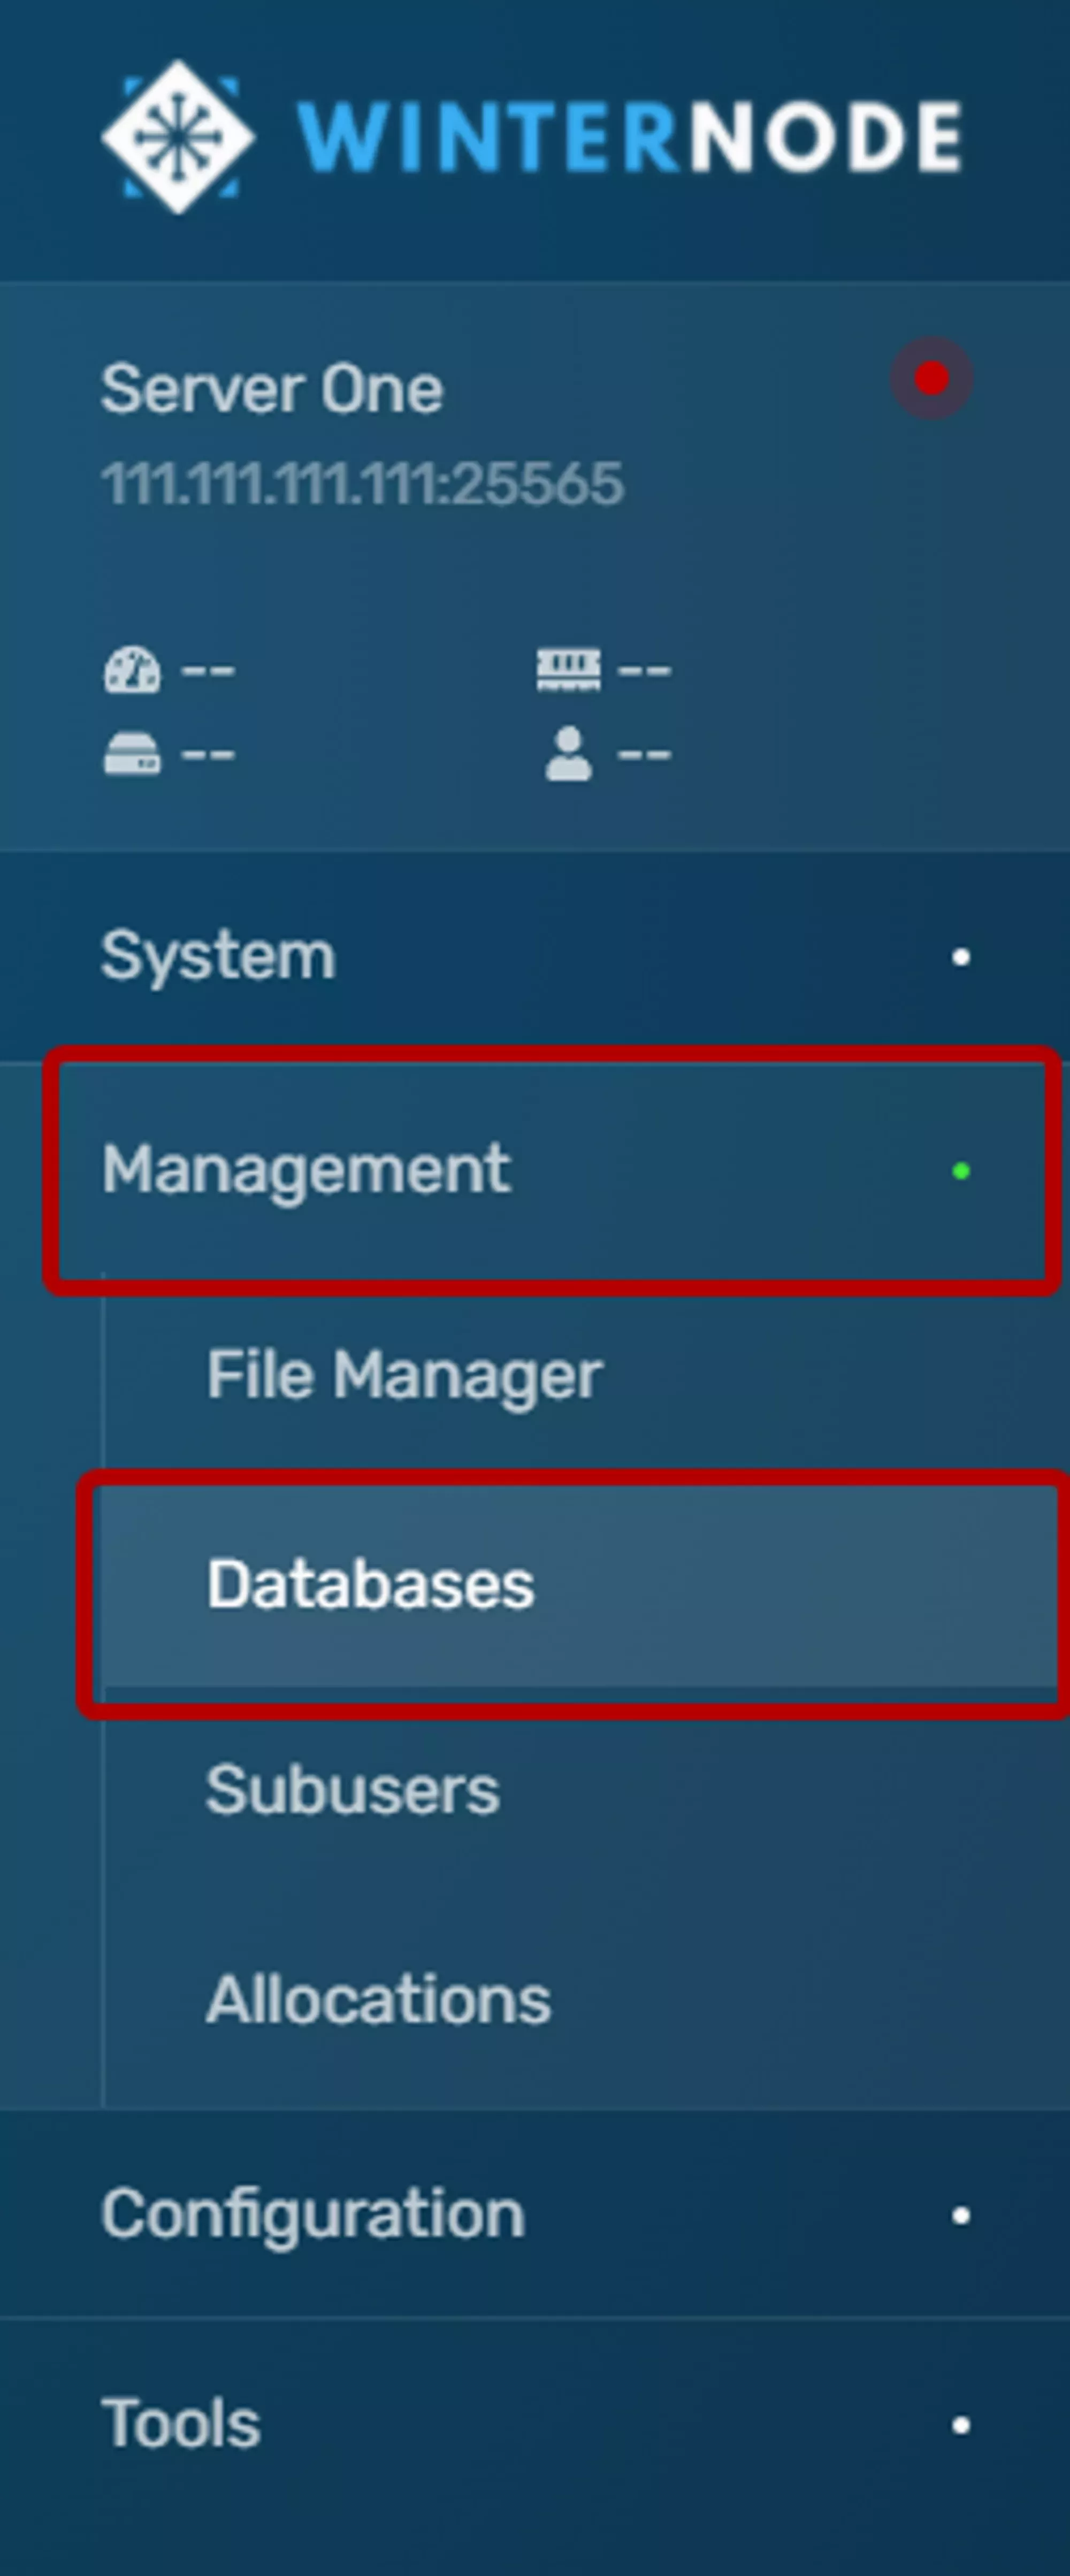
1. To create a database, head into the panel and under **`Managment`** click on **`Databases`** as shown in the example navigation bar to the right.
2. Click the `Create` button on the top right side of the `Databases` box.
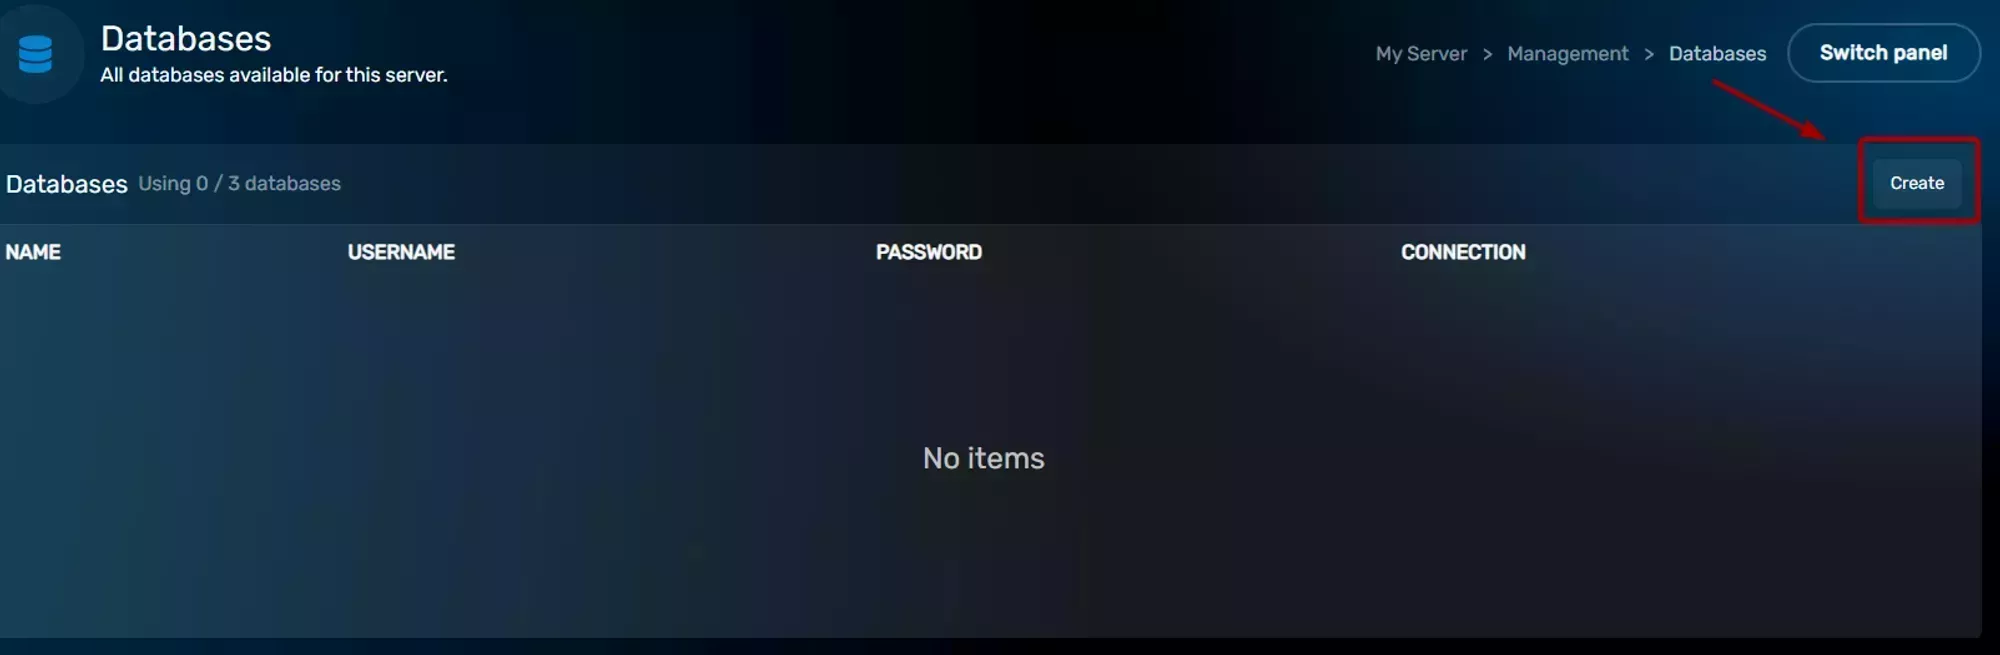
3. Click the `HOST` dropdown and select your server’s node, it should be the only option, and then fill out the `NAME` Field with a name for your database. You should leave the `CONNECTIONS FROM` Field as is (`%`) unless you’re trying to limit what can connect to your database, which isn’t generally necessary.
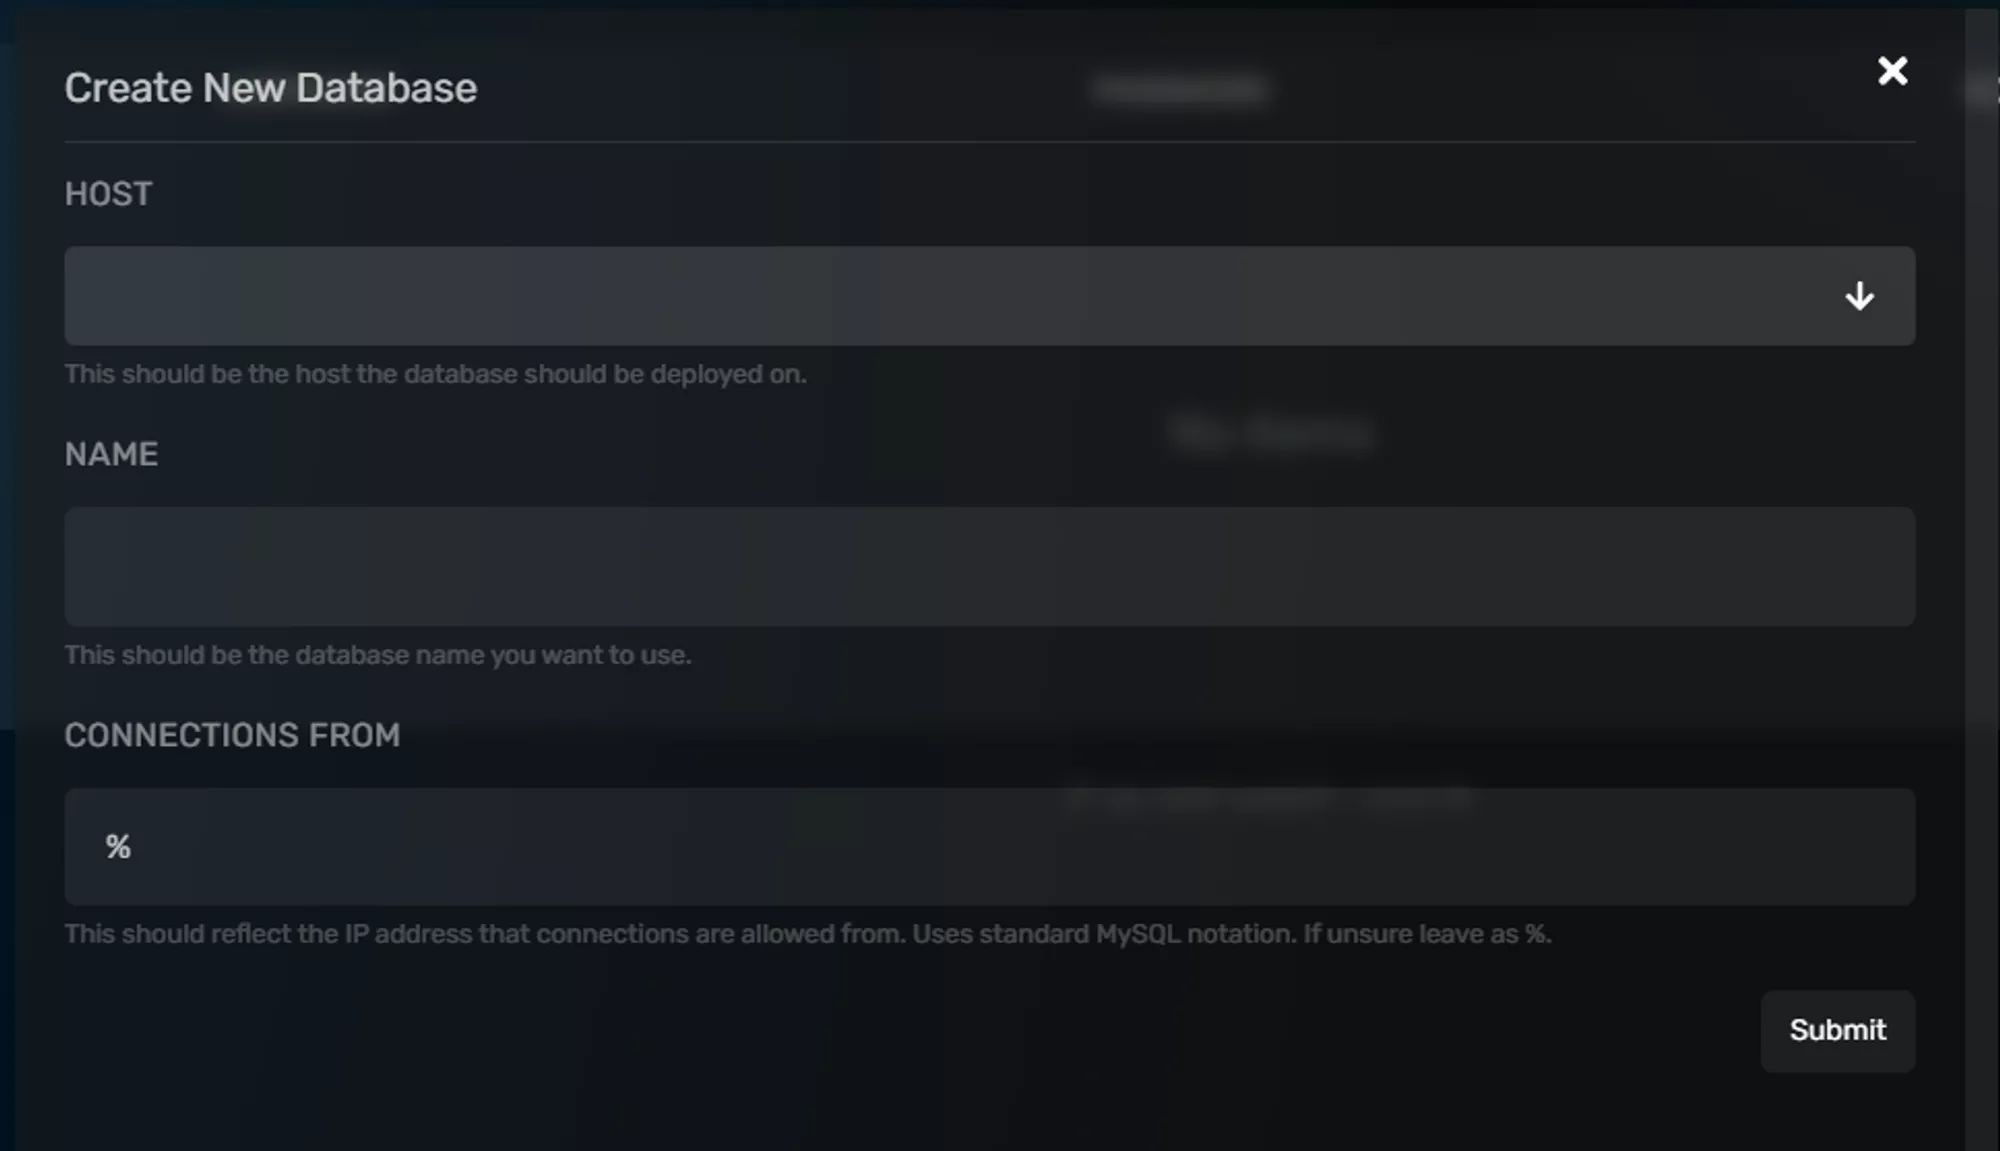
4. Then your database will be created and should appear on the list. It will have your database name, username, and connection address/port.
To reveal the password click on the key icon and to reset it click on the button to the far right side of the database entry.

---
# How to Download Your World or Server Files
> Download a copy of your world or any server files to your computer using the File Manager's Archive and Download options or SFTP.
Source: https://winternode.com/help/game-control-panel/downloading-your-server-files
Download a copy of your world, or any other files, from your server to your own computer. You can do this in the browser with the File Manager, or over [SFTP](/help/game-control-panel/using-sftp) for large downloads.
## Find Your World Folder
Every game stores its world or save data in a different place. Common locations on WinterNode servers:
| Game | World / save location |
|------|----------------------|
| Minecraft Java | The world folder in your server root, named `world` by default (the `level-name` value in `server.properties`) |
| Terraria | `saves/Worlds/` (each world is a `.wld` file; tModLoader worlds also have a matching `.twld`) |
| Valheim | `/.config/unity3d/IronGate/Valheim/worlds_local/` (each world is a `.fwl` and `.db` pair) |
| Palworld | `Pal/Saved/SaveGames/0/` |
| Unturned | `Servers/Default/Level` and `Servers/Default/Players` |
| Vintage Story | `data/Saves/` (each world is a `.vcdbs` file) |
For any other game, look for a folder named after saves, worlds, or your map name, or check that game's section of the [help center](/help).
## Download with the File Manager
Folders can't be downloaded directly, so you archive the folder first and download the archive.
1. Log in to the [Game Control Panel](https://gcp.winternode.com) and select your server
2. In the sidebar, click **File Manager**
3. Navigate to the folder you want (for example, your world folder from the table above)
4. Go up one level so you can see the folder in the file list, then click the **...** menu on the right side of its row
5. Select **Archive**
6. Wait for the archive to finish. A new file named like `archive-{date}.tar.gz` appears, and it's ready once its **LAST MODIFIED** column no longer says *a few seconds ago*
7. Click the **...** menu on the right side of the archive file and select **Download**
The archive saves to your browser's default download location. Single files (like a Terraria `.wld` or Valheim `.db`) don't need the archive step: use their **...** menu and select **Download** directly.
## Download Your Whole Server
To take everything at once:
1. In the **File Manager**, click the check box at the top of the **Name** column to select everything in your server root
2. Click **Archive** in the toolbar
3. Download the finished archive from its **...** menu, or over SFTP
This is the same process as a [manual backup](/help/game-control-panel/manual-backup). A full-server archive can be large, so expect the archiving step to take a while.
## Download with SFTP
For large worlds or full servers, [SFTP](/help/game-control-panel/using-sftp) is faster and more stable than the browser, and it can download folders without archiving them first.
1. Connect to your server with an SFTP client like [WinSCP](/help/game-control-panel/using-winscp) or FileZilla
2. On the server side, navigate to the folder you want
3. Drag it to a folder on your computer and wait for the transfer to finish
## Still Not Working?
If your download keeps failing or you can't find your world files, [contact our support team](https://winternode.com/discord?utm_source=help&utm_medium=article&utm_campaign=downloading-your-server-files) with:
- Your [Server UUID](/help/getting-started/finding-your-server-uuid)
- The folder or file you're trying to download
- What you've already tried (File Manager, SFTP, or both)
---
# Back Up Your Server Files Manually
> Learn how to create a manual backup of your WinterNode game server files using the File Manager, compress files, and safely store your backups.
Source: https://winternode.com/help/game-control-panel/manual-backup
WinterNode takes [automatic backups](/help/getting-started/backup-system) every 12 hours, but we always recommend taking your own backups before performing any potentially destructive work on your server. Sometimes making use of tools like [DriveBackupV2](/help/games/minecraft-java/plugins/drivebackupv2) or a [Backup Script](/help/general-utilities/game-server-backup-script-example) is either unwieldy or impossible, but you can still make a manual backup using the archive function in the File Manager. We'll be going over how to do exactly that here.
## Navigating to your Files
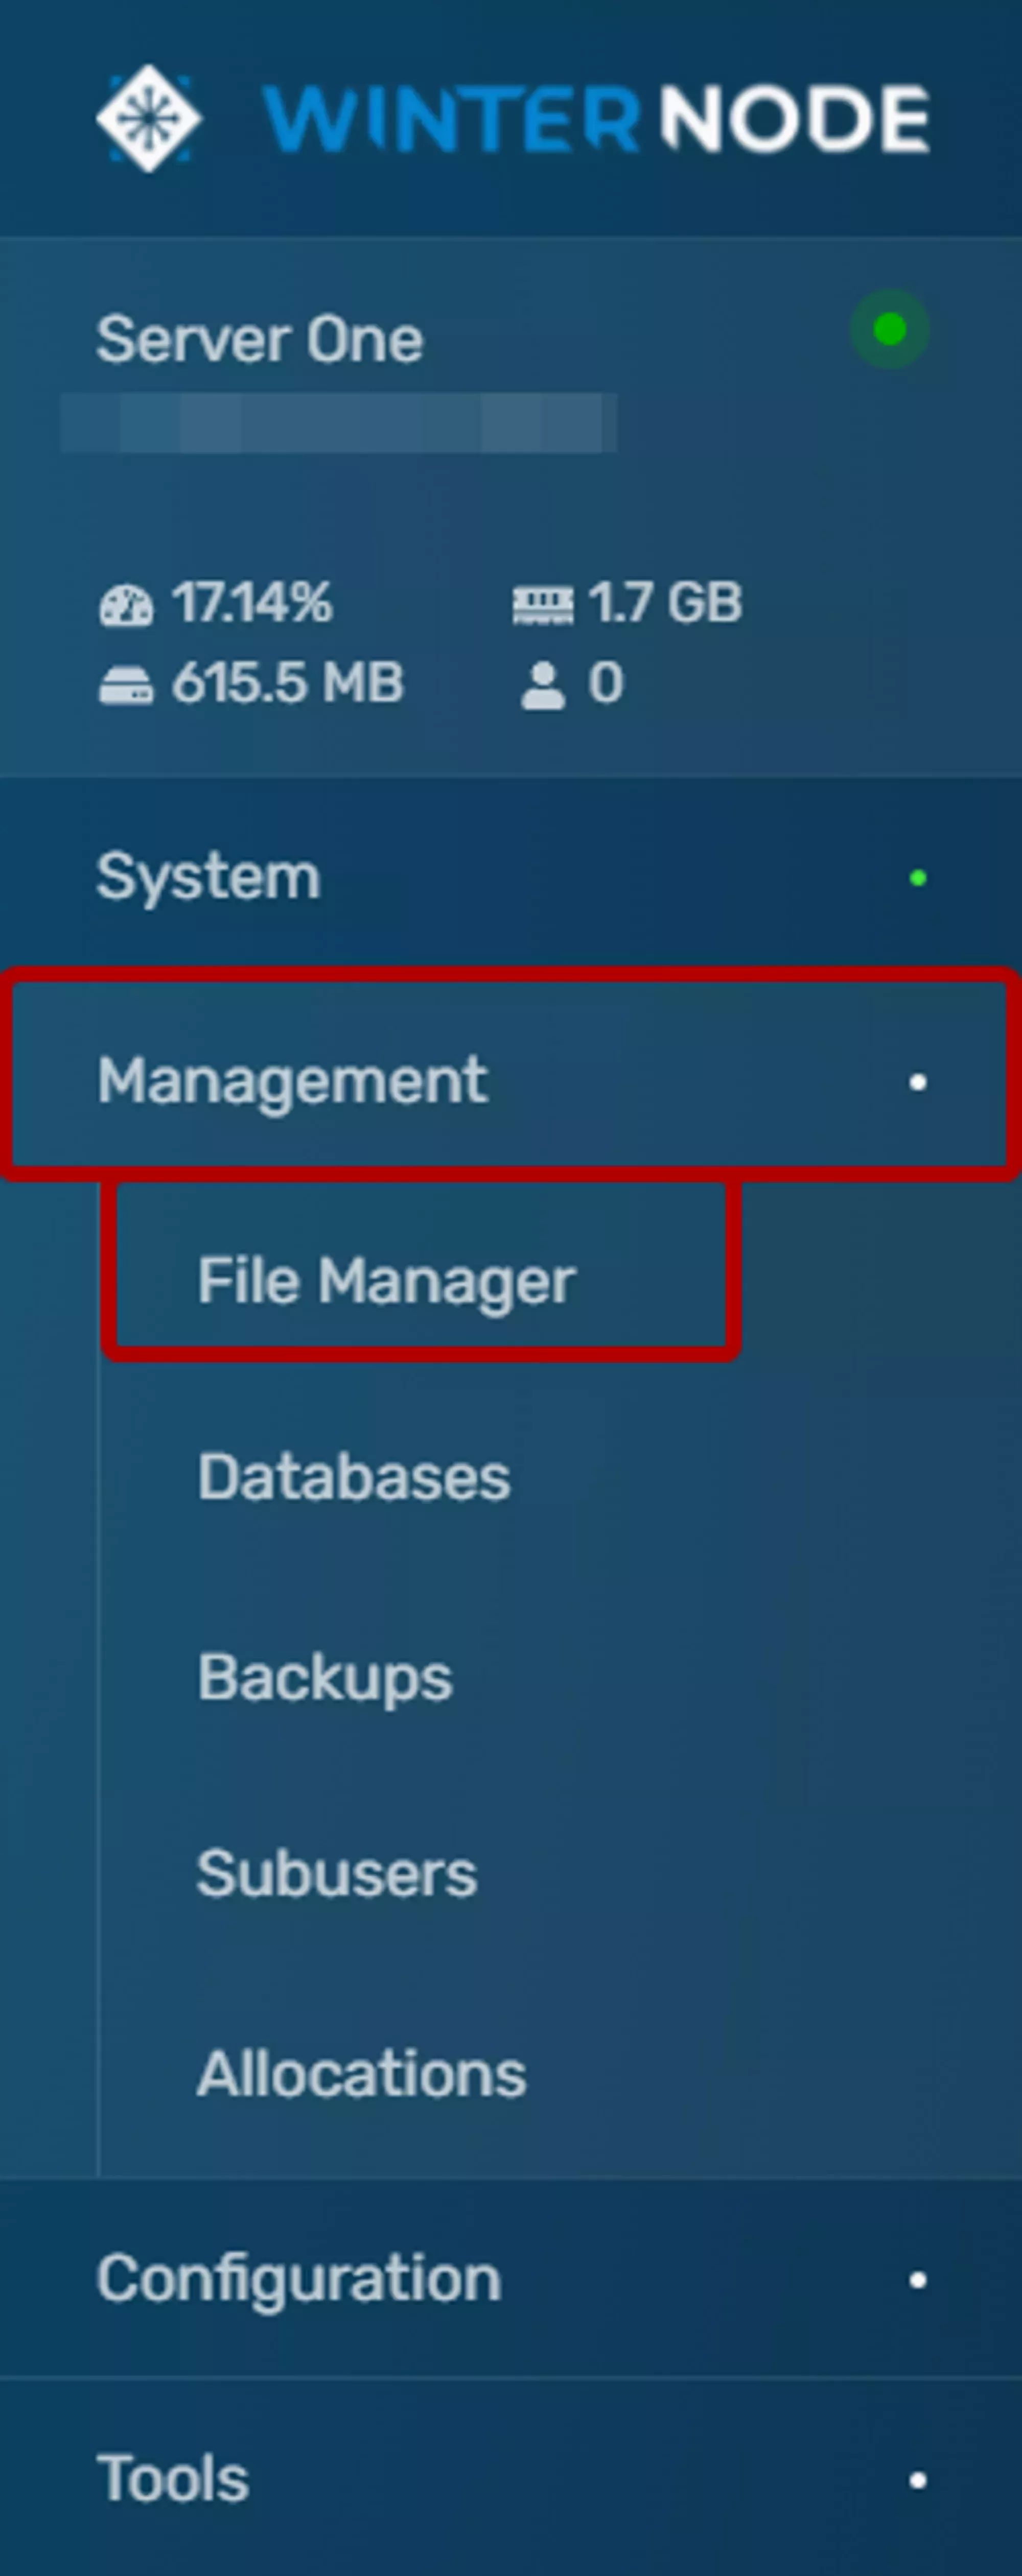
The File Manager is at the top level of the sidebar, between Console and Server Options, as seen in the image to the right. Once there you'll be taken to your server root and should see the all of the files currently located on your server.
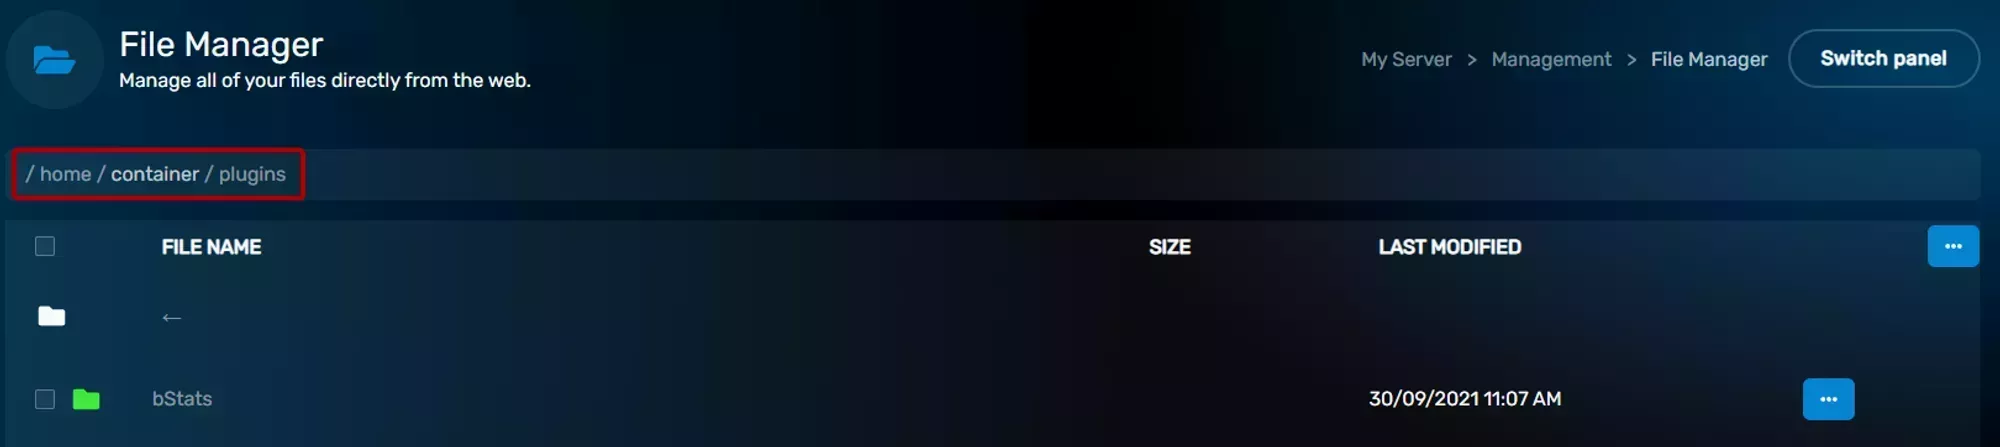
The File Manager displays the current file content of your server and allows you to navigate through the directories it contains. You can enter a Directory by clicking on its name in the File Table located in the center of your screen. When you enter a Directory it will be added to the File Path at the top of the page as seen in the image to the right.
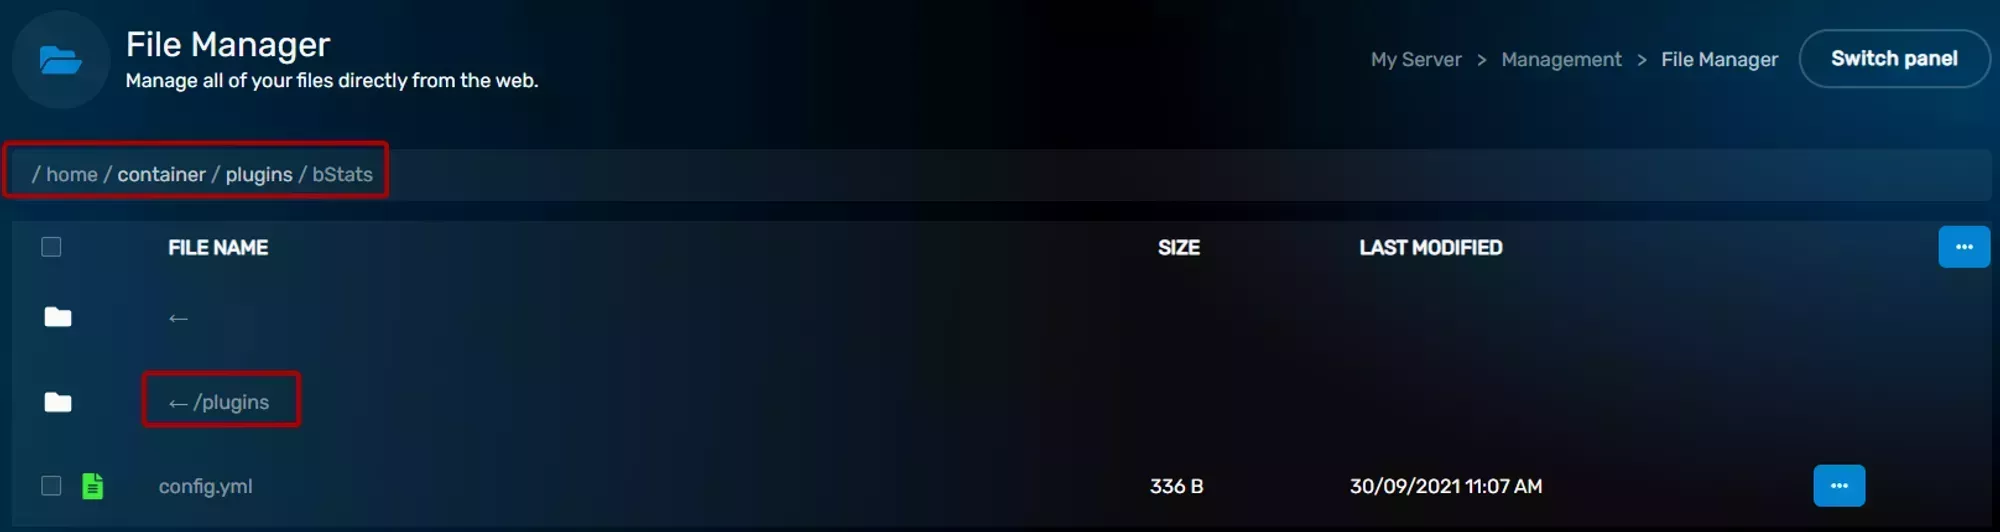
If you need to navigate back to the Directory above your current one, select the **.. parent directory** row at the top of the file list.
If you need to navigate back to the Server Root at any time you can click the home icon at the top left of the File Manager. Your Server Root will always be `/home/container` so you can double check your location using the breadcrumb path at the top of the screen.
## Creating an Archive
To back up your files you'll compress them into a single archive using the File Manager. Select the files and folders you want to keep. For a full backup, tick the check box at the top of the **Name** column to grab everything in your server root, then click **Archive** in the toolbar.
For the full walkthrough, including how to archive a single item straight from its `...` menu, see [Compressing files and folders](/help/game-control-panel/the-file-manager#compressing-folders-and-files) in the File Manager guide.
Once archiving finishes you'll have a new archive file named with the date and time it was created, for example `archive-{date}.tar.gz`, ready to store.
## Backing up your File
As a final step you’ll want to backup your archive in a safe location. This can be one of a few different ways depending on why you’re creating the backup, but it’s important to consider them.
Most of the time you’ll want to download the backup to your computer [Using SFTP](/help/game-control-panel/using-sftp) and store it somewhere safe there when doing anything destructing with your server. Once you have it downloaded you can upload it to other backup services if you need to keep it more long term.
Alternatively you can move the archive to a separate folder on your server using the move option when selecting a file, but if you accidentally delete the file or folder then you’ll loose the backup and everything in it.
If it is a very temporary backup, you can leave the archive in the place that it was created and when/if you need to restore to it then it will be as simple as decompressing it in place.
---
# Game Panel Sub-Users
> Invite and manage Game Panel Sub-Users, set permissions, enable 2FA, and control access to your WinterNode server securely and easily.
Source: https://winternode.com/help/game-control-panel/securing-access/game-panel-sub-users
A Game Panel Sub-User is able manage your server depending on the permissions you grant them. You invite them via email and they're able to create a WinterNode account without purchasing a server.
## Adding a new Game Panel Sub-User
Log into the GCP and navigate to the **"Management"** -> **"SubUsers"** tab.
Click the **"Create"** button on the top right.
Fill out the email of the SubUser
They'll receive an email with a link asking them to setup an account if they don't already have one and informing them that they've been invited to access your server. We have more information on what that looks like for them in the Next Section called Game Panel Sub-User Verification.
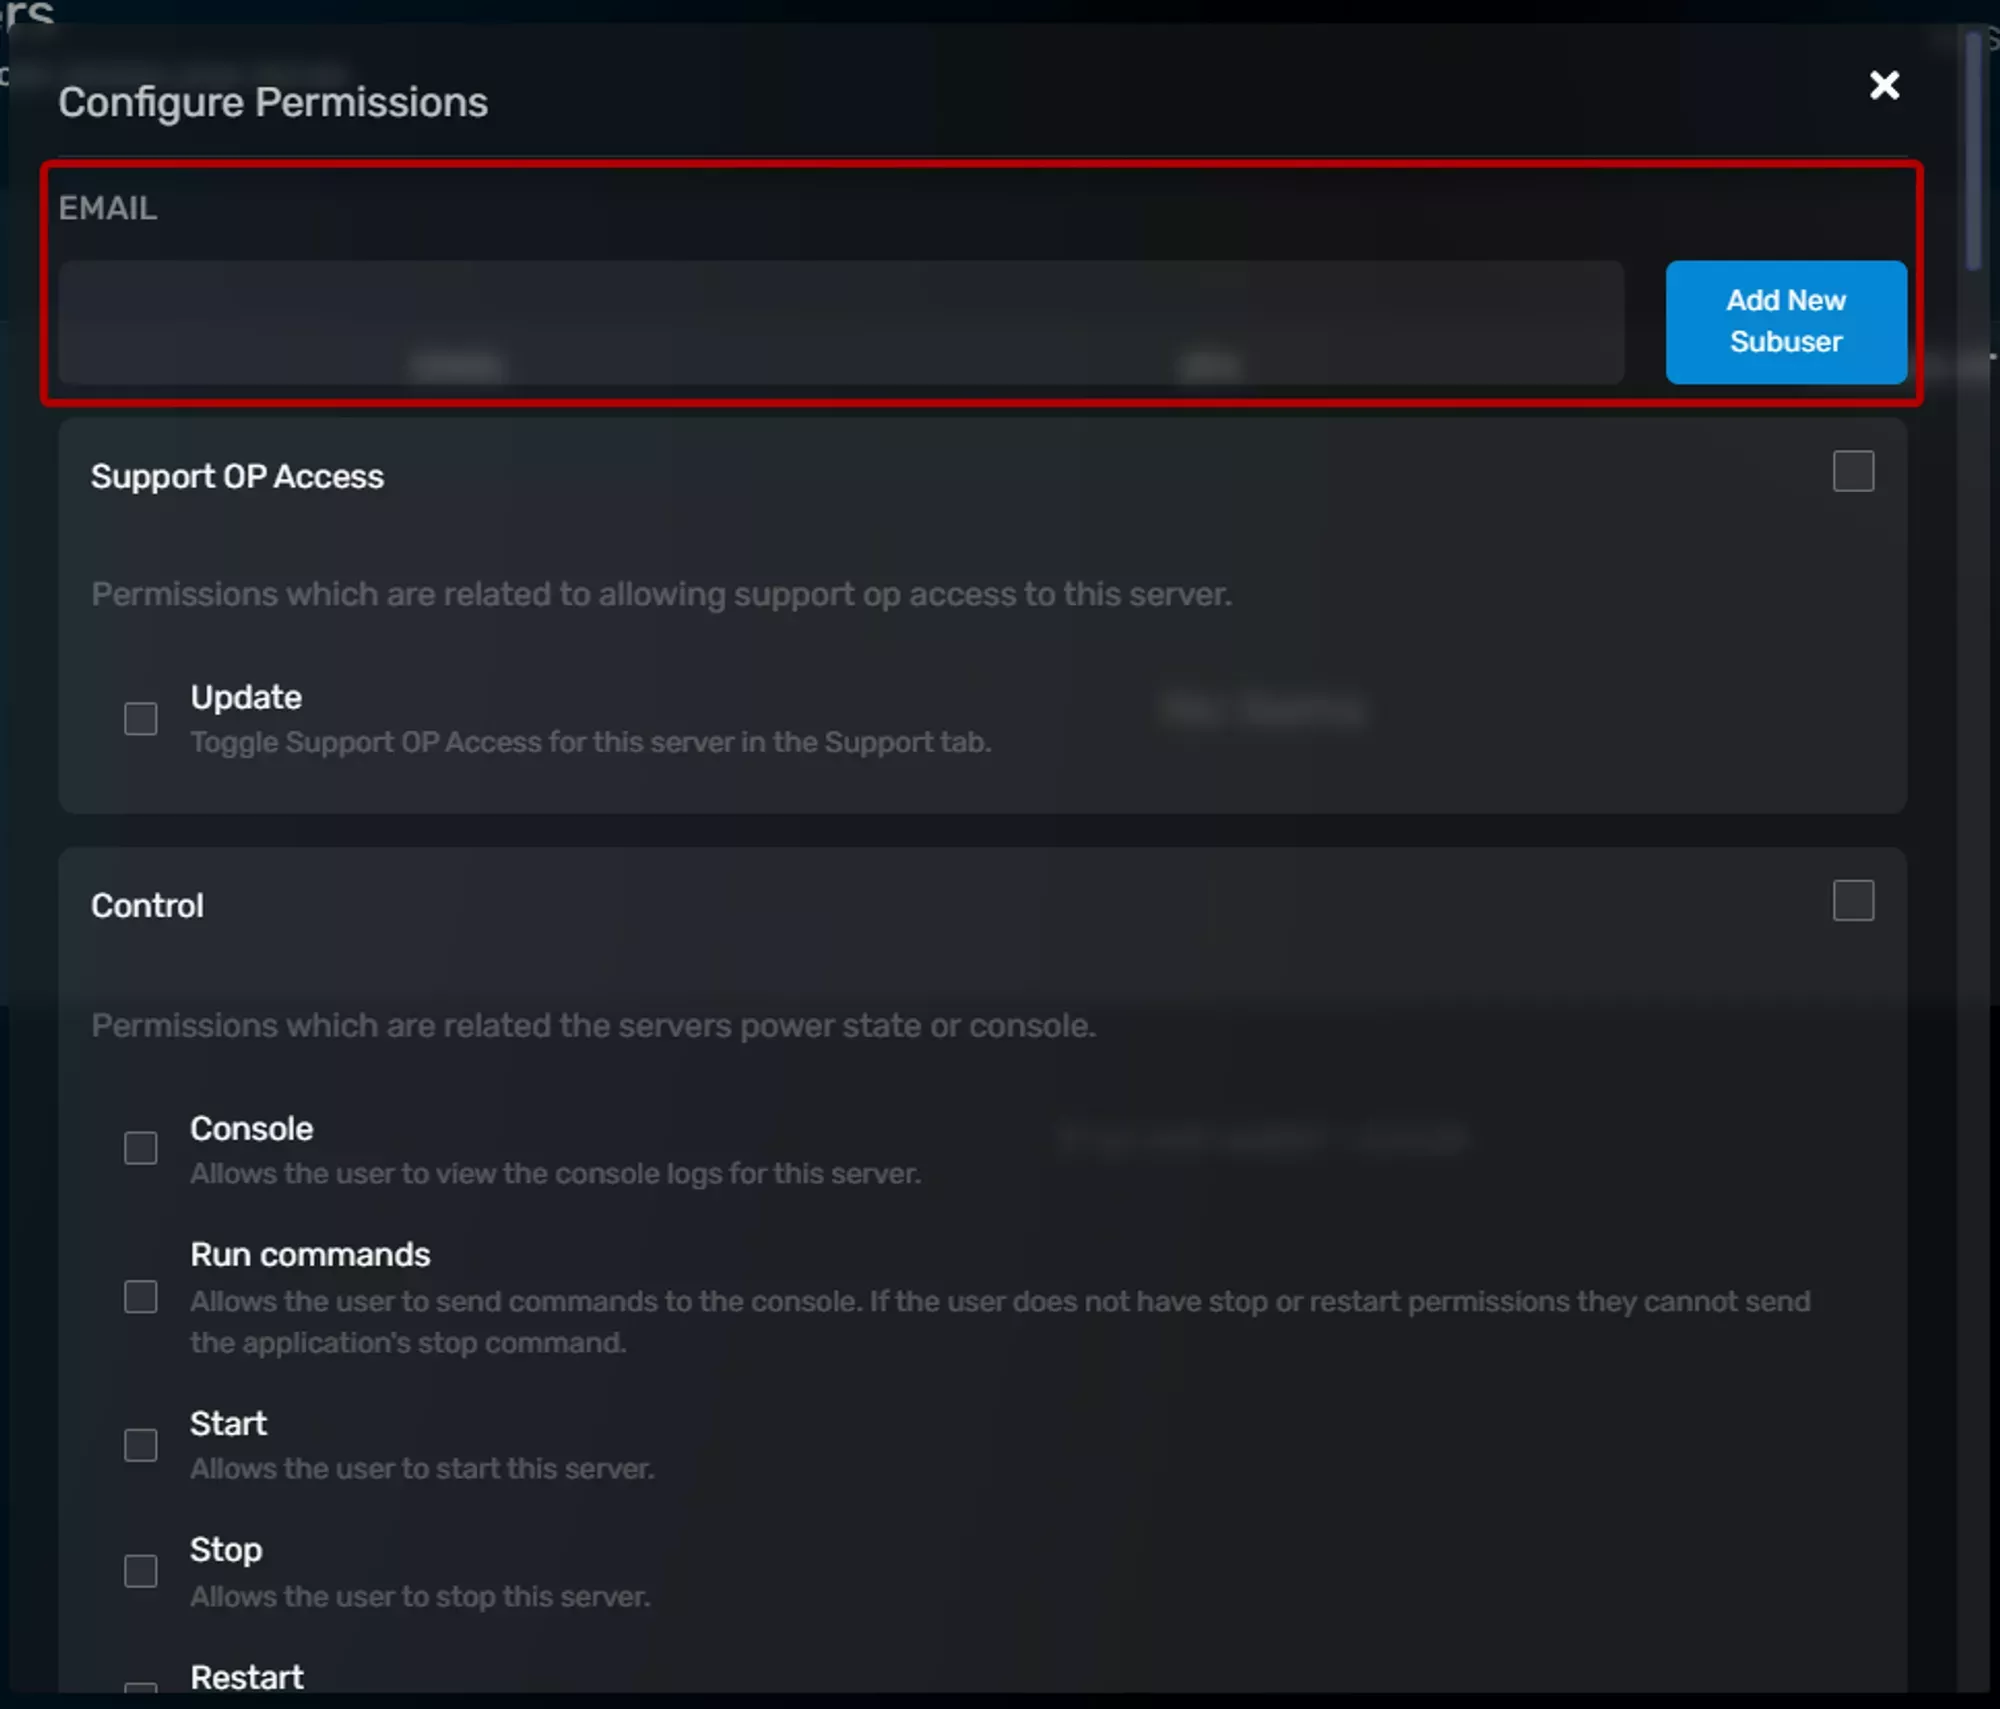
Select the permissions you'd like the SubUser to have.
They're separated into dropdowns and each permission has a short description for what it allows the Sub User to do. You can then grant access to it by ticking the checkbox next to it if it's something you want them to do, or leave it empty if you don't. There's also a section dedicated to the specifics of each permission in the [Securing a Game Panel Sub-Users account section](#setting-permissions).
Click **"Add New SubUser"**.
## Game Panel Sub-User Verification
Entering the users email address and clicking the `Add New Subuser` button will send an email to the user and they will be added to the list of Sub-Users for that server.

The user you invited will then receive emails similar to the ones shown below notifying them that they've been added to a new server and another instructing them on how to create an account if they haven't already.
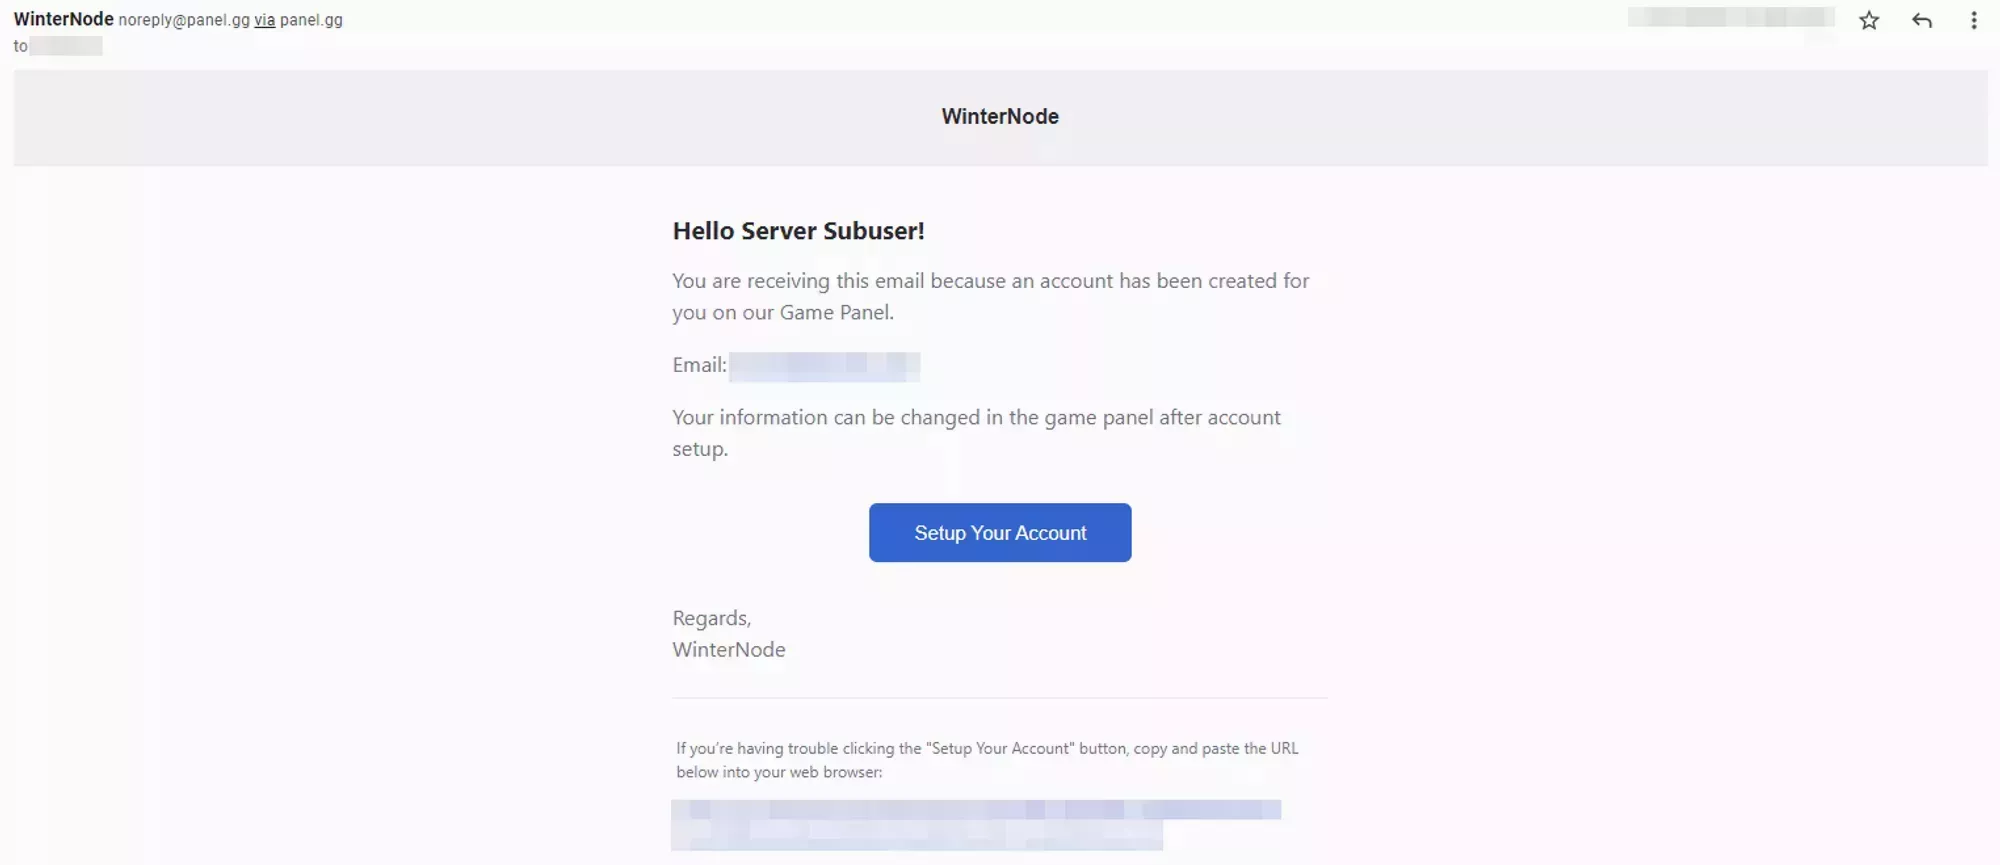
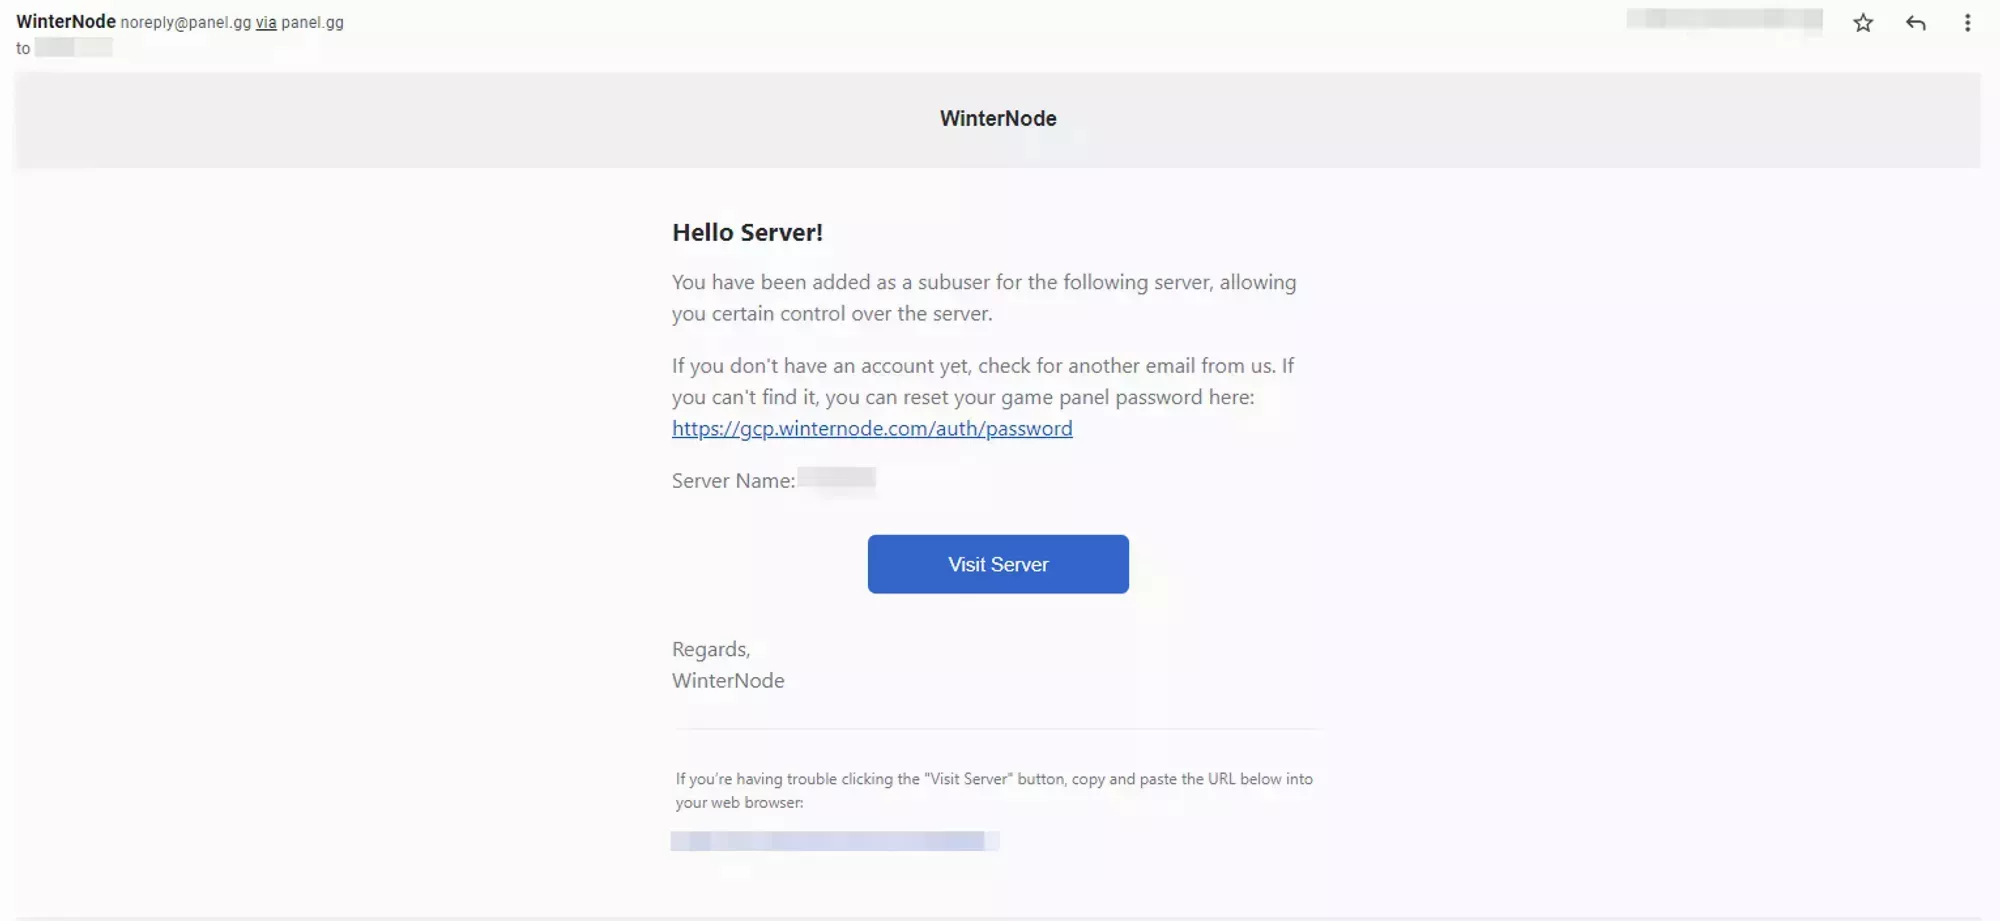
If they already have an account then they’ll be able to log in and see the new server added to the `My Servers` tab on the Game Panel just as they’d see any other server.
If they don’t have an account then they’ll need to create one using the link or button provided in the email sent to them. Once they’ve created an account they’ll have access to the server you’ve invited them to. They will only need to create one account to access any number of servers they’ve been invited to using that email address.
## Removing an existing Game Panel Sub-User
You can remove an existing Game Panel Sub-User from your server by following the steps below:
Navigate to the `Subusers` tab under `Management` on the server.
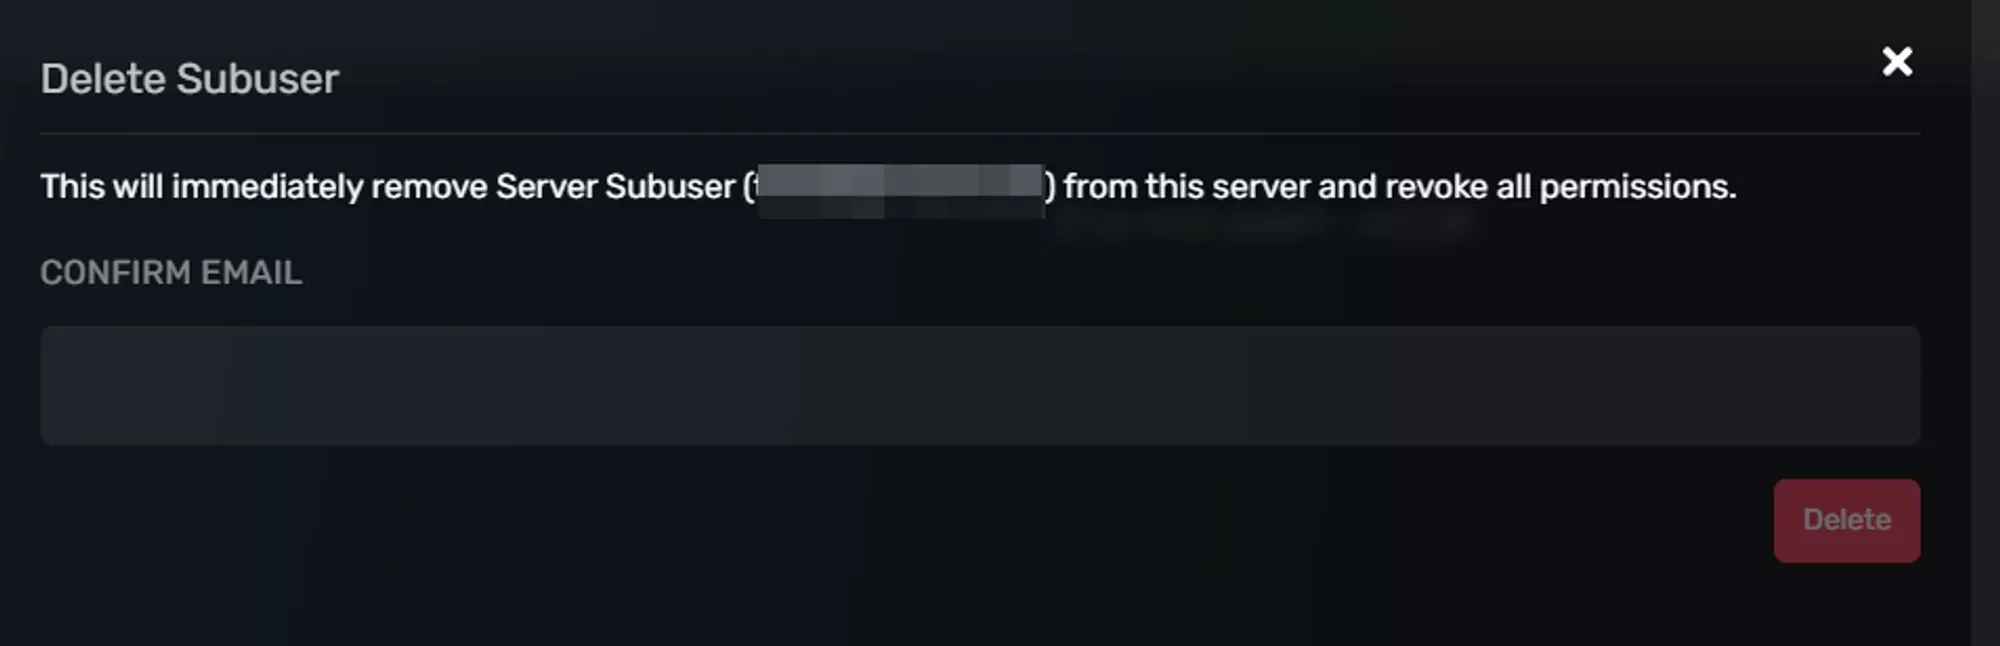
Click the Delete icon next to their name.

Confirm that you want to delete this Sub-User by entering their email address.
## Securing a Game Panel Sub-Users account
### 2 Factor Authentication
2-Factor authentication is an extra step added to logging into to an account that helps prevent unauthorized access. It's highly recommended for both the primary account and sub-users to all have 2FA enabled.
---
You can find the 2FA setting under the security controls tab on your home page in the Game Panel. Once there you’ll find a box labeled 2-Factor Authentication with a button inside labeled Enable 2-Factor Authentication. Click that button to get your Authentication code and QR code.
Log into the GCP and click the **"Account Settings"** button on the right navbar.
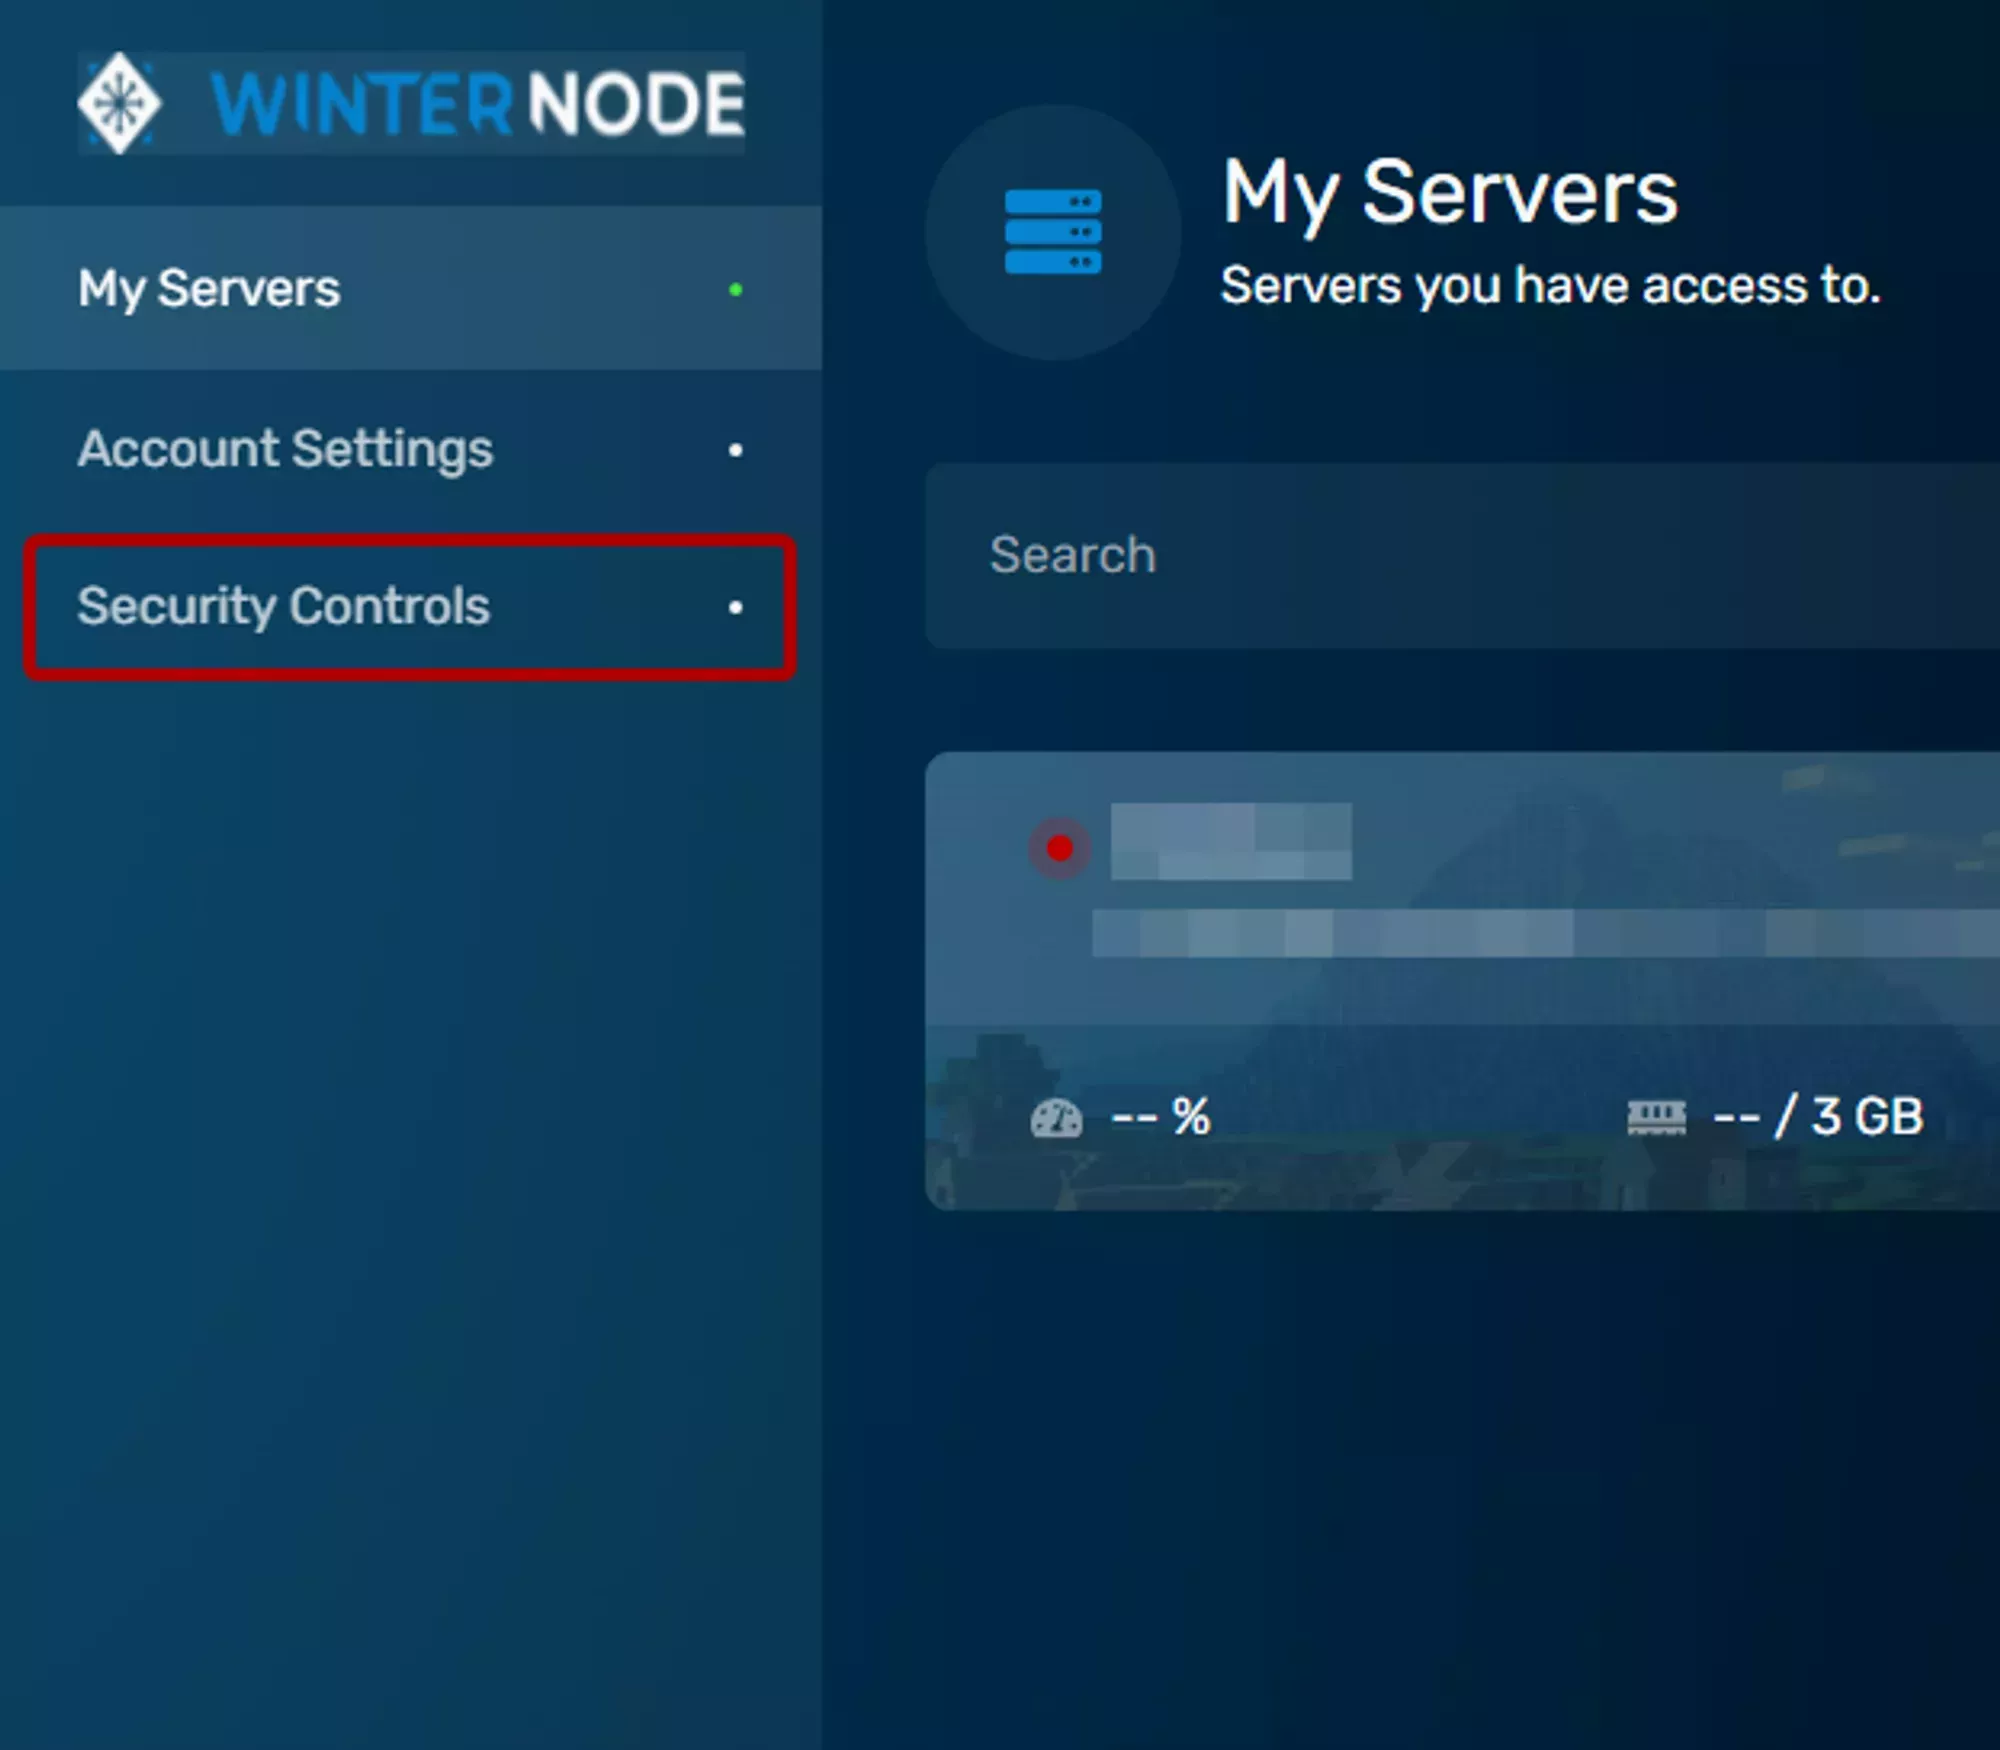
Click the **"2-Factor Authentication"** tab and click **"Enable 2-Factor Authentication"**.
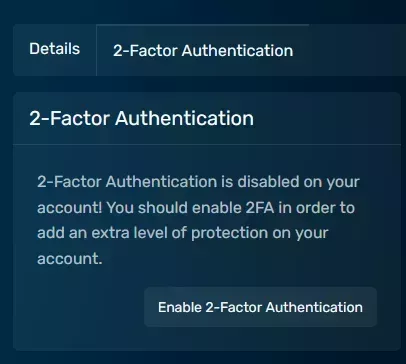
Scan the QR code or enter the code into your Authenticator app.
You can scan the QR code using an app like Google Authenticator or Authy or you can enter the code manually into either of the two apps. You can also click the alphanumeric code to copy it into your clipboard.
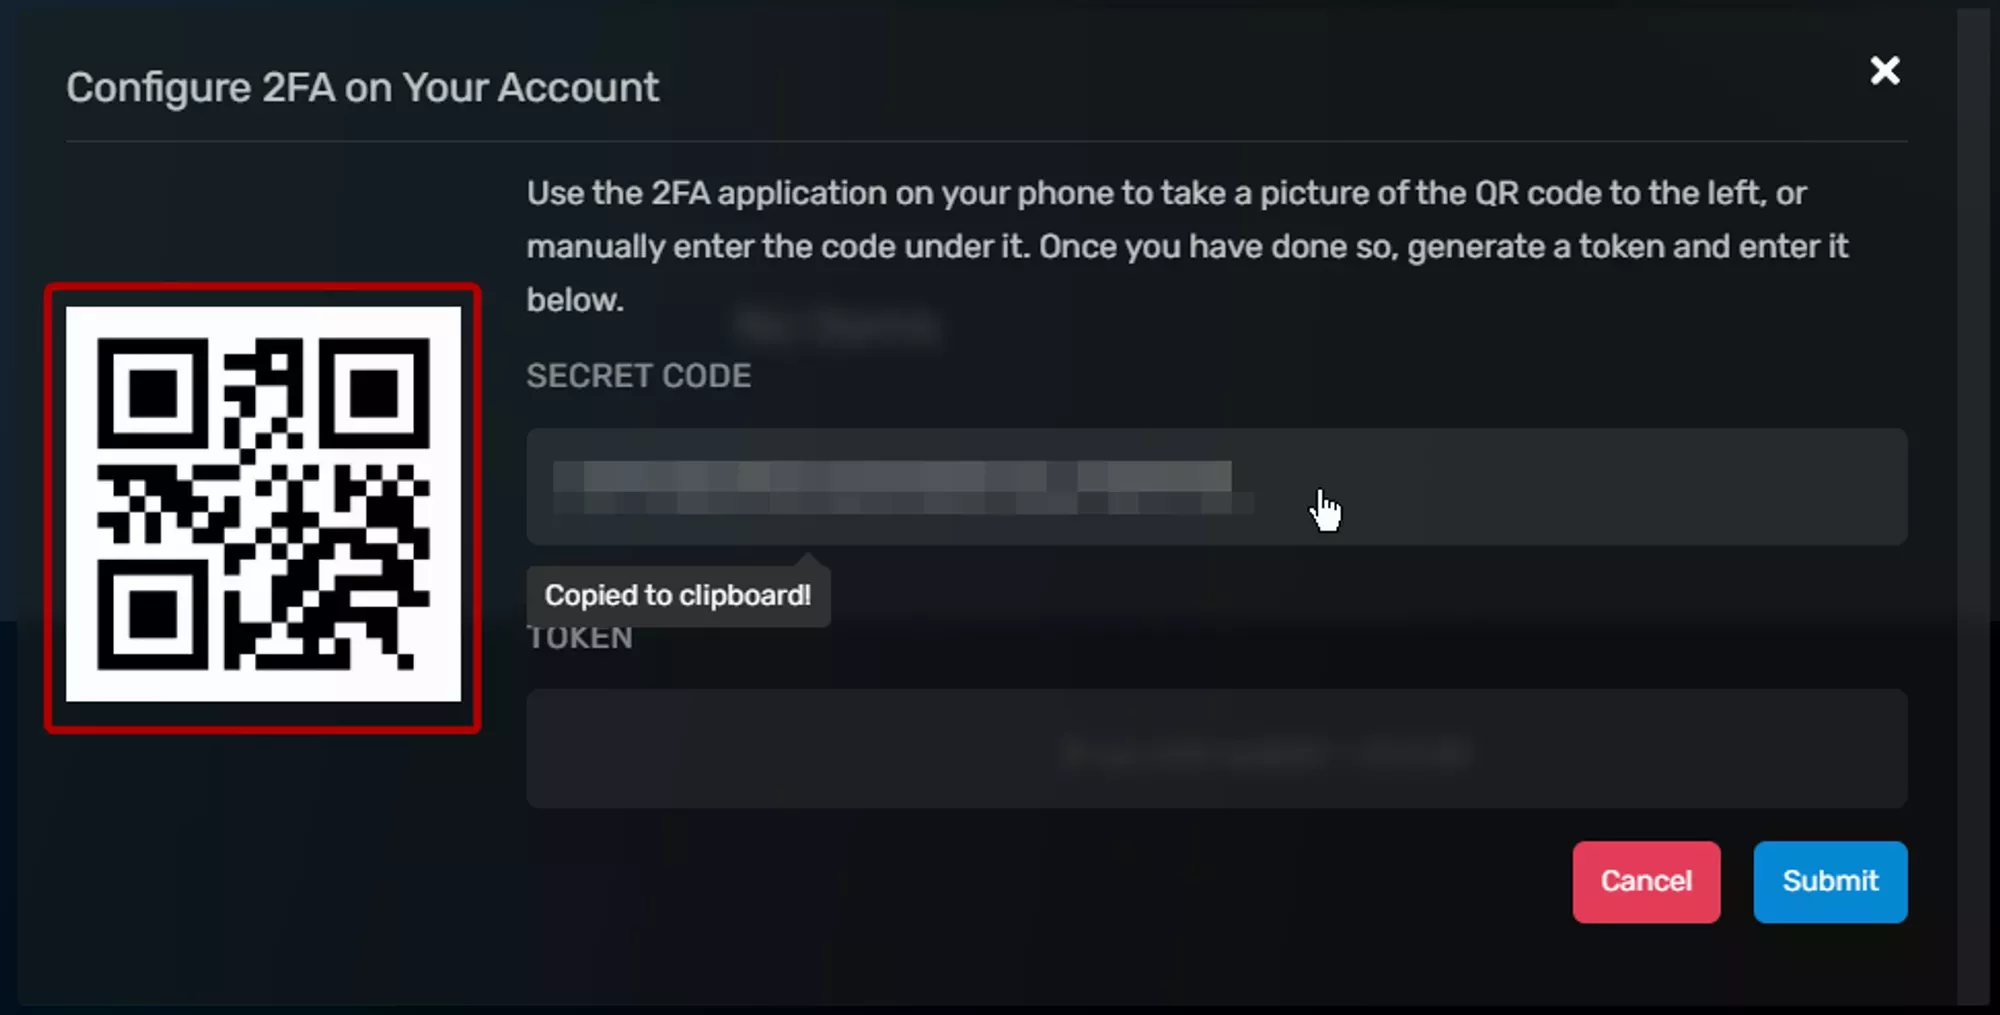
Enter the numbers that your app provides into the **"Token"** field.
## Setting Permissions
Before you create a Game Panel Sub-User, you have the ability to restrict their access to your server by specifying the permissions they have. You can also change those permission _after_ you create a Game Panel Sub-User by following the steps below:
Open the Sub Users page of your server
Open the **"Configure Permissions"** button on the right side of the user entry.

Select the permissions you want the user to have, using the list below as reference.
---
Support OP Access
> _Permissions which are related to allowing support op access to this server._
Update
> _Toggle Support OP Access for this server in the Support tab._
Ability to grant WinterNode staff access to your server for assistance. The toggle is located under the `Configuration -> advanced` tab.
Control
> _Ability to grant WinterNode staff access to your server for assistance. The toggle is located under the `Configuration -> advanced` tab._
Console
> _Allows the user to view the console logs for this server._
Ability to view the live console logs under the `System -> Console` tab. This is unrelated to any Console logs saved to a file or in the audit logs.
Run Commands
> _Allows the user to send commands to the console. If the user does not have stop or restart permissions they cannot send the application's stop command_
Ability to run commands on the `System -> Console` tab. The stop command is defined in the game egg, IE for Minecraft it’s simply `stop` and without the stop permission the user will not be able to run it.
Start
> _Allows the user to start this server._
Ability to start the server by clicking the start button on the `System -> Console` tab.
Stop
> _Allows the user to stop this server._
Ability to use the Stop command and press the Stop button on the `System -> Console` tab.
Restart
> _Allows the user to restart this server._
Ability to to use the restart button on the `System -> Console` tab.
Subuser
> _Permissions which allow users to manage other subusers assigned to the server._
Read
> _Allows the user to list & inspect Sub-Users assigned to this server._
Ability to list other Sub-Users, **their associated emails**, and the permissions assigned to them, under the `Management -> Subusers` tab.
Update
> _Allows the user to edit permissions assigned to other subusers._
Ability to edit the permissions assigned to other Sub-Users by clicking on the `Configure Permissions` button on the `Management -> Subusers` tab.
Create
> _Allows the user to create additional subusers on this server._
Ability to create new Sub-Users on the `Management -> Subusers` tab.
Delete
> _Allows the user to delete other subusers on this server._
Ability to delete other Sub-Users by clicking the trash can icon next to them in the list on the `Management -> Subusers` tab.
Allocations
> _Permissions which allow the user to manage all assigned IP:Port's to this server._
Read
> _Allows the user to view all allocations assigned to this server. Users with any access to the server can always view the default allocation via the Details page._
Ability to view the port and IP allocations for the server on the `Management -> Allocations` tab. If you or the Sub-User need additional ports allocated see our page on [Additional Ports & Allocations](/help/getting-started/additional-allocations).
Update
> _Allows the user to change the primary allocation._
Ability to change the primary port allocation which is used to display the connection address on your server list page and in the configuration for some server types. This can be accessed on the `Management -> Allocations` tab.
Server Options
> _Permissions which allow users to manage the server's configuration._
Read
> _Allows the user to view the startup command and associated variables for this server._
Ability to view the Startup Command and Variables on the `Server Options` tab.
Update
> _Allows the user to modify startup variables for this server._
Ability to edit the startup variables for the server under the `Server Options` tab. If you need your Startup Command changed, please open a ticket with WinterNode staff and we'll be happy to help!
Database
> _Permissions which allow users to manage MySQL databases for the server._
Read
> _Allows the user to view all databases associated with this server including the usernames and passwords for the databases._
Ability to view all data about and within databases associated with this server. Database details can be found under the `Management -> Databases` tab and the contents of Databases can be viewed with a software like [HeidiSQL](https://www.heidisql.com/).
Reset Password
> _Allows the user to reset the passwords for databases._
Ability to reset the password for any database associated with this server under the `Management -> Databases` tab.
Create
> _Allows the user to create additional databases for this server._
Ability to create a new database in the `Management -> Databases` tab as long as the server has an open database allocation.
Delete
> _Allows the user to delete the databases from this server._
Ability to delete any existing database under the `Management -> Databases` tab.
File Manager
> _Permissions which allow users to manage the files stored on a server through the File Manager or the SFTP Server._
SFTP
> _Allows the user to connect to the SFTP server._
Ability to connect the server via SFTP using the credentials under the `System -> SFTP Details` tab.
List
> _Allows the user to list all files & folders on this server but not view file contents._
Ability to list, but not view, folders and files under the `File Manager` tab.
Read
> _Allows the user to view the contents of existing files._
Ability to view, but not edit or save, the contents of existing files by selecting them under the `File Manager` tab.
Write
> _Allows the user to update the contents of existing files for this server._
Ability to update the contents of existing files on the server by uploading them directly, saving them using a file editor over SFTP, or the web editor on the `File Manager` tab.
Delete
> _Allows the user to delete files from this server in the file manager or SFTP._
Ability to delete existing files/folders on the server, either individually or in bulk, as seen on our [The File Manager](/help/game-control-panel/the-file-manager) page under the `File Manager` tab.
Archive
> _Allows the user to compress files & folders in the file manager._
Ability to compress existing files/folders on the server, either individually or in bulk, as seen on our [The File Manager](/help/game-control-panel/the-file-manager) page under the `File Manager` tab.
Git
> _Allows the user to use git actions (ie Cloning, Pulling)._
Ability to use the git actions by using the ellipsis menu on the top right side of the `File Manager` tab.
Schedule
> _Permissions which allow the user to create automatic tasks that run periodically on the server._
Read
> _Allows the user to list schedules & view a schedule's details including all of the assigned tasks._
Ability to view all schedules and associated tasks under the `Advanced → Schedules` tab.
Update
> _Allows the user to edit a schedule including all of the schedule's tasks. This will allow the user to remove individual tasks, but not delete the schedule itself._
Ability to edit a schedule as mentioned above under the `Advanced → Schedules` tab.
Create
> _Allows the user to create a new schedule._
Ability to create new schedules under the `Advanced → Schedules` tab.
Delete
> _Allows the user to delete schedules from this server._
Ability to delete any existing schedule associated with this server under the `Advanced → Schedules` tab.
Details
> _Permissions which allow the user to change the name that identifies the server in the panel._
Read
> _Allows the user to view this server details._
Ability to view the Server Details tab located at `System -> Server Details`.
Update
> _Allows the user to change this server name. This only allows the user to change the name the server is named in the panel, not in-game._
Ability to edit the Server Name parameter on the `System -> Server Details` tab.
Audit Log
> _Permissions which allow the user to inspect all actions going on for this server._
Read
> _Allows the user to view this server action logs. Note: This may contain information which could be locked behind other permissions._
Ability to view everything on the `System -> Audit Logs` tab.
Mod Manager
> _Permissions which allow the user to view & install one-click mods for this server._
Read
> _Allows the user to view available one-click mods to install on this server._
Ability to view mods available for installation on the Tools -> Mod Manager tab.
Update
> _Allows the user to install one-click mods on this server._
Ability to install mods listed on the `Tools -> Mod Manager` tab.
Modpack Manager
> _Permissions which allow the user to install Minecraft Modpacks on this server._
Read
> _Allows the user to view which modpacks are available for installation on this server._
Ability to view available ModPacks on the `Tools -> ModPack Manager` tab.
Install
> _Allows the user to install a modpack on this server._
Ability to install ModPacks listed on the `Tools -> Mod Manager` tab.
Plugin Manager
> _Permissions which allow the user to install Minecraft Plugins on this server._
Read
> _Allows the user to view which plugins are available for installation on this server._
Ability to view available Plugins on the `Tools -> Plugin Manager` tab.
Update
> _Allows the user to install a plugin on this server._
Ability to install Plugins listed on the `Tools -> Plugin Manager` tab.
Health Monitor
> _Permissions which allow the user to use the manage the Health Monitor for this server._
Read
> _Allows the user to view the status of server's Health Monitor._
Ability to view the current state of the server’s health monitor setting under the `Advanced > Server Actions` tab.
Update
> _Allows the user to toggle the server's Health Monitor status._
Ability to toggle the current state of the server’s health monitor setting under the `Advanced > Server Actions` tab.
Reinstall
> _Permissions which allow the user to trigger a re-installation for this server._
Update
> _Allows the user to reinstall this server._
Ability to install, or reinstall, the server on the `Advanced > Server Actions` tab.
---
# Securing Access
> Learn how to secure your WinterNode Game Panel account with 2FA and manage API keys for safe automation and enhanced account protection.
Source: https://winternode.com/help/game-control-panel/securing-access/overview
## Logging In
You can access your server on WinterNode using the [Game Control Panel](https://gcp.winternode.com/).
Watch your email for the server confirmation. (Check you spam folder)
Click the link in the email to create your password
Open the GCP and enter the username from the email and the password you just created.
## Game Panel 2-FA
What is 2FA?
2-Factor Authentication is an extra step added to logging into an account that helps prevent unauthorized access. When you log into your account you’ll be prompted to provide a token provided by an Authenticator application that’s cryptographically generated from a private code only shared between WinterNode and the Authenticator application.
As long as you don’t share those tokens or that code and a third party doesn’t have physical access to the device that you’re using for your Authenticator application. This is a nearly foolproof method of authenticating. For redundancy sakes, you can even save the original token in a password manager or other safe location, in case you lose your device or have multiple devices set up with an Authenticator application ready to go.
You can find the 2FA setting under the security controls tab on your home page in the Game Panel. Once there you’ll find a box labeled 2-Factor Authentication with a button inside labeled Enable 2-Factor Authentication. Click that button to get your Authentication code and QR code.
Log into the GCP and click the **"Account Settings"** button on the right navbar.

Click the **"2-Factor Authentication"** tab and click **"Enable 2-Factor Authentication"**.

Scan the QR code or enter the code into your Authenticator app.
You can scan the QR code using an app like Google Authenticator or Authy or you can enter the code manually into either of the two apps. You can also click the alphanumeric code to copy it into your clipboard.

Enter the numbers that your app provides into the **"Token"** field.
## Getting an API Key
What is an API Key?
An API Key can be used to interact with the [Game Panel API](https://gamepanel.notion.site/Client-API-b76f787c2cbb4970b8dcca7f20104a15) and automate most of the tasks you're able to do manually using the Game Control Panel (GCP). Every request you send to the API will need to be authorized using an API key, most often the same API Key for one project.
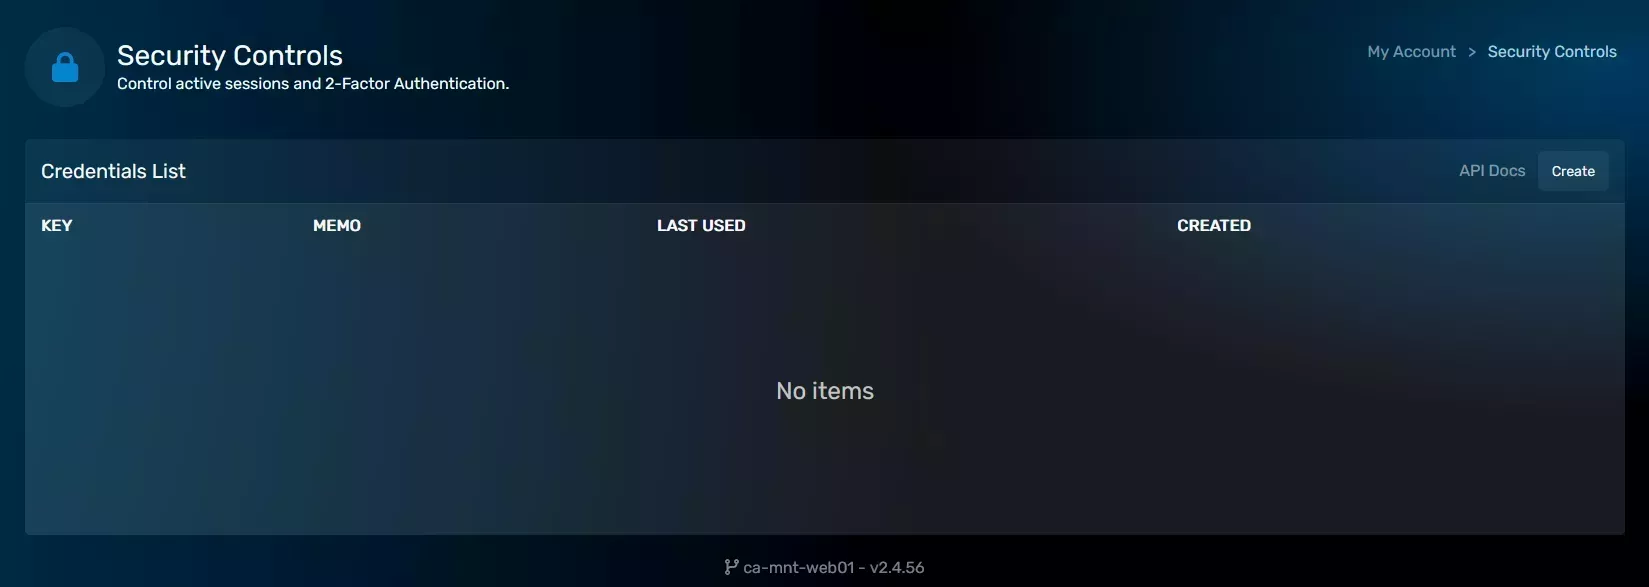
Log into the GCP and open the **"Security Controls"** tab on the bottom left.
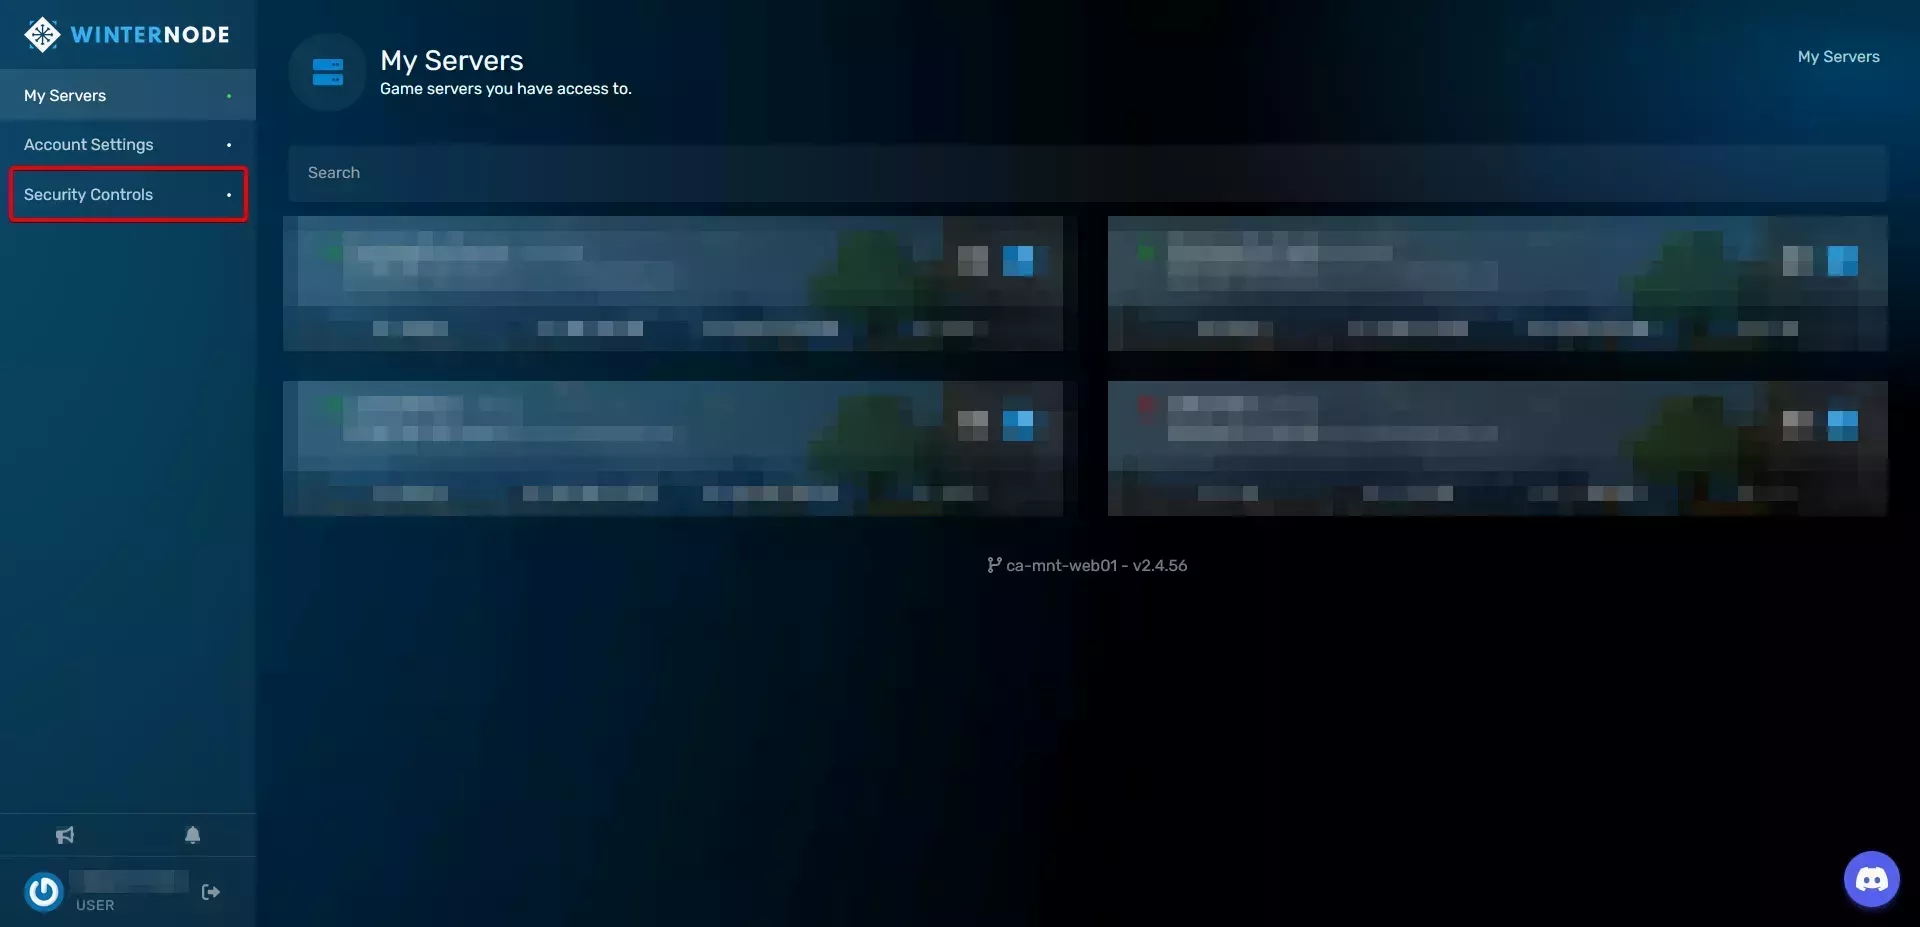
Click the **"Create"** button on the top right of the list.
Fill out the **"memo"** field with a name or reason for the API key
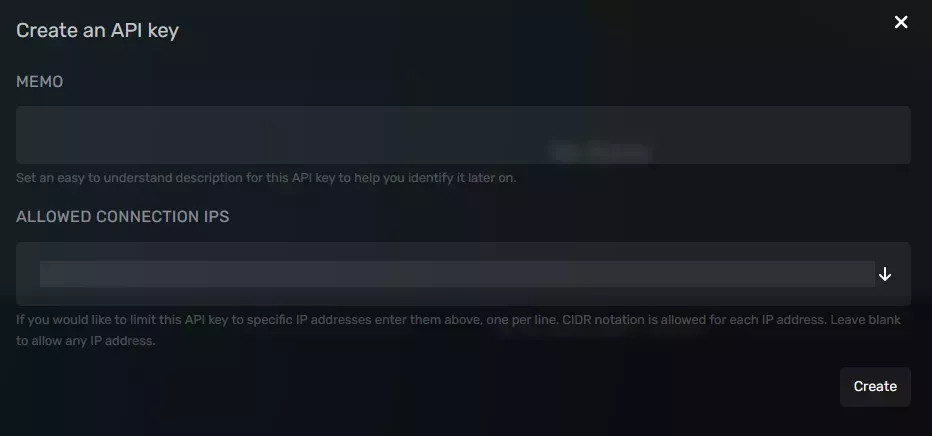
Optionally limit the IPs the API key can be used from by entering each IP into the **"Allowed Connection IPs"** separated by a comma.

Copy the key by clicking on the **"KEY"** item in the list to reveal and the copy

---
# Server Configuration
> Easily rename your WinterNode game server and configure server options using the Game Control Panel for flexible server management.
Source: https://winternode.com/help/game-control-panel/server-configuration/overview
Rename your WinterNode game server and configure server options using the Game Control Panel.
## Renaming Your Server
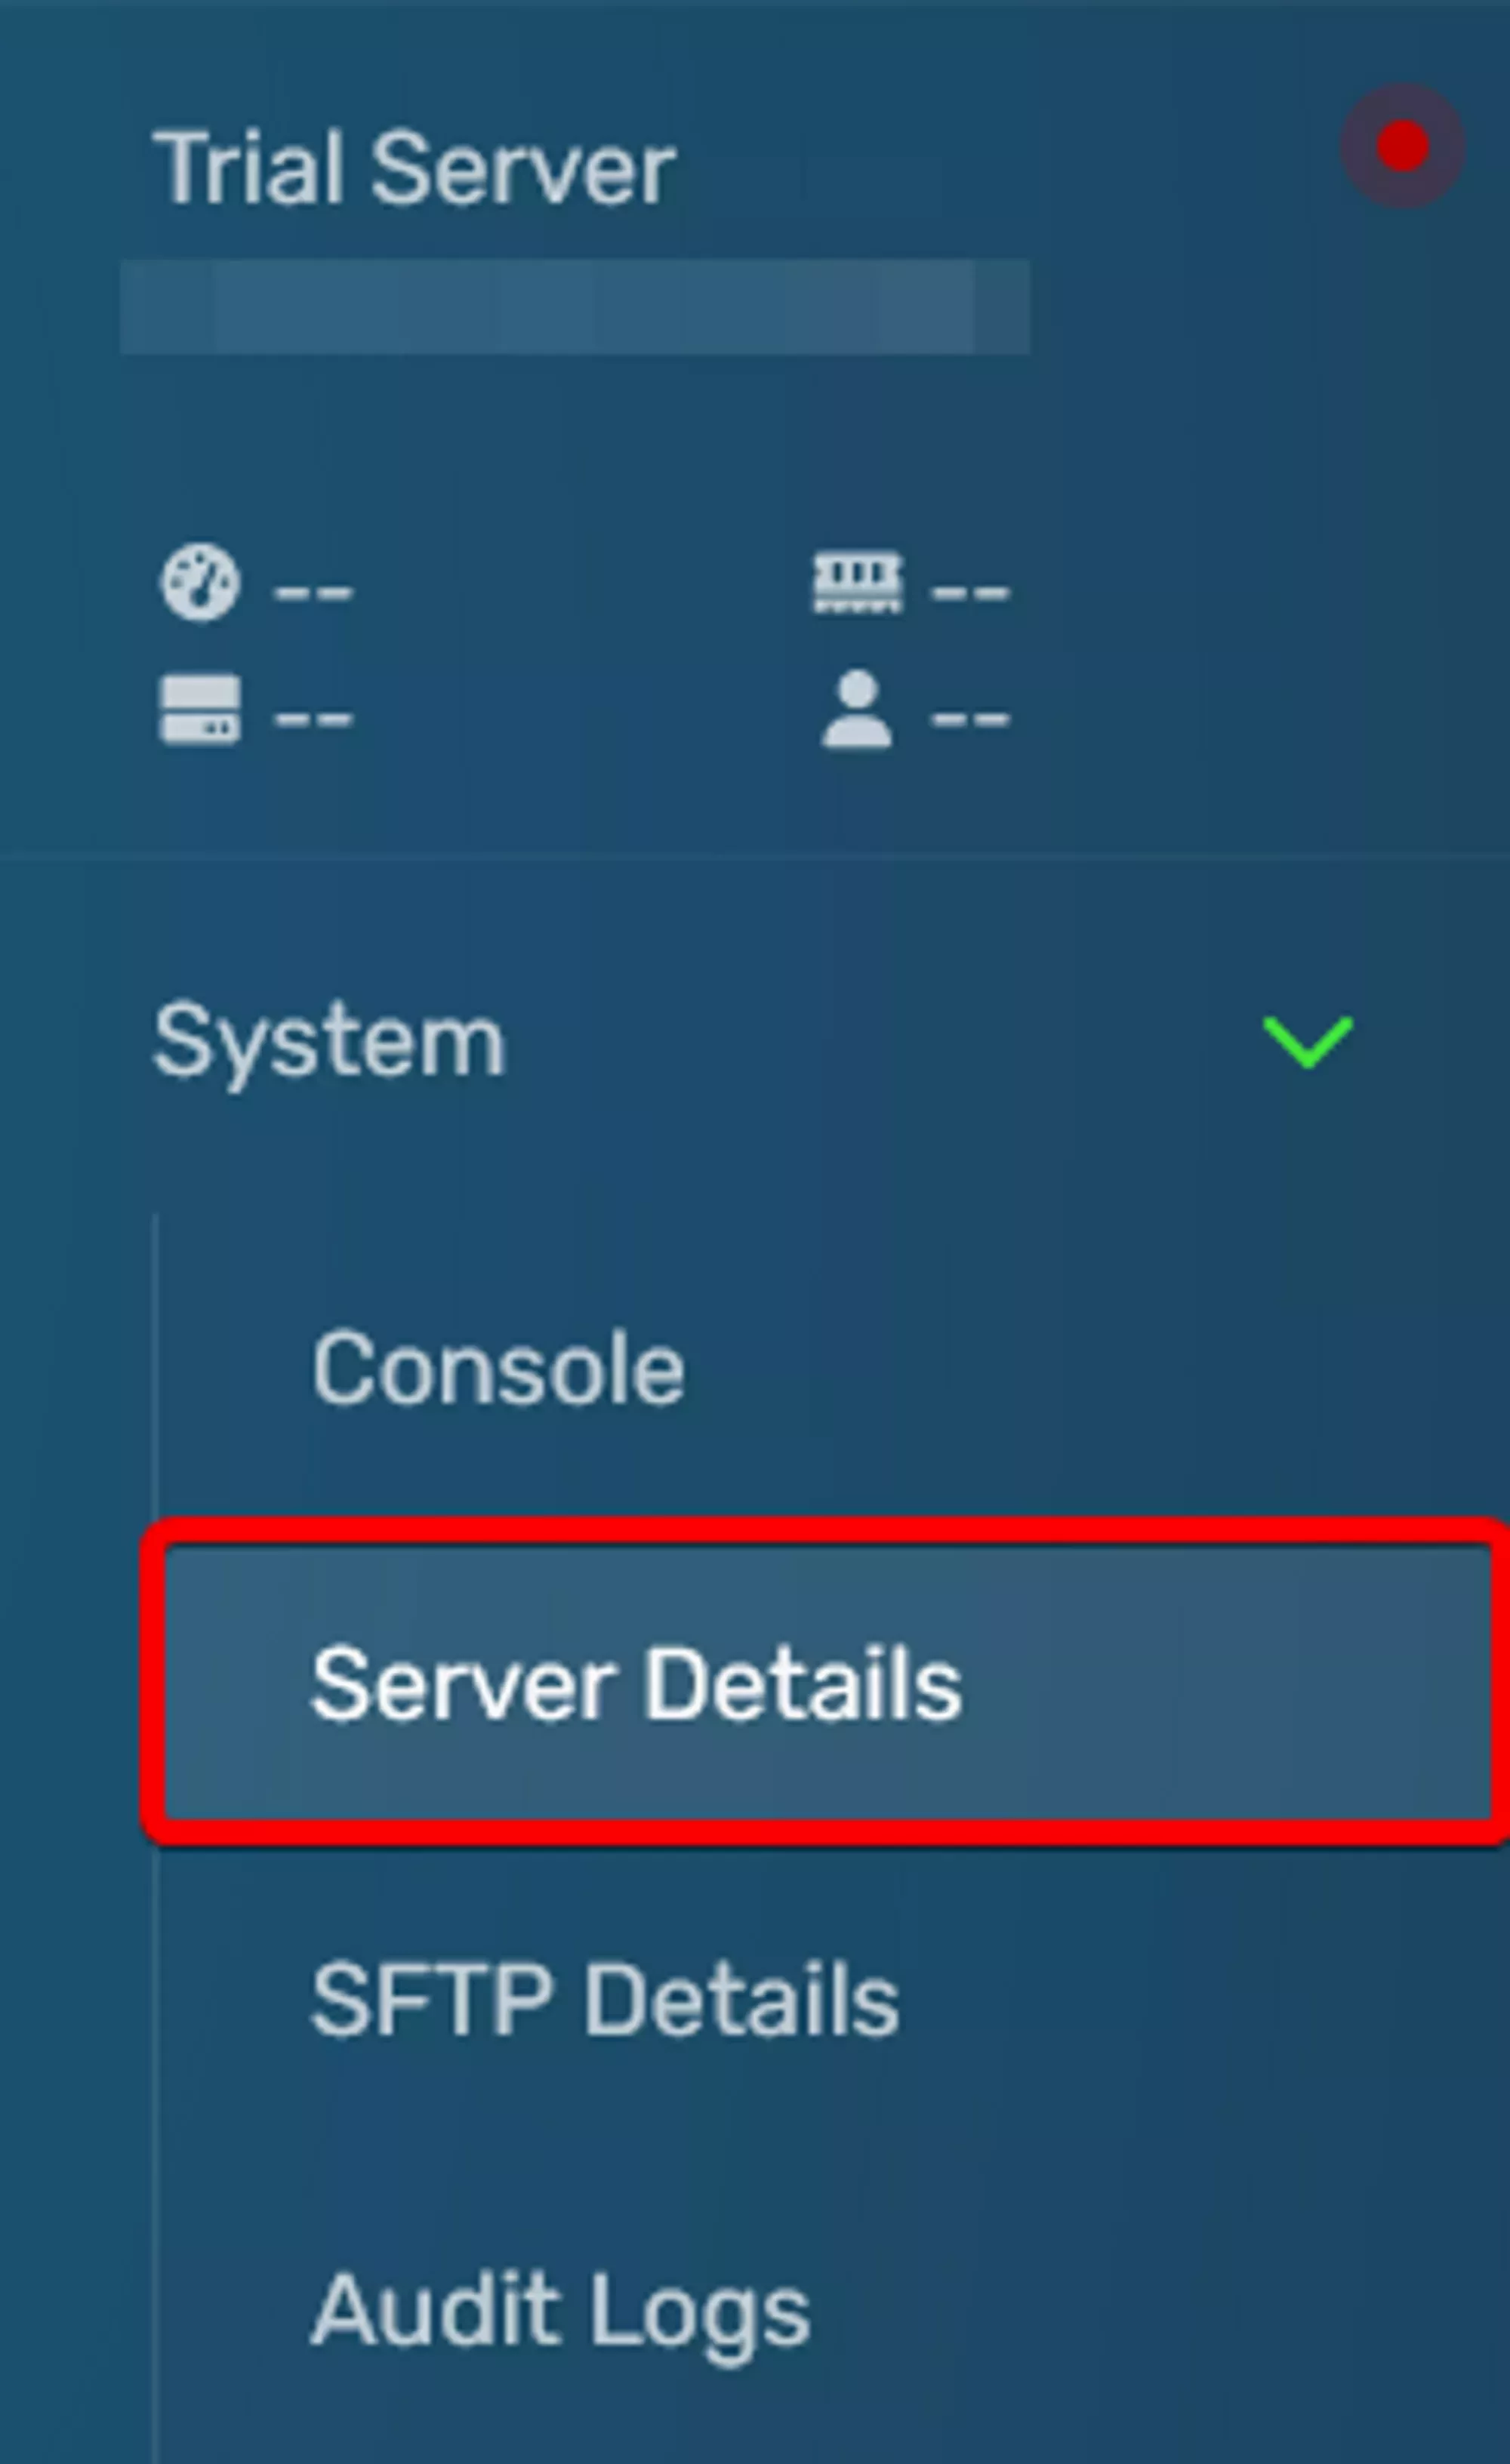
You may want to rename your server to something that is relevant to its purpose after upgrading from a Trial Server or after purchasing a new plan. Luckily, the process to do so is very simple. All you’ll need to do is navigate to your server on the Game Control Panel, and then use the side bar to get to the Server Details page under `System → Server Details`.
After you’ve navigated to the Server Details page, you’ll find the Server Name modal at the top of the page with the current server name populated. You can change that to any name you like and then click the “Update Server Name” button on the bottom right. You can find an example of the Server Name modal below.

## Server Options
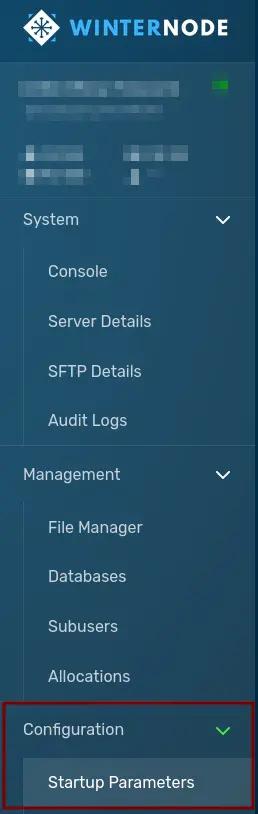
The WinterNode GCP (Game Control Panel) provides a number of configurable server options for every game we host, often making use of startup flags provided by the server software for use in the command used to start the server. These can be configured from the GCP by navigating to your server and finding the `Server Options` tab on the left side of the page.
Each game will have a different set of server options and they'll often be documented here on the Help Center under that game's category.
---
# How to Switch Your Server's Game
> Switch the game your WinterNode server runs using the panel's Switch Game tool.
Source: https://winternode.com/help/game-control-panel/switching-games
{/* This is a cross-reference entry - the sidebar links to the main article */}
---
# File Manager
> Learn how to use the WinterNode Game Control Panel File Manager to edit, upload, compress, and manage your server files.
Source: https://winternode.com/help/game-control-panel/the-file-manager
The file manager is best used for quickly editing text based files or uploading small files. It's also the main location where you'll archive (compress) and extract your files. To make the most out of your server it's important to understand what the File Manager can do for you, and what it can't. You'll find some walk throughs of the main features of the File Manager below.
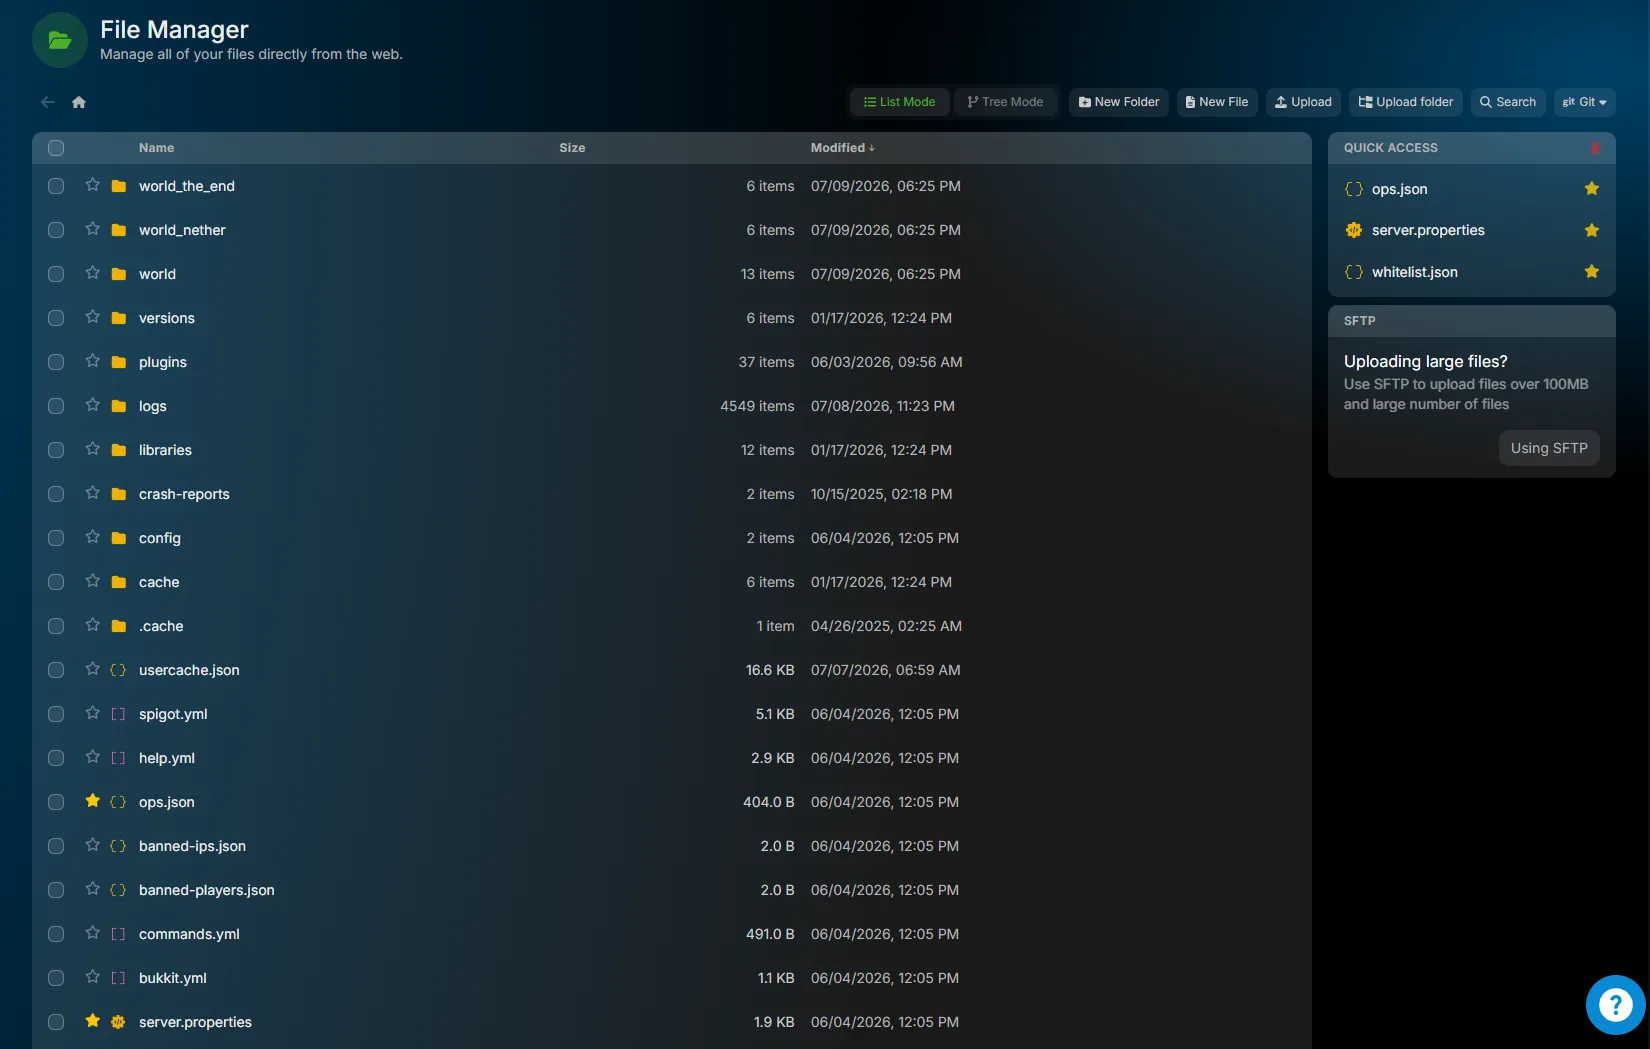
### Locating the File Manager
The File Manager is at the top level of the sidebar, between Console and Server Options, as seen in the image to the right. Once there you'll be taken to your server root and should see the all of the files currently located on your server.

### Navigation
The File Manager displays the current file content of your server and allows you to navigate through the directories it contains. You can enter a Directory by clicking on its name in the File Table located in the center of your screen. When you enter a Directory it will be added to the breadcrumb path at the top of the page as seen in the image to the right.
If you need to navigate back to the Directory above your current one, select the **.. parent directory** row at the top of the file list.


If you need to navigate back to the Server Root at any time you can click the home icon at the top left of the File Manager. Your Server Root will always be `/home/container` so you can double check your location using the breadcrumb path at the top of the screen.
### Editing a File
To edit a file navigate to it in the `File Table` and the click on its name. If it's a file that can be edited as text then you'll be sent to a basic text editor. You can easily edit your file from here and use the save button on the bottom right of the window to save your file. Once you're done editing you can use the `Return to File Manager` button to return to the directory that contained the file.
There are some QoL keyboard shortcuts that might make editing your files a little bit easier. You'll find a list of them below.
##### Shortcuts
Shortcut
Action
CTRL+SHIFT+D
Duplicates the current line to the line below.
CTRL+D
Deletes the current line.
CTRL+A
Selects the entire file.
CTRL+S
{" "}
Saves the current contents of the file. Will notify you when the
save is complete.*{" "}
CTRL+X
{" "}
Removes the selected content from the file and places into your paste buffer.
CTRL+V
{" "}
Places the contents of your paste buffer at the text cursor position.
CTRL+Z
Undoes the last action. Includes parts of typed text.
CTRL+SHIFT+Z
Redoes the last action that was undone.
## Copying a file
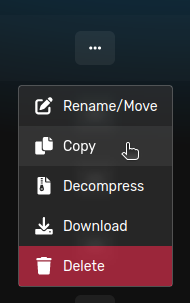
You can copy, or "duplicate", any file on your server using the File Manager by clicking on the kebab menu on the right side of the file entry and clicking copy. After a few moments, you'll see a new file with the name of the file you copied and the word `copy` followed by a `-` with the UNIX timestamp of the time it was copied. For example, a file named `testFile.txt` would be copied as `testFile.txt copy-1674676225`
This can be a great way to make a quick backup of a file you're working on. However, you can't copy folders at this time, but you can compress them by following [these steps](#compressing-an-individual-file-or-folder).
## Moving files and folders
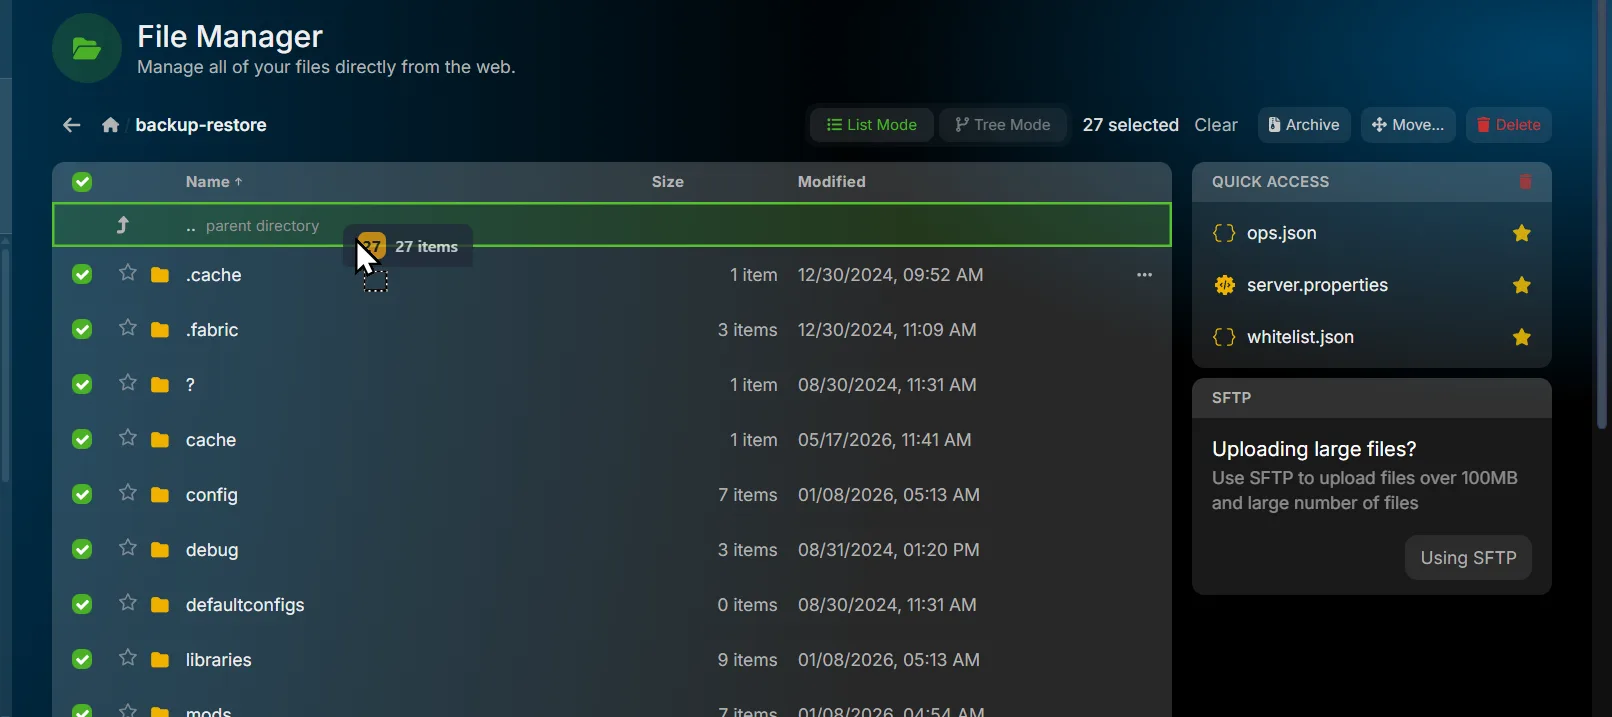
You can move files and folders without compressing them first. This is the quickest way to relocate a batch of files, such as moving restored files out of the `/backup-restore` folder and into your server root.
### Drag onto the parent directory
1. Select the files and folders you want to move using the check boxes on the left. To grab everything in the current folder, click the check box at the top of the **Name** column.
2. Drag the selection onto the **.. parent directory** row at the top of the file list.
3. The selected items move up one level into the folder above.
### Use the Move button
Prefer not to drag? With your files selected, click the **Move...** button in the toolbar and enter the destination path. Enter `/` to move everything to your server root.
To move a single item, open its context menu with the **...** button on the right side of the entry and select **Rename/Move**, then type the new path. The path includes the file or folder name, so moving the `world` folder into your server root means typing `world`.
## Decompressing a compressed file
After uploading your compressed file to your server [Using SFTP](/help/game-control-panel/using-sftp) you need to decompress it by following the steps below.
1. Locate the file you uploaded on the File Manager
2. Click the 3 dots on the right side of your file
3. Select **Extract**
4. Ensure that the files you wanted are now in the correct location!

## Compressing Folders and Files
Compressing a folder allows the folder to act as a single file and decreases its size at the same time, while compressing an individual file will only decrease it size. In both cases, programs such as game servers, plugins, mods, or software won't be able to interact with the files or folders as they normally would, so being able to compress items is primarily useful to you as a user rather than the server.
You can use the web file manager to compress files/folders individually or in bulk.
### Compressing an individual file or folder
You can compress a single file or a folder containing multiple files by following the steps below.
1. Locate the file or folder you want to compress
2. Click on the ellipsis menu on the right side of the item
3. Click the **Archive** option

### Compressing multiple files or folders
You can compress multiple files/folders into one archive by following the steps below
1. Locate the files/folders you want to compress.
2. Select each file/folder using the check boxes on the left side of the items.
3. Click the **Archive** button in the toolbar at the top of the File Manager.
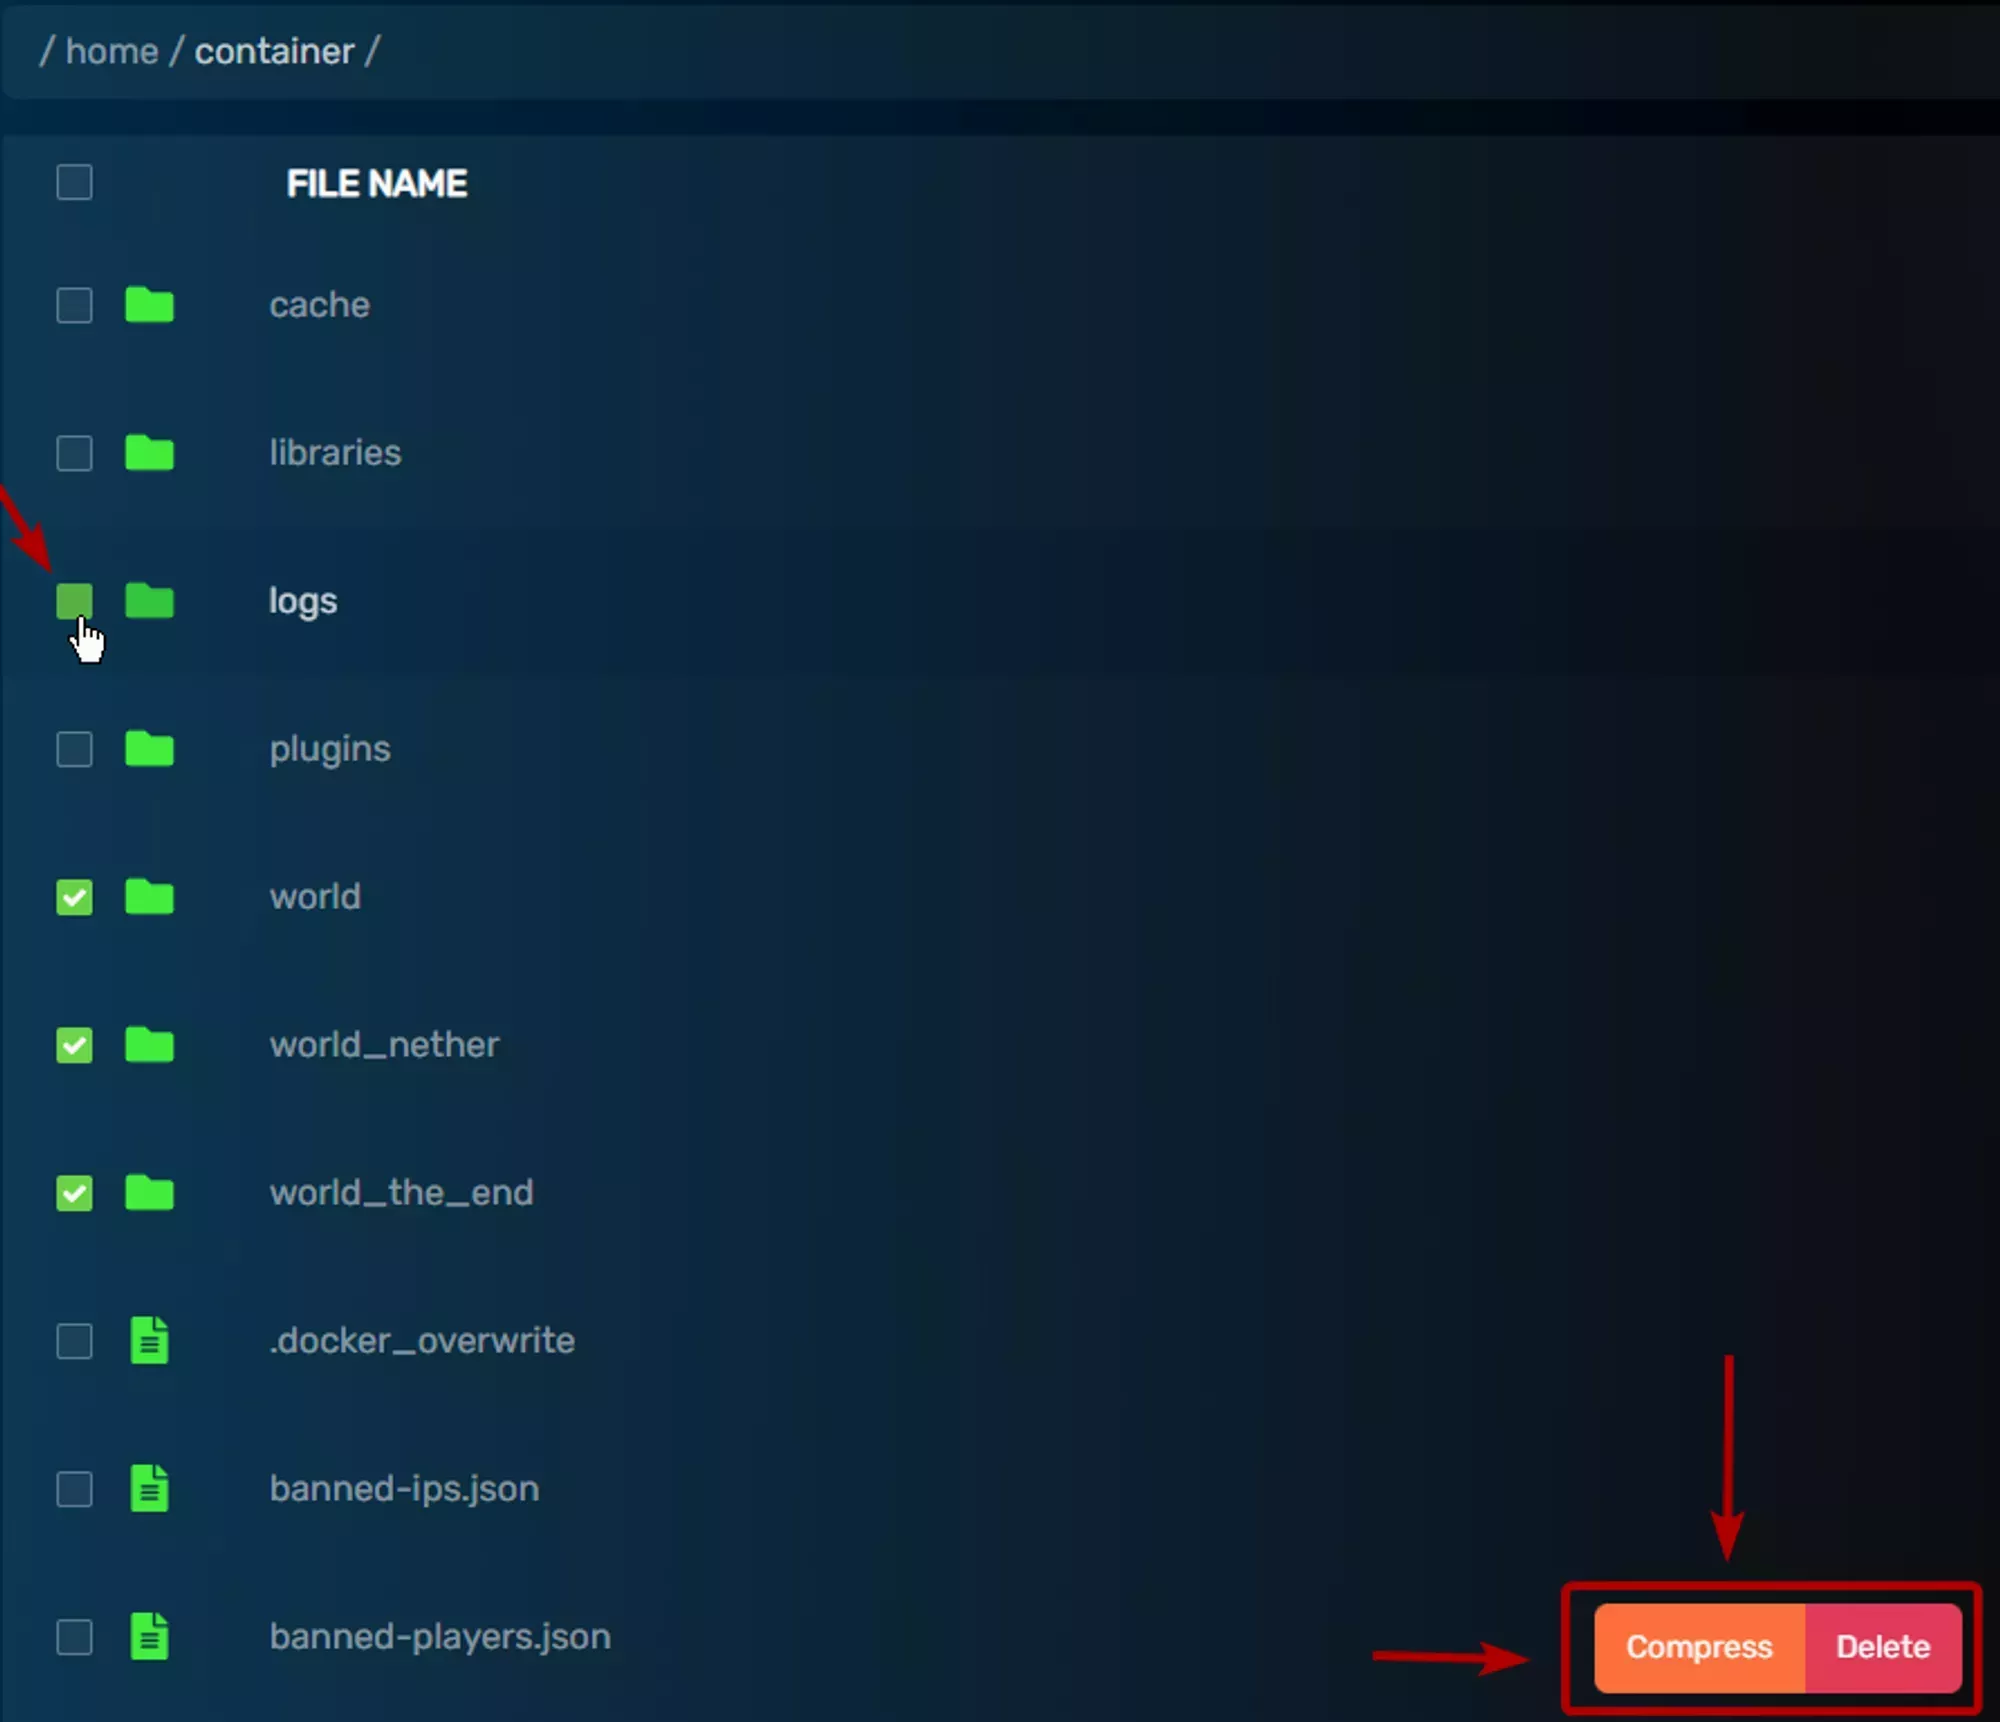
After archiving finishes you'll find a new archive file named with the date and time it was created. For example, `archive-{date}.tar.gz`
## Uploading a file
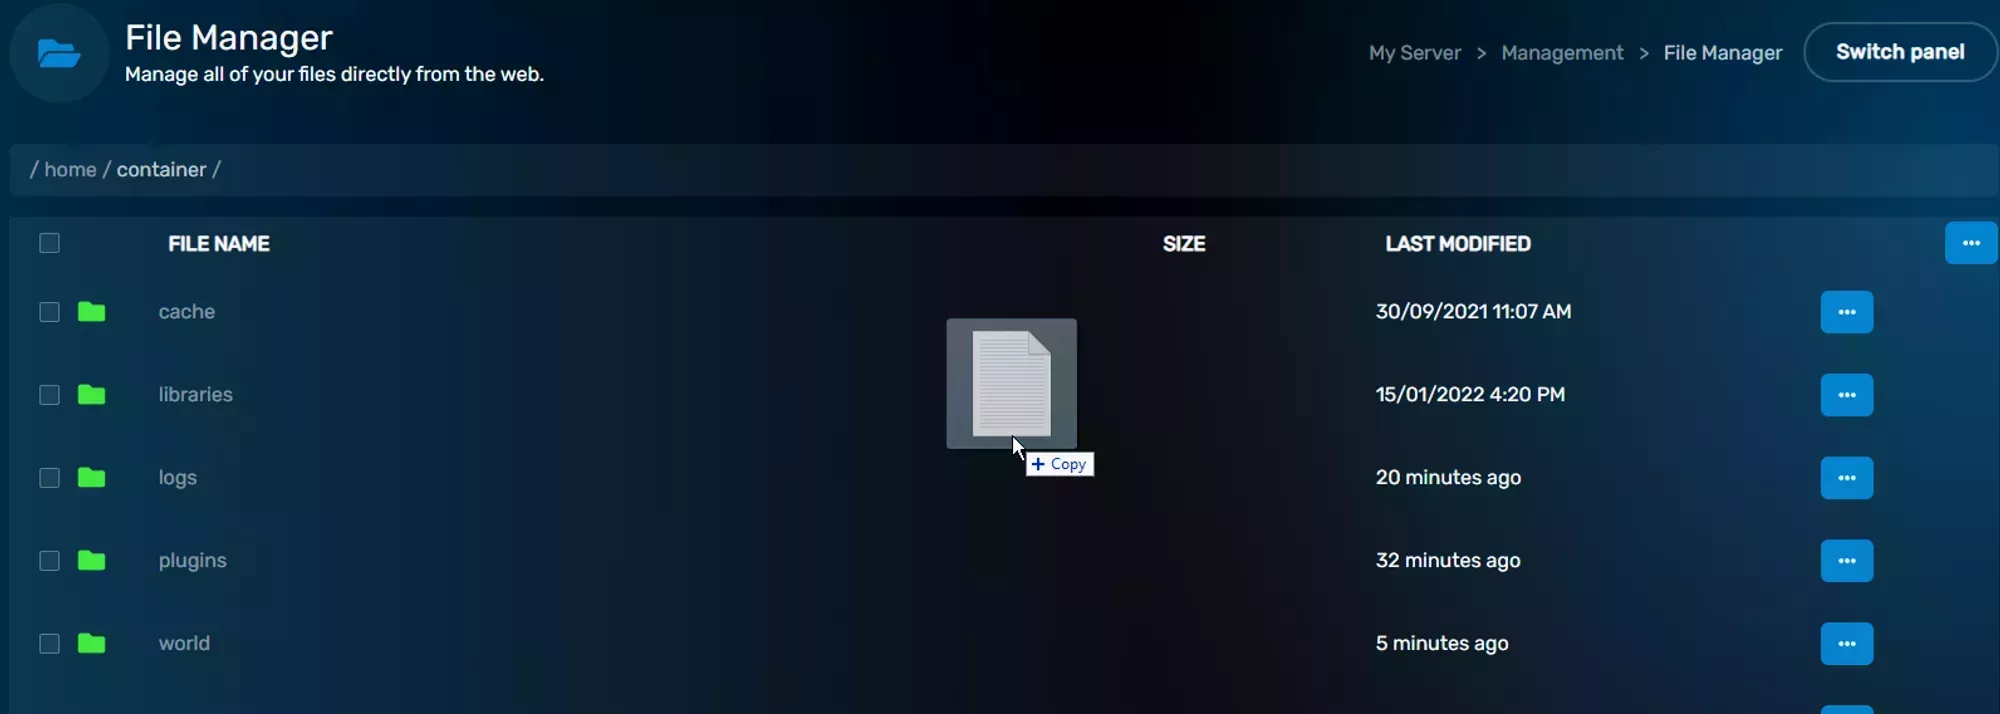
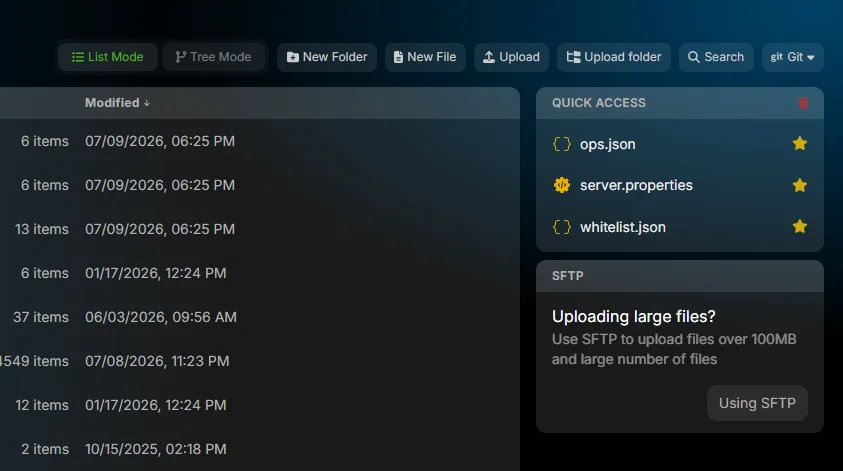
You can upload files directly from the File Manager by either dragging the file into the File List, as you can see in the image to the right, or by clicking the **Upload** button in the toolbar, which will open a file selector. The Web Based File Manager has an upload limit of 100mb, so if you need to upload a file that's larger than 100mb you need to use SFTP. If you're not sure how to use SFTP, then check out our [Using SFTP](/help/game-control-panel/using-sftp) page.
## Downloading a file
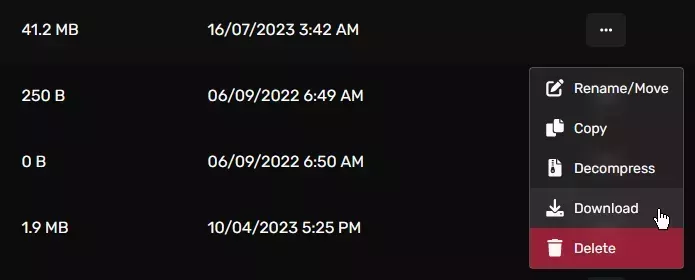
You can download a file from the file manager using the context menu for the file that appears after clicking on the ellipsis on the right side of the file entry and selecting the `Download` option. The file will be downloaded to the default download location for your browser.
You can download multiple files at once, or a folder, by either [compressing](/help/game-control-panel/the-file-manager#compressing-folders-and-files) the files you want to download, or individually selecting them for download using the ellipsis on the right side of the file entries.
## Deleting a file/folder
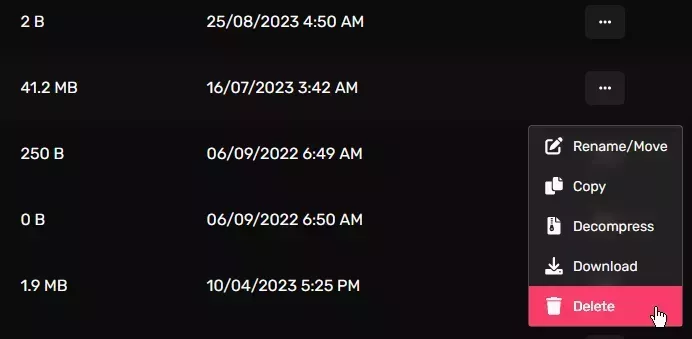
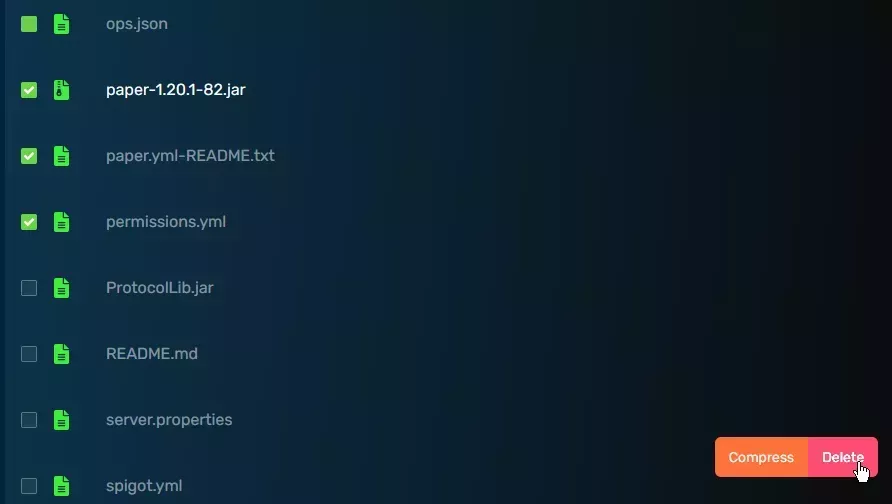
You can delete a file or folder by using the context menu that's opened with the ellipses on the right side of the file entry, or delete multiple files or folders by selecting the files/folders you want to delete using the check boxes on the left side of the entries and clicking the **Delete** button in the toolbar at the top of the File Manager.
---
# Schedule Manager
> Automate server tasks in the WinterNode Game Panel. Schedule commands and power actions with cron, on UTC, and check that your game actually supports the command you are scheduling.
Source: https://winternode.com/help/game-control-panel/the-schedule-manager
The schedule manager is a powerful tool provided by our Game Panel that allows you to schedule events such as running a console command or power actions. You can find details about how to use and take full advantage of the Schedule Manager below.
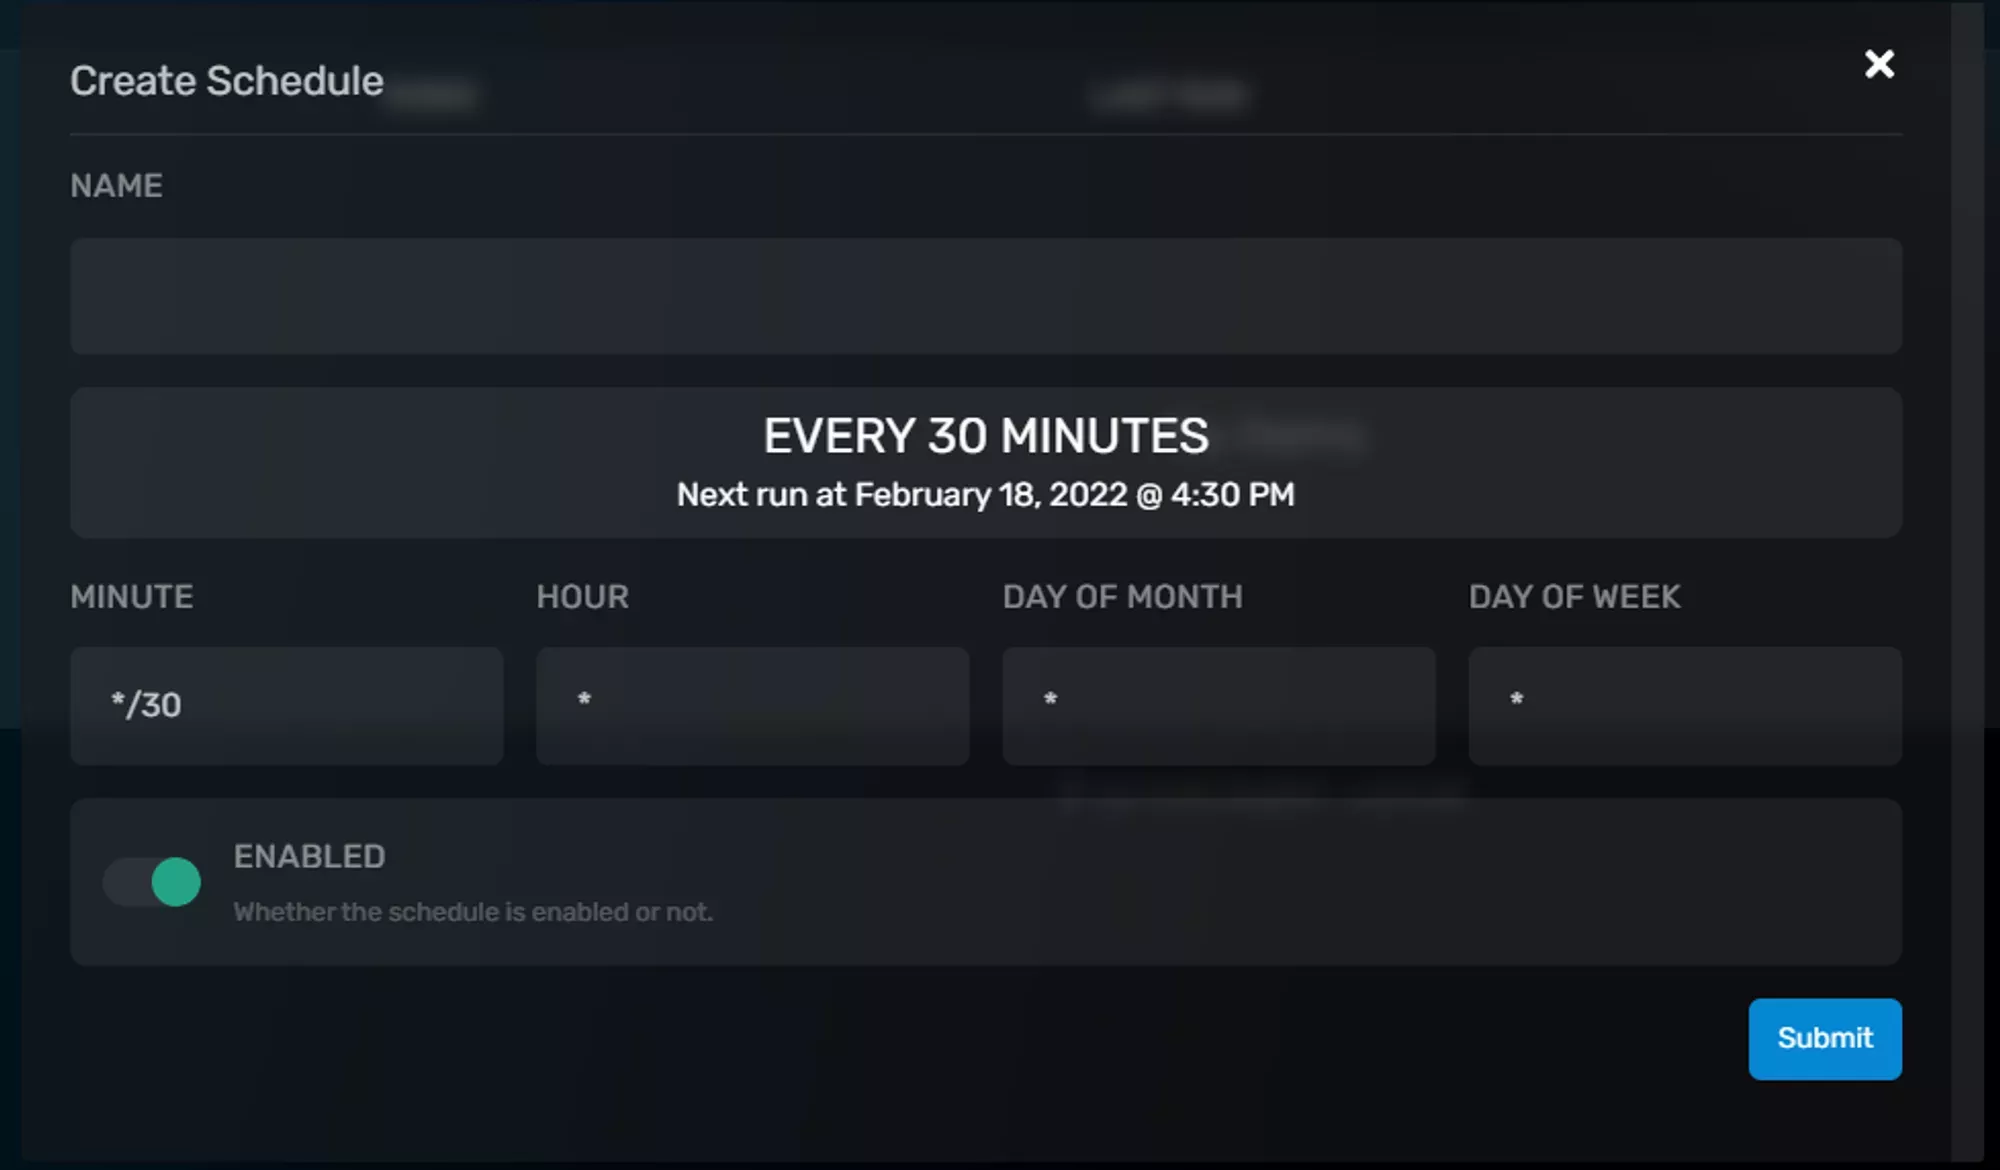
The Schedule Manager can be found under `Advanced -> Schedules`. Begin by clicking on `Create Task` on the upper right-hand side.
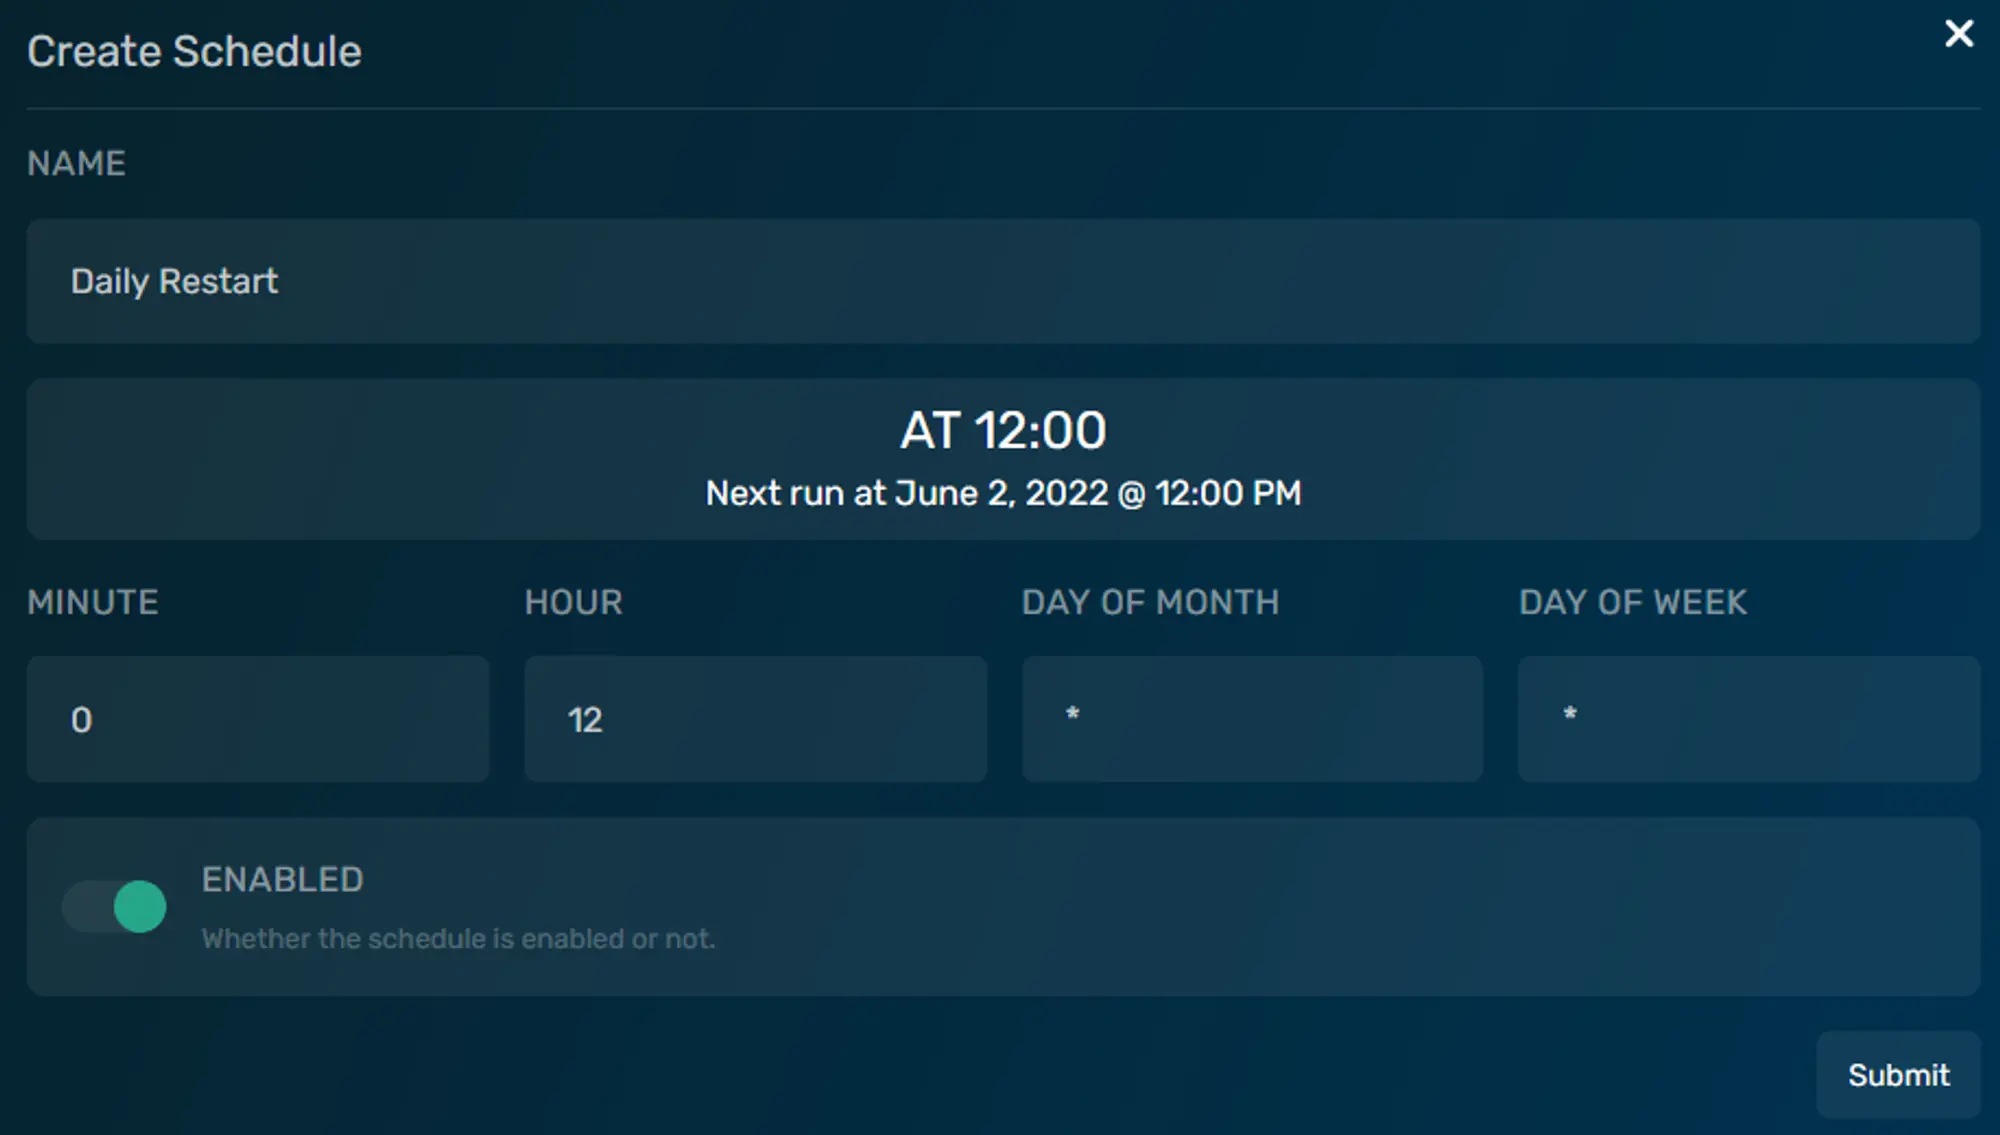
That will open a window similar to the one depicted in the image to the right with a task that runs every 30 minutes. You change the frequency and timing of the task by changing the data in the minute, hour, day of month, and day of week fields as shown in the next section.
The tasks that this schedule will run can be added after you create the schedule by clicking the `Submit` button.
## Schedule your own Task
You can define your own time using the CRON format as defined on [IBM’s website](https://www.ibm.com/docs/en/db2oc?topic=task-unix-cron-format). You can use [this editor](https://crontab.guru/) and the examples below to create your own Cron entries.
| | Minute | Hour | Day of Month | Day of Week |
|---|---|---|---|---|
| Every 30 minutes | `*/30` | `*` | `*` | `*` |
| Every 12 hours | `0` | `*/12` | `*` | `*` |
| Every Tuesday at noon | `0` | `12` | `*` | `2` |
| The first Day of every Month at Noon | `0` | `12` | `1` | `*` |
## Adding Tasks to your Schedule
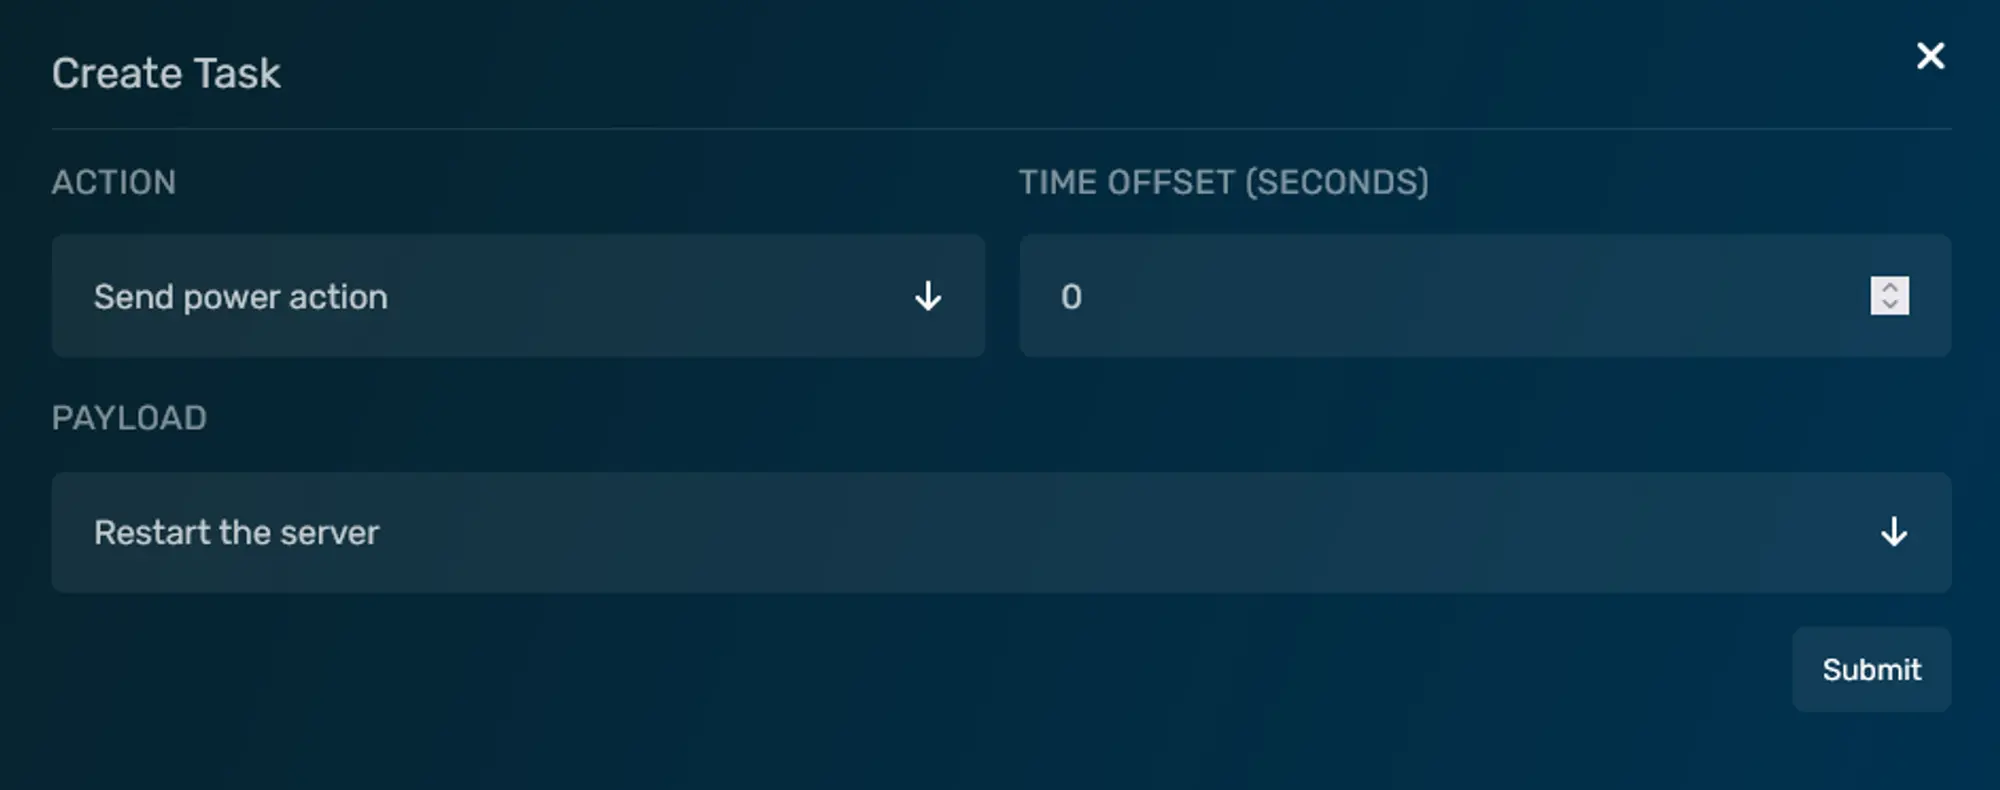
After you’ve created your schedule, you can add tasks to it by clicking the `Create Task` button on the top right. You’ll get a window that looks similar to the image to the right.
You can then change what you want the task to do by opening the `Action` drop down and either entering data into, or selecting a value from, the `Payload` field/dropdown.
You can also specify a `Time Offset`, in seconds, that will delay the task from running after the last task in the list. By default each task is run immediately after the last task in the list. So sequential delays are added up and delays of `0` are treated as simultaneous, but sequential.
### Power Tasks
When setting the `Action` dropdown to `Power Action` you can select `Start the server`, `Restart the server`, `Stop the server`, or `Forcibly stop the server` from the `payload` dropdown.
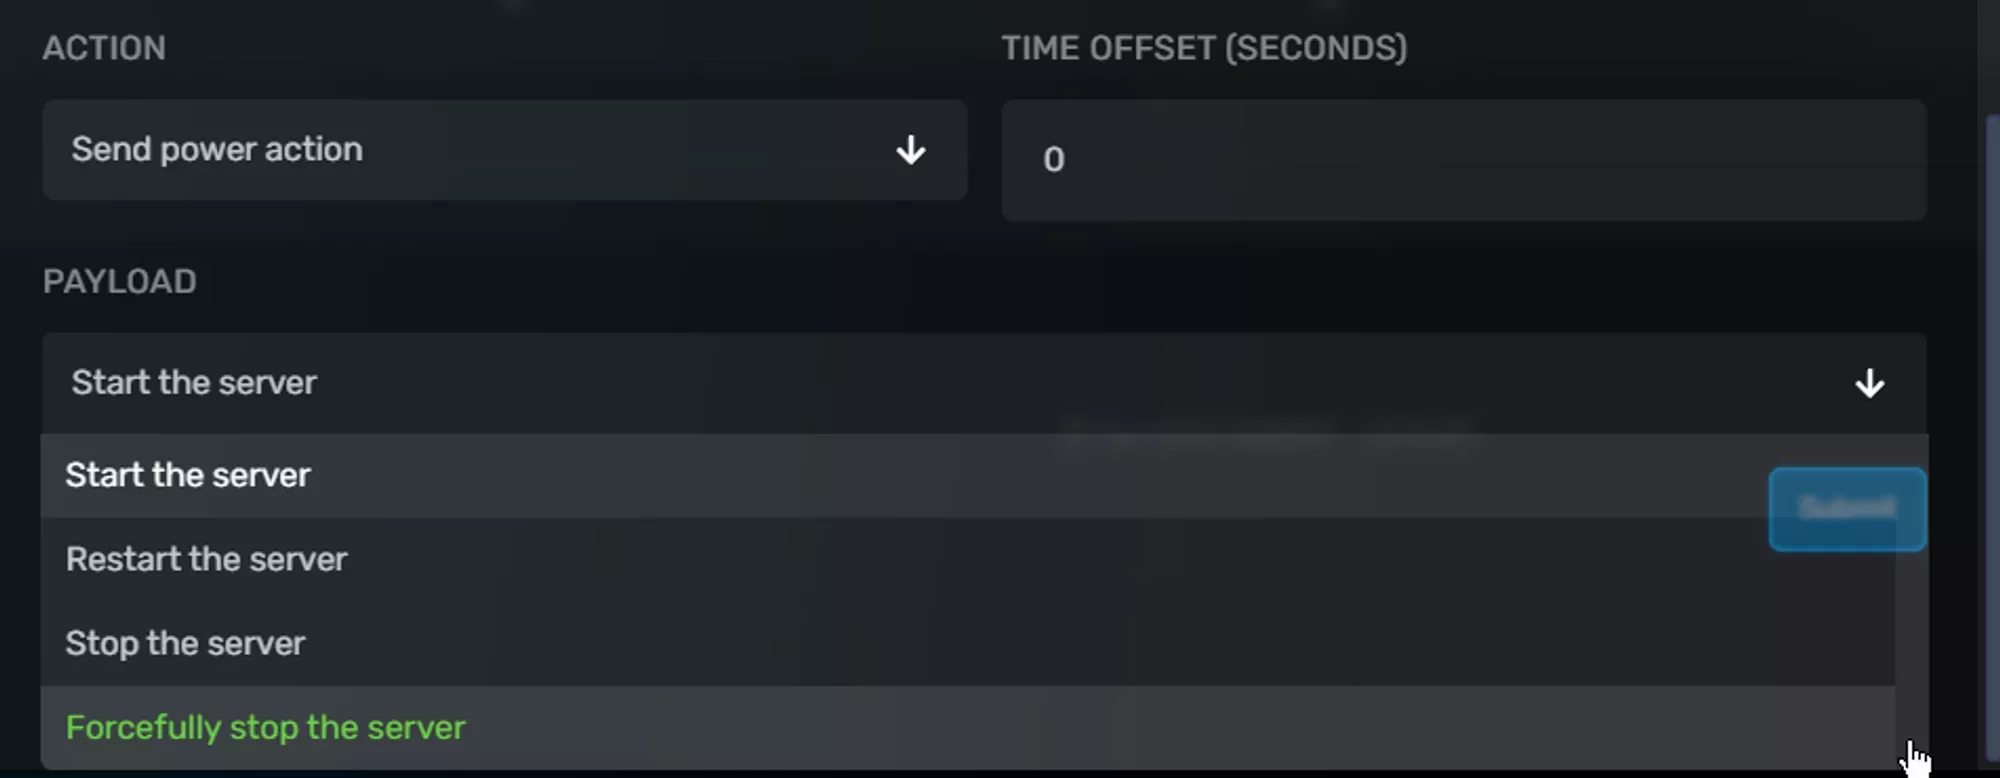
The `Forcibly stop the server` option is the same as using the kill button on the console tab and will send a signal to the server instance resulting in an unexpected shutdown. You may loose any unsaved data by using this option. The rest of the payloads do what they seem to by their name.
### Command Tasks
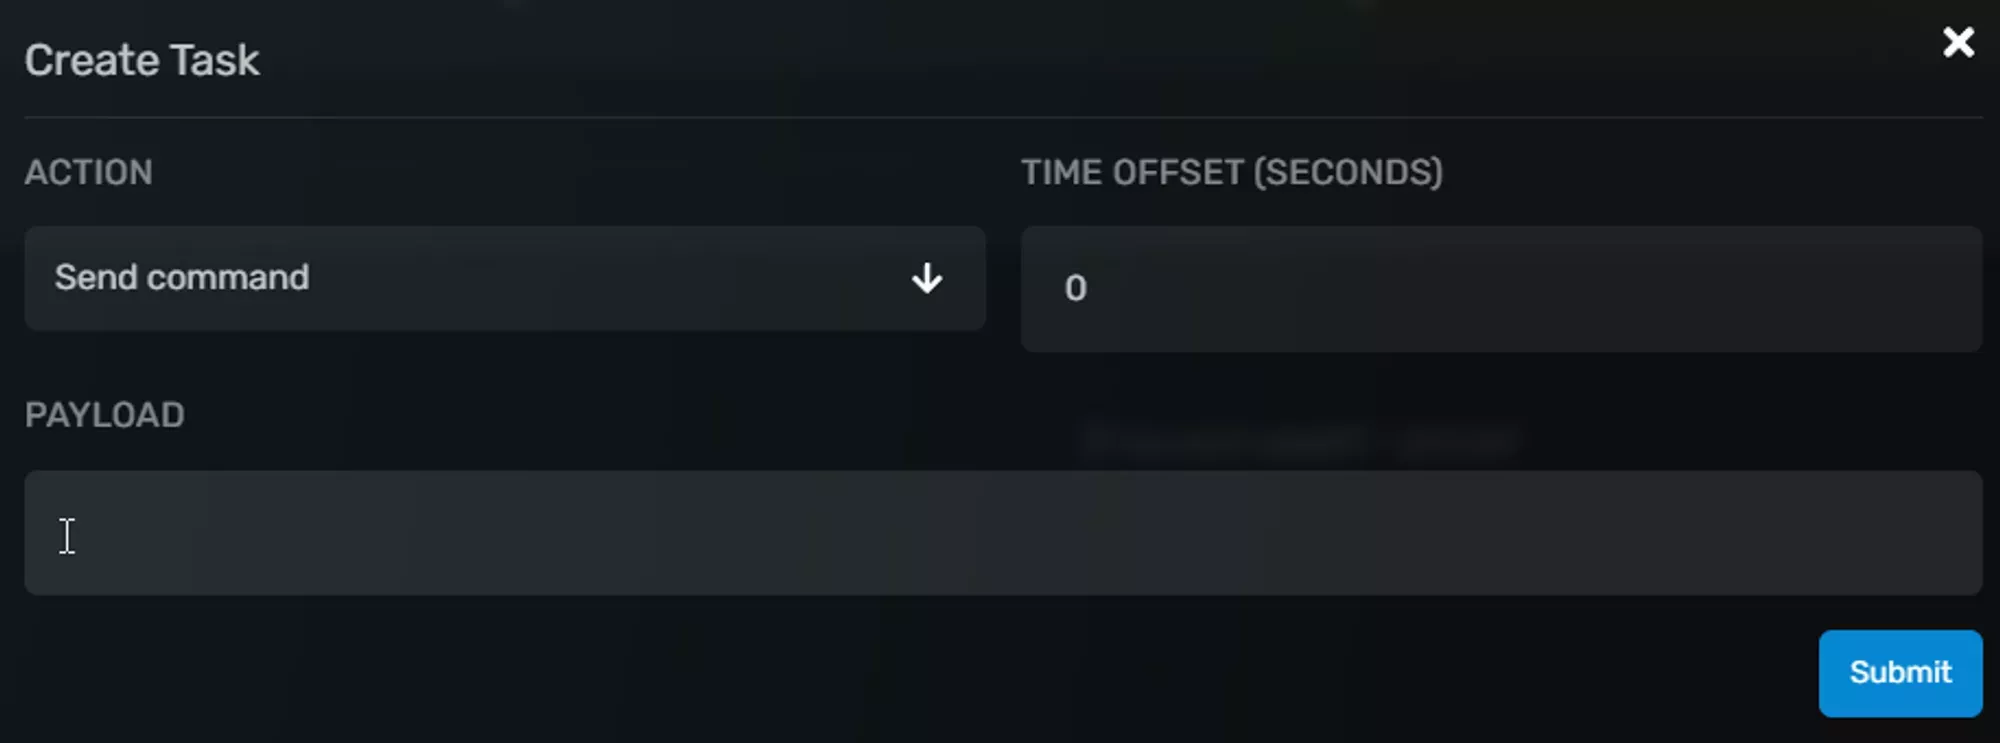
When setting the `Action` dropdown to `Send command` you’ll get a `Payload` text box where you can input the command you’d like to run. The command and it’s response will be sent to the console without checking for it’s success.
## Example Schedules
Below are a few example schedules you can use to get started creating your own schedule or use as is.
### Simple Daily Restart
You can create a simple daily restart schedule using the settings shown in the image to the right, and the CRON values shown below. You'll want your `Action` to be the `Send power action` and the payload to be `Restart the server`, as shown in the image to the right.
```
0 , 12 , * , *
```
### Daily Restart w/ Announcements
You can create a daily restart with announcements being sent to the players on your server by making use of the `Time Offset` field when creating a task. You'd start by creating the schedule to start X amount of time before the restart, and then have the actual restart command delayed until the time you want the server to restart, with the intervening time filled with server commands broadcasting the impending restart.
There are a few important things to remember when setting up a schedule like this.
- The tasks are processed in order, so if two tasks have an offset of 5 minutes, then the second task will run 10 minutes after the schedule starts. In other words, the time offset for a task doesn't start until the previous task has executed.
- The specific commands to broadcast on your server vary by game, and some games have no broadcast command at all. Check the game's pages on our Help Center, or its wiki, and test the command in the console tab before scheduling it.
- The time offset value is in **seconds**, so an offset of 5 minutes would have a value of `300` seconds.
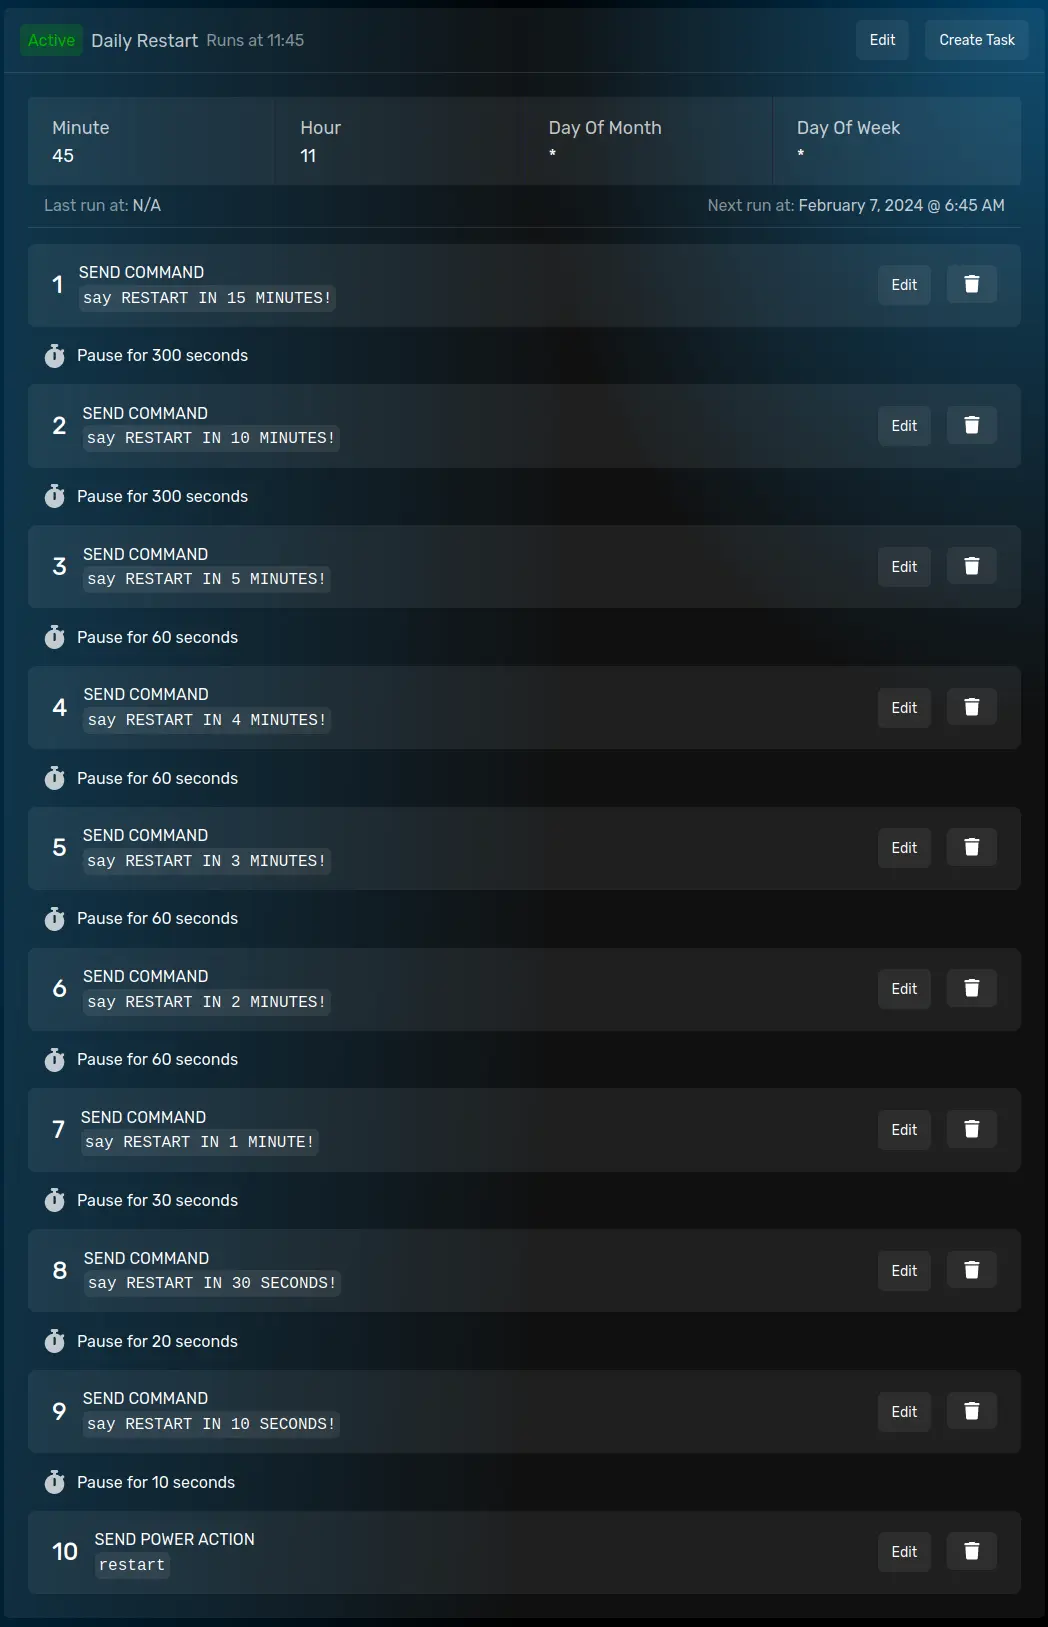
A complete daily restart schedule with announcements for 15 minutes leading up to the restart might look similar to the image on the right.
In the example shown, you can see the schedule starts at 11:45 with the goal being to have the server restart at 12am. The first task runs at 11:45 and then waits for 5 minutes, then each task waits before the next one is run, with the total amount of time waited adding up to the restart task running at 12am.
---
# Subdomain Manager
> Set up a free subdomain for your WinterNode server, manage DNS records, and make connecting easier for players with custom server addresses.
Source: https://winternode.com/help/game-control-panel/the-sub-domain-manager
You can set up a free subdomain for each of your services through our Game Panel. A subdomain allows you to share your server with your players without the use of a numerical IP, such as `111.111.111.111:25565`, and gives you the freedom to change the IP in the future without having to share it again.
The subdomain we offer would use one of our domains such as `playwn.co` and a custom “vanity” text at the beginning of the domain, for example `server.playwn.co`.
## What is a Subdomain
A subdomain is the part of a domain that sits before a normal domain. For example, a normal domain of `playwn.co` can have a subdomain of `server.playwn.co.` By using a subdomain a domain owner can increase the number of locations their domain can be directed at. In the case of WinterNode, we allow our clients (you) to direct subdomains under some of our domains to their Game Servers that you rent from us.
The benefits of having a domain or subdomain instead of a numerical IP for your Game Server include it being easier to communicate to your players, the ease in which they can be redirected if you need to change the numerical IP of your server, and being able to add some of your branding to the subdomain itself. Since we offer a subdomain for free there’s little reason not to set one up for your Game Server. There are however, some caveats to how subdomains are defined in the DNS or Domain Name System, we cover the most important ones directly below.
### Ports
A subdomain is directed towards one of your server’s allocations, each allocation contains the servers IP and a port that it has available to it. The subdomain is then created with two types of DNS records, a SRV record and an A record. The SRV record contains and respects the port provided by the allocation and the A record only has the IP. However, not all services support SRV records, including HTTP(S), the service that is used to run websites.
Minecraft, and most other games/game engines do support SRV records and will use the SRV record, but when connecting to web pages hosted by your game you’ll need to provide the port the web page is hosted on just as you would if you were connecting via the numerical IP.
### Propagation
Because of the sheer amount of people using the internet, there are thousands of “DNS Servers” across the world that communicate with each other to keep an up-to-date list of domains and their associated IP addresses. They each store those lists for a specified period of time before requesting a new list from a nearby DNS Server. This is called “caching” and results in a propagating affect when a change is made, similar to drooping a stone in a pool of water.
Once one DNS Server has received and approved a change, it takes time for other nearby DNS Servers to update their list and pass it on to their neighbors. For the most part this happens relatively quickly, but it can take up to 72 hours depending on a countless number of factors.
## Available Primary Domains
This is a list of Primary Domains that we offer for Clients (you) to use for your subdomains. If the subdomain you want is available under any of the Primary Domains listed below, or on the Game Panel, then you are free to use it by setting it up in the Game Panel!
- playwn.co
- r2f.co
## Locating the Subdomain Manager
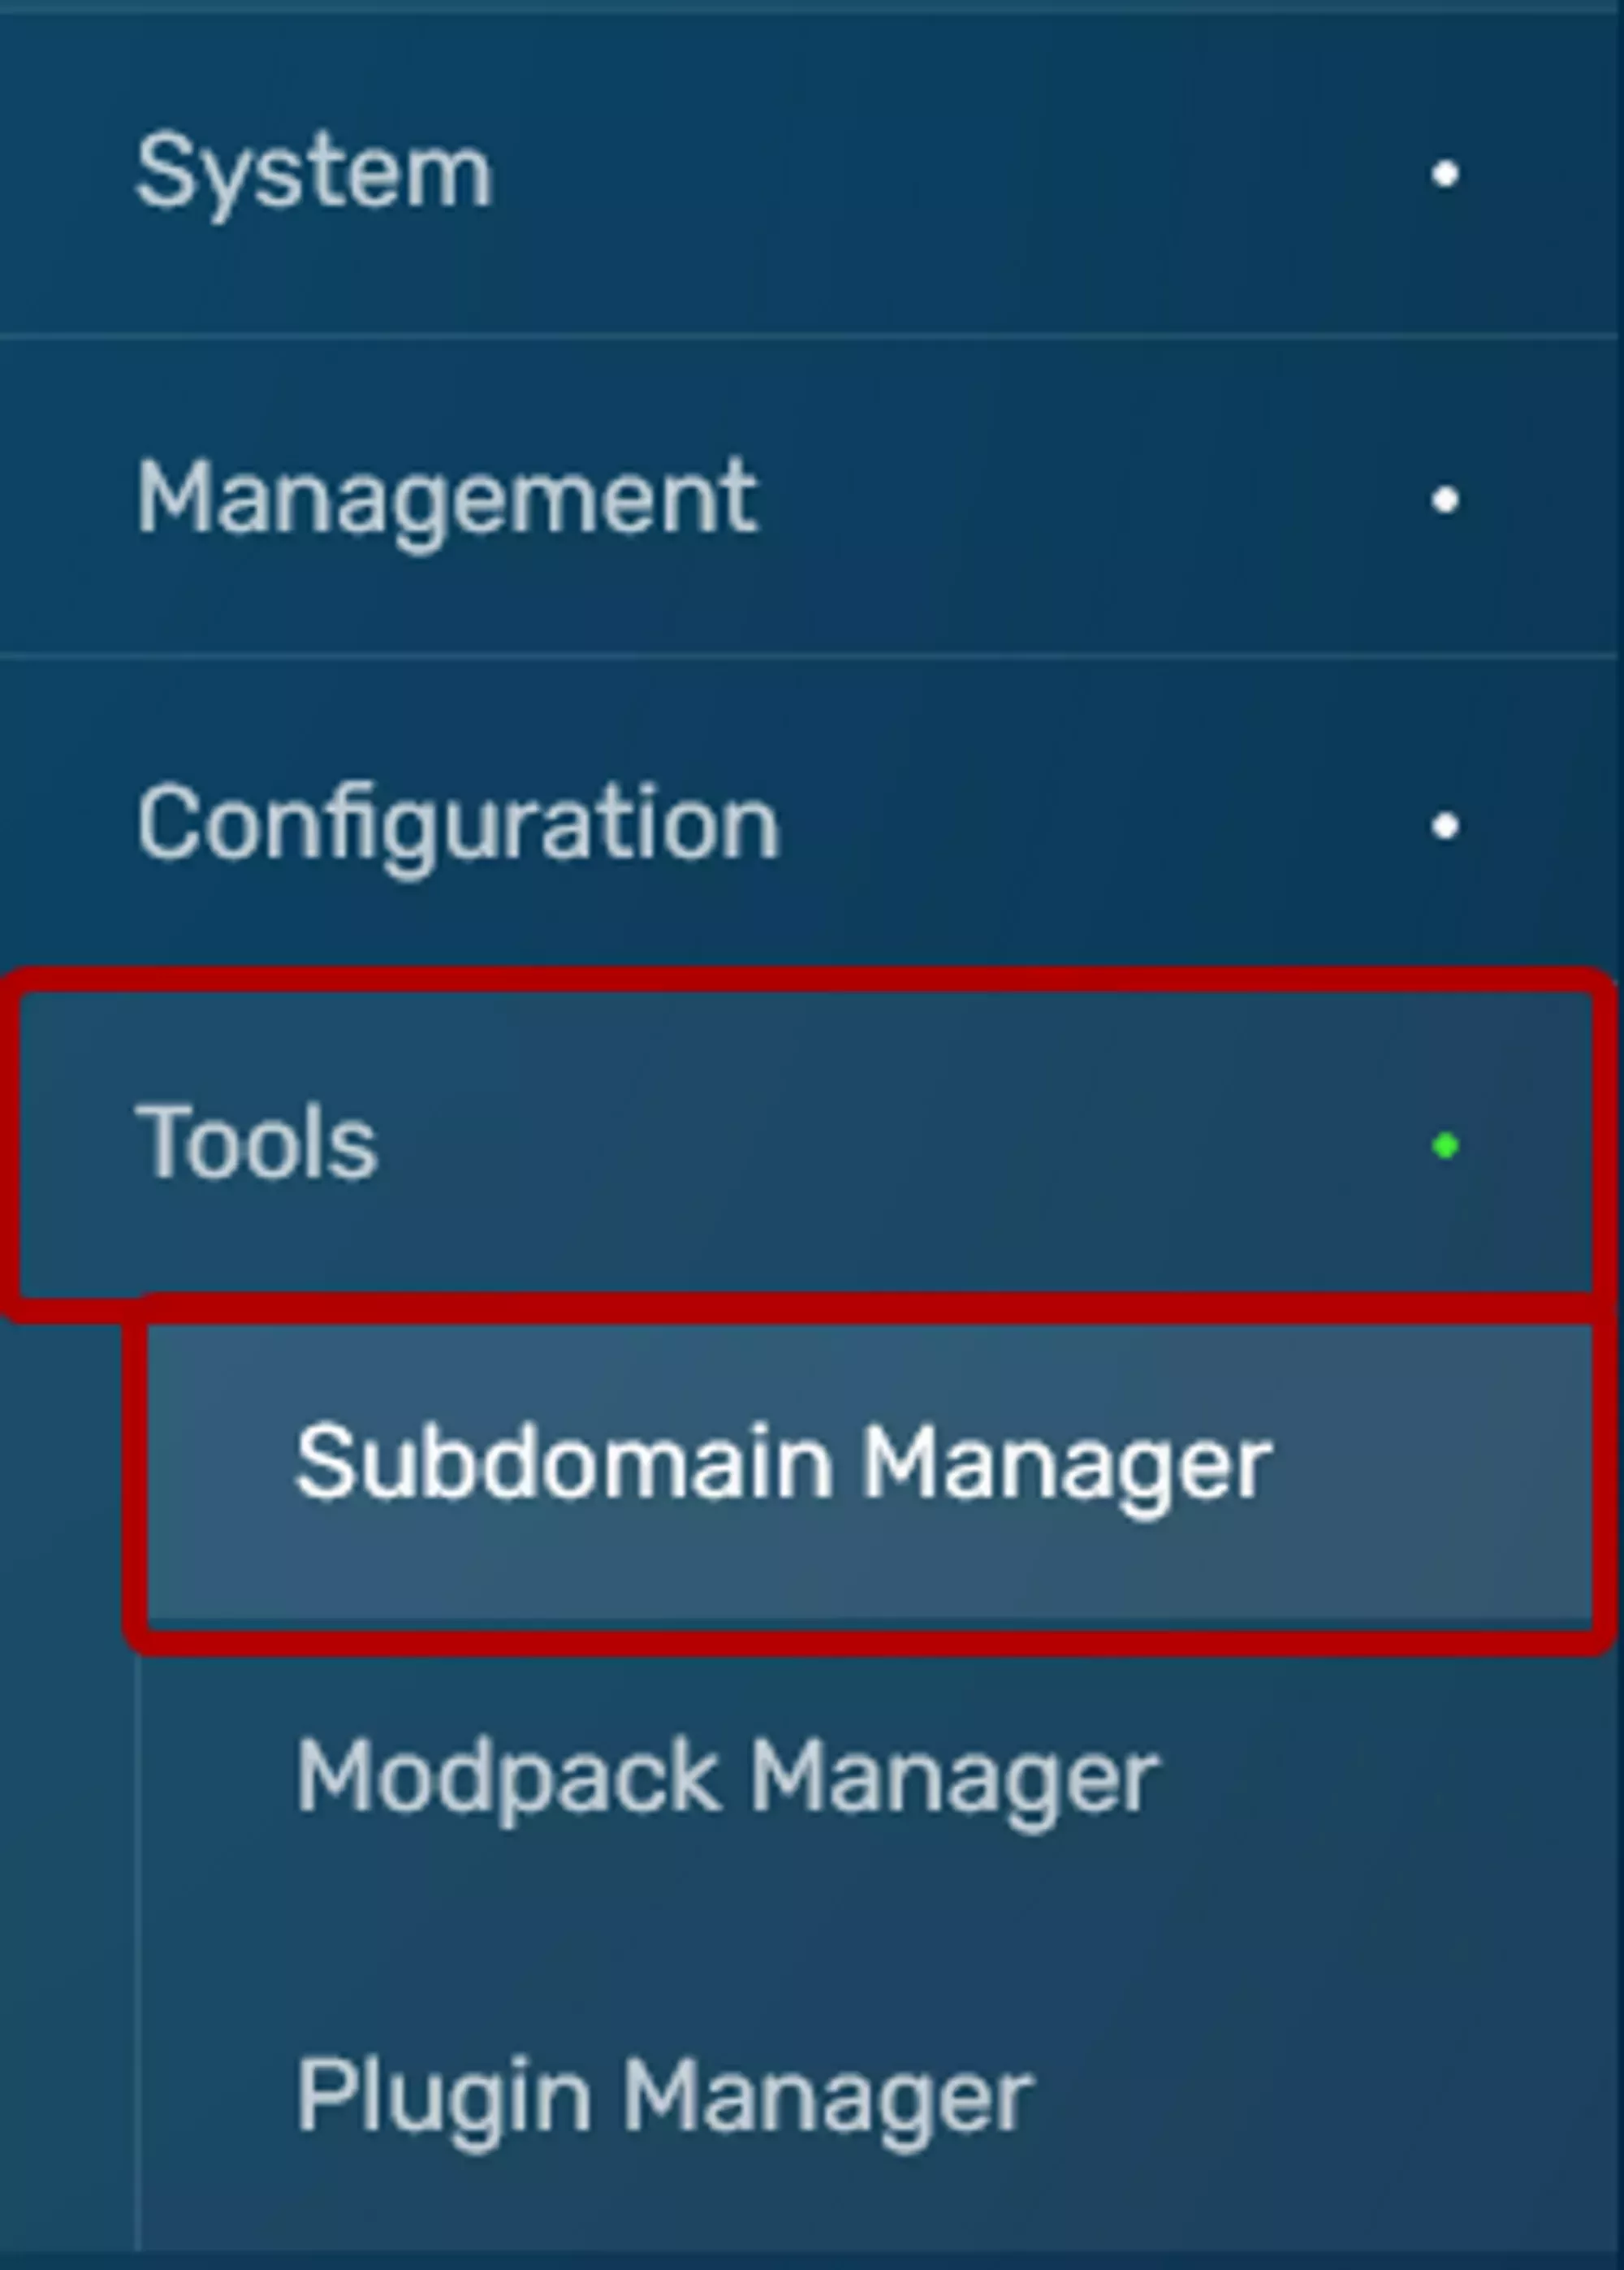
You can find the Subdomain Manager under the Tools tab in the navigation menu when viewing your server.
## Creating a New Subdomain
You can create a new Subdomain by clicking the Create button in the top right corner of the Subdomain Manger page.

Clicking the create button will open a Create New Subdomain window that will look similar to the one depicted in the image to the right.
The name field is where you’ll enter the “vanity” you want for your subdomain. IE the vanity in `server.playwn.co` is `server`. If the vanity you want to use is already in use, you’ll be notified when you click the create button after filling out all of the fields.
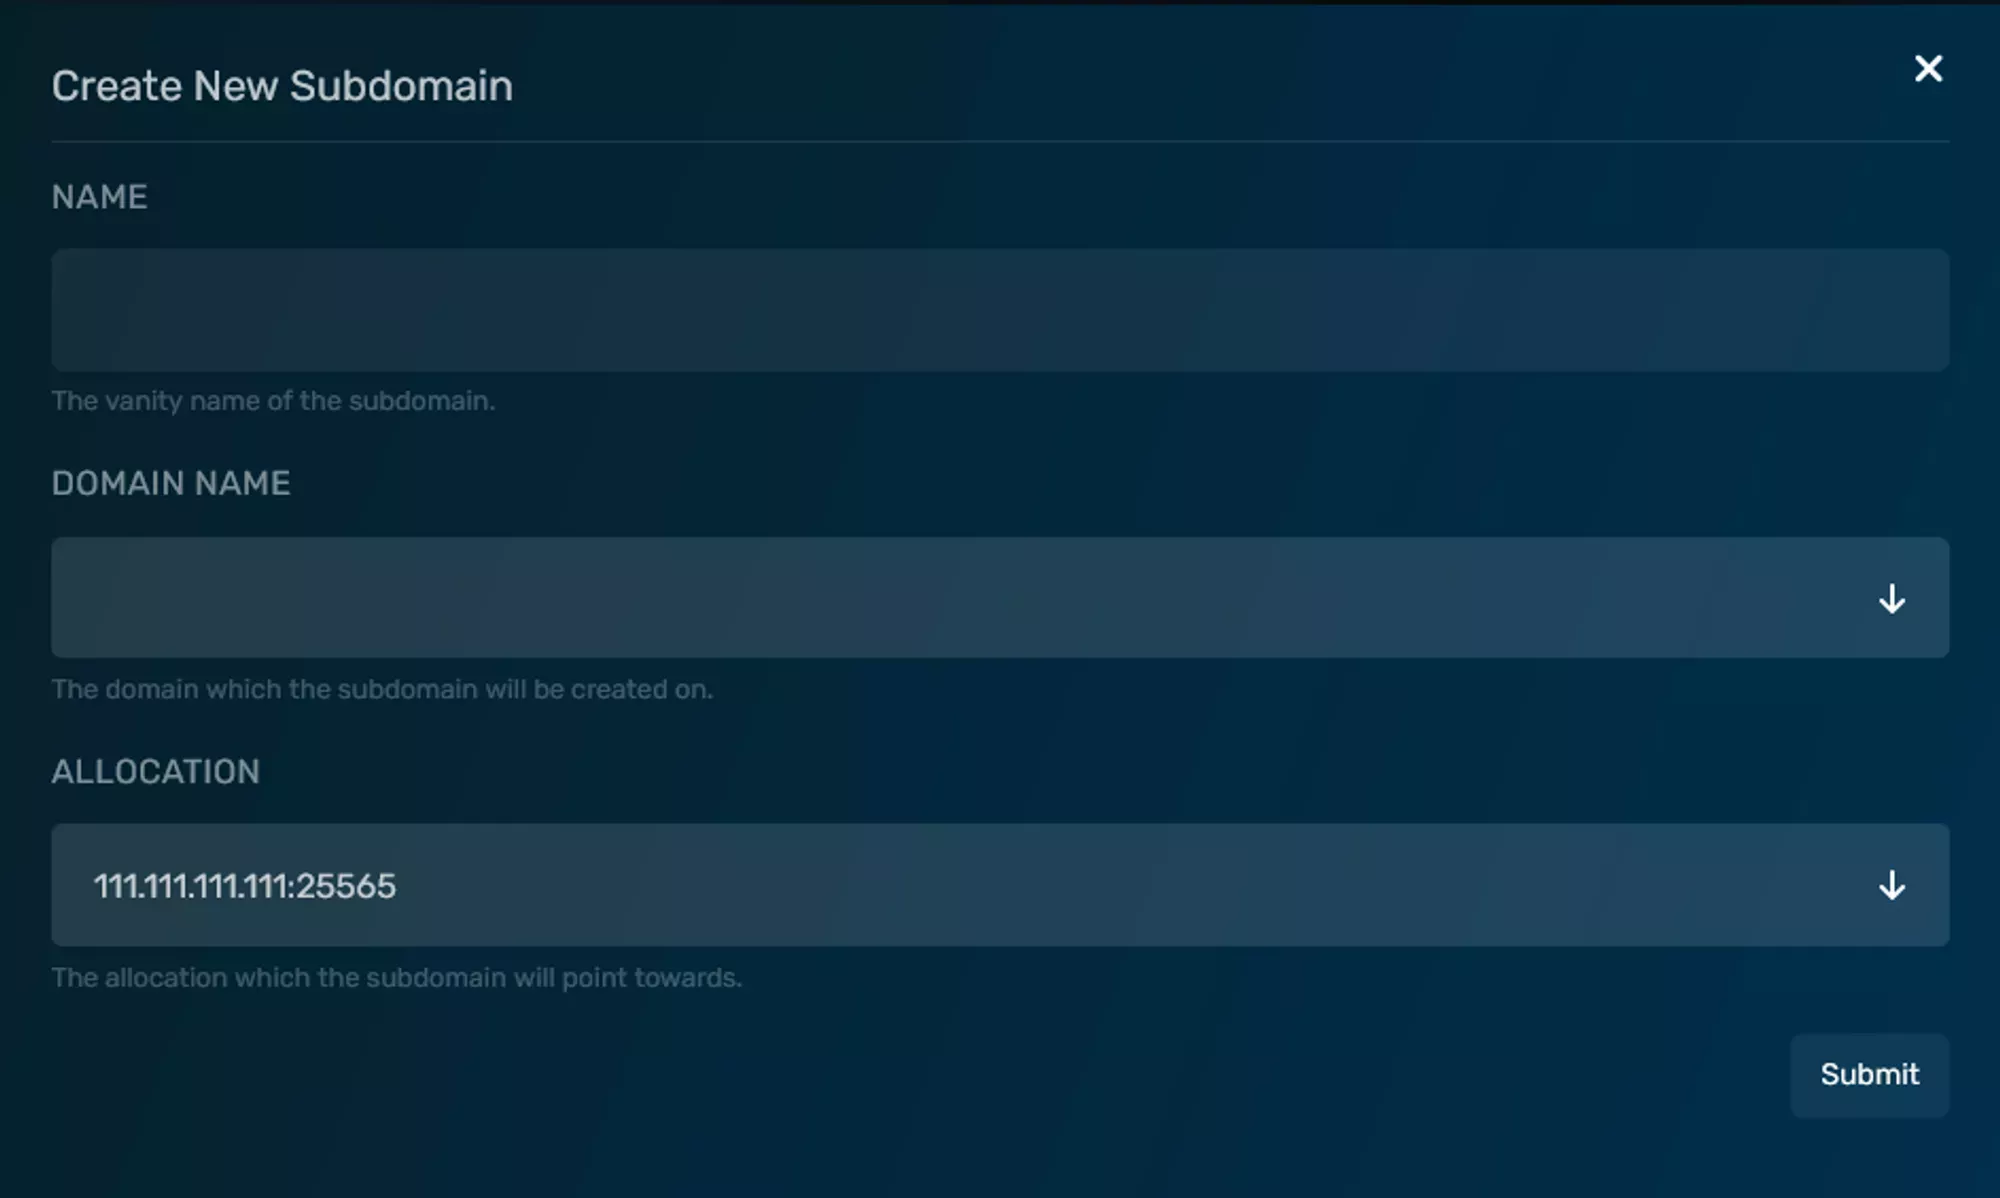
You’ll then select the Primary Domain you want from the Domain Name dropdown. That dropdown is the most up-to-date list of available Primary Domains we offer and will be the domain at the end of your vanity.
The allocation is the port and IP that your subdomain will be directed to.
The IP will always be that of your server and the port will only be affected by services that use SRV records, such as Games. For more details on that, please see the section on ports under the dropdown “What is a Subdomain”.
## Deleting an Existing Subdomain
If you no longer want to use a subdomain you created you can delete it by clicking the trashcan icon on the far right side of the entry.

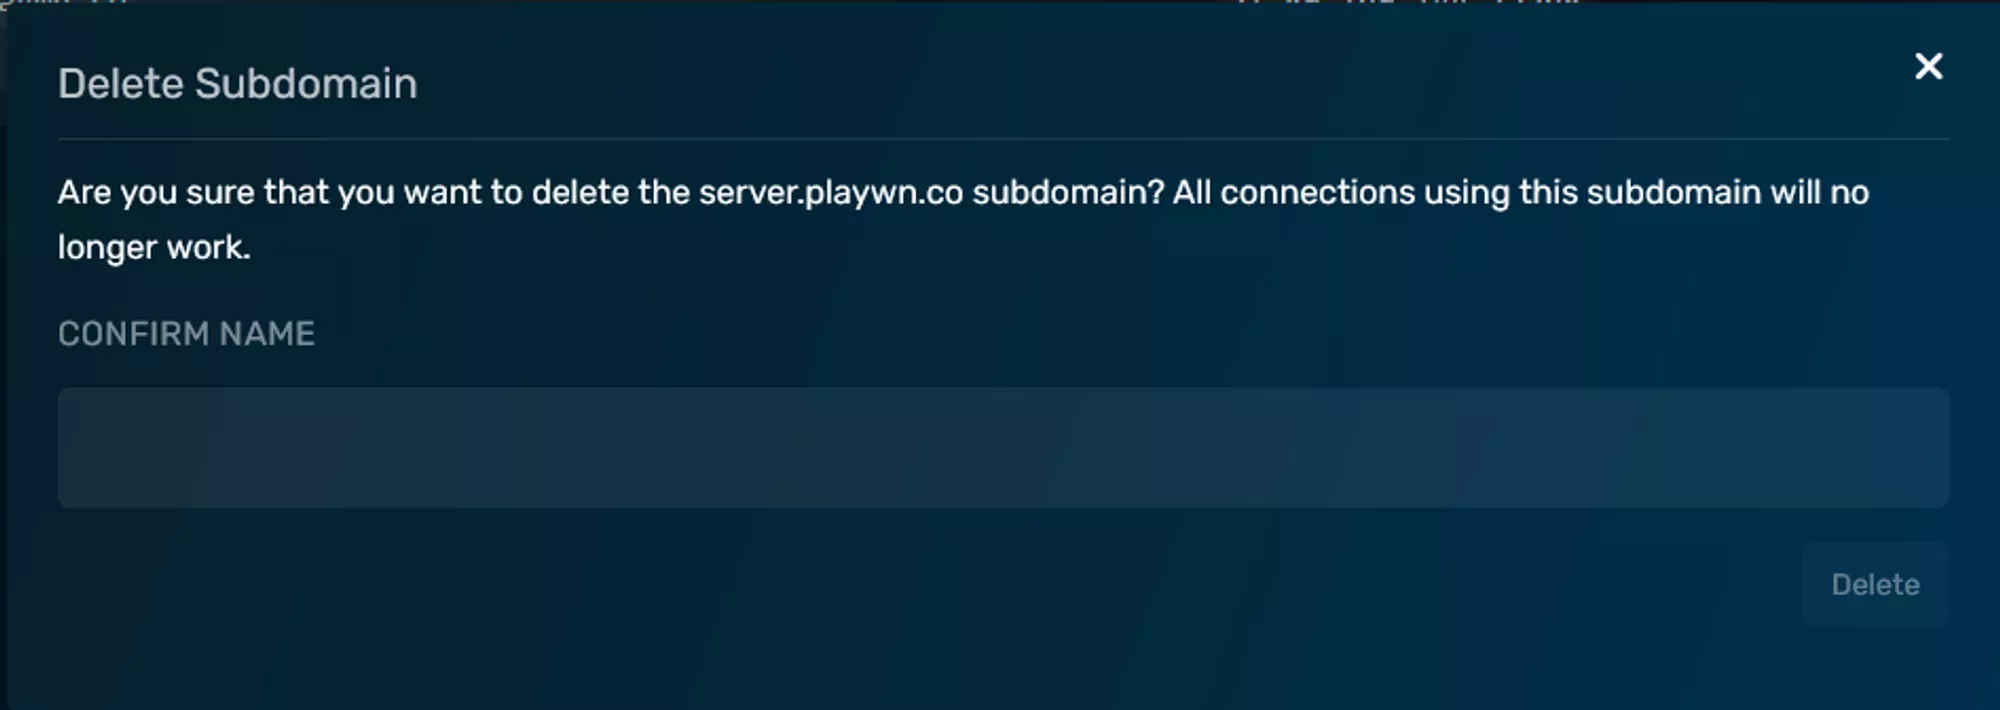
After clicking it you’ll be prompted to confirm the action with a window similar to the one shown below asking for you you to confirm the name of the subdomain. You need to enter the **full** name of the subdomain into the field, _including_ the Primary Domain. IE in order to delete `server.playwn.co` I need to enter `server.playwn.co`, not `server`.
---
# How to Transfer Files Using FileZilla
> Upload and download files on your WinterNode game server using SFTP with FileZilla, a free SFTP client for Windows, macOS, and Linux.
Source: https://winternode.com/help/game-control-panel/using-sftp
SFTP lets you transfer files larger than 100MB to your game server and keep a more stable connection than the browser-based File Manager. FileZilla is the most common free SFTP client and works on Windows, macOS, and Linux. If you'd rather use a Windows-only dual-pane client, see the [WinSCP guide](/help/game-control-panel/using-winscp).
## SFTP Credentials
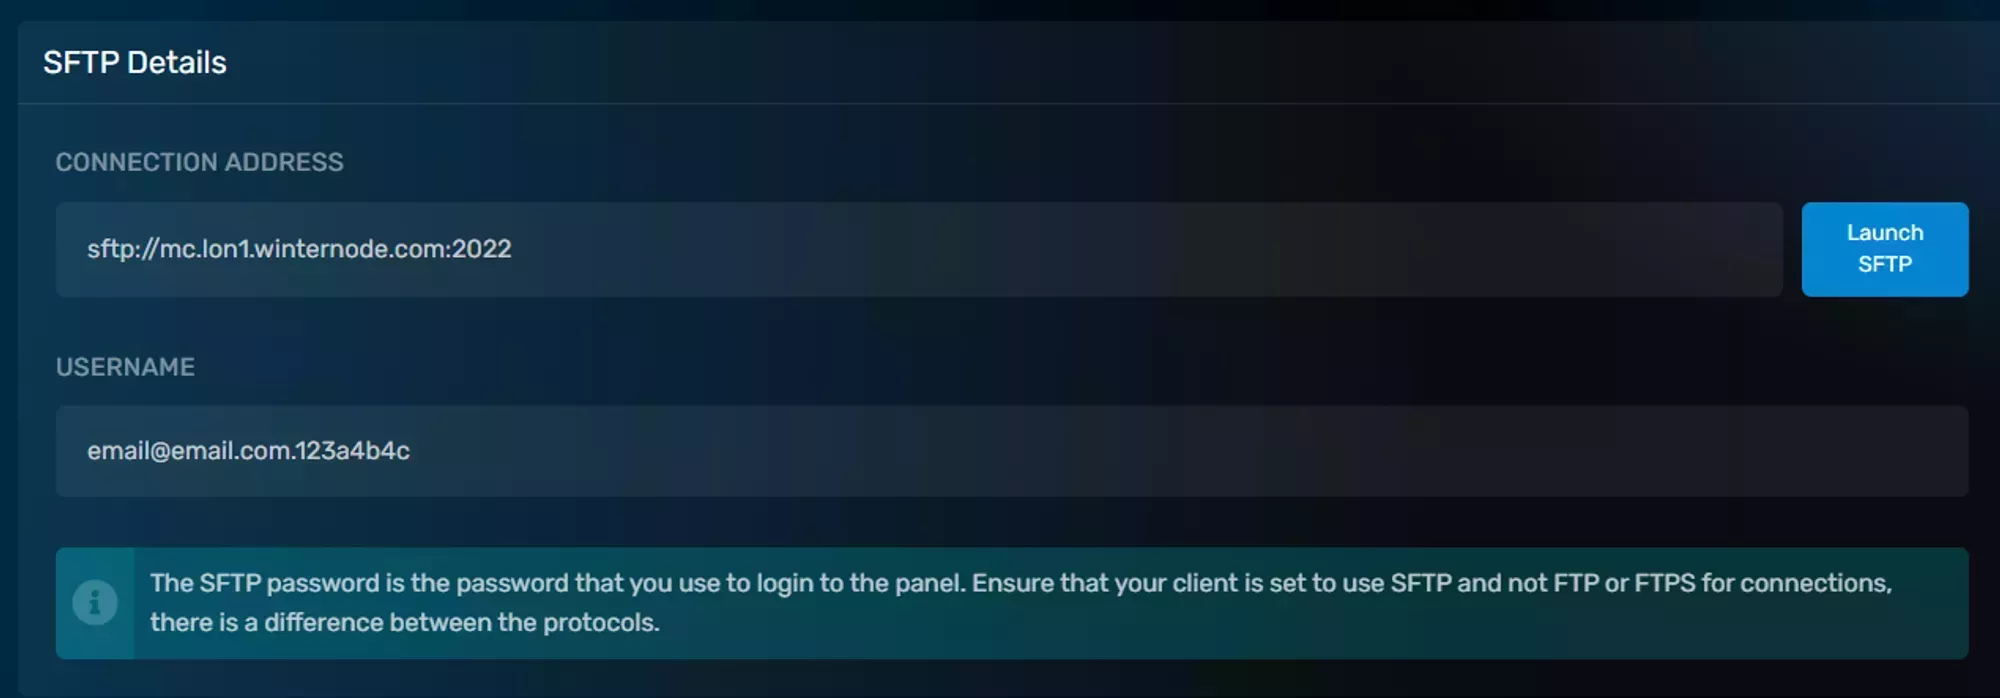
Regardless of the client you use, you'll need the SFTP credentials provided by the GCP. Each of your servers has a unique set of credentials: the connection address is specific to your server's node, the username is generated from your email and server UUID, and your password is the same one you use to log into the panel.
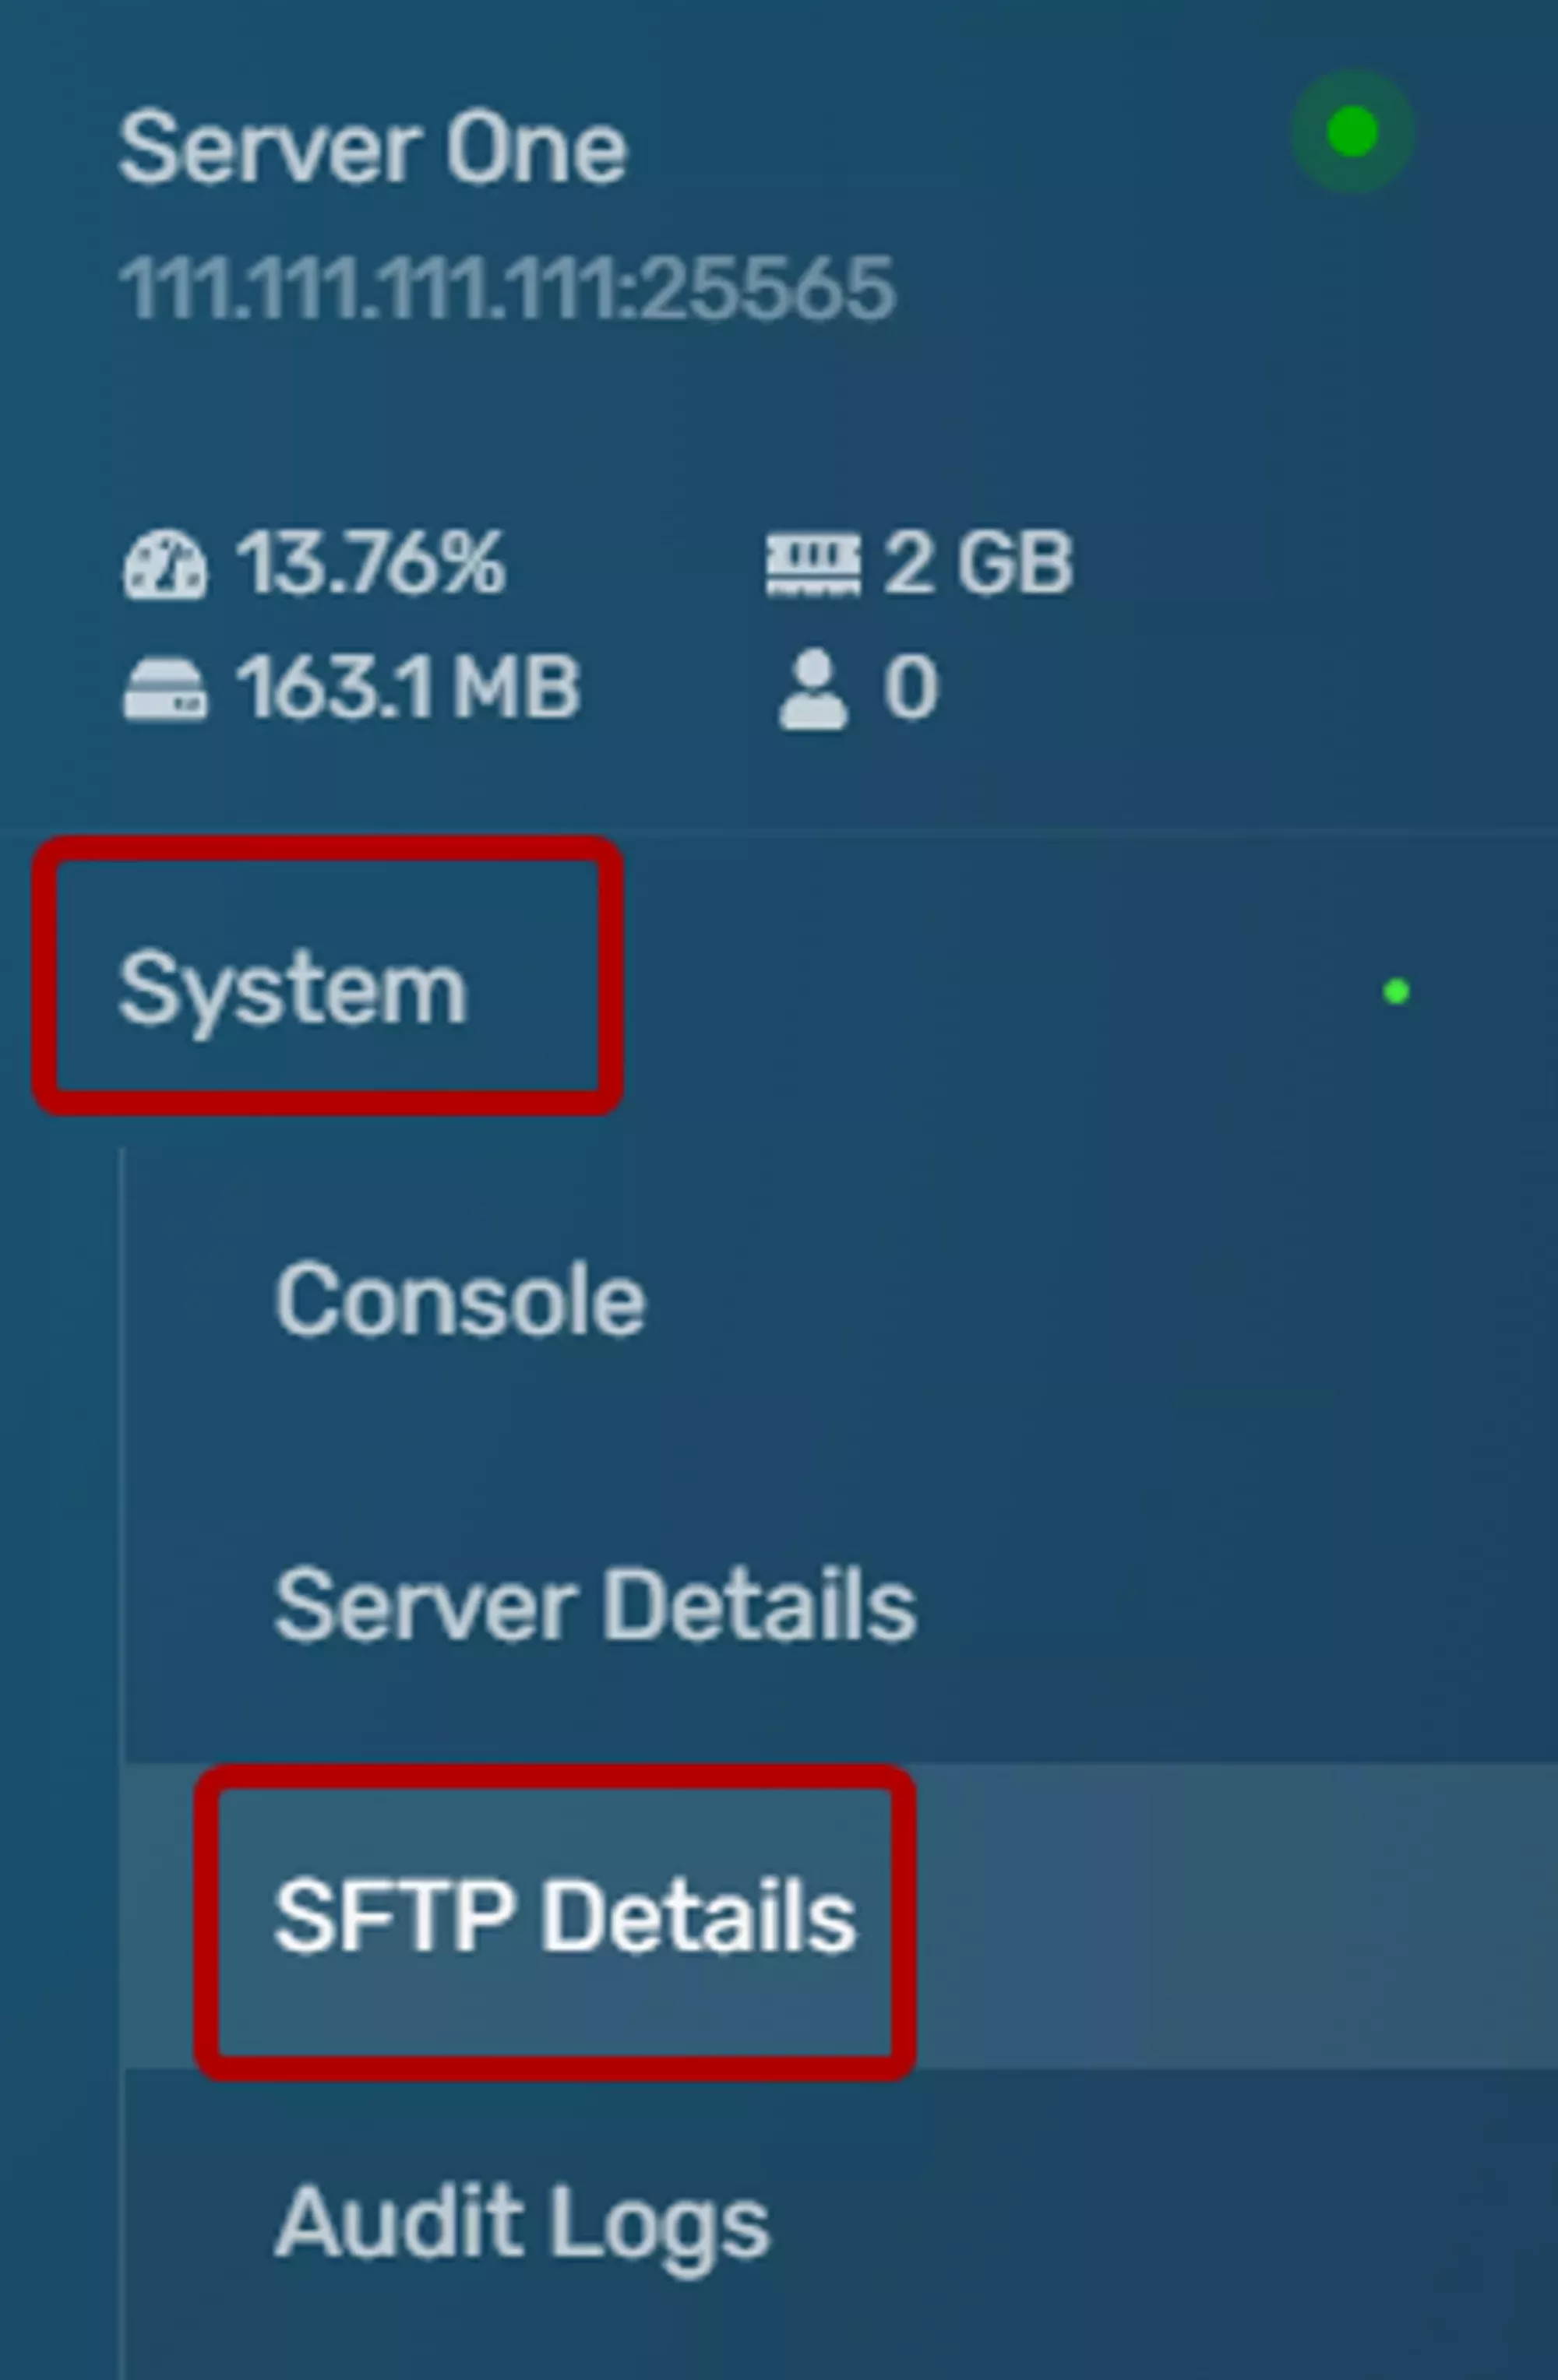
You can find your server's SFTP credentials under the **System** → **SFTP Details** tab.
## Downloading FileZilla
1. Go to the [FileZilla Project](https://filezilla-project.org/) website
2. Click **Download FileZilla Client**
3. Run the installer and follow the prompts to finish installing
## Connecting to Your Server
FileZilla is a GUI application that lets you browse, upload, and download files on your server through a familiar file-manager interface. The fastest way to connect is the **Quickconnect** bar at the top of the window.
Use your credentials from the [SFTP Credentials](#sftp-credentials) section above to fill in the Quickconnect bar:
1. Copy the **Connection Address** field from the panel and paste it into the **Host** field in FileZilla
2. Copy the **Username** field from the panel and paste it into the **Username** field in FileZilla
3. Enter your GCP password in the **Password** field
4. Click **Quickconnect**

## Uploading and Downloading Files
Once connected, your **local files appear on the left** and the Remote Site on your server appears on the right. Drag and drop between the two panes to transfer files in either direction.
1. Navigate to the folder you want to transfer **from** on one side
2. Navigate to the destination folder on the other side
3. Drag the file or folder from one pane to the other
4. Watch the progress under the **Queued files** tab at the bottom of the window
### Speeding Up Transfers of Many Small Files
If you *really* need to transfer a large amount of small files, or your bandwidth isn't being fully utilised for multiple large files, you can increase the number of files FileZilla transfers at the same time.
Increase concurrent transfers
1. Open FileZilla
2. Select **Edit** → **Settings** from the menu bar
3. Select **Transfers** on the left side of the Settings window
4. Under **Concurrent transfers**, change **Maximum simultaneous transfers** to a value between 1 and 10
5. Click **OK**
## Troubleshooting
### FileZilla: Authentication Failed
The **Authentication failed** error means FileZilla reached your server but was rejected during login. This is almost always a password problem.
1. Confirm you are entering your **Game Control Panel password**. This is the same password you use to log in to the panel website. There is no separate SFTP password
2. If you recently changed your panel password, update the stored password in FileZilla
3. Check that the **Username** matches the Username shown under **System** → **SFTP Details** in the panel, including the hyphen and numeric suffix
4. If you have forgotten your password, [reset it from the panel login page](/help/getting-started/accessing-the-game-control-panel#resetting-your-password)
### FileZilla: Could Not Connect to Server
The **Critical error: Could not connect to server** error means FileZilla could not reach the SFTP service at all.
1. **Wrong connection address.** Go to **System** → **SFTP Details** in the Game Panel and copy the Connection Address field again. Paste it fresh into the FileZilla **Host** field rather than typing it manually
2. **Wrong port.** The SFTP port is included in the Connection Address. If FileZilla prompts for a separate **Port** field, leave it blank so the port from the Host field is used
3. **Firewall or VPN.** Temporarily disable any VPN or third-party firewall software on your computer and try again. Some VPNs block non-standard SFTP ports
4. **Network issue.** If you can reach the Game Panel website but not SFTP, your ISP or local network may be blocking the connection. Try from a different network (such as a mobile hotspot) to confirm
### Still Not Working?
If none of the above resolves your issue, [contact our support team](https://winternode.com/discord?utm_source=help&utm_medium=article&utm_campaign=using-sftp) with:
- The exact error message from FileZilla (screenshot is ideal)
- What you've already tried
---
# How to Transfer Files Using WinSCP
> Upload and download files on your WinterNode game server using WinSCP, a free Windows SFTP client with a dual-pane file browser.
Source: https://winternode.com/help/game-control-panel/using-winscp
WinSCP is a free SFTP client for Windows with a dual-pane file browser that makes it easy to drag and drop files between your PC and your WinterNode game server. Use it when you need to transfer files larger than 100MB or manage many files at once.
## SFTP Credentials
Regardless of the connection method you use, you'll need the SFTP credentials provided by the GCP. Each of your servers has a unique set of credentials: the connection address is specific to your server's node, the username is generated from your email and server UUID, and your password is the same one you use to log into the panel.

You can find your server's SFTP Credentials under the **System** → **SFTP Details** tab.

## Downloading WinSCP
1. Go to the [WinSCP download page](https://winscp.net/eng/download.php)
2. Click the **Download WinSCP** button for the latest stable release
3. Run the installer and follow the prompts
4. On the **Setup type** screen, choose **Typical installation** unless you know you need something else
5. On the **User interface style** screen, choose **Commander** (recommended for dual-pane drag and drop)
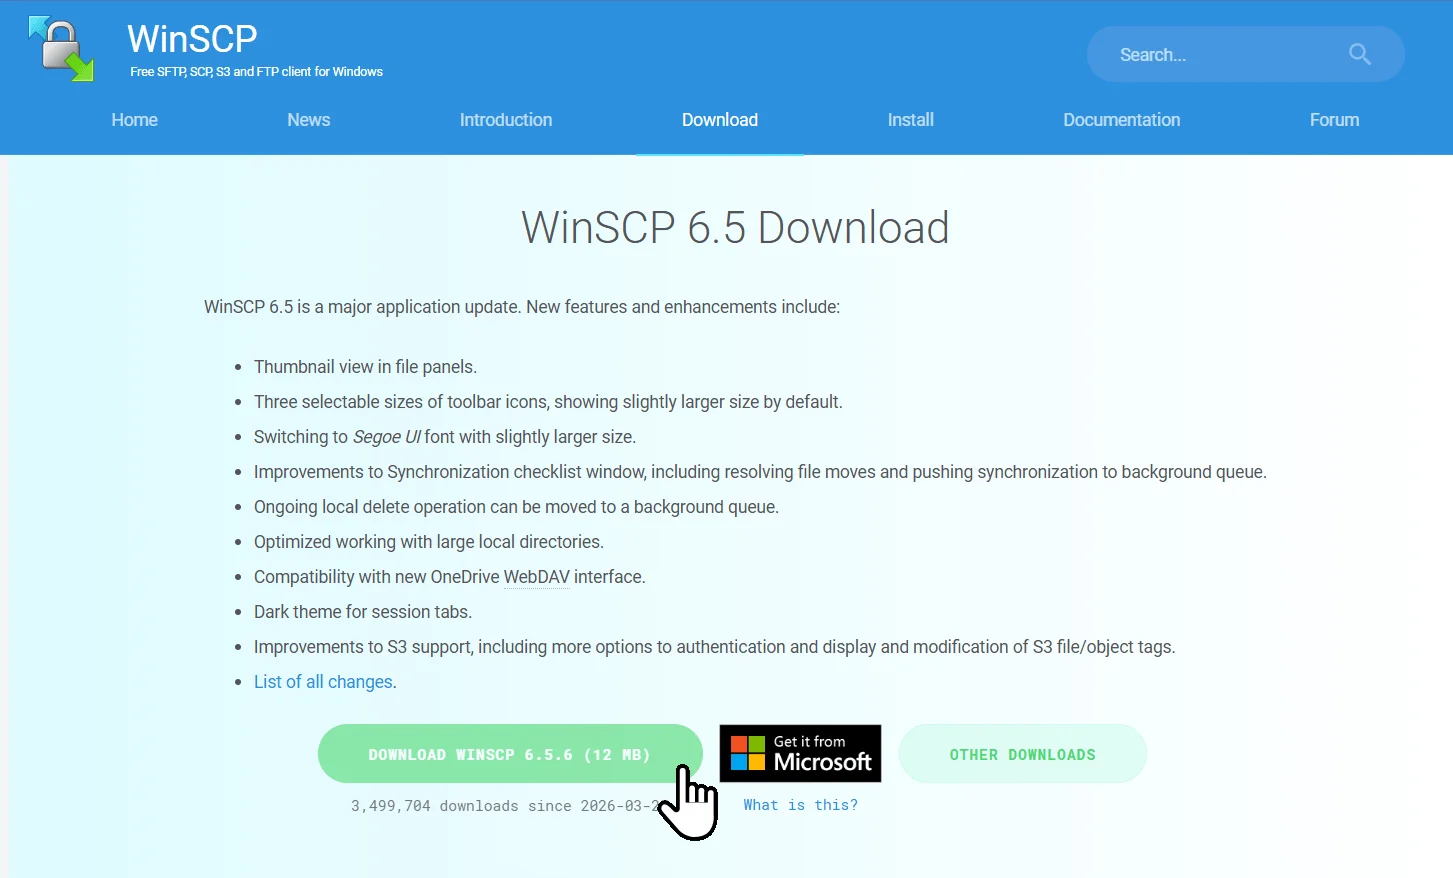
## Connecting to Your Server
1. Open WinSCP. The **Login** window appears on first launch
2. Set **File protocol** to **SFTP**
3. Copy the part of your **Connection Address** before the colon and paste it into **Host name**
4. Copy the number after the colon in your Connection Address and paste it into **Port number**
5. Copy the **Username** field from the panel and paste it into **User name**
6. Enter your Game Control Panel password in the **Password** field
7. Click **Login**
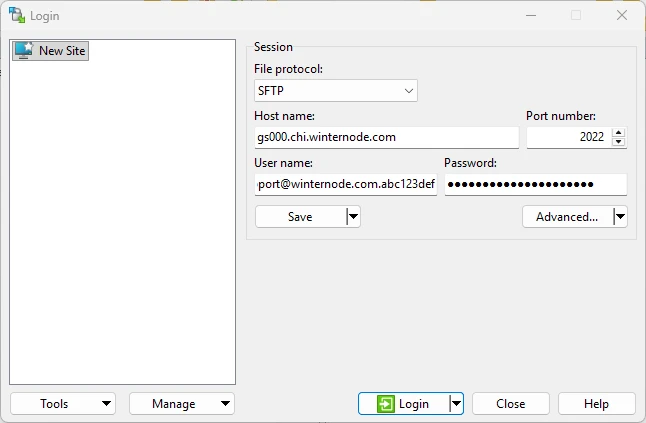
The first time you connect, WinSCP displays a **Warning: Continue connecting to an unknown server** dialog with the server's host key fingerprint. Click **Accept** to trust the server and add the key to WinSCP's cache. You won't see this prompt again for the same server.
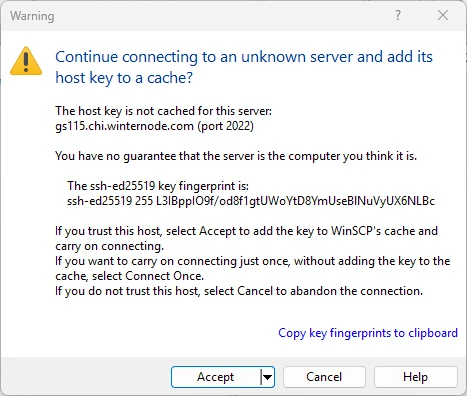
## Uploading and Downloading Files
Once connected, WinSCP shows your **local files on the left** and your **server files on the right**. You can drag and drop between the two panes to transfer files in either direction.
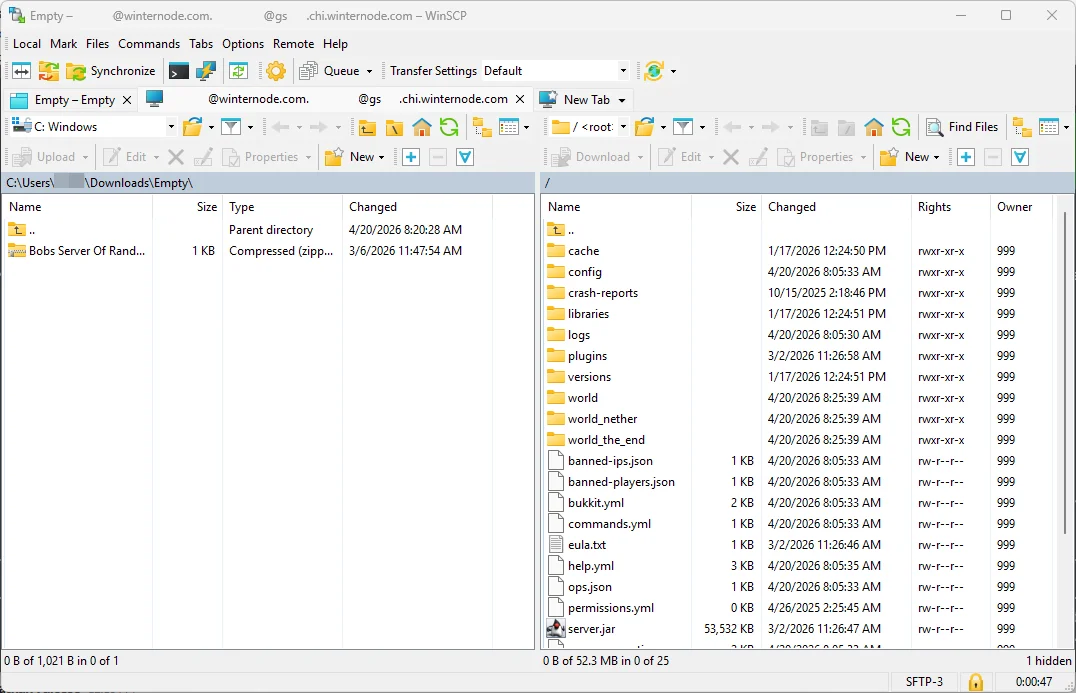
1. Navigate to the folder you want to transfer **from** on one side
2. Navigate to the destination folder on the other side
3. Drag the file or folder from one pane to the other
4. Confirm the transfer in the **Copy** dialog that appears
5. Wait for the progress bar to finish. Transfers appear at the bottom of the window
### Speeding Up Transfers of Many Small Files
If you're transferring a folder with lots of small files and your bandwidth isn't being fully utilised, increase the number of simultaneous transfers:
Increase concurrent transfers
1. In WinSCP, open **Options** → **Preferences** from the menu bar
2. Select **Transfer** → **Background** on the left
3. Change **Maximal number of transfers at the same time** to a value between 1 and 9
4. Click **OK**
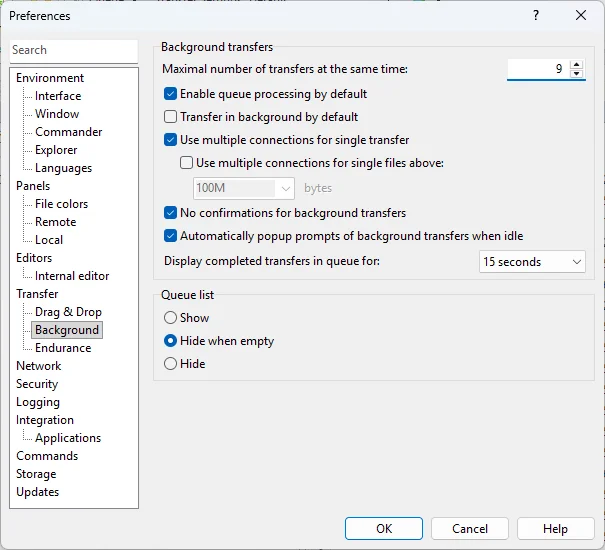
## Troubleshooting
### WinSCP: Authentication Failed
The **Authentication failed** error means WinSCP reached your server but was rejected during login. This is almost always a password problem.
1. Confirm you are entering your **Game Control Panel password**. This is the same password you use to log in to the panel website. There is no separate SFTP password
2. If you recently changed your panel password, update the stored password in your WinSCP saved site
3. Check that the **User name** matches the Username shown under **System** → **SFTP Details** in the panel, including the hyphen and numeric suffix
4. If you have forgotten your password, [reset it from the panel login page](/help/getting-started/accessing-the-game-control-panel#resetting-your-password)
### WinSCP: Network Error - Connection Refused or Timed Out
These errors mean WinSCP could not reach the SFTP service at all.
1. **Wrong host or port.** Go to **System** → **SFTP Details** in the Game Panel. Copy the part of the Connection Address *before* the colon into **Host name**, and the number *after* the colon into **Port number**. Do not paste the full `host:port` string into Host name
2. **Wrong protocol.** Make sure **File protocol** is set to **SFTP**. FTP and SCP will not connect
3. **Firewall or VPN.** Temporarily disable any VPN or third-party firewall software and try again. Some VPNs block non-standard SFTP ports
4. **Network issue.** If you can reach the Game Panel website but not SFTP, your ISP or local network may be blocking the connection. Try from a different network (such as a mobile hotspot) to confirm
### WinSCP: Host Key Was Not Verified
If you see **Host key was not verified** after clicking **Cancel** on the fingerprint prompt, WinSCP has refused the connection for safety.
1. Reconnect to your server
2. When the **Warning: Continue connecting to an unknown server** dialog appears, review the fingerprint
3. Click **Accept** to trust the key and add it to WinSCP's cache
If the fingerprint changed unexpectedly after a node migration or server move, this is usually expected. Click **Update** to accept the new key. If you did not expect a change, open a ticket with support before proceeding.
### Still Not Working?
If none of the above resolves your issue, [contact our support team](https://winternode.com/discord?utm_source=help&utm_medium=article&utm_campaign=using-winscp) with:
- The exact error message from WinSCP (screenshot is ideal)
- What you've already tried
---
# 7 Days to Die Server Admin Setup
> Common server and in-game commands for 7 Days to Die.
Source: https://winternode.com/help/games/7-days-to-die/administration/common-7-days-to-die-commands
Commands allow you to customize your server and manage your players.
## Giving Yourself Access
If you want to run commands in-game, you will need to make yourself a server admin. You can do this by adding your SteamID64 to `serveradmin.xml` in the `File Manager` in Quick Access.
Some commands can also be executed directly in the server console.
## Understanding Permission Levels
7 Days to Die uses a hierarchical permission system where lower numbers have higher privileges. Every command in the `serveradmin.xml` file has a required permission level. If your player's permission level is less than the command's required level, you can run it.
0 - Super Admin (full control, can use all commands
1-999 - Admin (still an admin, can be restricted depending on command limits set in XML)
1000 - Moderator (can use limited commands, like kicking or teleporting to players)
1001-1999 - Custom roles (you can assign players your desired permissions)
2000 - Default player (no special commands)
## Editing Privilege Levels (OPTIONAL)
If you want to change which commands require certain permission levels, you can edit `serveradmin.xml` under the `` header. Due to the complexity, we only recommend this for advanced users, but our support team is always available to assist you.
Most commands are already listed in the file, you just need to change the `permission_level` section of the entry.
For instance:
```
```
This command will require a permission level of 1000 or less to execute. If you wanted it to only be available to super admins, you'd change `1000` to `0`.
For a full list of commands, please see the [7 Days to Die wiki.](https://7daystodie.fandom.com/wiki/Command_Console)
## Getting Your SteamID64
The most common method to determine what your SteamID64 is by using [steamid.io](https://steamid.io).
Paste your Steam profile link (which can be found in the Steam client by clicking your username, then "profile").
You will then receive your SteamID64.
## Adding Players to Serveradmin.xml
Following the syntax below, you can add players to the serveradmin.xml file using their SteamID64 and specifying their permission level:
```
```
Replace `steamID="12345678910111213"` with the player's SteamID64. Replace `permission_level_default="1000"` with the desired permission level for that player.
Once you've added yourself to the file, save it and restart the server to apply the changes.
---
# 7 Days to Die Server Backup and World Transfer
> Back up your 7 Days to Die world, restore from backup, and migrate worlds from local or another host.
Source: https://winternode.com/help/games/7-days-to-die/administration/server-backup-and-world-transfer
Knowing where your world data lives and how to back it up is essential for any 7 Days to Die server. This guide covers save locations, manual backups, restoring from backup, and importing worlds from local play or another host.
## Automatic Backups on WinterNode
WinterNode takes automatic backups of your server files every 12 hours with 45-day retention. These backups are managed through the [backup system](/help/getting-started/backup-system) and can be restored through the Game Control Panel. See the [backup system guide](/help/getting-started/backup-system) for details on how to browse and restore backups.
The automatic backups cover everything - world saves, configuration files, mods, and server settings. For most situations, these are sufficient for recovery.
## World Save Location
7 Days to Die stores world data in a `Saves` directory within the server's data folder.
Inside the Saves directory, you'll find folders organized by world type, then by save name:
```
Saves/
└── [WorldType]/ (e.g., "RWG 6144" or "Navezgane")
└── [GameName]/ (matches the GameName setting in serverconfig.xml)
├── main.ttw
├── players/
├── Region/
└── ...
```
The `GameName` folder contains all your world data - terrain, player data, placed blocks, and entity states.
## Taking a Manual Backup
For critical moments (before updates, major setting changes, or mod installations):
1. **Stop the server** through the Game Control Panel to ensure files aren't being written to
2. Open [File Manager](/help/game-control-panel/the-file-manager) or connect via [SFTP](/help/game-control-panel/using-sftp)
3. Navigate to the Saves directory
4. Download the entire `GameName` folder
Store the backup on your local computer. This creates an off-server copy that's protected even if something happens to the server itself.
## Restoring from a Manual Backup
1. Stop the server
2. Navigate to the Saves directory via [File Manager](/help/game-control-panel/the-file-manager) or [SFTP](/help/game-control-panel/using-sftp)
3. Rename the current `GameName` folder (e.g., `MyWorld` to `MyWorld_old`) as a safety measure
4. Upload your backup folder to the same location with the original name
5. Start the server
The server will load the restored world on next startup.
## Transferring a World from Local Play
If you've been playing on a local/singleplayer world and want to move it to a dedicated server:
### Step 1: Find Your Local Save
On your PC, 7DTD saves are typically located at:
**Windows:**
```
C:\Users\[YourUsername]\AppData\Roaming\7DaysToDie\Saves\
```
You may need to enable "Show hidden files" to see the AppData folder.
**Linux:**
```
~/.local/share/7DaysToDie/Saves/
```
### Step 2: Upload to the Server
1. Stop the server
2. Connect via [SFTP](/help/game-control-panel/using-sftp)
3. Navigate to the server's Saves directory
4. Upload your local world folder, maintaining the same directory structure
5. Update `GameName` in serverconfig.xml to match your world folder name
6. Start the server
## Migrating from Another Host
The process is the same as transferring from local play:
1. Download the world save from your current host (check their documentation for save locations)
2. Upload to WinterNode via [SFTP](/help/game-control-panel/using-sftp)
3. Match the `GameName` in serverconfig.xml
4. Ensure the same game version is running
5. Transfer serverconfig.xml and serveradmin.xml if you want to keep your settings and admin list
For a general guide on migrating servers, see our [migration guide](/help/getting-started/migrating-to-winternode).
---
# Blood Moon Performance Settings
> Quick reference for 7 Days to Die blood moon performance settings with recommended values for different server sizes.
Source: https://winternode.com/help/games/7-days-to-die/configuration/blood-moon-performance-settings
Blood moon horde nights are the most CPU-intensive event in 7 Days to Die. If your server struggles during blood moons, these are the settings to adjust.
## Performance Settings Reference
| Setting | Default | Small Server (2-4) | Medium Server (5-8) | Large Server (9+) |
|---------|---------|--------------------|--------------------|-------------------|
| `BloodMoonEnemyCount` | 8 | 8 | 6-8 | 4-6 |
| `MaxSpawnedZombies` | 64 | 64 | 50-64 | 40-50 |
| `MaxSpawnedAnimals` | 50 | 50 | 40 | 30 |
| `ServerMaxAllowedViewDistance` | 12 | 12 | 10 | 8-10 |
| `BlockDamageAIBM` | 100 | 100 | 100 | 100 |
## How to Change These Settings
All of these settings are in `serverconfig.xml`. Edit the file via [File Manager](/help/game-control-panel/the-file-manager) or [SFTP](/help/game-control-panel/using-sftp):
1. Open `serverconfig.xml`
2. Find each setting and update the `value` field
3. Save the file
4. Restart the server
## Setting Details
### BloodMoonEnemyCount
The maximum number of simultaneously alive blood moon zombies per player. This is the single most impactful performance setting for horde nights.
A 4-player server with BloodMoonEnemyCount 8 can have up to 32 blood moon zombies active at once. Reducing to 6 drops that to 24 - a meaningful difference for server load.
### MaxSpawnedZombies
Global zombie cap across the entire server. During blood moons, most of this budget goes to horde zombies. Lowering this caps how many zombies can exist at once, providing a hard ceiling on server load.
### MaxSpawnedAnimals
Animals share processing time with zombies. Reducing this during peak load (or permanently) frees resources for zombie AI during horde nights.
### ServerMaxAllowedViewDistance
Controls how far chunks are loaded for each player. Lower values mean fewer chunks to process, which helps during blood moons when the server is already under heavy load.
### BlockDamageAIBM
Controls how much damage blood moon zombies deal to blocks. This doesn't directly affect performance, but higher values mean zombies break through structures faster, which can lead to more complex pathfinding recalculations. Keep at 100 unless you specifically want to change the difficulty.
## Additional Performance Tips
- **Schedule restarts before blood moons** - A fresh server handles blood moons better than one that's been running for days. See our [scheduled restarts guide](/help/games/7-days-to-die/configuration/scheduled-restarts).
- **Base location matters** - Bases far from cities and traders have less background chunk processing to compete with blood moon AI.
- **Mod impact** - Some mods add background processing or new entity types that compound during blood moons. If you're running mods and experiencing lag, test with mods disabled to isolate the cause.
For a comprehensive guide to blood moon optimization, see our [blood moon performance blog guide](/blog/7-days-to-die/7-days-to-die-blood-moon-server-performance).
---
# How to Enable Crossplay (PC + PS5 + Xbox)
> Enable crossplay on your 7 Days to Die server to let PC, PS5, and Xbox players join together.
Source: https://winternode.com/help/games/7-days-to-die/configuration/enabling-crossplay
Crossplay lets PC (Steam), PS5, and Xbox Series X/S players join the same 7 Days to Die server. Here's how to enable it and what to watch out for.
## Requirements
All of these must be true for crossplay to work:
- **EAC Enabled** - Easy Anti-Cheat must be on
- **No mods** - The `Mods` folder must be empty or not exist
- **Max 8 players** - ServerMaxPlayerCount must be 8 or fewer
- **World size 8192 or smaller** - WorldGenSize cannot exceed 8192
- **Same game version** - All players must be on the same version
## Enabling Crossplay
Open `serverconfig.xml` via [File Manager](/help/game-control-panel/the-file-manager) or [SFTP](/help/game-control-panel/using-sftp) and set these values:
```xml
```
Save the file and restart the server.
## Connecting from Each Platform
### PC (Steam)
1. Launch 7 Days to Die
2. Select **Join A Game**
3. Click **Connect to IP** and enter your server's IP and port
4. Or search for the server name in the browser
### PS5 / Xbox
1. Launch 7 Days to Die
2. Select **Join A Game**
3. Search for the server by name in the browser
4. Enter the password if prompted
See our [connecting guide](/help/games/7-days-to-die/connecting-to-your-7-days-to-die-server) for detailed connection steps.
## Troubleshooting
### Console players can't find the server
Check these in order:
1. EACEnabled is `true`
2. ServerAllowCrossplay is `true`
3. No files in the `Mods` folder
4. ServerMaxPlayerCount is 8 or fewer
5. WorldGenSize is 8192 or smaller
6. ServerVisibility is 2 (public) - or players have the correct IP
7. All players are on the same game version
### "Version Mismatch" error
PC and console updates don't always ship simultaneously. Wait for all platforms to update to the same version.
### Server shows in browser but won't connect
Verify the server password is correct and that the server isn't full (8 player cap applies).
For a deeper dive on crossplay features, limitations, and the mods tradeoff, see our [crossplay blog guide](/blog/7-days-to-die/7-days-to-die-crossplay-server-guide).
---
# Setting Up Scheduled Server Restarts
> Set up automatic restarts for your 7 Days to Die server to manage the memory leak and maintain performance.
Source: https://winternode.com/help/games/7-days-to-die/configuration/scheduled-restarts
7 Days to Die has a known memory leak where RAM usage gradually increases the longer the server runs. Scheduled restarts are the standard solution - most server administrators restart every 12-24 hours to keep performance stable.
## Why Restarts Matter
Without restarts, a 7DTD server's memory usage climbs steadily over time. A server that starts using 3-4GB might reach 6-8GB after 24-48 hours of continuous play, even with the same player count. This increased usage leads to:
- Gradual performance degradation
- Increased lag, especially during blood moons
- Potential crashes when memory is fully consumed
Daily restarts reset memory usage to baseline and keep the server running smoothly.
## Setting Up Scheduled Restarts
### Using the Schedule Manager
WinterNode's [Schedule Manager](/help/game-control-panel/the-schedule-manager) lets you automate server restarts on a recurring schedule.
1. Open your Game Control Panel
2. Go to **Advanced > Schedules** (or **Schedule Manager**)
3. Create a new schedule
4. Set the action to **Restart Server**
5. Set the schedule using cron syntax
### Recommended Schedule
**Daily restart at 5:00 AM UTC:**
```
Minute: 0
Hour: 5
Day of Month: *
Month: *
Day of Week: *
```
This translates to a cron expression of `0 5 * * *`.
Pick a time when your server typically has the fewest players online. Early morning (UTC) works for most groups.
### Twice-Daily Restarts (Heavy Use)
For servers with high player counts, heavy mod loads, or if you notice performance degradation within 12 hours:
**Restart at 5:00 AM and 5:00 PM UTC:**
```
Minute: 0
Hour: 5,17
Day of Month: *
Month: *
Day of Week: *
```
Cron expression: `0 5,17 * * *`
## Pre-Restart Warnings
The Schedule Manager restarts the server immediately at the scheduled time. There's no built-in warning system for connected players.
To give players a heads-up, you have a few options:
- **Server description** - Add restart times to your ServerDescription in serverconfig.xml so players can see when restarts happen
- **Discord announcement** - If your group uses Discord, post the restart schedule in a pinned message
- **CSMM or Server Tools mod** - If you're running mods, some server management tools can send in-game chat warnings before scheduled events
## Timing Restarts Around Blood Moons
If possible, avoid scheduling restarts during or right before blood moon nights. A restart mid-horde loses all progress on that blood moon.
With default settings (BloodMoonFrequency 7, DayNightLength 60), blood moon nights happen approximately every 7 real-time hours of server uptime. Since this doesn't align neatly with a 24-hour restart schedule, occasional conflicts are unavoidable - but picking a consistent off-peak restart time minimizes disruption.
## Verifying Restarts Are Working
After setting up the schedule:
1. Check the server's uptime after the scheduled restart time
2. The server console log should show a clean startup
3. Monitor RAM usage patterns - you should see periodic drops back to baseline rather than continuous climbing
---
# serverconfig.xml Settings Reference
> Complete reference for every important 7 Days to Die serverconfig.xml setting with recommended values by playstyle.
Source: https://winternode.com/help/games/7-days-to-die/configuration/serverconfig-xml-settings
This is a reference guide for the most important settings in your 7 Days to Die server's `serverconfig.xml` file. Settings are organized by category with defaults and recommended values.
## Editing Your Settings
Many settings can now be changed directly from **Server Options** in your Game Control Panel, no file editing required. Everything else still requires editing `serverconfig.xml` through:
- **File Manager** - Navigate to the root directory in your [Game Control Panel](/help/game-control-panel/the-file-manager), find serverconfig.xml, and edit in-browser
- **SFTP** - Connect via [SFTP](/help/game-control-panel/using-sftp) and edit locally
After making changes through File Manager or SFTP, restart the server for them to take effect. Changes made through **Server Options** apply automatically on the next restart.
{/* TODO: confirm exact Server Options field labels and navigation path with NUA before publishing */}
## Server Settings
These can be edited on the **Server Options** page:
| Setting | Default | Configurable Via | Description |
|---------|---------|-------------------|-------------|
| `ServerName` | "A WinterNode Server" | **Server Options** | Name shown in the server browser |
| `ServerDescription` | "7 Days to Die hosted by WinterNode.com" | **Server Options** | Description shown in the server browser |
| `ServerPassword` | "" | **Server Options** | Password required to join (blank = no password) |
| `ServerLoginConfirmationText` | "" | **Server Options** | Text shown to players in a confirmation prompt before they join |
| `ServerWebsiteURL` | "winternode.com" | **Server Options** | Website link shown in the server browser listing |
| `Region` | NorthAmericaEast | **Server Options** | Region shown in the server browser. Locked to a fixed list of valid regions |
| `Language` | English | **Server Options** | Primary language shown in the server browser listing |
| `ServerMaxPlayerCount` | 8 | **Server Options** | Maximum simultaneous players |
| `ServerPort` | 26900 | serverconfig.xml only | Game connection port (TCP) |
| `ServerVisibility` | 2 | serverconfig.xml only | 0 = not listed, 1 = friends only, 2 = public |
| `EACEnabled` | true | serverconfig.xml only | Easy Anti-Cheat. Must be true for crossplay, false for mods |
| `ServerAllowCrossplay` | false | serverconfig.xml only | Enable crossplay with PS5/Xbox. Requires EAC on |
## Player Slots
| Setting | Default | Configurable Via | Description |
|---------|---------|-------------------|-------------|
| `ServerReservedSlots` | 0 | **Server Options** | Number of slots reserved for players with the required permission level |
| `ServerReservedSlotsPermission` | 100 | **Server Options** | Permission level required to use a reserved slot |
| `ServerAdminSlots` | 0 | **Server Options** | Number of slots reserved for admins, usable even when the server is full |
| `ServerAdminSlotsPermission` | 0 | **Server Options** | Permission level required to use an admin slot |
## World Generation
| Setting | Default | Configurable Via | Description |
|---------|---------|-------------------|-------------|
| `WorldGenSeed` | "asdf" | **Server Options** | Seed for procedural world generation |
| `WorldGenSize` | 6144 | **Server Options** | Map size. Locked to 6144, 8192, or 10240. Larger = more RAM needed |
| `GameName` | "My Game" | **Server Options** | World save name. Changing this loads/creates a different world |
| `GameWorld` | "RWG" | **Server Options** | RWG (Random World Gen) or a pre-made map name like "Navezgane" |
## Gameplay Settings
| Setting | Default | Configurable Via | Description |
|---------|---------|-------------------|-------------|
| `GameDifficulty` | 2 | **Server Options** | 0 (Scavenger) to 5 (Insane). Affects zombie HP/damage and loot |
| `PlayerKillingMode` | 3 | serverconfig.xml only | 0 = no PvP, 1 = allies only, 2 = strangers only, 3 = everyone |
| `DayNightLength` | 60 | serverconfig.xml only | Real minutes per in-game day |
| `DayLightLength` | 18 | serverconfig.xml only | In-game hours of daylight (out of 24) |
| `XPMultiplier` | 100 | serverconfig.xml only | XP gain percentage (50 = half, 200 = double) |
| `LootAbundance` | 100 | serverconfig.xml only | Loot spawn amount (50 = half, 200 = double) |
| `LootRespawnDays` | 7 | serverconfig.xml only | Days before looted containers respawn |
| `AirDropFrequency` | 72 | serverconfig.xml only | In-game hours between airdrops (0 = disabled) |
| `DropOnDeath` | 1 | serverconfig.xml only | 0 = nothing, 1 = everything, 2 = toolbelt only, 3 = backpack only, 4 = delete all |
| `DropOnQuit` | 0 | serverconfig.xml only | Same options as DropOnDeath, triggered on disconnect |
## Blood Moon Settings
| Setting | Default | Configurable Via | Description |
|---------|---------|-------------------|-------------|
| `BloodMoonFrequency` | 7 | serverconfig.xml only | In-game days between blood moons |
| `BloodMoonRange` | 0 | serverconfig.xml only | Random variance in days (0 = exact, 2 = +/- 2 days) |
| `BloodMoonWarning` | 8 | serverconfig.xml only | In-game hour when the sky turns red (warning) |
| `BloodMoonEnemyCount` | 8 | serverconfig.xml only | Max alive zombies per player during blood moon |
See our [blood moon performance guide](/help/games/7-days-to-die/configuration/blood-moon-performance-settings) for tuning recommendations.
## Zombie and Spawn Settings
| Setting | Default | Configurable Via | Description |
|---------|---------|-------------------|-------------|
| `MaxSpawnedZombies` | 64 | serverconfig.xml only | Global maximum zombies on the server at once |
| `MaxSpawnedAnimals` | 50 | serverconfig.xml only | Global maximum animals on the server at once |
| `EnemySpawnMode` | true | serverconfig.xml only | Enable/disable zombie spawning entirely |
| `EnemySenseMemory` | 60 | serverconfig.xml only | Seconds zombies remember a player after losing line of sight |
| `BlockDamagePlayer` | 100 | serverconfig.xml only | Player block damage multiplier (%) |
| `BlockDamageAI` | 100 | serverconfig.xml only | Normal zombie block damage multiplier (%) |
| `BlockDamageAIBM` | 100 | serverconfig.xml only | Blood moon zombie block damage multiplier (%) |
## Performance Settings
| Setting | Default | Configurable Via | Description |
|---------|---------|-------------------|-------------|
| `ServerMaxAllowedViewDistance` | 12 | serverconfig.xml only | Max chunk view distance. Lower = less server load |
| `MaxQueuedMeshLayers` | 1000 | serverconfig.xml only | Mesh generation queue size. Lower if lag is constant |
## Land Claim Settings
| Setting | Default | Configurable Via | Description |
|---------|---------|-------------------|-------------|
| `LandClaimSize` | 41 | serverconfig.xml only | Protected area size (blocks) around a land claim |
| `LandClaimDeadZone` | 30 | serverconfig.xml only | Minimum distance between land claims |
| `LandClaimExpiryTime` | 7 | serverconfig.xml only | Days before an offline player's claim expires |
| `LandClaimOnlineDurabilityModifier` | 4 | serverconfig.xml only | Block durability multiplier when owner is online |
| `LandClaimOfflineDurabilityModifier` | 4 | serverconfig.xml only | Block durability multiplier when owner is offline |
## Recommended Presets
### PvE Casual
```xml
```
### PvE Hardcore
```xml
```
### PvP
```xml
```
For more detailed explanations of each preset, see our [server settings blog guide](/blog/7-days-to-die/best-7-days-to-die-server-settings).
---
# How to Connect to Your 7 Days to Die Server
> Easily connect to your 7 Days to Die server on WinterNode.
Source: https://winternode.com/help/games/7-days-to-die/connecting-to-your-7-days-to-die-server
Connecting to a 7 Days to Die server is a simple process, start by either getting the IP from the server owner or by getting it from the GCP if you're the server owner.
## Getting the IP
You can get the IP from the GCP by following the steps on [this article](/help/getting-started/connecting).
## Connecting
Using the IP from [the section above](#getting-the-ip) or the server owner, you can follow these steps to connect.
## Option 1 (Recommended): Connect to IP In-Game
Open the game.
In the menu, click "Join A Game"
At the bottom, click "Connect to IP"
In the popup, insert your Server's IP Address and Port into their respective fields.
If your server has a password set, you will be prompted to provide the password.
You'll then be connected to the server!
## Option 2: Connect through Steam Client
You can also connect using the [Steam Server Browser](/help/general-utilities/steam/connecting-to-steam-servers).
Open the Steam client.
In the top bar, select `View > Game Servers`.
Click the `+` button in the bottom right to add the server to your favorite servers.
In the Server Address section, paste your server's `IP:PORT`. If you set a password, you will need to enter that in the Password field.
After the server has been added, you'll see it in the server list.
Click the server, then select `Join Game`.
---
# How to Install Darkness Falls
> Install the Darkness Falls overhaul mod on your 7 Days to Die server. Covers version requirements, installation, and world generation.
Source: https://winternode.com/help/games/7-days-to-die/setup/installing-darkness-falls
Darkness Falls is the most popular overhaul mod for 7 Days to Die, adding a class system, tiered progression, demon enemies, custom world generation, and significantly increased difficulty.
## Requirements
| Requirement | Value |
|-------------|-------|
| Minimum RAM | 8 GB (10 GB recommended) |
| EAC | Must be disabled |
| Crossplay | Not available (EAC off) |
| Game version | V1.x (contact support to downgrade) |
| Client installation | Required for all players |
## Step 1: Download Darkness Falls
Download the latest Darkness Falls version from the official source:
- [Darkness Falls on 7daystodiemods.com](https://7daystodiemods.com/darkness-falls-mod/)
- Or the mod's official forum thread
The download is several hundred MB.
## Step 2: Prepare Your Server
1. **Set the correct game version** - Contact WinterNode support to set your server to the V1.x version that matches Darkness Falls requirements
2. **Disable EAC** - Edit `serverconfig.xml` via [File Manager](/help/game-control-panel/the-file-manager) or [SFTP](/help/game-control-panel/using-sftp) and set `EACEnabled` to `false`
3. **Set RAM to 8GB or higher** - Darkness Falls needs more memory than vanilla. Upgrade through your billing panel if needed
## Step 3: Upload via SFTP
Darkness Falls is too large for comfortable File Manager uploads. Use [SFTP](/help/game-control-panel/using-sftp) instead.
1. Connect to your server via [SFTP](/help/game-control-panel/using-sftp)
2. Navigate to the server root directory
3. Create a `Mods` folder if one doesn't exist
4. Extract the Darkness Falls download on your computer
5. Upload the Darkness Falls folder into `Mods/`
The folder structure should be:
```
Mods/
└── DarknessFallsV6/ (or whatever the folder is named)
├── ModInfo.xml
├── Config/
├── Resources/
└── ...
```
## Step 4: First Launch and World Generation
1. Start the server through the Game Control Panel
2. **Wait for world generation to complete** - This takes 15-30+ minutes on first launch
The server console will show world generation progress. Do not restart the server during this process. Interrupting world generation will corrupt the save and you'll need to start over.
## Step 5: Client Installation
Every player needs to install Darkness Falls on their PC:
1. Download the same version of Darkness Falls
2. Place the mod folder in the `Mods` folder of their local 7DTD game installation
3. Launch the game without EAC (select "Play without anti-cheat" at the launcher)
4. Connect to the server using the IP and port
All players must have the exact same Darkness Falls version installed.
## Troubleshooting
### World generation seems stuck
Darkness Falls world generation is slow by design. Check the server console for progress messages. If the console is still showing generation activity, it's working - just wait.
### Server crashes during world gen
This usually means insufficient RAM. Upgrade to at least 8GB (10GB recommended) and try again.
### "Mod version mismatch" on connection
Server and client must have the exact same Darkness Falls version. Verify both are using the same download.
### Custom POIs not appearing
If the world generated before the mod was properly installed, the custom POIs won't be present. You'll need to wipe the world save and regenerate.
For general mod installation help, see our [mod installation guide](/help/games/7-days-to-die/setup/installing-mods). For other overhaul mods that are compatible with V2.x, see our [server mods blog guide](/blog/7-days-to-die/best-7-days-to-die-server-mods).
---
# How to Install Mods on Your 7 Days to Die Server
> Step-by-step guide to installing modlets on your 7 Days to Die server via File Manager or SFTP.
Source: https://winternode.com/help/games/7-days-to-die/setup/installing-mods
7 Days to Die uses a folder-based mod system. Mods (called "modlets") go in a `Mods` folder in your server's root directory. Each mod is a folder containing a `ModInfo.xml` file and the mod's content files.
## Before You Start
**EAC must be disabled for mods to work.** Edit `serverconfig.xml` via [File Manager](/help/game-control-panel/the-file-manager) or [SFTP](/help/game-control-panel/using-sftp) and set `EACEnabled` to `false`, then restart the server.
## Step 1: Create the Mods Folder
If a `Mods` folder doesn't already exist in your server's root directory, create one:
1. Open the [File Manager](/help/game-control-panel/the-file-manager) in your Game Control Panel
2. Navigate to the root directory
3. Click **Create Directory** and name it `Mods`
## Step 2: Download the Mod
Download mods from trusted sources:
- [7daystodiemods.com](https://7daystodiemods.com/)
- [Nexus Mods](https://www.nexusmods.com/7daystodie/mods/)
- The mod's official GitHub or forum page
Most mods download as a `.zip` file. Extract it on your computer first.
## Step 3: Find the ModInfo.xml
After extracting, look for the folder that contains `ModInfo.xml`. This is the mod's root folder. The structure should look something like this:
```
MyModName/
├── ModInfo.xml
├── Config/
│ └── (XML patch files)
├── Resources/
│ └── (optional asset bundles)
└── UIAtlases/
└── (optional custom icons)
```
The folder containing `ModInfo.xml` is what you upload. Not the zip file, not a parent folder - the folder with `ModInfo.xml` directly inside it.
## Step 4: Upload to the Server
Upload the mod folder into your server's `Mods` directory:
**Using File Manager:** Navigate to `Mods/`, then upload the mod folder. For single files, use the upload button. For folders with subfolders, use [SFTP](/help/game-control-panel/using-sftp) instead.
**Using SFTP:** Connect to your server via [SFTP](/help/game-control-panel/using-sftp) and drag the mod folder into the `Mods` directory.
The final path should look like:
```
Mods/
├── MyModName/
│ ├── ModInfo.xml
│ └── Config/
├── AnotherMod/
│ ├── ModInfo.xml
│ └── Config/
```
## Step 5: Restart the Server
Restart your server through the Game Control Panel. Check the server console output for mod loading messages. Successfully loaded mods will appear in the console log.
## How XML Mods Sync to Clients
For modlets that only modify XML files (which is most of them), the server automatically pushes the changes to connecting clients. Players don't need to install anything - they just connect and the mod's XML changes are applied.
**However**, mods with custom assets (icons, models, textures, sounds) need to be installed on each player's client as well. The asset files don't sync automatically. The mod's documentation will specify whether client installation is required.
## Installing Multiple Mods
You can install multiple modlets at the same time. Each one goes in its own folder inside `Mods/`. Most modlets are compatible with each other since they use XML patching rather than file replacement.
**Overhaul mods are the exception.** Only install one overhaul mod at a time (Darkness Falls, Age of Oblivion, Rebirth, etc.). They modify the same core systems and will conflict. For overhaul mod installation, see the specific guide for the mod you're using:
- [Installing Darkness Falls](/help/games/7-days-to-die/setup/installing-darkness-falls)
## Troubleshooting
### Mod not loading
- Verify `ModInfo.xml` exists directly inside the mod folder (not nested in a subfolder)
- Check the server console for error messages
- Verify EAC is disabled
- Make sure the mod is compatible with your game version (V2.5)
### Server won't start after adding a mod
- Remove the mod folder and restart to confirm it's the cause
- Check for XML syntax errors in the mod's config files
- Verify you didn't accidentally modify any vanilla files outside the Mods folder
### Players can't connect after adding mods
- If console players can't connect, that's expected - mods require EAC off, which disables crossplay
- If PC players can't connect, they may need to disable EAC on their client as well (launch without anti-cheat)
- If the mod requires client-side installation, players need to install the mod on their PC too
---
# How to Become an Admin on Your Abiotic Factor Server
> Add your SteamID64 to Admin.ini to gain administrator privileges on your Abiotic Factor server.
Source: https://winternode.com/help/games/abiotic-factor/administration/become-an-admin
## Adding an Admin
To grant a player admin privileges on your Abiotic Factor server, add their [SteamID64](/help/general-utilities/steam/steamid64) to the `Admin.ini` file located at `AbioticFactor/Saved/SaveGames/Server/Admin.ini` using the [GCP File Manager](/help/game-control-panel/the-file-manager) or [SFTP](/help/game-control-panel/using-sftp). Place each SteamID64 on its own line.
## Removing an Admin
To revoke admin access, remove the player's SteamID64 line from `Admin.ini` and restart the server.
---
# Abiotic Factor Server Options
> Configure your Abiotic Factor server name, password, and player limit from the Server Options page in the WinterNode Game Control Panel.
Source: https://winternode.com/help/games/abiotic-factor/configuration/server-options
Configure your Abiotic Factor server's name, password, and player limit from the **Server Options** page in the Game Control Panel.
## Accessing Server Options
1. Log in to the [Game Control Panel](https://gcp.winternode.com).
2. Select your Abiotic Factor server.
3. Go to **Server Options**.
## Options Reference
### Server Name
Labeled **[SERVER] Server Name** in the panel. The name of your server as it appears to players.
---
### Server Password
Labeled **[SERVER] Server Password** in the panel. The password required for players to join your server. Leave blank for a public server with no password.
---
### Number of Players
Labeled **[SERVER] Number of Players** in the panel. The maximum number of player connections allowed on your server at once. Abiotic Factor defaults to a 6-player co-op cap, but dedicated servers can raise this limit for larger crews.
---
# How to Connect to an Abiotic Factor Server
> Connect to your Abiotic Factor server using Direct Connect and your server IP and port, with notes on passwords and console crossplay.
Source: https://winternode.com/help/games/abiotic-factor/quick-start/connecting-to-abiotic-factor-servers
You can join your Abiotic Factor server through the game client using the steps below. Make sure you have your [server IP and port](/help/getting-started/connecting#finding-your-ip-and-port) from the Game Panel first.
## Follow these steps to connect:
1. Launch Abiotic Factor.
2. From the main menu, select "Join Game."
3. Choose the "Direct Connect" tab.
4. Enter your server's IP and port in the address field.
5. Enter the server password if one is set.
6. Click "Connect" to load into the server.
---
# Back Up Your ARK Server
> Back up your ARK server manually or use the automatic backup system. Covers save file locations, backup schedules, and restoring from .bak files.
Source: https://winternode.com/help/games/ark/administration/backup-your-ark-server
WinterNode takes [automatic backups](/help/getting-started/backup-system) of your entire server every 12 hours, and you can request a restore through a support ticket. ARK also keeps its own rolling backups next to your live save, which you can restore yourself.
## Quick answer
- **Everything lives in `/ShooterGame/Saved/SavedArks`**, live saves and ARK's backups alike. Open **File Manager** from your server's sidebar.
- **Manual backup:** tick the files you want, then click **Archive** in the toolbar. You get an `archive-{date}.tar.gz`.
- **Restore an ARK backup:** stop the server, rename the live file out of the way, rename the backup to the live file's name, start the server.
## What is in the save folder
Your three live files are the world, named after your map (`TheIsland.ark`), one `.arkprofile` per player, and one `.arktribe` per tribe. Player files are named after the player's Steam account ID, which ARK also calls their UE4 ID, and tribe files after the tribe ID.
ARK backs each of those up on its own schedule, into the same folder:
| Backup file | Backs up | Written when | Restore it when |
| --- | --- | --- | --- |
| `TheIsland_AntiCorruptionBackup.bak` | The world | Every server start. Only one is kept | The world is corrupt or will not load, and you can accept losing progress since the last start |
| `TheIsland` plus a date and time stamp, ending `.ark` | The world | Every 3 hours while the server runs. Several are kept, the exact limit is unclear | You want to roll the world back to a specific point in time |
| `76561198000000000.profilebak` | One player | Every time that player logs in. Only the most recent is kept | A player lost levels, engrams, or their character |
| `1234567890.tribebak` | One tribe | On server start and when a tribe member joins. Only the most recent is kept | Tribe ownership, ranks, or membership are wrong |
## Taking a manual backup
A manual backup is worth having before anything destructive, on top of ARK's own backups and ours.
In **File Manager**, navigate to `/ShooterGame/Saved/SavedArks`, tick the check boxes next to the files you want, then click **Archive** in the toolbar. You'll end up with a new file named `archive-{date}.tar.gz`. Our [manual backup guide](/help/game-control-panel/manual-backup#creating-an-archive) covers archiving in full, including how to get the archive off the server and store it somewhere safe.
## Automatic backups
ARK's own backups sit in the same folder as the live data, so restoring one is a matter of renaming a file. The table above covers what each backup holds and when ARK writes it. To restore one, rename it to the name of the live file it replaces:
1. Stop the server.
2. Rename the live file out of the way, for example `TheIsland.ark` to `TheIsland.ark.old`. Keep it until you're sure the restore worked.
3. Rename the backup to the live file's name, for example `TheIsland_AntiCorruptionBackup.bak` to `TheIsland.ark`.
4. Start the server.
---
# How to Enable Crossplay on Your ARK Server
> Enable crossplay between Steam and Epic Games Store clients on your ARK server by adding the -crossplay startup parameter.
Source: https://winternode.com/help/games/ark/configuration/enabling-crossplay
Allow Epic Games Store (EGS) players to join your Steam-based ARK server by adding the `-crossplay` startup parameter.
## What Crossplay Supports
ARK crossplay connects **Steam** and **Epic Games Store** clients only. There is no crossplay between Steam/EGS and console platforms (PlayStation, Xbox, or Windows Store).
This feature was introduced in patch [311.74](https://ark.wiki.gg/wiki/311.74). EGS players connect using the same server address as Steam players.
## Enabling Crossplay
1. Log in to the [Game Control Panel](https://gcp.winternode.com) and select your ARK server
2. Navigate to **Server Options**
3. Find the **[ADMIN] Additional Arguments** field (or see [Startup Parameters](/help/games/ark/configuration/startup-parameters#additional-arguments))
4. Add `-crossplay` to the field
5. Save and restart your server
EGS clients can now connect to your server using the same IP and port.
## Testing the Connection
After enabling crossplay, verify it's working:
1. Have an EGS player open ARK and go to **Join ARK**
2. They should search for the server by name in the unofficial server list, or use **Direct Connect** with the server IP and port
3. If the server doesn't appear in the list, direct connect is the more reliable method
## Limitations
- **No mod support for EGS clients.** EGS players don't have access to the Steam Workshop. Running your server with any mods enabled will prevent EGS clients from connecting. This is the most common reason crossplay doesn't work after enabling it.
- **Server list visibility.** EGS players may not always see the server in the browser. Direct connect by IP is more reliable.
- **No console crossplay.** Steam/EGS crossplay does not extend to PlayStation, Xbox, or Windows Store versions of ARK.
---
# ARK Server Configuration Guide
> Configure your ARK server using GameUserSettings.ini, Game.ini, and command line arguments. Covers XP, taming, harvesting, and spoil rate multipliers.
Source: https://winternode.com/help/games/ark/configuration/guide
ARK's server settings live in two `.ini` files, and most of them can also be passed as command line arguments. Here is where the files are and how to change them.
## Quick answer
- **Both files are in `/ShooterGame/Saved/Config/LinuxServer`**, reachable from **File Manager** in your server's sidebar.
- **`GameUserSettings.ini`** arrives with defaults filled in. Most server settings go under `[ServerSettings]`.
- **`Game.ini`** starts empty. You add the section headers and settings yourself.
- **No file editing needed:** most options also work as command line arguments through the [Additional Arguments](/help/games/ark/configuration/startup-parameters#additional-arguments) server option.
- The [ARK Wiki](https://ark.wiki.gg/wiki/Server_configuration) documents every option, including the command line only ones. Every setting described on this page is from there.
## Locating the configuration files
ARK has two main configuration files when it comes to server behavior, `GameUserSettings.ini` and `Game.ini`. Open **File Manager** from your server's sidebar and navigate to `/ShooterGame/Saved/Config/LinuxServer`.
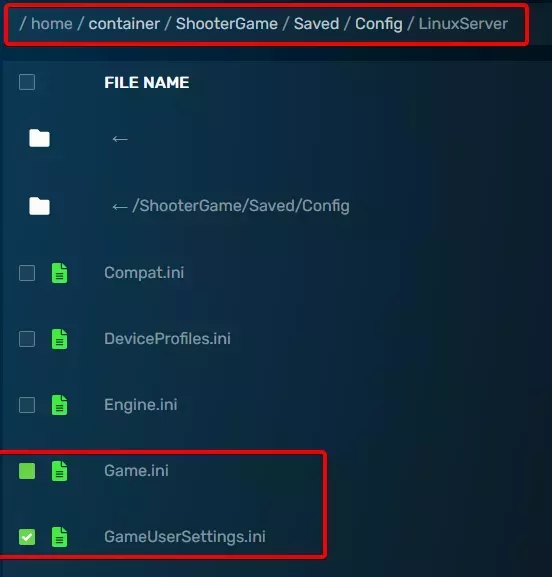
## Using the `.ini` files
Between them, the two files hold nearly every server and client option. Client options have no effect on your server, but they can sit in the file harmlessly.
- **`GameUserSettings.ini`** contains a set of defaults. Plenty of valid options are missing from it and you append those into the right section yourself. Sections are titled in `[]`, and settings recommendations usually name the section an option belongs to.
- **`Game.ini`** is empty until you write to it. It is also the only home for the `[/script/shootergame.shootergamemode]` options, which cannot be set on the command line.
## Using the command line
Most configuration options work on the command line as well, and some work _only_ there. Add them through the [Additional Arguments](/help/games/ark/configuration/startup-parameters#additional-arguments) server option, using the name the option has in its configuration file prefixed with a space and `-`, followed by `=` and the value.
Arguments the Wiki writes with a `?` can be split apart the same way, which is usually easier to read. Instead of `?AllowAnyoneBabyImprintCuddle=true?AllowFlyerCarryPvE=true`, write `-AllowAnyoneBabyImprintCuddle=true -AllowFlyerCarryPvE=true`.
## Common configuration options
These are the settings people change most often, and they double as an example of how to find and set any other option. None of them are present by default, so append each one under the section header listed below.
| Setting | File | Section | Default | What it changes |
| --- | --- | --- | --- | --- |
| `XPMultiplier` | `GameUserSettings.ini` | `[ServerSettings]` | `1.0` | Scales experience earned by players, tribes, and dinosaurs for every action. `1.0` matches singleplayer and official servers. Note that patch 313.5 activated an additional hardcoded multiplier of 4 on top of whatever you set. |
| `TamingSpeedMultiplier` | `GameUserSettings.ini` | `[ServerSettings]` | `1.0` | Scales dinosaur taming speed. Higher values tame faster. |
| `HarvestAmountMultiplier` | `GameUserSettings.ini` | `[ServerSettings]` | `1.0` | Scales yields from all harvesting: chopping trees, picking berries, carving carcasses, mining rocks. Higher values return more materials per strike. |
| `GlobalSpoilingTimeMultiplier` | `Game.ini` | `[/script/shootergame.shootergamemode]` | `1.0` | Scales the spoiling time of perishables globally. Higher values prolong the time before items spoil. |
---
# ARK Server Options
> Easily configure your ARK server on the WinterNode Game Panel. Follow step-by-step instructions for optimal setup and performance.
Source: https://winternode.com/help/games/ark/configuration/startup-parameters
The WinterNode Game Control Panel provides a few easily configurable options under the `Server Options` tab on your server page. These options make use of common command line arguments and are needed for the server to function as expected, but may be changed as needed using the fields provided in the modals.
### Server Password
The server password is required every time a player logs into the server from the ARK client. If left empty any player can join your server.
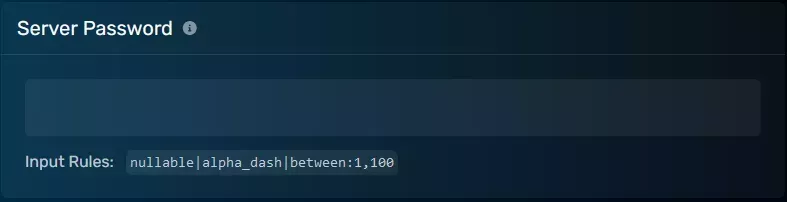
### Admin Password
The admin password is used to connect to your server's RCON server as well as to enable cheats for players in-game using the `EnableCheats ` command. Make sure that you choose a secure Server Password!
### Server Map
ARK provides a number of default maps either as part of the base game or as part of DLCs, you can also install 3rd party maps using the [Mods](#mods) server option. The default map strings can be found by mousing over the `I` next to the modal title, and 3rd party map IDs can normally be found as part of the workshop description.
### Server Name
The server name is what is displayed to players when they view the server in-game or in the steam server list.
### Rcon Port
The RCON Port is a port used internally to send commands to the server and confirm that it successfully started. You shouldn't need to change this under normal operation.
### Query Port
The Query Port is the port players used to connect to the server. You shouldn't need to change this under normal operation.
### Auto-update Server
This value changes whether or not the server should self-update when it starts. If you want to update your server to the latest patch, change it to `1`, otherwise leave it at `0` so that you don't get any unexpected updates that may break mods or settings.
### Battle Eye
The Battle Eye server option enables or disables the requirement for the Battle Eye anti-cheat system to be installed and enabled on a player's client when they connect to the server. Set this to `0` if you don't want players to have to have Battle Eye, or `1` you want to enforce Battle Eye usage.
### Additional Arguments
You can add additional startup arguments to the server using this field, making sure that they are valid arguments and will parse correctly.
### Mods
You can add mods to your server using the command line arguments introduced in introduced in patches [190.0](https://ark.wiki.gg/wiki/190.0), and [244.3](https://ark.wiki.gg/wiki/244.3). For more information on how to use this system, check out our article on [Installing ARK mods](/help/games/ark/setup/installing-mods).
### Max Players
You can limit the maximum number of players that can connect to your server by entering an integer into the Max Player field. There is no limit by default, but this can be useful for public servers.
---
# How to Connect to Your ARK Server
> Easily connect to your ARK server on WinterNode by using the correct Server Query Port and Steam client for a smooth multiplayer experience.
Source: https://winternode.com/help/games/ark/quick-start/connecting-to-ark-servers
Getting your ARK Server in the public server list is a game of chance and longevity, so you can’t rely on your server showing up there for your players. As a result there are a couple of methods to add your server to a players list and to give your server IP to players for easy connection.
## Locating your server IP and port.
Due to limitations of our current panel and the configuration options provided by the ARK Server Software, the primary IP and port visible on the panel is not the address you need to use when connecting to your server. You need the Server Query Port as defined in the `Configuration` → `Server Options` page on the Game Control Panel when viewing your server.
As shown below, you should see a number in the text box labeled Server Query Port. That's the port you'll need to place at the end of your server's IP address instead of the one provided by the panel. For example, you may get this IP when looking at your server's console `111.111.111:7777` and you'll see the Server Query Port listed as `27015`. To get the correct IP address and port you'll remove the existing numbers after the `:` character and add `27015` instead. This should give you `111.111.111:27015`.

## Connecting to your Server
The ARK Dedicated server uses Steam, so you can use the [Steam Client](/help/general-utilities/steam/connecting-to-steam-servers) to add your server to your Ark Favorites. Your server will now appear in your server list when the "Session Filter" is set to "Favorites", as seen in the image to the right.
*You may have to click the "Refresh" button to update the server list*.
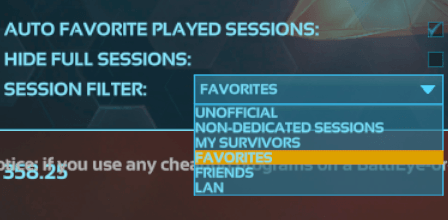
---
# ARK Server Quick Start Guide
> Learn how to set up maps, passwords, and Battle Eye for your ARK server on WinterNode, with tips for secure and easy multiplayer management.
Source: https://winternode.com/help/games/ark/quick-start/overview
### Setting your default/modded Server Map
ARK provides a number of default maps as part of the base game or DLC and you can also install 3rd party maps from the steam workshop using the [Mods](/help/games/ark/configuration/startup-parameters#mods) server option then following the steps in our [Installing ARK Mods](/help/games/ark/setup/installing-mods) article. The [Server Map](/help/games/ark/configuration/startup-parameters#server-map) server option is then used to select the map you want either by using the ID provided by the game, which you can find my hovering on the `I` next to modal title, or by using the ID provided by the mod author.
### Setting your Server Password
If you want to limit who can join your server you'll need to set a server password. This would be required every time a player logs into the server from the ARK client and would need to be shared with the players you want to be able to join your server. WinterNode uses the command line to define the server password and you can provide the password you want to use by editing the [Server Password](/help/games/ark/configuration/startup-parameters#server-password) server option located on the `Server Options` tab and restarting your server.
### Setting your Admin Password
The Admin Password is used to enable cheats in-game for players using the `EnableCheats ` command and for connecting to the server's RCON server. The default password provided by WinterNode should be a randomly generated string and can be found in the [Admin Password](/help/games/ark/configuration/startup-parameters#admin-password) server option located on the `Server Options` tab. You can change your Admin Password for ease of use, if it gets leaked, or if you just want to by changing the value in the [Admin Password](/help/games/ark/configuration/startup-parameters#admin-password) server option and restarting your server.
### Disabling Battle Eye
Bye default, Battle Eye is enabled and required for players to log in to your server. This means that any player who wants to play on your server will also need Battle Eye Anti-Cheat installed and running when they connect. If you don't want to have that requirement, you can change the [Battle Eye](/help/games/ark/configuration/startup-parameters#battle-eye) server option located on the `Server Options` tab to a `0` instead of a `1`, then restarting your server. This uses the `-NoBattlEye` command line argument to disable Battle Eye on the server and remove the requirement to have it installed locally when joining the server.
---
# ARK Server Waiting for RCON Connection
> Understand why the server console takes some time to authenticate into RCON.
Source: https://winternode.com/help/games/ark/quick-start/waiting-for-rcon-connection
When your ARK Server starts the console will show a repeating connection attempt being made to a local RCON server. This is 100% normal and expected because ARK does not expose a standard console application, instead we have to wait for the server to start and then connect over RCON, which is a protocol for sending commands remotely to game servers.
This is what you'll see when the console attempts a local RCON connection:
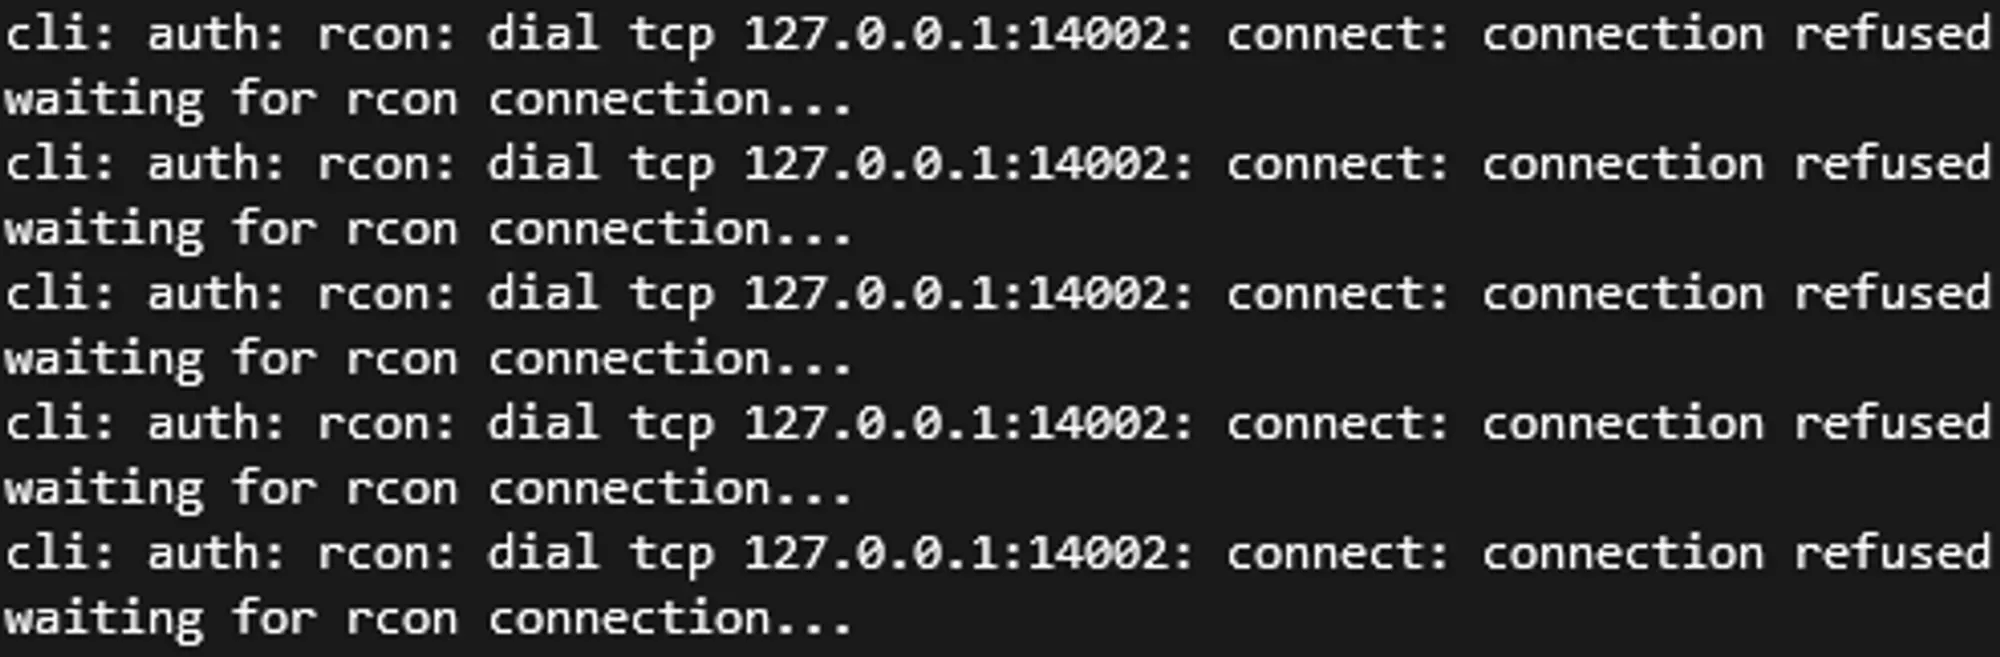
When the RCON connection is successfully established, you'll see this in the console:

Since we have to wait for the server to start, we attempt a connection to the RCON Server ever few seconds to see if it’s started yet. Once the server has started and accepts the connection, the console will connect to it and you’ll see the line `Waiting commands for 127.0.0.1: (or type :q to exit)`. This shouldn’t take more than 10 minutes. If it does, please reach out to our Support Team!
---
# How to Install Mods on Your ARK Server
> Install and manage ARK mods easily on your WinterNode server using ModIDs and the Game Control Panel, with automatic updates and simple removal steps.
Source: https://winternode.com/help/games/ark/setup/installing-mods
ARK has a very active modding community that posts mods to [ARK's Steam WorkShop](https://steamcommunity.com/workshop/browse/?appid=346110&requiredtags[]=Mod) under the Mod tag. You can install mods on your ARK server for community provided content, bug fixes, or quality of life features. When the mod is installed on the server the game clients that connect to it will automatically sync to your servers modlist and won't require any additional setup from your players.
## Finding the ModID
The ModID is the Steam asset ID for the asset that was uploaded to the workshop and is needed for the server to locate, download, and communicate the mod you want. When browsing the workshop you can find the ModId as part of the URL, or sometimes in the mod's description. For example in the link below shown here [https://steamcommunity.com/sharedfiles/filedetails/?id=1136125765](https://steamcommunity.com/sharedfiles/filedetails/?id=1136125765) **1136125765** is the ModID.
## Installing mods
You can use WinterNode's GCP (Game Control Panel) to automatically install and update the mods when the server starts. This makes use of the command line arguments introduced in patches [190.0](https://ark.wiki.gg/wiki/190.0), and [244.3](https://ark.wiki.gg/wiki/244.3). You can provide a list of ModIDs for the server to install and update in the `Mods` Server Option located in the `Server Options` tab.
The Mods server option can be a single ModID or multiple separated by commas `,`. After entering the Id's of the mods you want to use, restart the server and you'll get a few lines in the console similar to the ones shown below showing that they're being downloaded and/or updated.
```
Downloading item 1136125765 ...
Success. Downloaded item 1136125765 to "/home/container/Steam/steamapps/workshop/content/346110/1136125765" (3070262 bytes)
```
After the mod has been installed by the server you can test it by giving yourself one of items the mod adds using the `EnableCheats` command and your admin password, or if it doesn't add any, by looking for whatever feature it adds.
## uninstalling mods
To uninstall a mod from your ARK server, you can simply remove the ModID from the Mods server option. This will stop the server from loading the mod at startup. Items and structures from the mod will be removed, but it's a good idea to [take a backup](/help/games/ark/administration/backup-your-ark-server) before removing the mod just incase anything goes wrong.
---
# How to Save Your Brickadia Server World
> Save your Brickadia server world using the br.world.saveas console command. Includes accessing the console and updating server options.
Source: https://winternode.com/help/games/brickadia/administration/how-to-save-your-world
Brickadia allows you to save your world's progress through console commands.
## Access the console
First, you will need to log in to the [Game Control Panel](https://gcp.winternode.com) and access your server. Once you've accessed your server, you will be able to access the console.
## Run BR.World.Saveas
Next, you'll be able to run the `br.world.saveas` command, which will save progress. Execute `br.world.saveas `, which will save the current world under that world name.
## Update Server Options
Lastly, stop the server. Unfortunately due to the game being in early access, you will have to update the `[GAME] World` server option to the name you used when executing `br.world.saveas`. Then, you can start the server, and your progress will be saved as that new world. If you need to download the save file directly, you can access it at `.config/Epic/Brickadia/Saved/Worlds/`.
## Need further help?
We're always available! Feel free to open a support ticket in the [Client Area](https://clients.winternode.com) or in our [Discord](https://winternode.com/discord?utm_source=help&utm_medium=article&utm_campaign=brickadia-how-to-save-your-world).
---
# How to Set a Brickadia Server Token
> Setting a dedicated server token is required for a Brickadia server to be able to start.
Source: https://winternode.com/help/games/brickadia/administration/how-to-set-a-dedicated-server-token
Setting a dedicated server token is required for a Brickadia server to be able to start. This is in order for Brickadia to verify that you own the game. The token is unique to your server.
## Logging in to your Brickadia Account
First, you need to log in to the [Brickadia website](https://brickadia.com). If you don't have an account, register one and connect it to your Steam account.
## Navigate to "My Account" and Create the Token
After logging in, click the "Account" button in the top right of the navbar or click [this link](https://brickadia.com/account).
Once you're on that page, scroll down to the "**Dedicated Server Hosting** section." You will then see a green "**Create server hosting token**" button.
After clicking that button, the website will generate your token. Copy it to your clipboard.
## Apply the Token to your Server
If you did not provide the token at checkout, you can add it in the [Game Control Panel](https://gcp.winternode.com) by accessing your server and navigating to the Server Options page under **Server Options > [SYSTEM] Dedicated Server Hosting Token**. Paste the token you copied in the above step and restart the server to apply changes.
---
# How to Connect to Your Brickadia Server
> Connect to your Brickadia server on WinterNode by getting the server IP, adding it in-game, and entering the password if required for secure multiplayer...
Source: https://winternode.com/help/games/brickadia/quick-start/connecting-to-your-brickadia-server
Connecting to a Brickadia server is a simple process, start by either getting the IP from the server owner or by getting it from the GCP if you're the server owner.
## Getting the IP
You can get the IP from the GCP by following the steps on [this article](/help/getting-started/connecting).
## Connecting
Using the IP from [the section above](#getting-the-ip) or the server owner, you can follow these steps to connect. You can also add your server to the [Steam Server Browser](/help/general-utilities/steam/connecting-to-steam-servers) to keep it in your favorites.
Open the game.
Select the **"Join Game"** button in the menu.
Click **"Manual Connect"** in the top right corner.
Paste your server's IP and Port into the server address field (where it shows 127.0.0.1 by default).
If one was specified, enter your server password.
Click "Join Game" to be connected to the server.
---
# Brickadia Server Quick Start Guide
> The first steps for understanding the steps for setting up, controlling, and maintaining your Brickadia Server.
Source: https://winternode.com/help/games/brickadia/quick-start/overview
### Connect to the Server
Connect to your server using the server IP and Port. You can get the IP from the GCP by following the steps on [this article](/help/getting-started/connecting). Use the "**Manual Connect**" option in the top right corner of the "**Join Game**" page.
### Starting the Server
In order for the server to be able to start, a Dedicated Server Token must be generated to verify game ownership. You can generate this token in the Brickadia account center under **Dedicated Server Hosting > Create server hosting token.** More details can be found on our [Set a Dedicated Server Token](/help/games/brickadia/administration/how-to-set-a-dedicated-server-token) article.
- [Set a Dedicated Server Token](/help/games/brickadia/administration/how-to-set-a-dedicated-server-token)
- [Connecting to your Server](/help/games/brickadia/quick-start/connecting-to-your-brickadia-server)
---
# Core Keeper Server Options
> Configure your Core Keeper server name, password, world settings, and player limit from the Server Options page.
Source: https://winternode.com/help/games/core-keeper/configuration/server-options
Configure your Core Keeper server's name, password, world settings, and player limit from the **Server Options** page in the Game Control Panel.
## Accessing Server Options
1. Log in to the [Game Control Panel](https://gcp.winternode.com).
2. Select your Core Keeper server.
3. Go to **Server Options**.
## Options Reference
### Server Name
The name displayed to players when joining. Defaults to `WinterNode Core Keeper`.
---
### Server Password
The password players must enter to join the server. Maximum 28 characters.
A random password is generated automatically when your server is first created. To find or change it:
1. Go to **Server Options**.
2. Find the **[CONFIG] Server Password** field. The current password is shown here.
3. Enter a new value to change it, or leave it as-is.
Share this password with anyone you want to allow onto the server.
---
### Game ID
A custom Game ID players can use to find your server through Core Keeper's built-in matchmaking. Must be at least 28 alphanumeric characters, excluding the letters Y, y, x and the characters O and 0.
Leave this field empty to have a new Game ID generated automatically each time the server starts.
---
### Max Players
The maximum number of players allowed on the server at once. Accepts any value from 1 to 100. Defaults to `100`.
---
### World Index
Selects which world slot the server loads. Defaults to `0`. Increment this to run a different world without overwriting the existing one.
---
### World Seed
The seed used when generating a new world. Set to `0` to generate a random seed. This only has an effect the first time a world is created. Changing it later will not affect an already-generated world.
---
### World Mode
Sets the difficulty for the world. Accepts `0` for Normal or `1` for Hard. Defaults to `0`.
---
### Auto Update
Controls whether the server automatically updates to the latest version on each restart. Defaults to enabled (`1`). Set to `0` to disable.
---
# How to Connect to Your Core Keeper Server
> Join your Core Keeper server using your server IP and port from the Game Control Panel.
Source: https://winternode.com/help/games/core-keeper/quick-start/connecting-to-core-keeper-servers
Join your Core Keeper server using your server's IP address and port from the Game Control Panel.
1. Open Core Keeper.
2. Click **Join Game**.
3. Next to **Join with Game ID**, click the dropdown arrow and select **Join with IP**.
4. Enter your server's IP address, port, and password in their respective fields.
5. Click **Join** to connect to the server.
---
# DayZ Server Options Reference
> A complete reference for every configurable Server Option on your WinterNode DayZ server, grouped by category.
Source: https://winternode.com/help/games/dayz/configuration/server-options
This reference explains every Server Option available on your WinterNode DayZ server, grouped by category. All options are found in the **Game Panel** under **Configuration** → **Server Options**.
## Connection and Access
**Server Name**:
The name that appears for your server in the in-game server browser.
**Max Players**:
The maximum number of players who can be connected to the server at once.
**Server Password**:
The password players must enter to join. Leave this blank to allow anyone to connect without a password.
**Admin Password**:
The password used to log in as an admin on the server through the in-game admin login.
**Steam Query Port**:
The UDP port used for the Steam server browser. This is view-only. It controls whether your server shows up in the client's server list and can't be changed after the server is created.
**RCON Port**:
The port third-party tools like Battlemetrics use to manage your server remotely. This is view-only and is set to your game port plus 3 by default.
**RCON Password**:
The password used to authenticate remote management tools connecting over RCON.
## Gameplay and World Settings
**Verify Signatures**:
When on, every connecting client must run the exact same mod versions as the server, or they'll be kicked. Turn this off only if you understand the risk of allowing mismatched mod files.
**Enforce Game Version**:
When on, only clients running the same DayZ game version as the server can connect.
**Disable Third Person**:
When on, players can only use first-person view on your server.
**Disable Crosshair**:
When on, the crosshair is hidden for all players.
**Disable Personal Light**:
When on, the faint light that normally appears above each player at night is removed.
**Darker Nights**:
When on, nighttime is darker and more realistic, making a light source more important for players.
**Persistent Time**:
When on, the server saves its in-game time on shutdown and resumes from that time on the next start, instead of resetting.
**Time Multiplier**:
Speeds up or slows down in-game time. For example, a value of 12 compresses a full 24-hour day into 2 real hours. Accepts values from 0 to 24.
**Night Multiplier**:
An additional speed multiplier applied on top of Time Multiplier, but only during nighttime. Accepts values from 0.1 to 64. A higher value makes nights pass faster relative to days.
**Disable VoN**:
When on, in-game voice chat (Voice over Network) is disabled server-wide.
**VoN Quality**:
The audio quality of in-game voice chat, from 0 to 30. Higher values sound better but use more bandwidth.
## Mods
**Modlist File**
The filename of a modlist exported from the DayZ Launcher. Upload the HTML file to your server's root directory and the server will parse it to install and load mods automatically. Leave blank if you're not using a modlist file.
**Additional Mods**:
A semicolon-separated list of client mod folders to load, useful for mods you've uploaded manually rather than through a modlist file. Folder names can't contain capital letters, spaces, or start with a number.
**Server-Side Only Mods**:
A semicolon-separated list of mods that run only on the server and aren't required by connecting clients when Verify Signatures is on.
**Make Mod Files Lowercase**
When on, converts all loaded mod folder and file names to lowercase. Turn this on for one restart after copying mods over from a Windows machine, since Windows file names aren't case-sensitive and DayZ's Linux server is.
## Advanced
**Automatic Updates**:
When on, the server checks for game and mod updates on every startup and installs them before launching.
**Validate Server Files**:
When on, the server verifies all installed files during an automatic update. This significantly increases startup time, so it's best left off unless you suspect file corruption.
**Extra Startup Parameters**:
Additional command-line launch flags passed to the server binary. See the Bohemia Interactive wiki for a full list of valid flags.
**Server Binary**:
The name of the server executable. This is view-only and shouldn't need to change.
**DayZ Dedicated Server App ID**:
The SteamCMD app ID used to install the server. `223350` installs the Stable branch and `1042420` installs the Experimental branch. This is view-only, since switching branches requires deleting and reinstalling all server files.
---
# How to Connect to Your DayZ Server
> Connect to your DayZ server using Direct Connect and save it to your favorites for easy access.
Source: https://winternode.com/help/games/dayz/quick-start/how-to-connect-to-dayz-servers
Connect to your DayZ server by adding it directly through the game client's **Direct Connect** menu.
1. Launch **DayZ** from Steam. In the launcher, click **Servers**
2. Click **Direct Connect** in the bottom right corner of the main menu
3. Paste your server's **IP Address** and **Port**, check the **Add to Favorites** box, then click **Connect**. See [Finding Your IP and Port](https://winternode.com/help/getting-started/connecting#finding-your-ip-and-port) if you aren't sure where to find your IP.
4. You'll also be able to connect in-game from that point. Your server now appears in your **Favorites** list, so you can rejoin any time without re-entering the IP and port.
---
# How to Add and Manage Admins on Your Eco Server
> Manage Eco server admins on WinterNode by editing config files or using in-game commands, with tips for adding, removing, and logging admin actions.
Source: https://winternode.com/help/games/eco/administration/eco-admins
Eco Server Admins are granted some basic moderation tools, like being able to [ban and unban players](/help/games/eco/administration/moderation), some more Eco focused permissions like modifying a player's current skills and some of the Election/Governance systems, and some debug commands that can alter the world. A player can be made into an admin by modifying the server's configuration files or by using the in-game command `/manage admin` or `/admin`. Once a player is an admin there's no built in system to limit the permissions granted.
## Add an Admin
### Using Server Configuration
You can grant a player the Admin demographic by modifying the `Users.eco` file located in the `Configs` folder on your server. You might have to make a copy of the `Users.eco.template` and remove the `.template` suffix in order to get the `Users.eco` file.
Once you've opened the `Users.eco` file, you'll want to find the `Admins` section near the bottom of the file. It should look similar to what's shown on the right.
Once you've found the `Admins` section, you'll want to get the [SteamID64](/help/general-utilities/steam/steamid64) of the Steam user that you want to give the Admin demographic. Then you'll need to enter the [SteamID64](/help/general-utilities/steam/steamid64) into the `Admins → Collection → System.String → $values` array as shown on the right. When entering multiple users, enter each one on a new line with `,` characters at the end of each entry.
After adding the admin's [SteamID64](/help/general-utilities/steam/steamid64) value to the array, you'll need to restart the server. When the user next joins they'll be notified that they are now part of the Admin demographic and will have access to all of the Admin features that Eco offers.
### Using the `/admin` command
Admins have the ability to add another player to the Admin demographic using the in-game command `/manage admin` or it's shorthand `/admin`. Running the command with no arguments will show a list of the existing server admins. Including the player's in-game username, [SteamID64](/help/general-utilities/steam/steamid64), `slgid`, or account ID as the first argument will add them to the Admin demographic. The account ID can be found by hovering over the player's username in-game wherever it appears and looking at the bottom of the description box that pops up.
## Remove an Admin
### Using Server Configuration
You can remove a players Admin role by modifying the `Users.eco` file located in the `Configs` folder on your server.
Once you've opened the `Users.eco` file, you'll want to find the `Admins` section near the bottom of the file. It should look similar to what's shown on the right with one or more entries in the `Admins → Collection → System.String → $values` array.
After locating the Admins section and looking at the array that contains the current Admins, you can either look up the [SteamID64](/help/general-utilities/steam/steamid64) of the admin you want to remove and match that to the list or you can look up each entry in the list until you find the admin you want to remove.
After removing the Steam user's [SteamID64](/help/general-utilities/steam/steamid64) value from the Admins section, you'll need to restart your server. When the user next joins they'll be notified that they've been removed from the Admin group.
### Using the `/manage removeadmin` command
Admins have the ability to remove other Admins from the demographic by running the `/manage removeadmin` command in-game. You'll need to specify the users in-game username, [SteamID64](/help/general-utilities/steam/steamid64), `slgid`, or account ID as the first parameter. The account ID can be found by hovering over the player's username in-game wherever it appears and looking at the bottom of the description box that pops up.

## Admin command log
Eco logs every command sent by an admin in a log file located in the `/Logs/admin_commands` folder. If you have access to the server's file system you can view every command the admins on the server have run in a log file that's separated by the day the command was run. If you'd like to grant one or more of your admins access to the File System of your WinterNode hosted Eco server you can check out our page on [Game Panel Sub-Users](/help/game-control-panel/securing-access/game-panel-sub-users).
---
# Eco Server Moderation Commands
> Learn how to use moderation tools on your Eco server with WinterNode, including banning, muting, and unbanning players using admin commands.
Source: https://winternode.com/help/games/eco/administration/moderation
Eco offers a few basic moderation tools for use on the general population of your server. These commands are locked behind the Admin demographic, so will require that you be part of that demographic to run them. If you aren't sure how to add a player to the Admin demographic, check out [our article on managing Eco admins](/help/games/eco/administration/eco-admins).
## Banning
You can prevent a user from rejoining the server regardless of the other limits you have in place, like a server password or whitelist, by banning them. The ban system in use by Eco is tied to the player's Steam or Strange Loop Games account (if they have one), so it can't be bypassed with username changes.
### Ban a player
You can ban a player by running the command `/manage ban` or it's shorthand `/ban` with the player's in-game username, [SteamID64](/help/general-utilities/steam/steamid64), `slgid`, or account ID as the first argument. If you'd like to provide a reason for the ban that will be shown to the player and other Admins you can add a second argument by appending a `,` character to the command after the username, like so `/ban mov51, was rude`.
You can also "tempban" a player by providing a time limit on the ban as the third argument. For example, `/ban mov51, was rude, 2d`. The time format allows for the use of one time frame suffix, `m` (minute), `h` (hour), `d` (day), or `w` (week). You can not use multiple suffixes, such as `1w2d` to make a valid time frame.
The reason argument can be left out when tempbanning a player by leaving the space empty, `/ban mov51, , 2d`, giving the player a generic banned message when they try to join.
### Unban a player
if you'd like to unban a player who has been permanently banned or still has time left on their tempban, you can run the command `/manage unban` or it's shorthand `/unban` with the player's in-game username, [SteamID64](/help/general-utilities/steam/steamid64), `slgid`, or account ID as the first argument.
### List banned players
You can get a list of currently banned players and when they'll be unbanned by running the command `/manage ban` or it's shorthand `/ban` without any arguments. The date the player is set to be unbanned is shown both next to and below their username in the list. Strangely, permanently banned players will be given an "unban" date multiple years in the future.
## Muting
You can prevent a user from writing anything in chat by "muting" them. This doesn't extend to the in-game voice chat or other methods of writing in-game like signs, but it's a good tool for warning players that are straying out of accepted bounds.
### Mute a player
You can mute a player by running the command `/manage mute` or it's shorthand `/mute` with the player's in-game username, [SteamID64](/help/general-utilities/steam/steamid64), `slgid`, or account ID as the first argument. A reason for the mute can be provided as the second argument by appending a `,` character to the end of the first argument, as shown here `/mute mov51, said hello to bob`.
You can also provide a time limit for the mute using the 3rd argument. For example, `/mute mov51, said hello to bob, 6w`. The time format allows for the use of one time frame suffix, `m` (minute), `h` (hour), `d` (day), or `w` (week). You can not use multiple suffixes, such as `1w2d` to make a valid time frame.
### Unmute a player
You can unmute a player who has either been permanently or temporarily muted by running the command `/manage unmute` or its shorthand `/unmute` with the player's in-game username, [SteamID64](/help/general-utilities/steam/steamid64), `slgid`, or account ID as the first argument.
### Listing muted players
You can get a list of currently muted players and when they'll be unmuted by running the command `/manage mute` or it's shorthand `/mute` without any arguments. The date the player is set to be unmuted is shown both next to and below their username in the list. Permanently muted players will be given an "unmute" date multiple years in the future.
---
# Eco Server Options
> Configure your Eco server on WinterNode with server options like ports, passwords, server name, and more using the Game Control Panel for easy setup.
Source: https://winternode.com/help/games/eco/configuration/startup-parameters
The WinterNode Game Control Panel provides a few easily configurable options called [Server Options](/help/game-control-panel/server-configuration#server-options) under the `Server Options` tab on your server page. These options make use of common command line arguments and are needed for the server to function as expected, but may be changed as needed using the fields provided in the panes.
## Settings Not in the Panel
Most gameplay settings (world size, difficulty, collaboration levels, skill rates) are not exposed in **Server Options**. They live in separate config files under `/Configs/`. Edit them through the [File Manager](/help/game-control-panel/the-file-manager) and restart your server to apply.
| Setting | File | Notes |
|---------|------|-------|
| World size, seed, terrain generation | `/Configs/WorldGenerator.eco` | X and Y must match and be divisible by 4. Changes require a **server wipe** to apply |
| Difficulty, collaboration, skill rates | `/Configs/Difficulty.eco` | Same settings shown when creating a server in single-player |
| Network, ports, IP | `/Configs/Network.eco` | See [Network.eco: IPAddress and RemoteAddress](#networkeco-ipaddress-and-remoteaddress) below |
Field-by-field documentation for each file is maintained on the [Eco Wiki Server Configuration page](https://wiki.play.eco/en/Server_Configuration).
## [SERVER] Webserver Port
The port used to access your server's [Web Interface](https://wiki.play.eco/en/Web_Interface).

## [SERVER] Webserver Url
The URL used to connect to your server's [Web Interface](https://wiki.play.eco/en/Web_Interface) if you've setup any kind of Domain or Reverse Proxy.

## [SERVER] Public Server
Whether or not your server should show up on the public [Server Browser](https://wiki.play.eco/en/Server_Browser).
{/* ![The "Public Server" pane with a default value of [true], shown with a [true/false] dropdown.](/help/images/game-panel/eco/eco-startup-parameters-public-server.webp) */}
## [SERVER] Auto Update
Whether or not your server will update to the latest Eco version on restart. `1` is yes and `0` is no.
![The "Auto Update" pane with a default value of [1].](/help/images/game-panel/eco/eco-startup-parameters-auto-update.webp)
## [SERVER] Max Connections
The maximum number of users your server will accept. Defaults to `-1`, or unlimited.
![The "Max Connections" pane with a default value of [-1].](/help/images/game-panel/eco/eco-startup-parameters-max-connections.webp)
## [SERVER] Playtime
The playtime table for your Eco server. Used to show the active times when recommending a server on the [Server Browser](https://wiki.play.eco/en/Server_Browser). You can get the playtime table using [these steps](https://wiki.play.eco/en/Server_Configuration#Set_playtime_table).
{/*  */}
## [SERVER] Detailed Description
The long-form description of your server shown in the server browser.

## [SERVER] Server Password
The password required for connecting to your server. Is initially set on checkout and can be emptied if you don't want a password requirement.
## [SERVER] Server Name
The name for your server when viewing it in the server list.
## [SERVER] RCON Port
The RCON port that's assigned to your server. You aren't able to edit this, but it can be used to connect to your server over RCON if an [RCON Password](#server-rcon-password) is set.

## [SERVER] RCON Password
The password used for connecting to your server's RCON server over the [RCON Port](#server-rcon-port)

## [SERVER] Server Category
The category your server appears under in the server browser.
## [SERVER] Language
Sets the server [localization](https://wiki.play.eco/en/Server_Configuration/Localization.eco).

## [AUTH] Server Token
ECO V11+ servers need to be registered with a token from the ECO website. To add it to your WinterNode server:
1. Log in to the [ECO Website](https://play.eco/login)
2. Under **Server Authentication**, click **Generate Token** and copy the value
3. In the Game Panel, go to **Server Options**
4. Paste the token into the **Server Token** field
5. Click outside the field to save it, then restart your server. Server Options saves automatically and has no Save button

## Network.eco: IPAddress and RemoteAddress
Similarly, avoid modifying the `RemoteAddress` field unless directed by WinterNode support. Incorrect values can cause the server to become invisible in the Eco server browser or prevent players from joining through the server list, even if direct IP connections still work.
If some players are experiencing connection timeouts while others can connect normally, [contact support](https://winternode.com/discord?utm_source=help&utm_medium=article&utm_campaign=eco-startup-parameters). This is a known Eco networking issue that may require server-side adjustments.
---
# How to Connect to Your Eco Server
> Connect to your Eco server on WinterNode using your server IP, with step-by-step instructions for adding servers to your favorites and recent lists.
Source: https://winternode.com/help/games/eco/quick-start/connecting-to-eco-servers
Eco has an in-game server list, which includes a "Favorites" and "Recent" list. Your players can directly join your server using your IP which will add it to their "recent" list. You can find instructions below on connecting directly to your server. You can also add your server to the [Steam Server Browser](/help/general-utilities/steam/connecting-to-steam-servers) as an alternative.
If your server is [public](/help/games/eco/configuration/startup-parameters#server-public-server), then players will also be able to find your server on the [Server Browser](https://wiki.play.eco/en/Server_Browser).
## Finding your server IP
Eco uses the Primary Allocation for connections, so you can find the IP address on the server list under the name, and on the server page on the top right corner under the name.

## Adding a server
With the server IP in hand, you'll need to start the game and select the "Your Worlds" option from the game menu.
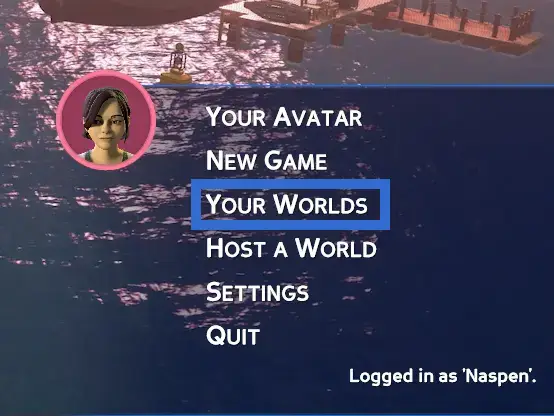
You should now see a screen that looks similar to the one on the right, where you can find a `+` icon on the top of the right side of the screen above the "Details" pane.
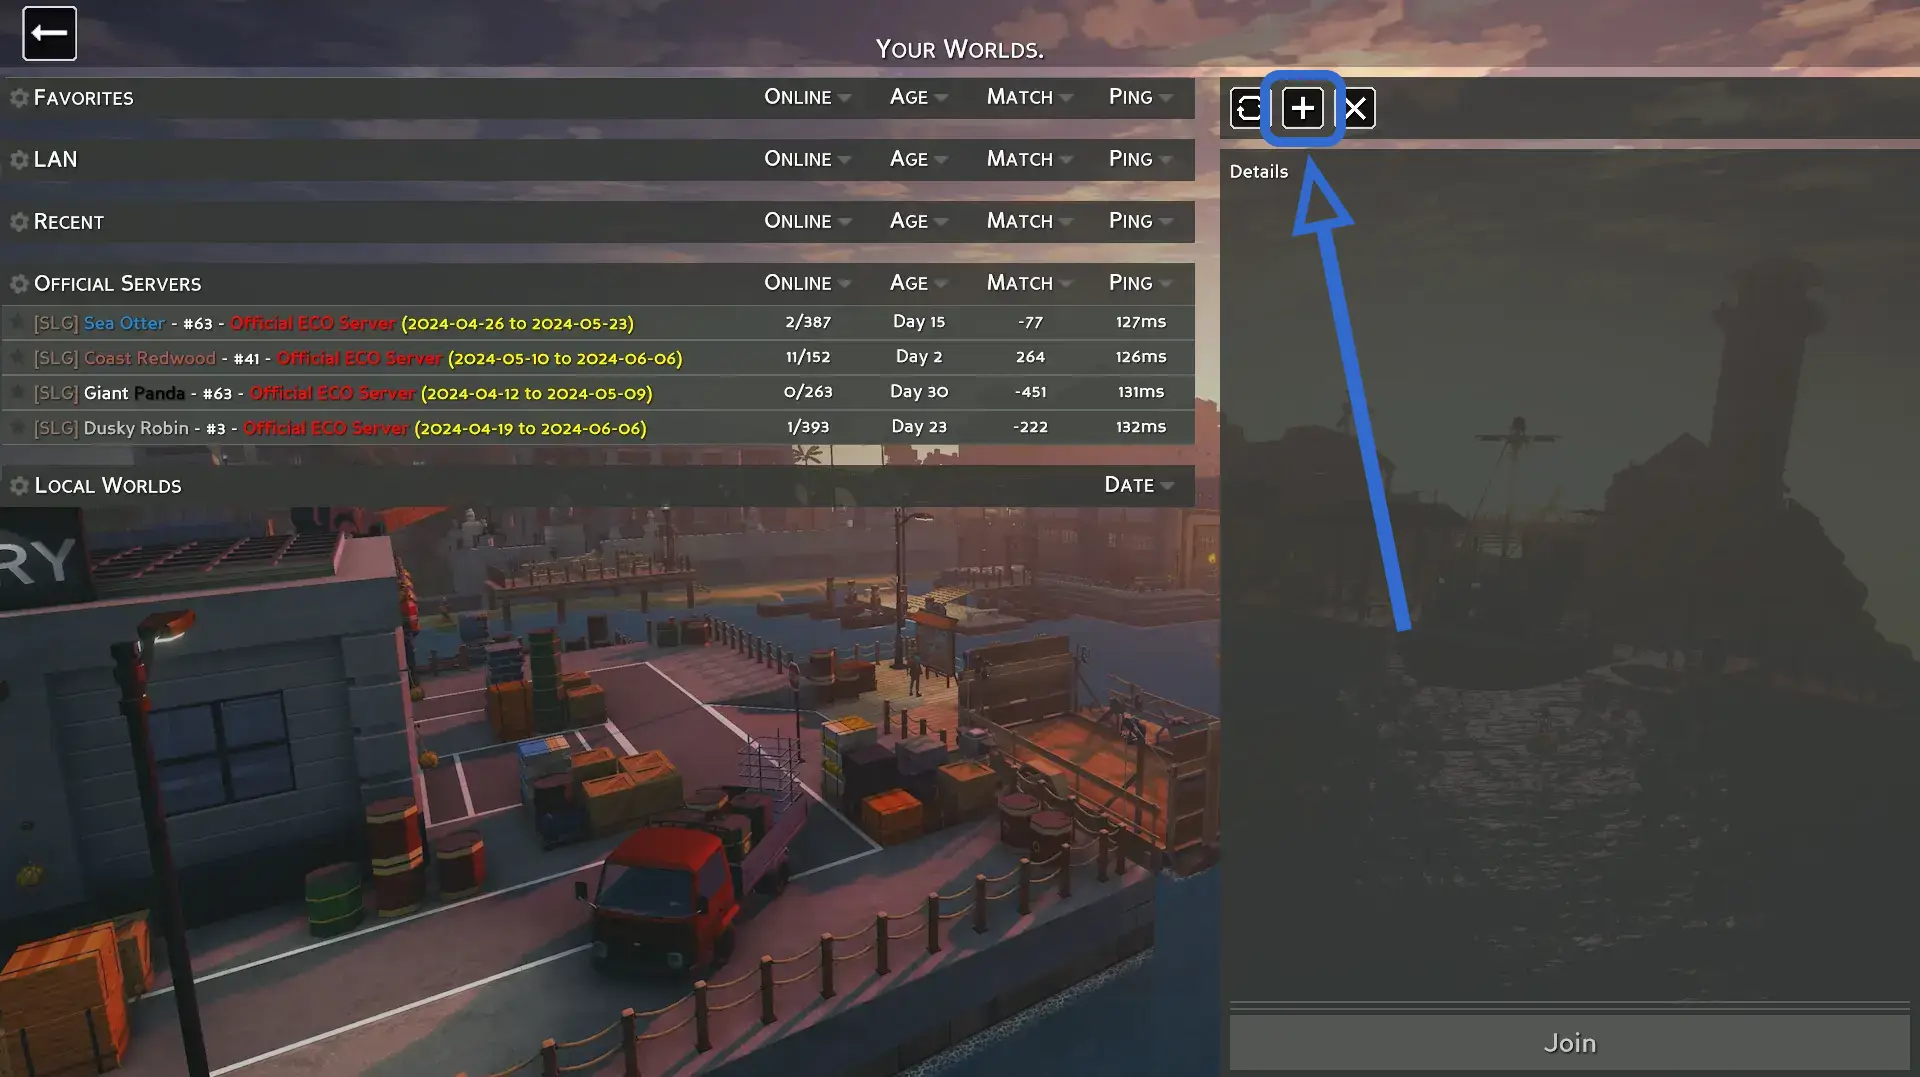
After clicking on the `+` button, you'll see a modal similar to the one to the right asking for the IP address. Enter the address here and click "join". You'll be connected to the server and it'll be added to the "Recent" list when you want to connect again.
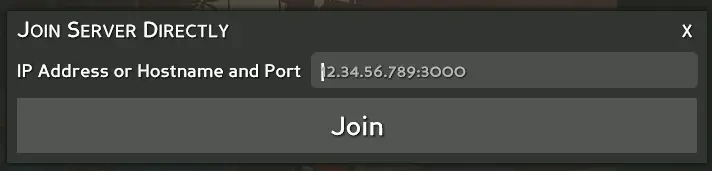
## Troubleshooting Connection Issues
If you or your players are getting a **"connection timed out"** error or the server isn't appearing in the server browser:
1. **Verify the server is online.** Check the Game Panel to confirm the server is running and not stuck in a crash loop.
2. **Use the correct IP and port.** Eco uses the Primary Allocation shown in the Game Panel. Make sure you're including the port (e.g., `192.168.1.1:3000`).
3. **Try connecting by direct IP.** If the server doesn't appear in the server browser but direct IP connections work, this may be a `Network.eco` configuration issue. See [Network.eco: IPAddress and RemoteAddress](/help/games/eco/configuration/startup-parameters#networkeco-ipaddress-and-remoteaddress).
4. **Run an MTR test.** If only some players can connect, the issue may be network-related. Have affected players [run an MTR test](/help/general-utilities/running-winmtr) and send the results to support.
5. **Don't modify Network.eco IP settings.** Changing the `IPAddress` field in `Configs/Network.eco` from its default can prevent the server from starting. See the [warning in Server Options](/help/games/eco/configuration/startup-parameters#networkeco-ipaddress-and-remoteaddress) for details.
---
# Eco Server Quick Start Guide
> Get started with your Eco server on WinterNode by registering with a token, setting up authentication, and accessing essential setup and moderation guides.
Source: https://winternode.com/help/games/eco/quick-start/overview
ECO V11+ servers need to be registered with a token from the ECO website.
You can get the token by creating or logging into an account on the [ECO Website](https://play.eco/login), using the **"Generate Token"** button under the **"Server Authentication"** header, and then adding the generated token to the [Server Token](/help/games/eco/configuration/startup-parameters#auth-server-token) Startup Parameter.
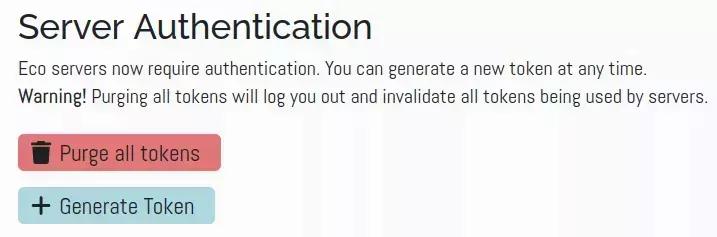
- [Connecting to Eco Servers](/help/games/eco/quick-start/connecting-to-eco-servers)
---
# How to Install Mods on Your Eco Server
> Install Eco mods on your WinterNode server easily using mod.io, with step-by-step instructions for uploading, decompressing, and testing mods.
Source: https://winternode.com/help/games/eco/setup/mods
Eco has a powerful built in modloader and an official recommended source for mods, [mod.io](https://mod.io/g/eco). [The forums](https://forum.play.eco/filebase/) also contain a mods directory, but it's considered deprecated favor of [mod.io](https://mod.io/g/eco) and it's unlikely to contain mods for the latest version of Eco.
## Installing Mods on your Server
Installing mods on your Eco server is a relatively simple process. You'll want to start by navigating to Eco's [mod.io page](https://mod.io/g/eco) and finding a mod that looks interesting to you. We'll be using [Big Shovel](https://mod.io/g/eco/m/big-shovel) and and [Log Pickup](https://mod.io/g/eco/m/log-pickup-debris-clear-and-stump-removal-9710) as examples.
### Big Shovels
We'll start by installing the Big Shovel mod. We can download the latest file by clicking the download button under the "Download Files Manually" section of the left sidebar. We'll get a `.zip` file containing 2 more `.zip` files. One named `AllBigShovel` and the other named `BigShovels`, as per the mods description on mod.io, each file contains a different configuration of the Big Shovels mod.
To install the configuration we want, we just need to upload the zip file to the root folder on your Eco server [Using SFTP](/help/game-control-panel/using-sftp).
Once the file has been uploaded, you'll need to decompress it [using the File Manager](/help/game-control-panel/the-file-manager#decompressing-a-compressed-file). The contents of the `.zip` file will be decompressed into the servers `Mods` folder following the file structure contained within the `.zip` file.

Now that the `.zip` file is decompressed we can restart the server and check that the mod we installed is working. In the case of BigShovels we want to check if we can dig when already holding material.
### Log Pickup
Log Pickup, or as it's formally known "Log Pickup, Debris Clear, and Stump Removal", has a similar install process as Big Shovels, but it doesn't provide install instructions and the `.zip` file is nested differently. So I wanted to use this mod as an example of how to interpret a mod's `.zip` file and how to locate what you need to upload to your server.
On Windows, you should be able to double click any `.zip` file to get a preview of the folder structure. It'll open in a standard file view, but you won't get image previews and it won't go through the process of decompressing every file, at least until you open it. For larger `.zip` files, it may still take awhile to open it, even after limiting what's decompressed, but Eco mods should be on the smaller side and shouldn't take more than a second or two.
The first files you see in the "root" of the `.zip` file are what will appear when you unzip the file on your server. In this case, Log Pickup includes a folder of the same name as the `.zip` file within the `.zip` itself. This means that when you unzip the `.zip` file on your server in the server root like we did for Big Shovels, we'll have a folder named `logpickupdebrisclear_X_X_X` inside of your server root which would place the mod files inside of another newly created sub-folder named mods inside of the `logpickupdebrisclear_X_X_X`. That's not what we want.
So for this mod, we'll need to decompress the `.zip` file locally and upload the contents of the `mods` folder it contains into the server's mods folder, telling the [SFTP](/help/game-control-panel/using-sftp) software to overwrite any files that already exist on the server.
Then after uploading the files to the server's mods folder, we can launch the game and test to see if the mod works. In this case, we'll want to see if stumps and debris are removed when you chop down a tree as a logging specialist. You can do this by logging in with a character that already has the logging specialty, or by running the command `/skills levelup logging` as a character you can test with. Then chop down a tree and look at the stump.
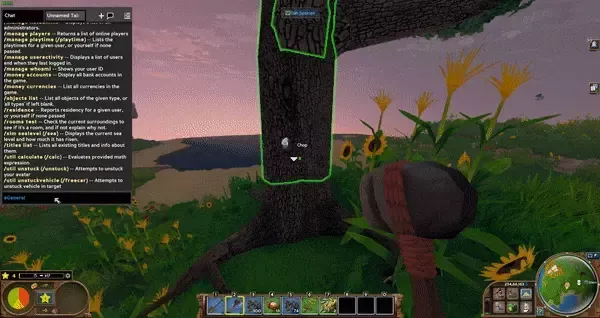
---
# Backing Up Your Enshrouded Server
> Enshrouded backup options on WinterNode: automated backups, manual snapshots, restoring saves, and world file location.
Source: https://winternode.com/help/games/enshrouded/backups
Protect your Enshrouded server data with automated backups, manual snapshots, and world file management through the WinterNode control panel.
## Automatic backups
WinterNode automatically backs up your Enshrouded server twice daily (2 AM and 2 PM CT) and retains backups for 45 days. These backups are stored separately from your server's storage allocation. To restore from an automatic backup, open a [Discord ticket](https://winternode.com/discord?utm_source=help&utm_medium=article&utm_campaign=enshrouded-backups) and let us know which backup you'd like restored.
For more details on the backup system, see our [Backup System](/help/getting-started/backup-system) guide.
## Manual backups
You can take a manual backup at any time through the GCP. See our [Manual Backup](/help/game-control-panel/manual-backup) guide for step-by-step instructions.
## World file location
Enshrouded stores world saves in the `savegame` directory at the root of your server. Inside this folder, each world is saved as a series of numbered files with a hex name (e.g., `3ad85aea`). The numbered copies are rolling backups that the game creates automatically - a new copy is made roughly every 10 minutes and when the server shuts down.
## Restoring from backup
To restore your world from a WinterNode automatic backup:
1. Stop your server
2. Open a [Discord ticket](https://winternode.com/discord?utm_source=help&utm_medium=article&utm_campaign=enshrouded-backups) with the date you'd like to restore from
3. We'll restore the backup and confirm when it's ready
4. Start your server
To restore from your own manual backup, use the [File Manager](/help/game-control-panel/the-file-manager) to replace the contents of the `savegame` directory with your backed-up files.
---
# How to Connect to Your Enshrouded Server
> Connect to your Enshrouded server on WinterNode using Steam favorites or the in-game server browser. Find your IP, port, and troubleshooting tips.
Source: https://winternode.com/help/games/enshrouded/connecting-to-enshrouded-servers
Connect to your Enshrouded dedicated server using Steam favorites for a reliable direct connection, or find it through the in-game server browser.
## Finding your server IP and port
Before connecting, you'll need your server's IP address and port. You can find both in the GCP:
- IP: The server summary on the top left of your server's page
- Query Port: The **Server Options** page under **[SERVER] Steam Query Port**
## Connect via Steam favorites
This is the most reliable way to connect to your server.
1. Open Steam and go to **View** > **Game Servers**
2. Click the **Favorites** tab
3. Click **Add a server** (the `+` button at the bottom)
4. Enter your server IP followed by the query port.
5. Click **Add This Address to Favorites**
6. Click **Refresh** - your server should appear in the list
7. Select your server and click **Connect**
Steam will launch Enshrouded and connect you directly.
## Connect via in-game server browser
1. Launch Enshrouded and select your character
2. Click **Play** and then **Join**
3. Use the search bar to filter by your [server name](/help/games/enshrouded/startup-parameters)
4. Select your server and click **Join**
5. Enter the server password if one is set
---
# How to Import Your Enshrouded World to WinterNode
> Transfer your Enshrouded world save from another host or local machine to your WinterNode server using SFTP or the File Manager.
Source: https://winternode.com/help/games/enshrouded/import-your-enshrouded-world
Transfer your existing Enshrouded world save from another hosting provider, a local dedicated server, or a co-op session to your WinterNode server.
## From another hosting provider
1. Download your world files from your previous host - you need the contents of the `savegame` directory
2. Stop your Enshrouded server on WinterNode
3. Upload the files to the `savegame` directory using [SFTP](/help/game-control-panel/using-sftp) or the [File Manager](/help/game-control-panel/the-file-manager)
4. Start your server
## From a local dedicated server
If you've been running a dedicated server on your own machine, the save files are in the same `savegame` directory inside your server installation folder. Follow the same upload steps above.
## From a co-op session
Enshrouded co-op saves are stored locally on the host player's machine. To move a co-op world to a dedicated server:
1. On the host player's PC, find the save files in `%LOCALAPPDATA%\Enshrouded\saves`
2. Stop your WinterNode server
3. Upload the save files to the `savegame` directory on your server using [SFTP](/help/game-control-panel/using-sftp)
4. Start your server
## Verifying the transfer
After uploading and starting the server, connect and check that your world loaded correctly. Look for your bases, explored areas, and character progression. If the world loads as a fresh map instead, double-check that the save files are in the correct `savegame` directory and not nested in an extra subfolder.
If you need help with a transfer, open a support ticket and we'll assist.
---
# How to Install Mods on Your Enshrouded Server
> Install Enshrouded mods on your WinterNode server using Shroudtopia or EML mod loaders. Covers mod sources, installation steps, and removal.
Source: https://winternode.com/help/games/enshrouded/mods
Enshrouded has no official mod support yet, so server mods run through a community mod loader. Install the loader, stop the server, drop the mod files into the `mods` directory, and start it back up.
## Quick answer
- **You need a mod loader first.** Shroudtopia and EML are the two that work on dedicated servers. The loader creates the `mods` directory that everything else goes into.
- **Where mods come from:** [Nexus Mods](https://www.nexusmods.com/enshrouded) is the primary source. Common categories are QoL tweaks (stack sizes, inventory management), building enhancements, and gameplay changes.
- **Where the files go:** the `mods` directory on your server, uploaded with the server stopped.
- **Server-side or both:** some mods work for everyone once installed on the server, others also need installing on each player's client. The mod's description page says which. Client-side installs use the same files, dropped into the player's local Enshrouded game directory.
## Installing mods
1. Install a mod loader (Shroudtopia or EML) following the instructions on its download page, then download the mods you want from Nexus Mods
2. Stop your server
3. Upload the mod files to the `mods` directory (created by the mod loader) using [SFTP](/help/game-control-panel/using-sftp) or the [File Manager](/help/game-control-panel/the-file-manager)
4. Start your server
Check each mod's description page before you start. Some need extra configuration beyond dropping the files in.
## Removing mods
1. Stop your server
2. Navigate to the `mods` directory in the [File Manager](/help/game-control-panel/the-file-manager)
3. Delete the files for the mod you want to remove
4. Start your server
---
# Enshrouded Server Options
> Set Enshrouded server name, max players, game mode preset, auto update, and other server options on WinterNode.
Source: https://winternode.com/help/games/enshrouded/startup-parameters
Configure your Enshrouded server's core settings including server name, player slots, and difficulty preset through the WinterNode Game Control Panel.
## Server name
The name of your Enshrouded server as it appears in the server browser.
## Max players
The maximum number of players that can be connected at the same time. Enshrouded supports up to 16 players.
## Auto update
Whether your server should check for and install game updates when it starts. Enabled by default.
## Game settings preset
Controls the overall difficulty and gameplay balance. Available presets:
- **Default** - Standard settings, recommended for first-time players
- **Relaxed** - Fewer enemies, more resources, focused on building
- **Hard** - More enemies with increased aggression
- **Survival** - Additional survival mechanics on top of harder enemies
- **Custom** - Unlocks individual gameplay settings in the config file
## Advanced configuration
Settings beyond the Server Options tab can be edited directly in the `enshrouded_server.json` file using the [File Manager](/help/game-control-panel/the-file-manager) or [SFTP](/help/game-control-panel/using-sftp). This includes custom game settings (when using the Custom preset), voice chat options, and user group permissions.
---
# Factorio Server Auto Saves and Backups
> Learn how Factorio's auto save system works, how to configure backup frequency and slots, and how to restore saves easily on your WinterNode server.
Source: https://winternode.com/help/games/factorio/administration/automatic-backups
In addition to Factorio's system below, WinterNode takes [automatic backups](/help/getting-started/backup-system) of your entire server every 12 hours.
Factorio has a built-in "backup" system called auto save slots, where every time the server saves it creates a copy of the world instead of saving to the original world file. This acts as a standard backup system, but instead of backing up the save indirectly, it does so every time the world is written to the disk.
The original save file is written to under similar conditions to when you're playing single player, like when all players leave the server or when the server restarts. So under normal play, your world is saved to the auto save slots, and then saved to the main save slot when the server pauses or stops, just like in single player.
## Configuring
You can configure the auto save frequency and the amount of auto saves kept using your server's [Server Options](/help/games/factorio/configuration/startup-parameters), specifically the [Auto Save Interval](/help/games/factorio/configuration/startup-parameters#auto-save-interval) and [Auto Save Slots](/help/games/factorio/configuration/startup-parameters#auto-save-slots) parameters.
The [Auto Save Interval](/help/games/factorio/configuration/startup-parameters#auto-save-interval) starts when the server is resumed, like when a player joins the server, and resets when it's paused.
The [Auto Save Slots](/help/games/factorio/configuration/startup-parameters#auto-save-slots) are used by generating an `_autosave[#].zip` file in your saves folder, which contains the contents of the `[saveName].zip` file.
## Restoring
You can easily restore to a Factorio autosave using the WinterNode game panel by renaming the `_autosave[#].zip` file to the name of your `[saveName].zip` file.
1. **Stop your server.**
2. Navigate to the saves folder using the [File Manager](/help/game-control-panel/the-file-manager#navigation)
3. [Make a copy](/help/game-control-panel/the-file-manager#copying-a-file) of the `[saveName].zip` file.
*Delete the original*
4. Make a copy of the `_autosave[#].zip` file you want to restore to.
*Look at the timestamps on the far right of the file table for when the auto saves took place.*
5. Rename either the copy or the original `_autosave[#].zip` to the name of your `[saveName].zip`
*For example, the default save name is `gamesave` so the file name would be `gamesave.zip`.*
---
# How to Update a Factorio Server
> Update your Factorio server on WinterNode easily using the Game Control Panel, with steps for safe backups, reinstalling, and selecting specific versions.
Source: https://winternode.com/help/games/factorio/administration/how-to-update-a-factorio-server
You’ll need to update your Factorio server to the latest release when a new version comes out so that your players can connect. You can do this through our Game Control Panel using the Reinstall button after taking a [Manual Backup](/help/game-control-panel/manual-backup) of your server. **Make sure to move the backup off of the server to ensure that it’s safe during the reinstall.**
You can find the reinstall button under the **"Configuration"** → **"Advanced"** tab on the GCP.
It will re-run the installation script for Factorio and download the latest files from steam while leaving your generated server files like the world and player data intact. But, It is still important to [take a backup](/help/game-control-panel/manual-backup) just in case the update goes wrong!
After pressing the reinstall button your server will shutdown and you'll loose access to your server panel while the install script runs again. If the process takes more than 5 minutes then reach out to our Support Team via a [Support Ticket](https://clients.winternode.com/submitticket.php) or [Discord](https://winternode.com/discord?utm_source=help&utm_medium=article&utm_campaign=how-to-update-a-factorio-server)!
---
# Factorio Server Options
> Configure your Factorio server on WinterNode with server options like version, slots, save name, passwords, and more using the Game Control Panel.
Source: https://winternode.com/help/games/factorio/configuration/startup-parameters
The WinterNode Game Control Panel provides a few easily configurable options called [Server Options](/help/game-control-panel/server-configuration#server-options) under the **"Configuration"** → **"server options"** tab on your server page. These options make use of common command line arguments and are needed for the server to function as expected, but may be changed as needed using the fields provided in the modals.
### Factorio Version
This is used by the re-install tool to update your server.
You can enter `latest` to get the latest stable release, `experimental` to get the latest experimental release, or the exact [version number](https://www.factorio.com/download/archive/) of the release you want.
![The "Factorio Version" modal with a default value of [latest], located on the server options page of the server page.](/help/images/games/factorio/factorio-startup-parameters-factorio-version.webp)
### Maximum Slots
The maximum number of players that can connect to your server. Defaults to 20, but you can set it to 0 for unlimited.
![The "Maximum Slots" modal with a default value of [20], located on the server options page of the server page.](/help/images/games/factorio/factorio-startup-parameters-maximum-slot.webp)
### Save Name
The name of the save the server will load. Used in the name of the save file located in the `saves` folder.
![The "Save Name" modal with a default value of [gamesave], located on the server options page of the server page.](/help/images/games/factorio/factorio-startup-parameters-save-name.webp)
### Server Token
Required with the [Server Username](/help/games/factorio/configuration/startup-parameters#server-username) parameter for your server to appear on the public server list. Your token and username can be found by logging into the [Factorio](https://factorio.com/profile) website.
![The "Server Token" modal with a default value of [undefined], located on the server options page of the server page.](/help/images/games/factorio/factorio-startup-parameters-server-token.webp)
### Server Name
The name that appears in the server list and the "continue playing" button on the title screen.
![The "Server Name" modal with a default value of [WinterNode.com Factorio Server], located on the server options page of the server page.](/help/images/games/factorio/factorio-startup-parameters-server-name.webp)
### Server Description
Shown under your server when viewed on the public server list.
![The "Server Description" modal with a default value of [Description], located on the server options page of the server page.](/help/images/games/factorio/factorio-startup-parameters-server-description.webp)
### Server Username
Required with the [Server Token](/help/games/factorio/configuration/startup-parameters#server-token) parameter for your server to appear on the public server list. Your token and username can be found by logging into the the [Factorio](https://factorio.com/profile) website.
![The "Server Username" modal with a default value of [undefined], located on the server options page of the server page.](/help/images/games/factorio/factorio-startup-parameters-server-username.webp)
### Auto Save Interval
The frequency at which the server will save the game and utilize an additional ["Autosave slot"](/help/games/factorio/configuration/startup-parameters#auto-save-slots).
![The "Auto Save Interval" modal with a default value of [10], located on the server options page of the server page.](/help/images/games/factorio/factorio-startup-parameters-auto-save-interval.webp)
### Auto Save Slots
The number of additional saves that are kept in the saves folder as new saves are made.
![The "Auto Save Slots" modal with a default value of [5], located on the server options page of the server page.](/help/images/games/factorio/factorio-startup-parameters-auto-save-slots.webp)
### AFK Kick
How long in minutes before a player will be kicked from the server for meeting the AFK requirements.
![The "AFK Kick" modal with a default value of [0], located on the server options page of the server page.](/help/images/games/factorio/factorio-startup-parameters-afk-kick.webp)
### Factorio RCON Password
The password used for RCON (Remote Console) connections to your server. This allows remote administration tools to connect and execute commands.

### Factorio RCON Port
The port used for RCON connections. By default, this is set to your primary server port + 1.

### Server Password
The password needed for players to connect to the server. Can be left empty if you don't want a password requirement.
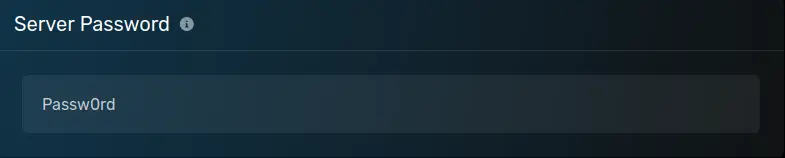
### Additional Parameters
Any additional server options for the Factorio headless server, see the [Wiki](https://wiki.factorio.com/Command_line_parameters) for examples.
---
# How to Connect to Your Factorio Server
> Find and connect to your Factorio server on WinterNode using IP and port, or set up public listing with server token and username for easy multiplayer...
Source: https://winternode.com/help/games/factorio/quick-start/connecting-to-factorio-servers
Factorio, like any multiplayer game, has a few methods of connecting to it, which we'll cover here. It also has a public server list that you can add your server too if desired, which we'll also cover.
## Connect to address
The primary method of connecting to a Factorio server, especially one that's private, is by using the `Connect to address` option. This is where you'll share the IP and port of your server with your players, and they'll use it to connect to your server.
With Factorio, you can find the IP address and port you need using the primary allocation for your server. This is the address and port combination shown in the top right hand corner on your server's page, or on the server card when viewing your server list.

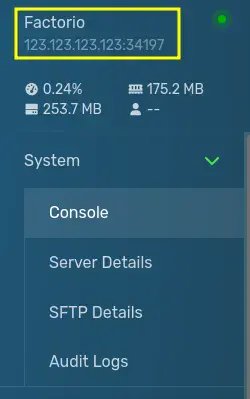
With the IP located, you can send it to you players for them to open the `Multiplayer > Connect to address` menu in game and then enter the address and port.
## Public Server List
If you'd like your server to appear on the public server list, you'll need to fill out the [Server Token](/help/games/factorio/configuration/startup-parameters#server-token) and [Server Username](/help/games/factorio/configuration/startup-parameters#server-username) fields with the information you get from the [Factorio](https://factorio.com/profile) website.
After you've logged in or signed up, you should see a page with a "Profile" box at the top. That box contains two fields that you need, `Username` and `Token`.
Put those two into their respective server options and restart your server, then you can search for your server on the public server list using either the [Server Name](/help/games/factorio/configuration/startup-parameters#server-name) or [Server Description](/help/games/factorio/configuration/startup-parameters#server-description).
---
# How to Change Your Garry's Mod Server Name
> Change the name your Garry's Mod server shows in the in-game server browser by setting the hostname value in server.cfg.
Source: https://winternode.com/help/games/gmod/changing-your-server-name
Change the name your Garry's Mod server shows in the in-game server browser by setting the `hostname` value in `server.cfg`.
## Set the Hostname in server.cfg
1. Log in to the [Game Control Panel](https://gcp.winternode.com) and select your server
2. In the sidebar, click **File Manager**
3. Navigate to `garrysmod/cfg/`
4. Open `server.cfg`
5. Find the `hostname` line (press CTRL+F to search)
6. Set it to your new name, keeping the double quotes:
```cfg title="garrysmod/cfg/server.cfg"
hostname "My Awesome Server"
```
7. Click **Save**
8. Click **Restart** on the Console page to apply the change
WinterNode GMod servers ship with a `server.cfg` that already includes a `hostname` line, so you normally only need to edit it. If the line or the file is ever missing, add it using the format above (create the file with **New File** if needed).
Your server should now show the new name in the in-game server browser. If the old name still appears, refresh the server list; the browser caches results.
### Still Not Working?
If your server name still shows the default after a restart, [contact our support team](https://winternode.com/discord?utm_source=help&utm_medium=article&utm_campaign=changing-your-server-name) with:
- Your [Server UUID](/help/getting-started/finding-your-server-uuid)
- The name you set in `server.cfg`
- What the server browser currently shows
---
# How to Change Max Players on Your Hytale Server
> Adjust the player limit on your Hytale server by editing the MaxPlayers setting in config.json.
Source: https://winternode.com/help/games/hytale/configuration/max-players
Change how many players can join your Hytale server at once by editing the MaxPlayers setting. The default is 100, but you can raise or lower it based on your needs.
## Change Max Players (WinterNode)
1. Stop your server from the Game Panel
2. Navigate to **File Manager**
3. Open `config.json` in the root directory
4. Find the `"MaxPlayers"` line and change the number:
```json
"MaxPlayers": 50,
```
5. Click **Save File** (you'll see a confirmation)
6. Start your server
Your server now enforces the new player limit.
## Change Max Players (Other Hosts or Self-Hosted)
The process is the same on any host - you just need access to your server files.
1. Connect to your server via your host's file manager or SFTP
2. Open `config.json` in the root directory
3. Edit the `"MaxPlayers"` value to your desired number
4. Save the file and restart your server
If you're self-hosting, the config file is in the same directory as your server executable.
## How Many Players Can Your Server Handle?
The number you set in config is just a cap - whether your server runs smoothly at that limit depends on your resources.
The main factors that affect player capacity:
- **RAM** - More players means more data tracked in memory. If the server starts lagging as players join, RAM is usually the first bottleneck.
- **CPU** - Each player generates tick load. Large groups in the same area are harder on the CPU than players spread across the map.
- **World complexity** - Servers with lots of placed structures and entities use more resources per player than a fresh world.
There's no universal formula since Hytale is new and performance characteristics are still being understood. If you notice lag as player count increases, lower the limit or upgrade your server's RAM allocation.
---
# How to Set a Password on Your Hytale Server
> Restrict access to your Hytale server by setting a password in config.json. Players will need the password to connect.
Source: https://winternode.com/help/games/hytale/configuration/server-password
Restrict who can join your Hytale server by setting a password. Players will be prompted to enter the password when they connect - if they don't have it, they can't get in.
## Set Your Server Password (WinterNode)
1. Stop your server from the Game Panel
2. Navigate to **File Manager**
3. Open `config.json` in the root directory
4. Find the `"Password"` line and add your password between the quotes:
```json
"Password": "yourpassword",
```
5. Click **Save File** (you'll see a confirmation)
6. Start your server
Your server now requires a password to join.
## Set Your Server Password (Other Hosts or Self-Hosted)
The process is the same on any host - you just need access to your server files.
1. Connect to your server via your host's file manager or SFTP
2. Open `config.json` in the root directory
3. Edit the `"Password"` line to include your password
4. Save the file and restart your server
If you're self-hosting, the config file is in the same directory as your server executable.
## How Players Join
When a player tries to connect to your server, they'll be prompted to enter the password before the connection completes. If they enter the wrong password, they won't be able to join.
Players don't see the password in the server list or anywhere else - they need to get it from you directly.
## Removing the Password
To make your server public again, set the password back to an empty string:
```json
"Password": "",
```
Save the file and restart.
---
# How to Authenticate Your Hytale Server
> Fix the 'No server tokens configured' warning on a Hytale server by running /auth login from the console and completing the Hypixel authentication flow.
Source: https://winternode.com/help/games/hytale/configuration/server-tokens
If your Hytale server console shows *"No server tokens configured. Use /auth login to authenticate."*, the server hasn't completed authentication against the Hytale/Hypixel auth services.
WinterNode normally handles this for you. As an approved Hytale server provider, the panel authenticates your server in the background and refreshes its tokens as needed. The warning above only shows up in the rare case that the automatic flow doesn't complete, and you can fix it yourself by running `/auth login` from the server console.
## Manually Authenticate Your Server
1. Log in to the [Game Control Panel](https://gcp.winternode.com) and open your Hytale server
2. Find the **Console** on the main server page
3. Make sure the server is running
4. In the console input field, type `/auth login` and press Enter
5. The console prints a URL and a one-time code. Open the URL in your browser
6. Sign in with your Hypixel account if prompted
7. Enter the code from the console when the page asks for it
8. Confirm that you want to authorize this server
The console should now log a success message. The warning will not reappear on the next start.
## What `/auth login` Does
`/auth login` initiates an OAuth-style flow with the Hytale/Hypixel auth backend:
1. The server requests a device-code grant
2. The backend returns a URL and a short one-time code
3. You visit the URL in your browser and enter the code while signed in to your Hypixel account
4. The auth backend issues access and refresh tokens back to the server
5. The server keeps those tokens so it can re-authenticate on future starts without prompting you again
This is the same flow many CLI tools use (`gh auth login`, `gcloud auth login`, etc.). Nothing leaves the server except the auth handshake.
## Verifying Tokens Are Configured
After authenticating, restart your server and watch the console on startup. You should *not* see the *"No server tokens configured"* warning. If everything's healthy, the server will print its normal startup messages and accept connections.
## When You Need to Re-Authenticate
WinterNode refreshes tokens on its own as long as the panel handled the initial authentication, so you usually never have to think about this. You only need to re-run `/auth login` if both of these apply:
- You manually authenticated this server previously (the panel didn't do it for you)
- You then changed the email or username on the Hypixel account tied to that authentication
In that case, run `/auth login` again from the console and complete the flow with the updated account.
## If `/auth login` Doesn't Work
| Symptom | Likely cause |
|---------|-------------|
| Console prints "unknown command" | The server isn't fully started yet, or the binary doesn't recognize `/auth`. Wait for full startup and try again. |
| Browser shows "code not found" or "expired" | Codes are short-lived. Run `/auth login` again to get a fresh code and complete the flow within a couple of minutes. |
| Page says "no Hytale access" on your account | The Hypixel account you signed in with doesn't own Hytale. Sign in with the account that owns the game. |
| Console shows the same warning after restart | Authentication didn't stick. Run `/auth login` again. If the warning still comes back on the next start, contact support so we can look at the auth state from our side. |
## Still Not Working?
If none of the above resolves the warning, [contact our support team](https://winternode.com/discord?utm_source=help&utm_medium=article&utm_campaign=hytale-server-tokens) with:
- Your [Server UUID](/help/getting-started/finding-your-server-uuid)
- The full warning line(s) from your server console
- The Hypixel account username you're trying to authenticate with (not the password)
- What happened when you ran `/auth login` (no output? a different error? URL didn't load?)
---
# How to Connect to Your Hytale Server
> Connect to your Hytale dedicated server using the in-game Direct Connect option. Includes where to find your server IP address.
Source: https://winternode.com/help/games/hytale/quick-start/how-to-connect-to-your-hytale-server
In order to connect to your Hytale server, follow these simple steps:
## Step 1: Open the Game & Servers Menu
Open your game, then access the servers menu by clicking "Servers"
## Step 2: Connect to IP
We recommend using direct connect to join the server. You can do this by clicking "Direct Connect" in the bottom right.
This will open a UI where you can put your [IP Address](/help/getting-started/connecting). Then click connect, and you'll be good to go!
---
# How to Install Mods on Your Hytale Server
> Upload mods to your Hytale server using the File Manager or SFTP for files over 100MB.
Source: https://winternode.com/help/games/hytale/setup/adding-mods
Add mods to your Hytale server by uploading `.jar` files to the `mods/` folder and restarting.
## Upload Mods via File Manager
For mod files under 100MB, the built-in File Manager is the quickest option.
1. Stop your server from the console or by clicking **Stop** in the Game Panel
2. Go to **Files** → **File Manager**
3. Open the `mods/` folder (it's in the root directory)
4. Click **Upload** and select your `.jar` file(s)
5. Start your server
Your mods will load automatically on startup.
## Upload Large Mods via SFTP
The web File Manager has a 100MB upload limit. For larger files, use SFTP instead.
1. Stop your server
2. Connect to your server via SFTP using the credentials in your Game Panel
3. Navigate to the `mods/` folder
4. Upload your `.jar` file(s)
5. Start your server
See our [SFTP guide](/help/game-control-panel/using-sftp) for detailed connection instructions.
## Verify Mods Loaded
After restarting, check that your mods loaded correctly:
1. Go to the **Console** in your Game Panel
2. Look for messages indicating your mod initialized
3. If you see errors, check that you uploaded the correct `.jar` file and that it's compatible with your server version
## File Structure Reference
Your server's root directory should look like this, with mods inside the `mods/` folder:
```
/home/container/
├── hytale-downloader/
├── logs/
├── mods/
│ └── your-mod.jar ← mods go here
├── Server/
├── universe/
└── .hytale-downloader-credentials.json
```
---
# Improving Hytale Server Performance
> Install the Performance Saver plugin to reduce lag and prevent crashes on your Hytale server.
Source: https://winternode.com/help/games/hytale/setup/performance-saver-plugin
Reduce lag and prevent crashes on your Hytale server by installing the Performance Saver plugin.
## What Performance Saver Does
Hytale server performance varies heavily based on player behavior. A few players exploring in different directions can consume significantly more resources than a large group staying together. This plugin monitors your server and automatically adjusts settings when resources get tight.
**Key features:**
- **TPS stabilization** - Caps server TPS at 20 (or 5 when empty) for smoother, more consistent performance
- **Dynamic view radius** - Temporarily reduces view distance when CPU or memory is under pressure, then restores it when things calm down
- **Smarter memory management** - Triggers garbage collection when chunks unload, freeing memory that Java would otherwise hold onto
The result: fewer crashes, less lag, and a playable experience even when resource usage spikes.
## Install the Plugin
1. Download the latest release from the [Performance Saver GitHub releases page](https://github.com/nitrado/hytale-plugin-performance-saver/releases) (v1.0.0 as of this writing)
2. Upload the `.jar` file to your server's `mods/` folder - see [How to Add Mods](/help/games/hytale/setup/adding-mods) if you need help with this step
3. Restart your server
The plugin works immediately with sensible defaults. No configuration required.
## Configuration (Optional)
Most servers won't need to change anything, but if you want to tweak the behavior, the plugin creates a `config.json` file in its folder after first run.
A few settings you might adjust:
| Setting | Default | What it does |
|---------|---------|--------------|
| `TpsLimit` | 20 | Maximum TPS when players are online |
| `TpsLimitEmpty` | 5 | TPS when no players are connected (saves resources) |
| `MinViewRadius` | 2 | Lowest view radius the plugin will reduce to under pressure |
If players mention view distance dropping too aggressively during busy moments, you can raise `MinViewRadius` - though this trades crash prevention for visibility.
See the [full configuration reference](https://github.com/nitrado/hytale-plugin-performance-saver#configuration) on GitHub for all available options.
---
# How to Toggle Voice Chat on Your Hytale Server
> Enable or disable voice chat on your Hytale server using a single console command.
Source: https://winternode.com/help/games/hytale/setup/toggling-voice-chat
Enable or disable voice chat on your Hytale server with a single command - no restart required.
## Toggle Voice Chat from the Console
1. In the Game Control Panel, click **Console**
2. Type one of the following and press **Enter**:
- To enable: `/voicechat enabled true`
- To disable: `/voicechat enabled false`
The change takes effect immediately.
## Toggle Voice Chat In-Game
You must be a server op to run this command in-game.
1. Join your server
2. Open the chat and run one of the following:
- To enable: `/voicechat enabled true`
- To disable: `/voicechat enabled false`
---
# How to Update Your Hytale Server
> Update your Hytale server to the latest version by restarting through the Game Panel. Includes a Reinstall fallback if the auto-update fails.
Source: https://winternode.com/help/games/hytale/setup/updating-your-hytale-server
Hytale ships frequent updates in Early Access, and WinterNode's Hytale downloader pulls the latest game files every time your server starts. Most updates apply by restarting the server; if that doesn't work, a reinstall picks up everything cleanly.
## Quick Update (Most of the Time)
This is all you need for routine patches.
1. Log in to the [Game Control Panel](https://gcp.winternode.com)
2. Select your Hytale server
3. Click **Stop** and wait for the server to fully shut down
4. Click **Start**
5. Wait for the server status to show **Online**. This usually takes 1-2 minutes.
The downloader checks for new game files during startup and applies them automatically. Your world, mods, and configs are not touched.
## If the Update Doesn't Apply
If the server starts but stays on the old version, force a clean reinstall.
1. Stop your server
2. In the sidebar, navigate to **Advanced** > **Server Actions**
3. Click **Reinstall Server**
4. Confirm the reinstall when prompted
5. Wait for the process to finish
6. Click **Start**
A reinstall replaces the game binaries and re-runs the Hytale downloader from scratch. It does not delete your `universe/` (worlds), `mods/`, or configuration files.
## Verify the Version
After the server is back online:
1. Open the **Console** in the Game Panel
2. Look at the startup logs for the version line printed by the Hytale downloader
3. Compare against the latest patch announced on the [Hytale Blog](https://hytale.com/news)
If the versions match, the update is done.
## After a Major Update
Two follow-ups are worth doing after any sizable patch:
- **Update Hytale on your PC and your players' PCs.** Clients older than the server can't connect. Everyone needs the same patch installed through the Hytale launcher.
- **Update your mods.** Mods compiled against the previous version often fail to load until the author publishes an update. Open the [Plugin Browser](/help/games/hytale/setup/using-the-plugin-browser) and click **Check All Updates**, or check each mod's CurseForge page manually. See [Installing Mods](/help/games/hytale/setup/adding-mods) for manual uploads.
## Still Not Working?
If a restart and a reinstall both leave you on the wrong version, [contact our support team](https://winternode.com/discord?utm_source=help&utm_medium=article&utm_campaign=updating-your-hytale-server) with:
- Your [Server UUID](/help/getting-started/finding-your-server-uuid)
- The version your console reports
- The version you expected
- Any error lines from the downloader output
---
# How to Upload a Singleplayer World to Your Hytale Server
> Transfer your singleplayer Hytale world to your server to continue your adventure with friends.
Source: https://winternode.com/help/games/hytale/setup/upload-a-world
Upload your singleplayer Hytale world to continue your adventure with friends on your WinterNode server.
## Before You Start: Back Up Your Server
If your server has any mods installed, back up your mods folder before uploading a singleplayer world. Singleplayer saves include their own mods folder, which may overwrite your server's mods when you extract the world. If you're uploading to a fresh server with no mods, you can skip this step.
1. Stop your server from the WinterNode control panel
2. Navigate to **File Manager**
3. Locate the **mods** folder in the server root directory
4. Click the **...** next to the mods folder and select **Compress**
5. Once compressed, download the .tar.gz archive
6. Save the backup to your PC
## Step 1: Locate Your Singleplayer World
Your Hytale singleplayer worlds are stored in a folder on your PC.
1. Press **Windows + R** to open the Run dialog
2. Type `%appdata%` and press **Enter**
3. Navigate to **Hytale** → **UserData** → **Saves**
4. Find the folder for the world you want to upload
Each folder inside Saves represents a different singleplayer world. The folder names usually match what you named the world in-game. If you're not sure which one is correct, check the "Date Modified" timestamp to find your most recent save.
## Step 2: Compress Your World
You need to compress your world folder into a ZIP file before uploading.
1. Right-click on your world folder (the one containing the **universe** directory)
2. Select **Compress to** → **ZIP File**
3. Name the ZIP file something simple with no spaces or special characters (example: `myworld.zip`)
## Step 3: Stop Your Server
Before uploading files, you need to stop your server to prevent file corruption.
1. Log in to your WinterNode control panel
2. Navigate to your Hytale server
3. Click **Stop** and wait for the server to fully shut down
## Step 4: Upload Your World
The upload method depends on your file size.
### For Files Under 100MB (File Manager)
1. Navigate to **File Manager** in your control panel
2. You should be in the server root directory by default
3. Click **Upload** in the top right
4. Select your compressed world ZIP file
5. Wait for the upload to complete
### For Files Over 100MB (SFTP Required)
If your world file exceeds 100MB, you'll need to use SFTP to upload it.
1. Follow our [SFTP setup guide](https://winternode.com/help/game-control-panel/using-sftp) to connect to your server
2. Upload the ZIP file to your server's root directory
3. Return to the File Manager in your control panel to extract it
## Step 5: Extract Your World
Now that the ZIP file is uploaded, you need to decompress it.
1. In **File Manager**, locate your uploaded ZIP file
2. Either:
- Click the checkbox next to the file and click **Decompress** in the popup, or
- Click the **...** next to the file and select **Decompress**
3. Wait for the extraction to complete
The extraction will create a **universe** folder in your server root (or add to an existing one). Inside `universe/worlds/`, you'll find your singleplayer world.
## Step 6: Update Server Configuration
Your server won't automatically load the new world - you need to tell it which world to use.
1. In **File Manager**, find and open the **config.json** file in your server root
2. Locate the `"Defaults"` section
3. Change the `"World"` value to match your world's folder name
For example, if your world folder is named `myworld` inside `universe/worlds/`, your config should look like this:
```json
"Defaults": {
"World": "myworld",
"GameMode": "Adventure"
}
```
4. Click **Save** to save your changes
## Step 7: Start Your Server
You're ready to load your world.
1. Return to the main control panel
2. Click **Start** to start your server
3. Wait for the server to fully start up
4. Join your server and verify your world loaded correctly
Check that your spawn location, builds, and terrain look correct. If everything looks good, you've successfully transferred your singleplayer world to multiplayer.
## Troubleshooting
### Server Loads the Wrong World
The world name in `config.json` doesn't match your world's folder name. Double-check that the `"World"` value under `"Defaults"` matches the folder name inside `universe/worlds/` exactly, with no typos or extra characters.
### Server Starts with a Blank/New World
This usually means the extraction didn't work properly or the files are corrupted. Try these steps:
1. Stop your server
2. Delete the ZIP file and re-download it from your singleplayer saves
3. Re-compress the world (make sure you're compressing the folder that contains the **universe** directory)
4. Upload and extract again
### Missing Items or Blocks
If items or blocks appear as "unknown" or disappear entirely, your singleplayer world likely used mods that aren't installed on your server. You need to install the same mods on your server for everything to appear correctly.
If you overwrote your server's mods folder during extraction, restore your backed-up mods folder and then manually add any additional mods your singleplayer world requires.
---
# Using the Plugin Browser on Your Hytale Server
> Browse, install, update, and uninstall plugins on your Hytale server using the built-in Plugin Browser.
Source: https://winternode.com/help/games/hytale/setup/using-the-plugin-browser
Install, manage, and remove plugins on your Hytale server using the built-in Plugin Browser - no manual file uploads required.
## Finding the Plugin Browser
In your game panel, navigate to **Tools** > **Plugin Browser**. You'll land on the Browse Plugins tab, which pulls plugins from CurseForge. From here you can search by name or filter by category - Mobs/Characters, Blocks, Food/Farming, Furniture, Gameplay, Library, Miscellaneous, Prefab, Quality of Life, Utility, and World Gen. The default sort is Most Popular, but you can page through results using the Previous Page and Next Page buttons.
If you want to check a plugin out before installing it, clicking **View** opens its CurseForge page in a new tab.
## Installing a Plugin
1. Find the plugin you want using the search bar or category filters.
2. Click **Install** next to the plugin. It installs immediately - there's no confirmation prompt.
3. Restart your server for the plugin to take effect.
Plugins always install the latest available version. If a plugin requires dependencies, they're pulled in automatically - you don't need to install them separately.
## Managing Installed Plugins
Switch to the **Installed** tab at the top of the Plugin Browser to see everything currently on your server. From there, each plugin has three options:
- **Uninstall** - Removes the plugin. Restart your server afterward.
- **Auto-update On / Off** - Toggles whether this plugin updates automatically when a new version releases.
- **View on CurseForge** - Opens the plugin's CurseForge page.
To update all installed plugins at once, click **Check All Updates** at the top of the Installed tab. This pulls the latest versions of any plugins that have updates available. Restart your server after updating to apply the changes.
---
# How to Connect to Your Killing Floor 2 Server
> Connect to your Killing Floor 2 server using the query port and Steam favorites. Includes finding your server IP and port configuration.
Source: https://winternode.com/help/games/killing-floor-2/quick-start/connecting-to-your-killing-floor-2-server
Connecting to a Killing Floor 2 server is a simple process, start by either getting the IP from the server owner or by getting it from the GCP if you're the server owner.
## Getting the IP
You can get the IP from the GCP by following the steps on [this article](/help/getting-started/connecting).
## Getting the Query Port
To connect, Killing Floor 2 requires you to use the Query Port. You can locate the Query Port under `Server Options > [ADMIN] Query Port`. It is generally the Game Port + 1 (for example a `14000` game port would have a `14001` query port).
## Add the server to your Steam Favorites
In order to allow the server to appear in your server list under the Favorites tab, you need to add the server to your Steam game servers.
To do this, open your Steam client. Under "View," click "Game Servers" (see our [Steam Server Browser](/help/general-utilities/steam/connecting-to-steam-servers) guide for details), then add the server by clicking the "+" in the bottom right. This will open a "Add server by IP" menu, where you can input your server's IP:PORT.
## Connecting
Using the IP and Query Port from [the sections above](#getting-the-ip) or the server owner, you can follow these steps to connect.
Click "Browse Servers"
Open the game.
Click the **"Browse Servers"** button in the menu.
Click the **"Favorites"** tab.
If the server was added to your Steam favorites correctly, you will see it here. You may need to click "Refresh."
---
# Killing Floor 2 Server Quick Start Guide
> Get your Killing Floor 2 server running with this quick start guide. Covers enabling WebAdmin and connecting to your server.
Source: https://winternode.com/help/games/killing-floor-2/quick-start/overview
In KILLING FLOOR 2, players descend into continental Europe after it has been overrun by horrific, murderous clones called Zeds that were created by the corporation Horzine. The Zed outbreak caused by Horzine Biotech’s failed experiments has quickly spread with unstoppable momentum, paralyzing the European Union. Only a month ago, the first Zed outbreak from the original KILLING FLOOR ripped through London; now the specimen clones are everywhere. [[homepage]](https://www.killingfloor2.com)
## Enabling WebAdmin
WebAdmin is a beta feature that allows you to administrate the server through a web interface. It requires an additional port which can only be added by WinterNode staff. If you're looking to enable WebAdmin, you will need to reach out through a support ticket.
- [Connecting to your Server](/help/games/killing-floor-2/quick-start/connecting-to-your-killing-floor-2-server)
---
# Backing Up Your Minecraft Bedrock Server
> Back up your Minecraft Bedrock server on WinterNode: where the world lives, what a snapshot restore does and does not do, and how to take manual backups.
Source: https://winternode.com/help/games/minecraft-bedrock/administration/backing-up
Backing up a Bedrock server means knowing which folder holds the world and which files hold everything else, because the world, the add-ons, and the server configuration live in different places. WinterNode also takes [automatic snapshots](/help/getting-started/backup-system) of your whole server every 12 hours as an additional safety net, taken between 2AM-3AM and 2PM-3PM CST and kept for 45 days.
## Where your data lives
Everything below is relative to your server root, which is what you see when you open the [File Manager](/help/game-control-panel/the-file-manager) or connect over [SFTP](/help/game-control-panel/using-sftp).
### World data
Every world is a folder inside `worlds`, named after the `level-name` setting in `server.properties`. On WinterNode the default is `bedrockWorld`, so the live world is `worlds/bedrockWorld`. Inside it you will find:
- `db`, the LevelDB folder that holds every chunk, entity, and player. This is the world.
- `level.dat` and `level.dat_old`, the world settings (seed, game rules, spawn).
- `levelname.txt`, the display name shown in the client.
- `world_behavior_packs.json` and `world_resource_packs.json`, the list of packs applied to this world.
Unlike Java, there are no separate Nether or End folders. All three dimensions and all player data are inside `db`, so copying the single world folder captures everything. If you changed `level-name`, look for a folder with that name instead. The [world import](/help/games/minecraft-bedrock/setup/world-import) guide covers the same folder from the other direction.
### Add-ons and configuration
These are **not** inside the world folder. Losing them does not affect your world, and restoring the world does not bring them back:
- `behavior_packs` and `resource_packs` in the server root, where [installed add-ons](/help/games/minecraft-bedrock/setup/installing-addons) are unpacked. The world only stores a list of which packs to load, not the packs themselves.
- `server.properties`, `allowlist.json`, and `permissions.json` in the server root. These hold the server settings, the allowlist, and every operator.
A full manual backup should include the world folder, both pack folders, and those three root files. If you only have room for one thing, take the world folder.
## Restoring from a WinterNode snapshot
Our snapshots are a copy of your whole server directory, taken between 2AM-3AM and 2PM-3PM CST and kept for 45 days. Request one with the `/request-backup-files` command in a [Discord](https://winternode.com/discord?utm_source=help&utm_medium=article&utm_campaign=minecraft-bedrock-backing-up) ticket, or by ticket in the Client Area with your server's Node, UUID, and the backup window you want. Restores are usually done well inside 24 hours.
### Moving the restored world into place
1. Wait for the bot to post its *Backup Restoration Complete* message in your ticket
2. In the [Game Control Panel](https://gcp.winternode.com), select your server and click **Stop**
3. In the sidebar, click **File Manager**
4. Rename your current `worlds/bedrockWorld` folder (for example to `bedrockWorld.old`) so you can fall back to it
5. Open the `/backup-restore/worlds` folder
6. Move the restored `bedrockWorld` folder (or whatever your `level-name` is) into `worlds` in your server root
7. Click **Start**
Your server should now show as **Online** with the restored world loaded. [Restoring Your Server from a Backup](/help/general-utilities/backup-restoration#moving-your-files-to-where-they-should-be) walks through the move with screenshots.
You do not have to move everything. If the world is corrupt but your add-ons are fine, move only the world folder and leave the rest of `/backup-restore` alone. If a bad add-on broke the server, move `behavior_packs` and `resource_packs` and leave the world as it is.
### What the snapshot leaves out
Individual files over 5GB and MySQL databases are [excluded](/help/getting-started/backup-system#whats-excluded). A Bedrock world is made of many small files inside `db`, so this almost never affects the world itself. It does apply to any single large file you keep on the server, such as a compressed archive of an old world, so download those rather than leaving them in place.
## Taking a manual backup
Bedrock Dedicated Server has no built-in automatic backup. Take one yourself by copying or downloading the folders listed under [Where your data lives](#where-your-data-lives) while the server is stopped. Bedrock writes to `db` constantly while running, and a copy taken mid-write can fail to load.
The quickest way is to select the world folder in the [File Manager](/help/game-control-panel/the-file-manager), compress it into a single archive, then download that archive over [SFTP](/help/game-control-panel/using-sftp) or from the File Manager. [Back Up Your Server Files Manually](/help/game-control-panel/manual-backup) shows each step. Downloading gives you a remote copy, so even if every file on the server is cleared you still have something to restore from.
Take one before every [server update](/help/games/minecraft-bedrock/administration/updating-minecraft-bedrock-edition). Bedrock clients update automatically and cannot be rolled back, so the server has to follow, and a world that fails to load on the new version is much easier to deal with when you have a copy from a few minutes earlier.
### Restoring a manual backup
1. In the [Game Control Panel](https://gcp.winternode.com), select your server and click **Stop**
2. Rename or delete the world folder you are replacing inside `worlds`
3. Upload your copy over [SFTP](/help/game-control-panel/using-sftp) into `worlds`, named exactly as your `level-name`
4. Click **Start**
See [Restoring from a Personal Backup](/help/general-utilities/backup-restoration#restoring-from-a-personal-backup) for the full upload walkthrough.
### Still Not Working?
If your restored world does not load or the files are not where you expect, [contact our support team](https://winternode.com/discord?utm_source=help&utm_medium=article&utm_campaign=minecraft-bedrock-backing-up) with:
- Your [Server UUID](/help/getting-started/finding-your-server-uuid)
- The backup date and time you requested
- What is currently inside `/backup-restore` and which folder you moved
---
# Updating Minecraft Bedrock Edition
> Update your Minecraft Bedrock server on WinterNode easily using the Game Panel or manual installation, with tips for backups and safe file management.
Source: https://winternode.com/help/games/minecraft-bedrock/administration/updating-minecraft-bedrock-edition
Bedrock Clients update automatically and can not be reverted to old versions, so you need to be prepared to update your Bedrock Server as soon as new versions release. To that end, we’ll be covering how to easily update your Bedrock Server using the Panel Installer or the official Mojang files for a Vanilla Server. Our [Minecraft Bedrock server hosting](/games/minecraft?software=bedrock) includes the panel Reinstall Server button used in these steps.
## Using the Panel Installer
You can use the GCP to install the latest version of Bedrock by reinstalling the server files under `Advanced → Server Actions` using the Reinstall Server modal. This should only delete the server files related to the Server Version and leave things like your world and player data alone. You should still take a backup in the rare case that something goes wrong with the update.
## Manual Installation
If the Panel Installer isn’t working for any reason, you can manually install a Bedrock version using the steps below.
You’ll need to download latest Bedrock Server files for Linux from the [Minecraft website](https://www.minecraft.net/en-us/download/server/bedrock) after agreeing to the EULA and Privacy Policy. They will be downloaded as a zip file that you can upload to the server directly [Using SFTP](/help/game-control-panel/using-sftp).
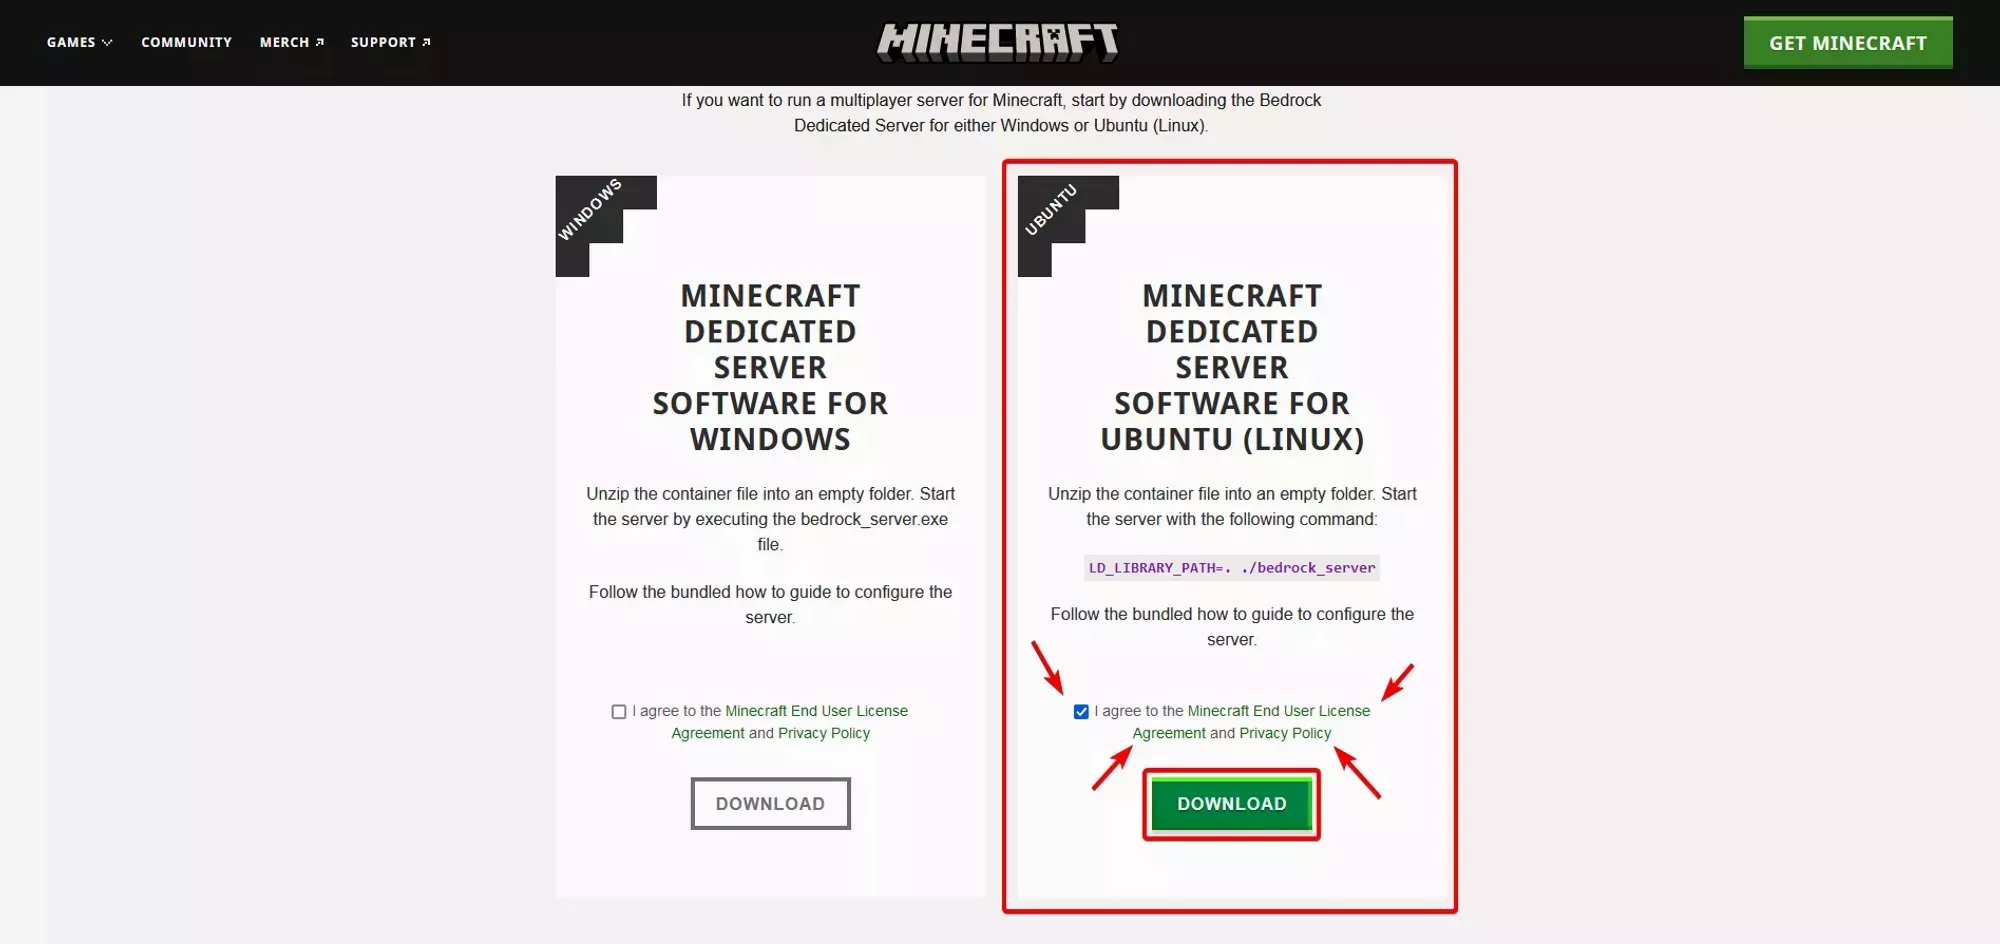
After you’ve finished downloading the File from the Minecraft Website and uploading it to your server you can decompress the files using the [File Manager](/help/game-control-panel/the-file-manager) in your root directory. The decompression will replace any files needed for the update and leave your world/player data behind, except for the `server.properties` file as mentioned below.
---
# Minecraft Bedrock Server Properties
> Reference guide for server.properties settings on your Minecraft Bedrock server, including player limit, gameplay, world, and performance options.
Source: https://winternode.com/help/games/minecraft-bedrock/configuration/server-properties
The `server.properties` file controls core settings for your Minecraft Bedrock server, including the player limit. You'll find it in your server's root directory.
## Editing server.properties
1. In the [Game Control Panel](https://gcp.winternode.com) sidebar, click **Console** and stop your server.
2. In the sidebar, click **File Manager**.
3. Find `server.properties` in the root directory and click it to open the editor.
4. Make your changes.
5. Click **Save**.
6. Return to the **Console** and start your server to apply the changes.
## Server Identity
**`server-port`** · Default: `19132`
The IPv4 port your server runs on. This is managed automatically by the panel. If your server is running on the wrong port, restarting it will resolve the issue.
**`server-portv6`** · Default: `19133`
The IPv6 port your server runs on. Also managed automatically by the panel.
## Players
**`max-players`** · Default: `10`
Maximum players allowed on the server. WinterNode doesn't limit player slots, so set this to whatever your plan can handle. The Bedrock default is `10` purely as a Mojang convention. There is no hosting cap on this value.
**`allow-list`** · Default: `false`
When enabled, only players on the allow list can join. This is Bedrock's equivalent of a whitelist. Manage the list with the in-game `/allowlist add ` command, or by editing `allowlist.json` in the root directory.
**`player-idle-timeout`** · Default: `30`
Minutes before idle players get kicked. Set to `0` to disable.
**`default-player-permission-level`** · Default: `member`
The permission level new players get when they first join. Options: `visitor`, `member`, `operator`. Use `operator` only on servers where you trust everyone with admin commands.
## Gameplay
**`force-gamemode`** · Default: `false`
Controls whether the server uses the current `gamemode` value or the gamemode that was saved when the world was created. When `true`, every player is sent the gamemode set under [Server Options](/help/games/minecraft-bedrock/configuration/startup-parameters) on each join, regardless of any per-player gamemode change made in a previous session. When `false`, players keep whatever gamemode was last saved for them in the world.
## World
**`level-name`** · Default: `Bedrock level`
The folder name for your world. Change this to load a different world folder. The folder must already exist in the `worlds/` directory.
**`level-seed`** · Default: blank
Seed for world generation. Only affects new worlds or ungenerated chunks. Leave blank for random.
## Performance
**`view-distance`** · Default: `32`
Maximum number of chunks sent to each player. Lower values reduce bandwidth and CPU load. For most public servers, `16` to `24` is a good balance.
**`tick-distance`** · Default: `4`
Number of chunks around each player that are actively ticked. Range is `4` to `12`. Lower values significantly reduce CPU usage on busy servers.
## Authentication
**`online-mode`** · Default: `true`
When enabled, the server verifies players with Xbox Live. Set to `false` to allow players without Xbox accounts.
## Resource Packs
**`texturepack-required`** · Default: `false`
Kicks players who decline a server resource pack. Use this when your server requires a specific pack to function correctly (custom items, UI, etc.).
For full pack setup including how to upload and assign packs, see the resource pack guides in the help center or open a ticket.
---
# Minecraft Bedrock Server Options
> Set up your Minecraft Bedrock server on WinterNode with version, name, gamemode, and more using easy server options in the Game Control Panel.
Source: https://winternode.com/help/games/minecraft-bedrock/configuration/startup-parameters
The WinterNode Game Control Panel provides a few easily configurable options called [Server Options](/help/game-control-panel/server-configuration#server-options) under the `Server Options` tab on your server page. These options make use of common command line arguments and are needed for the server to function as expected, but may be changed as needed using the fields provided in the panes.
## Bedrock Version
The version of Bedrock Edition used by the "Reinstall Server" button when installing the server.
## Server Name
The name of your Bedrock Server, used in the world files and configurations.
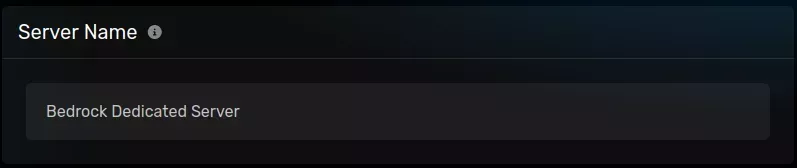
## Gamemode
The default gamemode for your server.
![The "Gamemode" pane with a default value of [survival], selected from with a [creative|survival|adventure] dropdown, located on the server options page of the server page.](/help/images/games/minecraft-bedrock/minecraft-bedrock_startup-parameters_gamemode.webp)
## Difficulty
The [Game Difficulty](https://minecraft.wiki/w/Difficulty)
![The "Difficulty" pane with a default value of [normal], selected from with a [peaceful|easy|normal|hard] dropdown, located on the server options page of the server page.](/help/images/games/minecraft-bedrock/minecraft-bedrock_startup-parameters_difficulty.webp)
## Allow Cheats
Whether or not "cheats" are allowed on the server.
![The "Allow Cheats" pane with a default value of [true], shown with a [true|false] dropdown, located on the server options page of the server page.](/help/images/games/minecraft-bedrock/minecraft-bedrock_startup-parameters_allow-cheats.webp)
---
# How to Connect to Your Minecraft Bedrock Server
> Find and connect to your Minecraft Bedrock server on WinterNode using your server IP and port, with step-by-step instructions for all device types.
Source: https://winternode.com/help/games/minecraft-bedrock/connecting-to-minecraft-bedrock-servers
## Finding the IP and port
Bedrock Edition servers running the Bedrock Edition software, IE not using the Geyser plugin/proxy, can be connected to using the Primary IP and port that you can find by [Locating the IP address](/help/getting-started/connecting) and port of your server. If you do not have a Bedrock server yet, our [Bedrock server hosting](/games/minecraft?software=bedrock) gives you a Primary IP and port to share the moment it is ready.
## For players
As a server owner, you should share the IP address or domain and port (if applicable) with your players. As a player, you can follow the steps below.
The UI on different Bedrock Edition devices is very similar, but we're using Android as an example.
Once you have the address and port, you'll need to navigate to the "Servers" tab of the "Play" menu, then scroll down below the "Featured Servers" to find the "Add Server" button.
You should get a popup with the title "Add External Server", which has fields for the "Server Name", "Server Address", and "Port". The "Server Name" can be anything you like, but the "Server Address" should be the address and port you figured out previously.
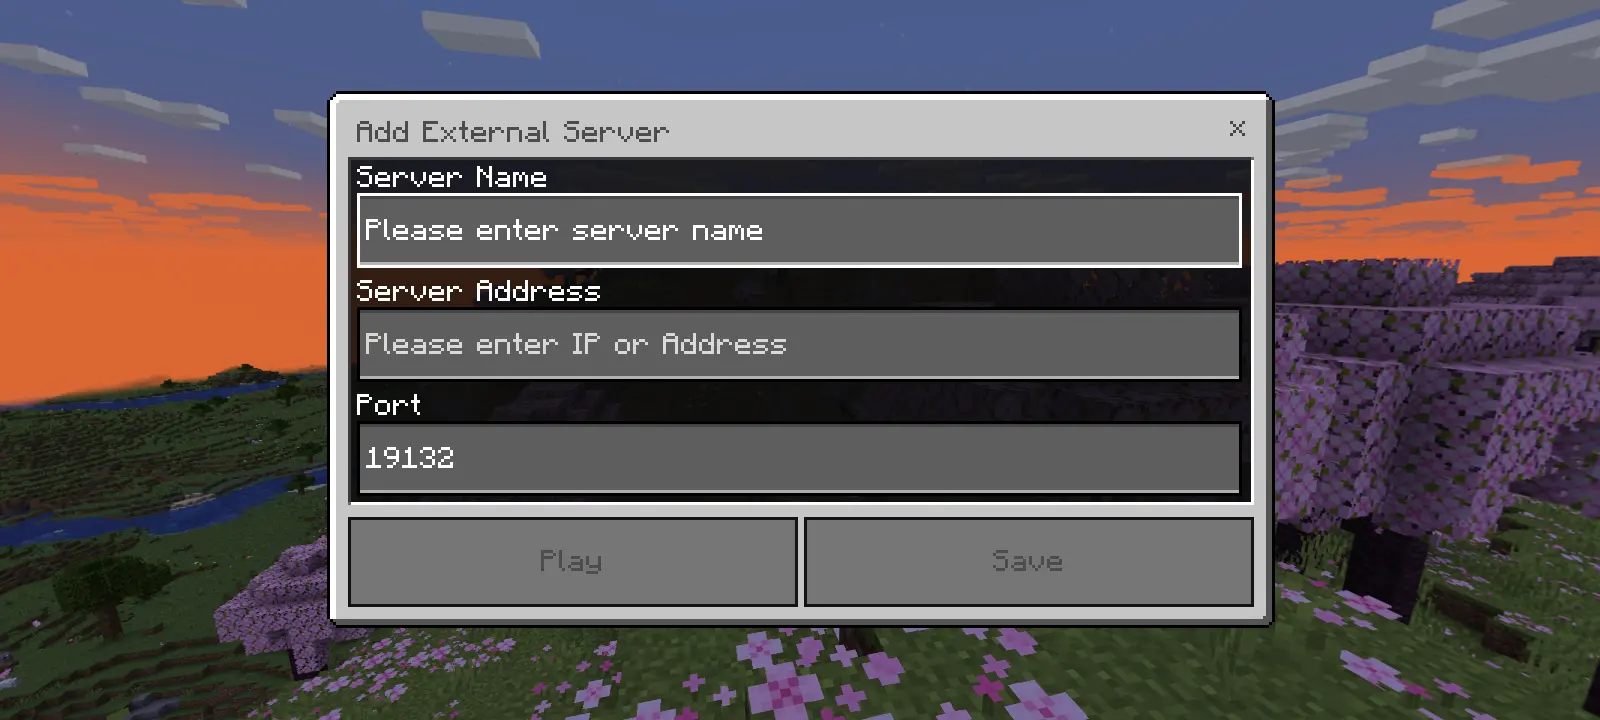
---
# How to Connect Xbox and Consoles to a Bedrock Server
> Connect Xbox, PlayStation, and Nintendo Switch to your WinterNode Minecraft Bedrock server by joining through a friend or using BedrockConnect.
Source: https://winternode.com/help/games/minecraft-bedrock/connecting-xbox-and-consoles
Xbox, PlayStation, and Nintendo Switch have no **Add Server** button in Minecraft. To join your WinterNode Bedrock server from a console, use one of the two methods below.
## Method 1: Join through a friend
Use this when someone is already on your server from a phone, PC, or Windows device. It is the fastest way in and needs no setup on the console.
1. On a phone or PC, join your Bedrock server using [Add External Server](/help/games/minecraft-bedrock/connecting-to-minecraft-bedrock-servers).
2. Make sure that player is on your **Friends** list in Minecraft. Add them by their gamertag if they are not.
3. On your console, open the **Play** screen and go to the **Friends** tab.
4. Find your friend's session and select **Join**.
You are now on the server as a normal player. You stay connected even if your friend leaves.
## Method 2: BedrockConnect
BedrockConnect lets a console connect to any server through the **Featured Servers** list. You point your console's DNS at a BedrockConnect address, then enter your server IP and port.
1. Get the current DNS address from the [BedrockConnect project](https://github.com/Pugmatt/BedrockConnect).
2. On your console, open your network DNS settings and set the **Primary DNS** to that address. Paths are listed below.
3. Restart Minecraft.
4. On the **Play** screen, open the **Servers** tab and select any server under **Featured Servers**.
5. In the BedrockConnect menu that opens, choose to add a server, then enter your server IP and port.
6. Select your server to connect.
**Where DNS settings live:**
- **Xbox:** **Settings** > **General** > **Network settings** > **Advanced settings** > **DNS settings** > **Manual**
- **PlayStation:** **Settings** > **Network** > **Settings** > your connection > **Advanced Settings** > **DNS Settings** > **Manual**
- **Nintendo Switch:** **System Settings** > **Internet** > **Internet Settings** > your connection > **Change Settings** > **DNS Settings** > **Manual**
## Playing on a Java server with cross-play?
If your server runs Java Edition with the Geyser plugin, console players still connect through BedrockConnect (Method 2 above). See the [Geyser plugin guide](/help/games/minecraft-java/plugins/geyser) for the server side of cross-play.
---
# How to Enable Experimental Features in Minecraft Bedrock
> Enable Experimental Features on your Minecraft Bedrock server by turning them on in your Bedrock client, then uploading that world to the server.
Source: https://winternode.com/help/games/minecraft-bedrock/setup/enabling-experimental-features
Experimental Features are a per-world, client-side toggle. You turn them on for a world in your Bedrock client, then upload that world to your server. There is no server-side switch and nothing to change in the [Game Control Panel](https://gcp.winternode.com).
## Quick answer
- **New world:** create it in your Bedrock client, turn on the experiments you want in the world settings, then load in once so it saves.
- **Existing server world:** download it over SFTP first, then enable the experiments on it in your Bedrock client.
- **Then upload the world** to your server's `worlds` folder and set `level-name` in `server.properties` to match the folder name exactly. Full steps: [How to Import a World to Your Minecraft Bedrock Server](/help/games/minecraft-bedrock/setup/world-import).
Microsoft's [Experimental Features documentation](https://learn.microsoft.com/en-us/minecraft/creator/documents/experimentalfeaturestoggle#experimental-features-available-in-minecraft-bedrock-edition) lists which experiments are currently available and how the toggle behaves in each client. These steps apply to any [hosted Bedrock server](/games/minecraft?software=bedrock).
## Enable Experiments on a New World
1. Open your Bedrock client and start creating a world.
2. In the world settings, open **Experiments** and turn on the features you want, accepting the warning when it appears.
3. Create the world, load into it, and give the game a few seconds to save.
The world now sits in your client's saves folder, ready to upload.
## Enable Experiments on an Existing World
If the world is already on your server, download it first. Connect [using SFTP](/help/game-control-panel/using-sftp), download the world folder from the `worlds` directory, and move it into your Bedrock client's saves folder.
Where the Bedrock saves folder is
On Windows, paste this into the run box (Win+R) or a File Explorer address bar:
`%LocalAppData%/Packages/Microsoft.MinecraftUWP_8wekyb3d8bbwe/LocalState/games/com.mojang/minecraftWorlds`
Other platforms may require special device privileges, a third-party app, or a pre-existing configuration to store worlds somewhere you can reach. Use Windows if you have access to it.
If you are working from a server backup instead, the world folder is the one containing a `levelname.txt` file.
1. In your Bedrock client's world list, click the pencil (edit) icon next to the world.
2. Open **Experiments** and turn on the first feature you want, then accept the warning. Minecraft creates a copy of the world at this point.
3. Switch to that new copy, enable any remaining experiments on it, then load in once so it saves.
If the world is already in your client with the experiments you want, open the pencil icon to confirm they are on and skip straight to uploading.
## Upload the World to Your Server
Stop your server, replace the world folder inside `worlds`, and set `level-name` in `server.properties` to the exact folder name (spaces and capitalization included). Otherwise the server generates a blank world and loads that instead.
Those steps, including how to reach `server.properties` and what the folder should look like, are covered in [How to Import a World to Your Minecraft Bedrock Server](/help/games/minecraft-bedrock/setup/world-import). Nothing about the upload changes for a world with experiments enabled.
## Addons That Need Beta APIs
**Beta APIs** is the experiment that Script API addons rely on. Without it, packs referencing `@minecraft/server` or `@minecraft/server-net` fail to load. Enable it the same way as any other experiment, then follow [How to Install Addons on Your Minecraft Bedrock Server](/help/games/minecraft-bedrock/setup/installing-addons) to register the packs.
## Need a hand?
Not sure whether an experiment is worth the risk to your world, or want us to handle the upload? [Reach out to our team](https://winternode.com/discord?utm_source=help&utm_medium=article&utm_campaign=minecraft-bedrock-enabling-experimental-features) anytime. We are happy to take a backup and walk it through with you.
---
# How to Install Addons on Your Minecraft Bedrock Server
> Install behavior packs and resource packs on your Minecraft Bedrock server, configure the pack JSON files, and fix common addon loading errors.
Source: https://winternode.com/help/games/minecraft-bedrock/setup/installing-addons
An addon loads on a Bedrock server only when the pack folder is on the server **and** its header UUID is registered in the world's pack JSON files. Uploading the pack on its own changes nothing in-game.
## Quick answer
- **Extract `.mcpack` and `.mcaddon` files on your own computer.** They are renamed `.zip` archives, and BDS reads folders, not archives.
- **Upload** behavior pack folders to `/behavior_packs/` and resource pack folders to `/resource_packs/` over [SFTP](/help/game-control-panel/using-sftp), with `manifest.json` directly inside each folder.
- **Register every pack** in `world_behavior_packs.json` and `world_resource_packs.json` inside your world folder, using the `uuid` from the manifest's **`header`** section.
- **Check `level-name`** in `server.properties` matches your world folder name exactly, then start the server and watch the console.
If you run your world on our [Minecraft Bedrock server hosting](/games/minecraft?software=bedrock), you upload these pack folders over SFTP.
## Step 1: Upload Your Pack Folders
Addons download as `.mcpack` (a single pack) or `.mcaddon` (a bundle of packs). Both are renamed `.zip` archives, and the File Manager cannot extract either extension, so unpack them on your own computer first: rename the file to `.zip` and use your operating system's built-in unzip tool, or open it directly with an archive tool like 7-Zip.
1. Connect to your server [using SFTP](/help/game-control-panel/using-sftp)
2. Upload each behavior pack folder to `/behavior_packs/` and each resource pack folder to `/resource_packs/`
Each pack must be a single folder with a `manifest.json` file **directly inside it**, not nested in a subfolder. A `.mcaddon` usually holds several pack folders, so upload each one to whichever directory matches its type.
## Step 2: Find the Pack UUID from manifest.json
Open the pack's `manifest.json` and copy the `uuid` listed under the **`header`** section. The `modules` UUID looks identical and is the most common reason a pack silently fails to load.
```json
{
"format_version": 2,
"header": {
"name": "My Addon",
"uuid": "xxxxxxxx-xxxx-xxxx-xxxx-xxxxxxxxxxxx", ← use this one
"version": [1, 0, 0]
},
"modules": [
{
"uuid": "yyyyyyyy-yyyy-yyyy-yyyy-yyyyyyyyyyyy", ← NOT this one
"type": "data",
"version": [1, 0, 0]
}
]
}
```
## Step 3: Register Packs in the World JSON Files
Inside your world folder (found under `/worlds/` on the server), there are two files that tell BDS which packs to load:
- `world_behavior_packs.json` lists your behavior packs
- `world_resource_packs.json` lists your resource packs
Each file must be a valid JSON array with one entry per pack:
```json
[
{
"pack_id": "xxxxxxxx-xxxx-xxxx-xxxx-xxxxxxxxxxxx",
"version": [1, 0, 0]
},
{
"pack_id": "zzzzzzzz-zzzz-zzzz-zzzz-zzzzzzzzzzzz",
"version": [2, 1, 7]
}
]
```
The `pack_id` must be the **header UUID** from Step 2. The `version` must match the version array in the pack's `manifest.json` header.
Common JSON errors that prevent packs from loading
| Error | What to fix |
|-------|-------------|
| `//` comment in the file | JSON does not support comments. Remove any `//` or `/* */` lines |
| Missing `,` between entries | Every `}` that closes an entry (except the last one) needs a trailing `,` |
| Period instead of comma (`}.`) | Change `}.` to `},` |
| Leading space in `pack_id` value | The UUID must start immediately after the `"`. Remove any spaces |
| Mismatched entry count | Every `pack_id` must correspond to a folder that actually exists in `behavior_packs/` or `resource_packs/`. Remove entries for packs that aren't uploaded |
| File saved with a BOM | Some editors save UTF-8 with a byte-order mark, which BDS cannot parse. Re-save as plain UTF-8 |
Use a JSON validator (such as our [JSON Validator tool](/tools/validate/json)) to check your files before starting the server if you're unsure.
## Step 4: Verify level-name Matches Your World Folder
Open `server.properties` and check the `level-name` value. It must **exactly** match the name of your world folder inside `/worlds/`, including any spaces or capitalization.
```
# server.properties
level-name=My World ← must match the folder name exactly
```
If `level-name=MyWorld` but your folder is named `My World`, BDS auto-creates a blank `MyWorld` folder and loads that instead. Your pack registrations in `My World` are never read.
## Step 5: Enable Beta APIs (if packs use the Script API)
Some addons use the Bedrock **Script API** for custom gameplay logic, UI, or entity behavior. These need the **Beta APIs** experiment enabled on the world, which is a client-side toggle: download the world, turn on **Beta APIs** under Experiments in your Bedrock client, then re-upload it. See [Enabling Experimental Features](/help/games/minecraft-bedrock/setup/enabling-experimental-features) for the full procedure.
Without it, those packs fail with errors referencing `@minecraft/server` or `@minecraft/server-net`.
## Step 6: Start the Server and Check the Console
Start your server and watch the console output. A working addon load looks like:
```
[INFO] Loading resource pack: My Addon v1.0.0
```
If a pack fails, the console shows which pack and why.
Common console error messages
| Console message | Cause |
|-----------------|-------|
| `broken resource manifest` | manifest.json is missing, malformed, or uses an incorrect UUID |
| `Pack not found` | The `pack_id` in your world JSON has no matching folder in `behavior_packs/` or `resource_packs/` |
| `Script module failed to load` | Beta APIs experiment is not enabled on the world |
| `block definition error` | The pack uses block definitions incompatible with your current BDS version. Check for a pack update |
## Need a hand?
Stuck on a pack that still will not load? [Reach out to our team](https://winternode.com/discord?utm_source=help&utm_medium=article&utm_campaign=minecraft-bedrock-installing-addons) anytime. Send us the pack name and your console output and we will take a look. If we can fix it on your server for you, we will.
---
# How to Import a World to Your Minecraft Bedrock Server
> Import a world to your Minecraft Bedrock server on WinterNode using SFTP or File Manager, with steps for folder setup, configuration, and format...
Source: https://winternode.com/help/games/minecraft-bedrock/setup/world-import
If you have a Minecraft Bedrock world from another server host, a backup, or Single Player then follow these steps to upload it to your server! The same upload steps let you move a world onto our [managed Minecraft Bedrock hosting](/games/minecraft?software=bedrock) from another host.
Stop your server.
Failure to stop your server before uploading a world may result in data loss or corruption.
Locate the Saves you want to upload.
If your upload a save from a backup of your server, locate the folder that contains a `levelname.txt` file.
If you're uploading a world from Single player, use the information below to locate the saves folder.
### Windows
The location of the saves folder is different for each platform that Minecraft Bedrock runs on, but the client with the easiest saves location is Windows, which you can access by entering the following address into the run box (Win+R) or the address bar of a File Explorer window.
`%LocalAppData%/Packages/Microsoft.MinecraftUWP_8wekyb3d8bbwe/LocalState/games/com.mojang/minecraftWorlds`
### Other systems
Other versions of Minecraft Bedrock edition may require special privileges on your device, a 3rd-party program, or a pre-existing configuration to store your worlds to an external location. It’s recommended to use Windows if you have access to it, or research other methods of locating or accessing the saves location if you do not.
Open FileZilla or another SFTP application.
You'll need to connect to your server using SFTP in order to upload the world. If you haven't done this before, check out our guide on [Using SFTP](/help/game-control-panel/using-sftp).
Navigate to the `worlds` folder on your server [Using SFTP](/help/game-control-panel/using-sftp).
Delete the existing world folder (usually named `bedrockWorld`).
Upload your world folder to the `worlds` directory.
Open the `server.properties` file in your server's root directory.
You can either use the [File Manager](/help/game-control-panel/the-file-manager) in the WinterNode Control Panel or download the file via SFTP, edit it locally, and re-upload it.
Find the line that starts with `level-name=` and change the value to match the name of your uploaded world folder.
For example, if your world folder is named `MyWorld`, the line should read `level-name=MyWorld`.
Start your server.
---
# Backing Up Your Minecraft Java Server
> Back up your Minecraft Java server on WinterNode: where world data lives, what a snapshot restore does and does not do, and how to take manual backups.
Source: https://winternode.com/help/games/minecraft-java/administration/backing-up
Backing up a Minecraft server means knowing which folders hold the data you care about, because the world, the plugins or mods, and the server configuration all live in different places. WinterNode also takes [automatic snapshots](/help/getting-started/backup-system) of your whole server every 12 hours as an additional safety net, taken between 2AM-3AM and 2PM-3PM CST and kept for 45 days.
## Where your data lives
Everything below is relative to your server root, which is what you see when you open the [File Manager](/help/game-control-panel/the-file-manager) or connect over [SFTP](/help/game-control-panel/using-sftp).
### World data
The main world folder is named after the `level-name` setting in `server.properties`, which is `world` by default. How the Nether and End are stored depends on the server software:
| Server software | Overworld | Nether | End |
|-----------------|-----------|--------|-----|
| Paper, Spigot, Purpur, and other Bukkit-based servers | `world` | `world_nether` | `world_the_end` |
| Vanilla, Fabric, Forge, NeoForge | `world` | `world/DIM-1` | `world/DIM1` |
If you changed `level-name`, the word `world` in each of those names is replaced with whatever you set. A Paper server with `level-name=survival` has `survival`, `survival_nether`, and `survival_the_end`.
The main world folder also holds `level.dat` (seed, spawn, game rules), `playerdata` (inventories and ender chests), `stats`, `advancements`, and `datapacks`. On Paper and Spigot, player data stays in the main world folder even though the Nether and End are split out, so a copy of `world` on its own still captures every player's inventory.
### Plugins, mods, and configuration
These are **not** inside the world folder. Losing them does not affect your world, and restoring the world does not bring them back:
- `plugins` on Paper and Spigot, with each plugin's config and data in its own subfolder. This is where CoreProtect's `database.db` and BlueMap's render output live.
- `mods` and `config` on Fabric, Forge, and NeoForge.
- `server.properties`, `ops.json`, `whitelist.json`, `banned-players.json`, `banned-ips.json`, and `usercache.json` in the server root, plus `bukkit.yml`, `spigot.yml`, and `config/paper-global.yml` on Paper.
A full manual backup should include the world folders, the plugin or mod folder, and those root files. If you only have room for one thing, take the world folders.
## Restoring from a WinterNode snapshot
Our snapshots are a copy of your whole server directory, taken between 2AM-3AM and 2PM-3PM CST and kept for 45 days. Request one with the `/request-backup-files` command in a [Discord](https://winternode.com/discord?utm_source=help&utm_medium=article&utm_campaign=minecraft-java-backing-up) ticket, or by ticket in the Client Area with your server's Node, UUID, and the backup window you want. Restores are usually done well inside 24 hours.
### Moving the restored world into place
1. Wait for the bot to post its *Backup Restoration Complete* message in your ticket
2. In the [Game Control Panel](https://gcp.winternode.com), select your server and click **Stop**
3. In the sidebar, click **File Manager**
4. Rename your current `world`, `world_nether`, and `world_the_end` folders (for example to `world.old`) so you can fall back to them
5. Open the `/backup-restore` folder
6. Move the restored `world`, `world_nether`, and `world_the_end` (or just `world` on Vanilla, Fabric, and Forge) into your server root
7. Click **Start**
Your server should now show as **Online** with the restored world loaded. [Restoring Your Server from a Backup](/help/general-utilities/backup-restoration#moving-your-files-to-where-they-should-be) walks through the move with screenshots.
You do not have to move everything. If a griefer wrecked the Overworld but your plugins are fine, move only the world folders and leave the rest of `/backup-restore` alone. If a plugin update broke the server, move `plugins` and leave the world as it is.
### What the snapshot leaves out
Individual files over 5GB and MySQL databases are [excluded](/help/getting-started/backup-system#whats-excluded). This bites Minecraft more than most games:
- **CoreProtect** keeps its log in a single SQLite file, `plugins/CoreProtect/database.db`. On a busy server it grows past 5GB within a few months, and once it does it is left out of every snapshot. Rollback history from before your last manual copy is gone if the file is lost.
- **BlueMap** render data can cross the same line, so a restore may come back with the map needing a full re-render.
- **MySQL databases** you created under **Management** > **Databases** are never included. Plugins that store data in MySQL (some economy, permissions, and stats plugins) need their own export.
- **Backups made by plugins** such as [DriveBackupV2](/help/games/minecraft-java/plugins/drivebackupv2) are excluded too. That is fine when they are being uploaded off-server, which is the point of using them, but a local-only `backups` folder is not protected by our snapshot.
If you rely on any of these, keep your own copy. The [manual backup](#taking-a-manual-backup) steps below cover it.
## Taking a manual backup
Minecraft has no built-in automatic backup. Take one yourself by copying or downloading the folders listed under [Where your data lives](#where-your-data-lives) while the server is stopped, so nothing is being written mid-copy.
The quickest way is to select the world folders in the [File Manager](/help/game-control-panel/the-file-manager), compress them into a single archive, then download that archive over [SFTP](/help/game-control-panel/using-sftp) or from the File Manager. [Back Up Your Server Files Manually](/help/game-control-panel/manual-backup) shows each step. Downloading gives you a remote copy, so even if every file on the server is cleared you still have something to restore from.
For backups that run on their own, [DriveBackupV2](/help/games/minecraft-java/plugins/drivebackupv2) uploads scheduled archives to Google Drive, OneDrive, or an SFTP destination on Paper and Spigot servers. It is the best option for large CoreProtect databases, since it is under your control and not subject to the 5GB limit.
### Restoring a manual backup
1. In the [Game Control Panel](https://gcp.winternode.com), select your server and click **Stop**
2. Rename or delete the world folders you are replacing
3. Upload your copies over [SFTP](/help/game-control-panel/using-sftp), using the same folder names as before
4. Click **Start**
See [Restoring from a Personal Backup](/help/general-utilities/backup-restoration#restoring-from-a-personal-backup) for the full upload walkthrough.
### Still Not Working?
If your restored world does not load or the files are not where you expect, [contact our support team](https://winternode.com/discord?utm_source=help&utm_medium=article&utm_campaign=minecraft-java-backing-up) with:
- Your [Server UUID](/help/getting-started/finding-your-server-uuid)
- The backup date and time you requested
- What is currently inside `/backup-restore` and which folders you moved
---
# Minecraft Server Bot Scanners
> Learn about Minecraft server bot scanners, their impact, and how WinterNode blocks known scanner IPs to protect your server from spam and unwanted...
Source: https://winternode.com/help/games/minecraft-java/administration/bot-scanners
## Introduction
If you're seeing rapid-fire connection attempts in your server console from names you don't recognize, you're likely dealing with server scanners. These are automated bots that ping Minecraft servers to gather data or spam ads. They don't actually join (they aren't real accounts), but they can fill your console with noise. Here's what they are and what we've done about them. On WinterNode [Minecraft server hosting](/games/minecraft), we null route the known scanners at our Chicago nodes, so this console noise never reaches servers hosted there.
## What are Minecraft Server Scanners
Minecraft Server Scanners are automated bots that attempt to connect to Minecraft servers. Their main goal is to send requests to servers which result in a message being displayed in the server's console. These bots do not join the server as they aren't real accounts, which allows them to spam requests at a rapid pace. These bots primarily gather statistics, spam, and in some cases, advertise. While these bots are generally harmless in terms of gameplay, they can cause annoyance and concern for server administrators due to the constant spam messages they generate in the server console.
## Known Server Scanners
It's important to be aware of the known server scanners to better understand their impact on your server.
Below is a list of known server scanners, along with their IP addresses:
Spam Advertising using Login Attempts & Potential risk of scanning for insecure servers.
## Blocking Server Scanners: Our Approach
We null route (drop all traffic from) the IP addresses of known server scanners at our **Chicago nodes**. If your server is hosted there, these scanners can't reach it at all, so no action is needed on your end. We're working on extending these blocks to our other locations (UK, Germany, Australia, Finland, and France).
If your server is hosted elsewhere and you want to block these scanners yourself, here are the IP addresses and ranges we null route:
## Reporting New Scanners
If you spot new scanner IPs spamming your console, let us know through a support ticket so we can add them to the block list. If one of our null routes is causing issues for your server (blocking something it shouldn't), reach out and we'll look into it.
---
# How to Find Your Minecraft Client Logs
> Find your Minecraft client logs and crash reports to help troubleshoot crashes, lag, and connection issues. Covers the vanilla launcher and third-party launchers.
Source: https://winternode.com/help/games/minecraft-java/administration/getting-client-logs
Find your Minecraft client logs to troubleshoot crashes, rendering issues, lag, and disconnects. The client and server keep separate logs - this article covers finding the client-side files.
## What You're Looking For
Client logs live in two places:
- **`logs/latest.log`** - Created every time you launch the game. Contains general output including errors, warnings, and mod loading info.
- **`crash-reports/`** - Generated when the game crashes. Each file is timestamped and includes a stack trace with the cause.
For most troubleshooting, `latest.log` is the one you want. Upload it to [mcLogs](https://mclo.gs/) to get a shareable link you can send to support or post in Discord.
## Vanilla Launcher (Windows)
### Default Location
1. Open Windows File Explorer
2. Type `%appdata%/.minecraft` in the address bar and press Enter
3. Open the `logs` folder for `latest.log`, or `crash-reports` for crash files
### Custom Installation Location
If you set a custom game directory when creating the installation:
1. Open the Minecraft Launcher and select **Minecraft: Java Edition**
2. Click the **Installations** tab
3. Hover over the installation you use and click the folder icon on the right
4. This opens the game directory - find `logs` or `crash-reports` from here
## Vanilla Launcher (macOS)
1. Open Finder
2. Click **Go** > **Go to Folder** in the menu bar
3. Type `~/Library/Application Support/minecraft` and press Enter
4. Open the `logs` or `crash-reports` folder
## Third-Party Launchers
Most third-party launchers store logs in a separate directory per instance.
**CurseForge / Overwolf:** Right-click your modpack instance and select **Open Folder**. The `logs` and `crash-reports` folders are inside.
**Prism Launcher / MultiMC:** Right-click the instance and select **Minecraft Folder** (or **.minecraft**). Logs are in the same `logs/` and `crash-reports/` directories.
**ATLauncher:** Click the instance, then **Open Folder**. Same directory structure.
In all cases, the log files are in the same relative location (`logs/latest.log` and `crash-reports/`) - the only difference is where each launcher puts its instance folder.
## What to Look For in Logs
If you're reading the log yourself before sending it to support:
- **Crash cause** - In crash reports, look for the line starting with `Description:` near the top. It usually tells you what went wrong (e.g., "Ticking entity", "Rendering screen").
- **Mod errors** - Search for `ERROR` or `FATAL` in `latest.log`. Mod loading failures appear early in the log with the mod name.
- **Out of memory** - Look for `java.lang.OutOfMemoryError`. This means your client needs more RAM allocated in the launcher settings.
- **Connection issues** - Search for `Connection refused` or `Timed out` if you can't connect to a server.
---
# How to Recover from Griefing and Prevent Future Attacks
> Restore your Minecraft server after a grief attack and secure it against future incidents using online-mode, AuthMe, and CoreProtect.
Source: https://winternode.com/help/games/minecraft-java/administration/grief-recovery-and-prevention
Recover your Minecraft server after a grief attack and put protections in place to prevent it from happening again.
The most common cause of griefing on servers that have otherwise functioning permissions is `online-mode=false` set in `server.properties` without an authentication plugin. When online mode is disabled, the server skips Mojang account verification - meaning anyone can join using any username, including impersonating admins or other players with elevated permissions.
## Step 1: Restore from a Backup
WinterNode automatically backs up every server twice daily, around **2am-3am and 2pm-3pm US Central Time**. If your world was griefed, open a support ticket on [Discord](https://winternode.com/discord?utm_source=help&utm_medium=article&utm_campaign=minecraft-java-grief-recovery-and-prevention) and let us know which backup window you'd like restored (before the grief happened).
If you have your own backup archive, you can restore it yourself - see the [Backup Restoration guide](/help/general-utilities/backup-restoration) for step-by-step instructions.
## Step 2: Identify the Cause
Before making changes, check whether `online-mode` is the issue:
1. Open **File Manager** and find `server.properties` in your root directory
2. Look for the `online-mode` setting:
```properties
online-mode=false
```
If it's set to `false`, this is likely how the griefer gained access. Continue to Step 3.
## Step 3: Fix the Security Vulnerability
You have two options depending on whether your server needs offline mode:
### Option A: Re-enable Online Mode (Recommended)
If you don't specifically need offline mode (for example, you're not running a proxy or cracked client server), switching back to `true` restores Mojang account verification and closes the impersonation vulnerability immediately.
1. In `server.properties`, set:
```properties
online-mode=true
```
2. Save the file and restart your server
### Option B: Install AuthMe (If You Need Offline Mode)
If your server needs to stay in offline mode - for example, because it runs behind a Velocity or BungeeCord proxy, or supports cracked clients - install an authentication plugin to require players to register and log in with a password before they can interact with the server.
[AuthMe](https://www.spigotmc.org/resources/authmereloaded.6269/) is the most widely used option:
1. Download **AuthMeReloaded** from [SpigotMC](https://www.spigotmc.org/resources/authmereloaded.6269/)
2. Stop your server
3. Upload the JAR to your `plugins/` folder using the **File Manager** or [SFTP](/help/game-control-panel/using-sftp)
4. Start your server to generate the AuthMe config files
5. Players will now be prompted to `/register ` on first join and `/login ` on every subsequent join
## Step 4: Install CoreProtect for Future Incidents
Even with online mode properly secured, griefing can still happen through legitimate players. [CoreProtect](/help/games/minecraft-java/plugins/coreprotect) logs every block placement, block break, and container interaction on your server, and lets you roll back damage by a specific player over a time range - without needing to restore a full backup.
```
/co rollback u: t:1h r:100
```
This rolls back everything a player did in the last hour within 100 blocks of where you're standing. See the [CoreProtect guide](/help/games/minecraft-java/plugins/coreprotect) for full command reference and setup instructions.
---
# Fixing Malware on Your Minecraft Server
> Resolve the 'no route to host' error on your Minecraft server by removing malware, reinstalling plugins from official sources, and securing your setup.
Source: https://winternode.com/help/games/minecraft-java/administration/no-route-to-host
The `java.net.NoRouteToHostException: No route to host` error is one of a few known errors that appear when you've been infected with malware through one of the plugins you've installed on your Bukkit based server. You'll normally find infected plugins on sites that leak premium plugins or re-host them away from the authors official source, though the official source can be compromised on rare occasions.
## How to Remove the Malware
If you're receiving this error you'll need to take immediate action by following the steps below.
1. Stop your server and take a manual backup using our [Manual Backup](/help/game-control-panel/manual-backup) guide.
2. Delete and re-install all of the plugins currently on your server
- You’ll want to make sure you take note of the plugins you currently have, your backup can help with that.
- Make sure you delete all of them. The malware can spread between plugins and missing one can cause it to spread again.
- Make sure to download them from the **official sources**. Do not download any plugins from a site that re-hosts plugins or hosts plugins that - are otherwise sold by their author. Good sources include but are not limited to
- [
spigotmc.org
](https://spigotmc.org/)
- [
builtbybit.com
](https://builtbybit.com/)
- [
github.com
](https://github.com)
- [
bukkit.org
](https://bukkit.org/)
- [
hangar.papermc.io
](https://hangar.papermc.io/)
- and the author's official website such as [papermc.io](https://papermc.io), [luckperms.net](https://luckperms.net/), and [essentialsx.net](https://essentialsx.net/)
3. Delete and re-install your server software.
- You can use the Edition Installer as per our guide on [Using the Edition Installer](/help/games/minecraft-java/setup/using-the-edition-installer) or by uploading the jar file directly [Using the File Manager](/help/game-control-panel/the-file-manager) or [Using SFTP](/help/game-control-panel/using-sftp).
4. Take a “clean” backup before starting your server.
5. Start your server and take another backup and run [MCAntiMalware](https://www.spigotmc.org/resources/spigot-anti-malware.64982/).
**5.1**. You’ll need to start your server, stop it, and take another backup.
**5.2**. You’ll want to run [MCAntiMalware](https://www.spigotmc.org/resources/spigot-anti-malware.64982/) to make sure that you weren’t infected again.
6. You can run [MCAntiMalware](https://www.spigotmc.org/resources/spigot-anti-malware.64982/) by changing the Server Jar option in your servers [Server Options](/help/games/minecraft-java/configuration/startup-parameters) to the name of the jar you download from the [MCAntiMalware](https://www.spigotmc.org/resources/spigot-anti-malware.64982/) page.
**6.1** If you were infected, revert back to your “clean” backup and run [MCAntiMalware](https://www.spigotmc.org/resources/spigot-anti-malware.64982/) before starting your server to get a list of what plugins are infected before the server starts. If you downloaded them from the official sources, you may need to contact those plugin authors.
---
# Minecraft Server Administration
> Essential guides for managing and maintaining your Minecraft Java server, including updates, world management, and troubleshooting.
Source: https://winternode.com/help/games/minecraft-java/administration/overview
This section covers essential server administration tasks for your Minecraft Java server.
## Server Management
- [Updating Your Server](/help/games/minecraft-java/administration/updating-minecraft-java-edition) - Keep your server up to date with the latest Minecraft versions
- [World Management](/help/games/minecraft-java/administration/world-management) - Backup, restore, and manage your server worlds
## Troubleshooting
- [Getting Client Logs](/help/games/minecraft-java/administration/getting-client-logs) - How to collect logs for troubleshooting
- [World Format Differences](/help/games/minecraft-java/administration/spigot-vanilla-world-formats) - Understanding Spigot vs Vanilla world formats
## Security
- [Server Security](/help/games/minecraft-java/administration/bot-scanners) - Protect your server from bots and scanners
- [Connection Issues](/help/games/minecraft-java/administration/no-route-to-host) - Troubleshoot "No route to host" errors
---
# Minecraft Spigot and Vanilla World Formats
> Learn the difference between Spigot and Vanilla Minecraft world formats and how to safely convert and migrate worlds between each format step by step.
Source: https://winternode.com/help/games/minecraft-java/administration/spigot-vanilla-world-formats
Worlds made with Spigot have a different folder structure to those made with vanilla, even though the actual data within the folders is the same. If you want to use your Vanilla world on a Spigot based server, or if you want to move a Spigot world to a Vanilla/Fabric Server or Single player game, then you'll have to move the folders a bit to get the game to recognize the files for what they are.
## Vanilla to Spigot
Get the seed of your Vanilla world
Lucky for us, Spigot does most of the work of restructuring the world. There are a few things we have to ourselves though. To start with we need to get the seed of your Vanilla world. If you don't know what it is then you'll need to load the world in either single-player or multi-player and run the `/seed` command and save the output.
Rename your world folder
Now you need to rename the backup of your world file to either `world` or another name without spaces. If you want to choose another name you can substitute spaces with `_` or `-`.
Stop your server and delete the default spigot world stored in world, world_nether, and world_the_end
The next step is to work on the Spigot side of things. Start by stopping your server and navigating to the file manager.
We need to delete the default world generated by spigot. It's stored in 3 separate folders named `world`, `world_nether`, and `world_the_end`. Spigot will regenerate these files with the contents of your Vanilla world
Add your seed to server.properties using the level-seed property
This is where we need the seed you obtained earlier. Navigate to the `server.properties` file and change the contents of `level-seed` to your seed. This will make sure that newly generated chunks will match your current world.
Change the level-name=world property in server.properties to your world name (if needed)
You only need to do this step if you chose a folder name other than `world`, but if you did then you need to change the `level-name=world` property in `server.properties` to your the name that you chose.
Compress and upload your world over SFTP
Now you need to compress your world folder, not its contents, and upload it to your server over SFTP. Make sure to upload the compressed file to the root of your server. The root is where you'll find files like `server.jar` and `server.properties`.
Decompress the world and start the server
The final step is to decompress your world file. Just select the 3 dots on the right of the compressed file and select decompress. Check the image on the right for an example of how that looks. Wait for the decompression to complete and then start your server.
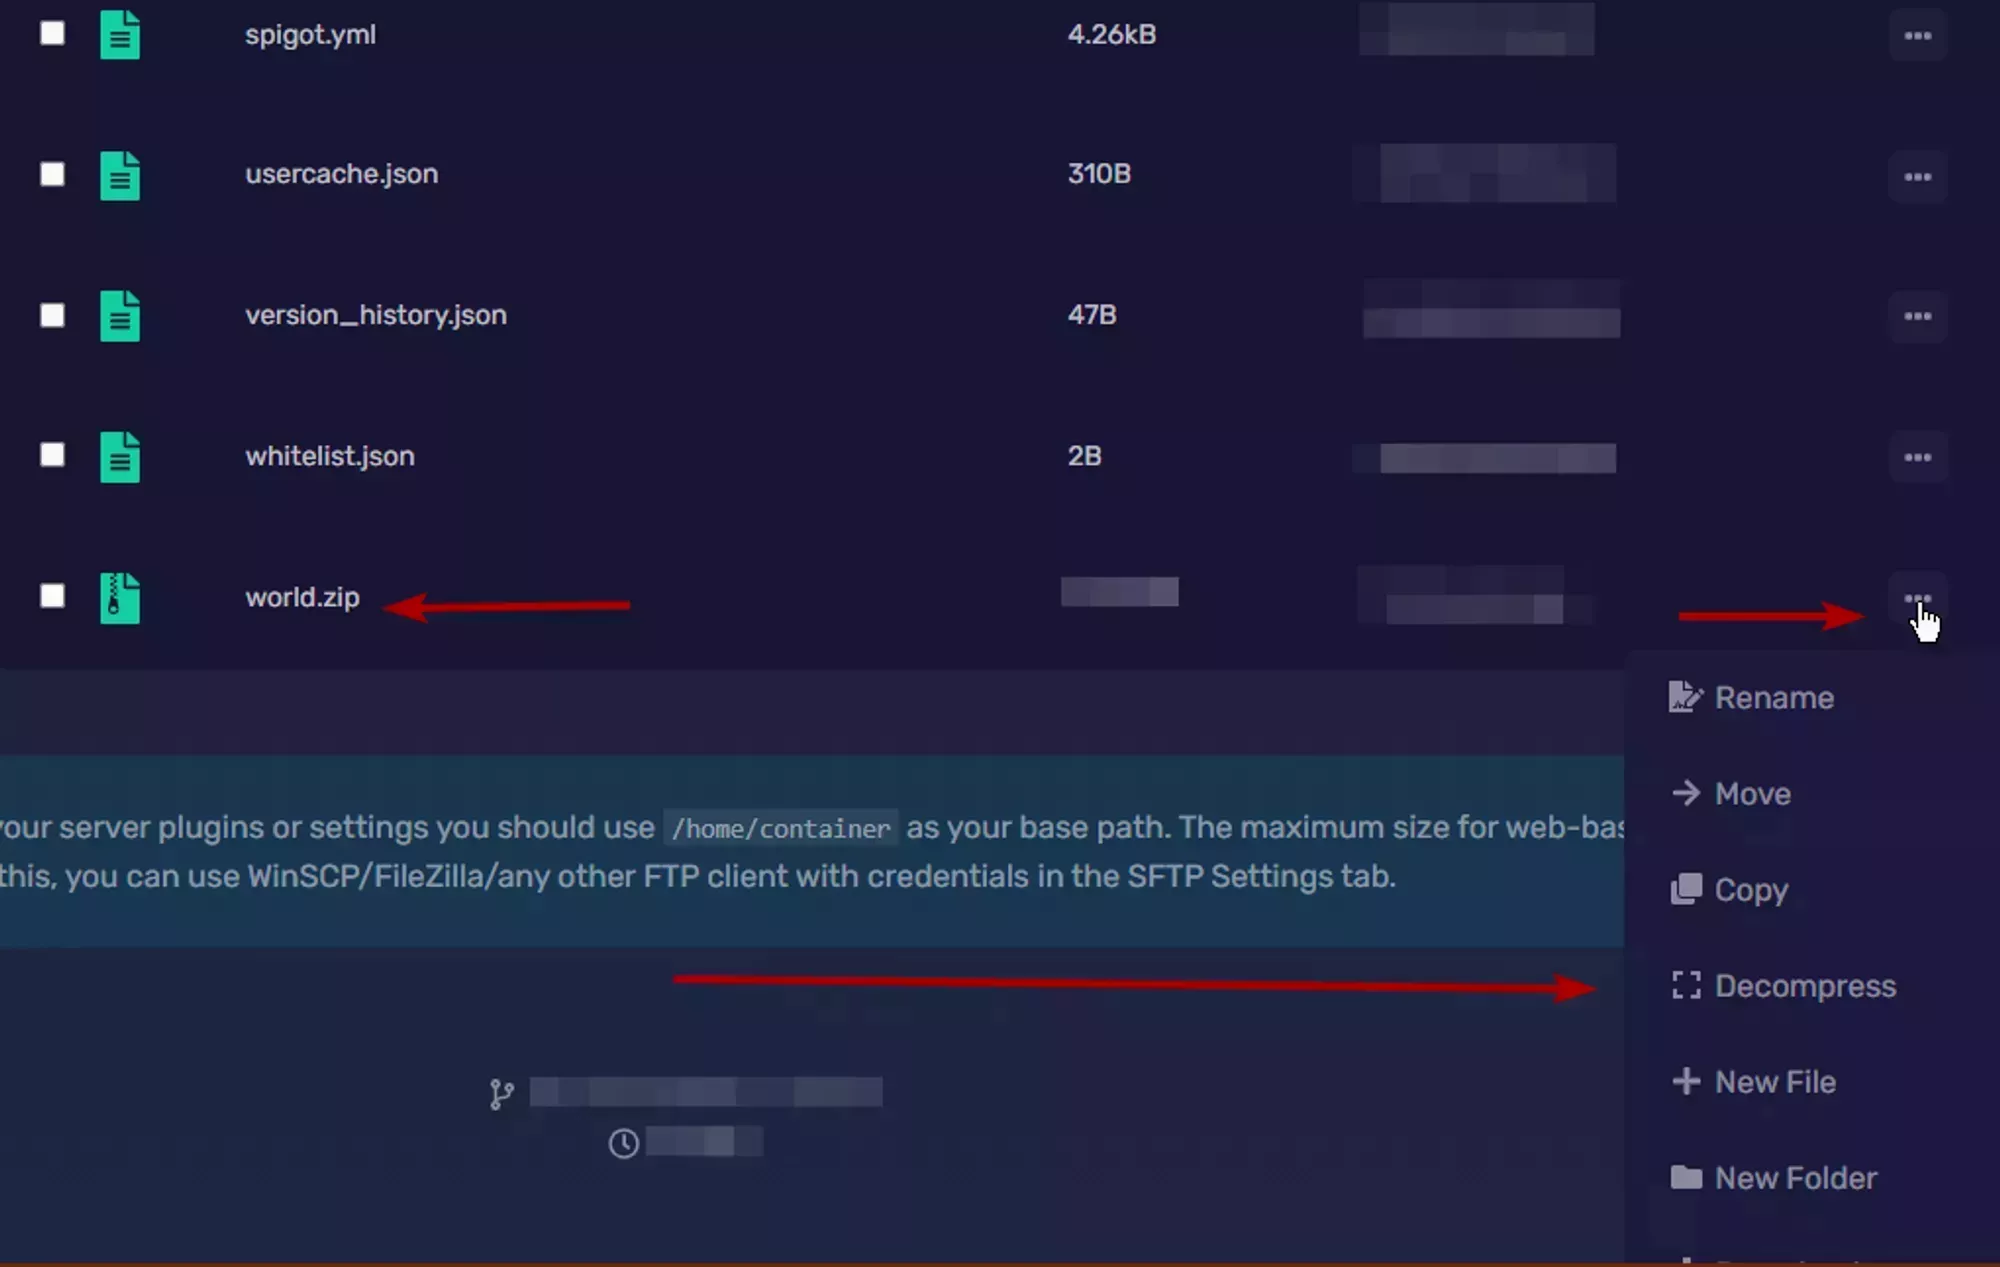
While your server is starting you should watch the logs. You'll see these two lines in it followed by the status of the migration.
`---- Migration of old nether folder required ----`
`---- Migration of old the_end folder required ----`
If you see those two lines then everything went as planned and your world has been migrated!
Congratulations!
If you don't see those, or if there's an error after them then something has gone wrong during the process. If you aren't sure what you missed, feel free to reach out to us through our support channels and we'll be more than happy to help you out!
## Spigot to Vanilla
Converting a Spigot world to the Vanilla format has to be done by hand because the Vanilla game doesn't have the ability to recognize the Spigot format. Luckily, it's a relatively simple process.
Download your world over SFTP
The first thing you'll need to do is download the three spigot worlds over SFTP. By default they'll be named `world`, `world_nether`, and `world_the_end`. If you set a custom name for your world in `server.properties` then the word `world` will be replaced with the name you set.
It's recommended that you compress your world folders before you download them because SFTP doesn't handle transferring small files very well. To compress the world folders just press the options button on the right of each folder, and select archive. The archive is what you'll download. For and example of what that looks like, see the image on the right.

After you've downloaded the compressed world folders, make sure you decompress them and move them all to the same location.
Move the world_the_end/DIM1 and world_nether/DIM-1 folders to the world folder
The individual world folders that you just downloaded are just the separate dimensions that are included in the vanilla game. Each folder has the parts it needs to be it's own vanilla save file, but only the terrain information for one dimension. So all we need to do is move the terrain information to one of those folders, specifically the folder for the overworld.
We'll start by moving the nether dimension over. Make sure that you know where the 3 folders you downloaded are and that you can move files between them. Now locate the `world_nether/DIM-1` folder and move it to `world/DIM-1`. Next, do the same to the end by`world_the_end/DIM1` to `world/DIM1`.
That's everything! Now when you move the `world` folder to a Vanilla/Fabric/Forge server, or your client's save folder it'll be able to find the dimensions in the folder just like it expects.
Once the world is uploaded you need to decompress it by using the file manager on the Game Panel. For an example of where the compressed world file should be and how to access the decompress button, see the image to the right. Wait for the file to decompress and then start your server.
---
# Updating Minecraft Java Edition
> Update your Minecraft Java server safely on WinterNode with tips for backups, plugin and mod compatibility, and step-by-step instructions for all editions.
Source: https://winternode.com/help/games/minecraft-java/administration/updating-minecraft-java-edition
Updating a Minecraft Java server means swapping the server jar for a newer build, then confirming your plugins and mods still work on it. Take a backup before you start, because a world that has been opened on a newer version can not be reverted.
## Before you update
- **Wait for your server software.** Spigot, Paper, Forge, and Fabric do not release on the same day Mojang does. Expect at least a couple of weeks for a stable build.
- **Then wait for your plugins and mods.** They can only update after the loader they depend on does, so allow a few more days on top of that. Datapack timelines vary a lot more.
- **Back up your world.** This is the step people skip and regret.
## Plugin/Mod Updates
Check every plugin and mod your server uses for support on the version you are moving to. The download page is the fastest way to tell: if the author has released an update or widened the supported versions, download the new file and swap it out on your server. If the page has not changed, you will have to test it on a local server or during the update itself.
## Updating Server Software
### Option 1: the Edition Installer
The [Edition Installer](/help/games/minecraft-java/setup/using-the-edition-installer) is the easiest path and covers Spigot, Paper, Forge, NeoForge, Fabric, and Vanilla. In the [Game Control Panel](https://gcp.winternode.com) sidebar, open **Advanced** > **Server Actions**, then use **Install a Different Edition** to pick your software and version.
It carries stable releases, so a brand new or experimental version may not be listed yet. If yours is missing, use Option 2.
### Option 2: upload the jar yourself
Download the jar for your server software:
| Software | Where to get the jar | Issue tracker |
|---|---|---|
| **Paper** | The [Paper downloads page](https://papermc.io/downloads/paper). The latest stable build shows first, and experimental builds sit behind a banner asking if you're looking for `1.XX.X`. | [GitHub Issues](https://github.com/PaperMC/Paper/issues) |
| **Spigot** | Spigot has no direct download. Build the jar yourself with [Build Tools](https://www.spigotmc.org/wiki/buildtools/). Spigot tends to release slightly ahead of Paper, though we recommend Paper for its performance. | [Issue Tracker](https://hub.spigotmc.org/jira/projects/SPIGOT/issues/SPIGOT-7559?filter=allopenissues) |
| **Forge / NeoForge** | See [Installing Forge and NeoForge](/help/games/minecraft-java/setup/using-the-edition-installer), which covers versions the installer doesn't list. | [Forge](https://github.com/MinecraftForge/MinecraftForge/issues), [NeoForge](https://github.com/neoforged/NeoForge/issues) |
| **Fabric** | See [Installing Fabric](/help/games/minecraft-java/setup/using-the-edition-installer), which covers versions the installer doesn't list. | [GitHub Issues](https://github.com/FabricMC/fabric-loader/issues) |
| **Vanilla** | The bottom of the release announcement, normally under "Get the Release" > "Cross-platform server jar". Read the [Vanilla](#vanilla) caveats first. | [Issue Tracker](https://bugs.mojang.com/projects/MC/issues/MC-273457?filter=allopenissues) |
Installing the jar works the same way for every one of them:
1. Stop your server, then upload the jar to your server's root directory (the first place you see when opening the File Manager) [using SFTP](/help/game-control-panel/using-sftp) or [the File Manager](/help/game-control-panel/the-file-manager).
2. Set the [Server Jar File](/help/games/minecraft-java/configuration/startup-parameters#server-jar-file) server option to the exact file name you uploaded, then Start the server.
3. Watch the console for errors from your plugins and mods. Once the server is up, join and test your plugins, datapacks, and configurations before opening it to the public.
### Vanilla
The Vanilla server software is the way to play on release day, but it comes with real trade-offs:
- It lacks the performance work done by community developers, so it may crash more often than even an unconfigured Spigot/Paper server, especially when generating new chunks.
- Paper often adjusts the DFU (Data Fixer Upper) to perform better and fix minor bugs. We recommend waiting for Paper for this reason among others.
- Your server-side mods and plugins won't run until you switch back to software that supports them. Datapacks still work if they've been updated.
- You can move a Spigot/Paper world onto Vanilla, but files need shifting around first. See [Spigot to Vanilla world formats](/help/games/minecraft-java/administration/spigot-vanilla-world-formats#spigot-to-vanilla). You can switch back once Paper/Spigot release.
- If a Forge/Fabric server had mods that added items, blocks, or entities, you *can not* switch to Vanilla without losing that data and risking world corruption.
---
# Minecraft World Management
> Manage your Minecraft world settings: seeds, world types, game rules, difficulty, world borders, importing, and switching worlds on WinterNode.
Source: https://winternode.com/help/games/minecraft-java/administration/world-management
Configure your Minecraft server's world settings (seeds, world types, game rules, difficulty, world borders, and multi-world setups) by editing `server.properties` or using in-game commands.
In single player, Minecraft gives you a GUI for all of these options when creating a world. On a server, you configure them through files and commands instead.
## Using a Specific Seed on a New World
1. Stop your server
2. Delete the existing world folder(s)
3. Open `server.properties` and find the `level-seed` property
4. Paste your desired seed as the value
5. Start your server
A new world will generate using the seed you provided. If you delete the world again later, it will regenerate with the same seed.
## Setting the World Type on a New World
1. Stop your server
2. Delete the existing world folder(s)
3. Open `server.properties` and find the `level-type` property
4. Set it to one of the values from the [Minecraft Wiki](https://minecraft.wiki/w/Server.properties#level-type). For example, `minecraft/:large_biomes` for Large Biomes (make sure to escape the `:` with a `/`)
5. Start your server
The new world will generate with the type you selected. Like seeds, deleting the world and restarting will regenerate it with the same settings.
## Managing Game Rules on an Existing World
Game rules modify in-game behavior and are changed using the `/gamerule` command from the server console or by a player with Operator status.
1. Run `/gamerule `. For example, `/gamerule waterSourceConversion false` to disable infinite water
2. The change takes effect instantly with no restart needed
You can find the full list of available game rules and what they do on the [Minecraft Wiki](https://minecraft.wiki/w/Game_rule?so=search#List_of_game_rules).
## Changing World Difficulty on an Existing World
1. Run `/difficulty ` from the console or as an Operator. For example, `/difficulty easy`
2. The change takes effect instantly with no restart needed
You can also change difficulty by editing the `difficulty` property in `server.properties`, but changes made there require a server restart.
For details on what each difficulty level changes (mob damage, effects, spawning behavior), see the [Minecraft Wiki](https://minecraft.wiki/w/Difficulty).
## Setting a World Border
The `/worldborder` command sets a visible boundary that prevents players from traveling past a defined area. Run these commands from the server console or as an Operator.
### Set the border size
1. Run `/worldborder set ` where `` is the total width in blocks. For example, `/worldborder set 10000` creates a border that extends 5,000 blocks in each direction from the center
2. The border appears immediately as a blue-tinted wall at the edges
The border size is a diameter (total width), not a radius. A 10,000-block border covers -5,000 to +5,000 from the center.
### Move the border center
The border is centered on `0, 0` by default. To move it:
1. Run `/worldborder center ` with the coordinates you want. For example, `/worldborder center 500 -200`
### Shrink or expand the border over time
You can make the border change size gradually:
1. Run `/worldborder set `. For example, `/worldborder set 5000 600` shrinks (or expands) the border to 5,000 blocks over 10 minutes
This is commonly used for UHC or event servers where the border closes in over time.
### Check the current border
1. Run `/worldborder get` to see the current border width
### Set border per dimension
On Paper and its forks, the border is shared across dimensions by default. To set a different border for the Nether or End, use the `execute` command:
1. Run `execute in minecraft:the_nether run worldborder set `
2. Run `execute in minecraft:the_end run worldborder set `
## Custom Generator Settings for a SuperFlat World
The `generator-settings` property in `server.properties` controls SuperFlat layer configuration, but there is no established generator for the format it needs. The easier approach is to configure the world in single player and upload it:
1. Create a SuperFlat world in single player and customize the layers, structures, and settings to your liking
2. Upload the world folder to your server's root directory [using SFTP](/help/game-control-panel/using-sftp)
3. If you're running Spigot or a fork, convert the world from Vanilla to Spigot format using [our guide](/help/games/minecraft-java/administration/spigot-vanilla-world-formats)
4. Make sure the `level-name` property in `server.properties` matches the name of the uploaded world folder
5. Start your server
New chunks generated on the server will use the generator settings from the uploaded world. However, if you delete the world file, the server will fall back to its default settings.
## Importing an Existing World
1. Stop your server
2. Upload your world folder to the server's root directory [using SFTP](/help/game-control-panel/using-sftp)
3. Make sure the world folder contains the `regions` folder and `level.dat` directly inside it (not in sub-folders)
4. Open `server.properties` and set `level-name` to the name of your uploaded world folder
5. Start your server
For more detailed instructions, see our dedicated article on [Importing a World](/help/games/minecraft-java/setup/world-import), which walks through the [SFTP upload](/help/games/minecraft-java/setup/world-import#upload-with-sftp) method step by step.
## Switching Between Worlds
### With Vanilla
1. Stop your server
2. Open `server.properties` and change the `level-name` property to the name of the world folder you want to load
3. Start your server
The server will look for a world folder matching that name. If none exists, it creates a new one. You can switch back to a previous world at any time by changing `level-name` to the old folder name.
### With MultiVerse (Spigot)
[MultiVerse](https://www.spigotmc.org/resources/multiverse-core.390/) is a long-standing plugin that lets you create, load, and switch between multiple worlds without restarting your server. Each world is a separate dimension with shared player data by default.
1. Download [MultiVerse Core](https://www.spigotmc.org/resources/multiverse-core.390/)
2. Follow the [installation instructions](https://github.com/Multiverse/Multiverse-Core/wiki/Install)
3. Use MultiVerse commands to create and manage worlds in-game
MultiVerse also has addons for separate inventories per world, nether portal routing between worlds, and more. Check the [MultiVerse wiki](https://github.com/Multiverse/Multiverse-Core/wiki) for full setup details.
---
# Aikar's Flags for Minecraft Servers
> WinterNode auto-applies Aikar's JVM flags to new Minecraft servers to reduce lag and prevent out-of-memory crashes. Check, keep, or replace them.
Source: https://winternode.com/help/games/minecraft-java/configuration/aikars-flags
WinterNode auto-applies tuned JVM flags to new Minecraft servers, so most servers already have the right flags with no setup. This guide shows how to check your flags, add Aikar's flags on an older server, or replace them with your own.
## Check your current flags
1. In the [Game Control Panel](https://gcp.winternode.com) sidebar, click **Server Options**
2. Find the **JVM Flags** field
3. If it already holds a long line starting with `-XX:+UseG1GC`, your server is set up and you do not need to change anything
## Add Aikar's Flags manually
Use these steps only if your **JVM Flags** field is empty, usually on a server created before June 29, 2026.
1. In the [Game Control Panel](https://gcp.winternode.com) sidebar, click **Server Options**
2. Copy the flags below and paste them into the **JVM Flags** field:
```bash title="JVM Flags"
-XX:+UseG1GC -XX:+ParallelRefProcEnabled -XX:MaxGCPauseMillis=200 -XX:+UnlockExperimentalVMOptions -XX:+DisableExplicitGC -XX:G1NewSizePercent=30 -XX:G1MaxNewSizePercent=40 -XX:G1HeapRegionSize=8M -XX:G1ReservePercent=20 -XX:G1HeapWastePercent=5 -XX:G1MixedGCCountTarget=4 -XX:InitiatingHeapOccupancyPercent=15 -XX:G1MixedGCLiveThresholdPercent=90 -XX:G1RSetUpdatingPauseTimePercent=5 -XX:SurvivorRatio=32 -XX:+PerfDisableSharedMem -XX:MaxTenuringThreshold=1 -Dusing.aikars.flags=https://mcflags.emc.gs -Daikars.new.flags=true
```
3. Click outside the field to save it. Server Options saves automatically and has no Save button
4. Click **Restart** to apply the change
Your startup command updates automatically. You should notice fewer lag spikes and more stable memory after the restart.
## Use your own flags
WinterNode never overwrites JVM flags you set yourself. To use a custom set, paste your flags into the **JVM Flags** field, click **Save**, then click **Restart**. Your flags always take priority over the automatic ones.
## What Aikar's Flags Do
Your Minecraft server shares its RAM with Java itself. Java needs some of that RAM for a background task called **garbage collection** (GC), which clears out data the server no longer needs.
Without Aikar's Flags, the server can use up so much RAM that Java runs out of room to do garbage collection. This causes lag spikes when GC runs, or an out-of-memory (OOM) crash when it can't run at all.
Aikar's Flags fix this by telling Java how to split RAM between the server and GC. They set aside enough memory for GC to run smoothly, so your server stays stable.
## Why Overhead Matters
"Overhead" is the RAM reserved for Java's internal tasks (garbage collection, class loading, and other background work). It is not available to the Minecraft server itself.
WinterNode reserves approximately `1.5 GB` of overhead on plans that need it. Aikar's Flags help Java use that overhead efficiently, so your server gets the most out of its remaining RAM.
## Further Reading
For a full technical breakdown, see the [Aikar's Flags documentation on Paper Docs](https://docs.papermc.io/paper/aikars-flags).
---
# How to Add a Custom Minecraft Server Icon
> Add a custom server icon to your Minecraft server by uploading a 64x64 PNG named server-icon.png for easy branding and player recognition in the server...
Source: https://winternode.com/help/games/minecraft-java/configuration/how-to-add-a-server-icon
Adding a Server Icon establishes branding and makes it easier for your players to find your server from their Multiplayer server list.
1. Server Icon must be exactly **64x64 pixels** and in the file format **PNG**. The free [Server Icon Generator](/tools/minecraft/server-icon-generator) converts any image to the right size and format in your browser.
2. Upload the icon to your server using the **File Manager**.
3. Ensure the image is named `server-icon.png`.
4. Restart your Server.
Next time you refresh your Multiplayer Servers list you and your players will see your brand new Server Icon!

---
# Minecraft Resource Packs
> Add and enforce resource packs on your Minecraft server with step-by-step instructions for setup, direct download links, and SHA1 hash generation.
Source: https://winternode.com/help/games/minecraft-java/configuration/resource-packs
Serving a resource pack from your Minecraft Java server takes three properties in `server.properties`: `resource-pack` (a direct download URL), `resource-pack-sha1` (the hash of that exact file), and `require-resource-pack` (whether players must accept it). These steps work the same on any [hosted Minecraft server](/games/minecraft), whether you run vanilla, Paper, or a modded setup.
## Quick answer
1. Upload your pack zip to [MC-Packs.net](https://mc-packs.net/). It gives you both the direct download URL and the SHA-1 hash.
2. Open `server.properties` in the [File Manager](/help/game-control-panel/the-file-manager) and replace the `resource-pack` and `resource-pack-sha1` lines with those values (press CTRL+F to search).
3. Set `require-resource-pack` to `true` if every player must use the pack, or leave it `false` to make the pack optional.
4. Restart your server.
The rest of this article covers the alternatives: hosting somewhere other than MC-Packs, generating the hash yourself, and what the prompt looks like to your players.
## What players see
When a player first joins, Minecraft tells them your server either recommends or requires a resource pack.
**Recommended** (`require-resource-pack=false`): the player can download the pack or continue without it. Their choice is saved against your server on the multiplayer screen.
**Required** (`require-resource-pack=true`): the player can download the pack or disconnect. There is no option to play without it.
The download comes from the URL in your `server.properties` file, and it only happens when the pack file has changed.
## Pack Enforcement
Enforcement requires Minecraft 1.17 or newer. Set `require-resource-pack` to `true` in your `server.properties` file and restart. Players then choose between downloading the pack and leaving the server.
## MC-Packs
MC-Packs is the recommended host for packs up to 100MB. It generates your direct download URL and your SHA-1 hash for you, so you never have to compute the hash yourself.
Go to [MC-Packs.net](https://mc-packs.net/) and select your pack zip. When the upload finishes, the results page shows your direct download URL and SHA-1 hash, plus the two finished `server.properties` lines ready to copy.
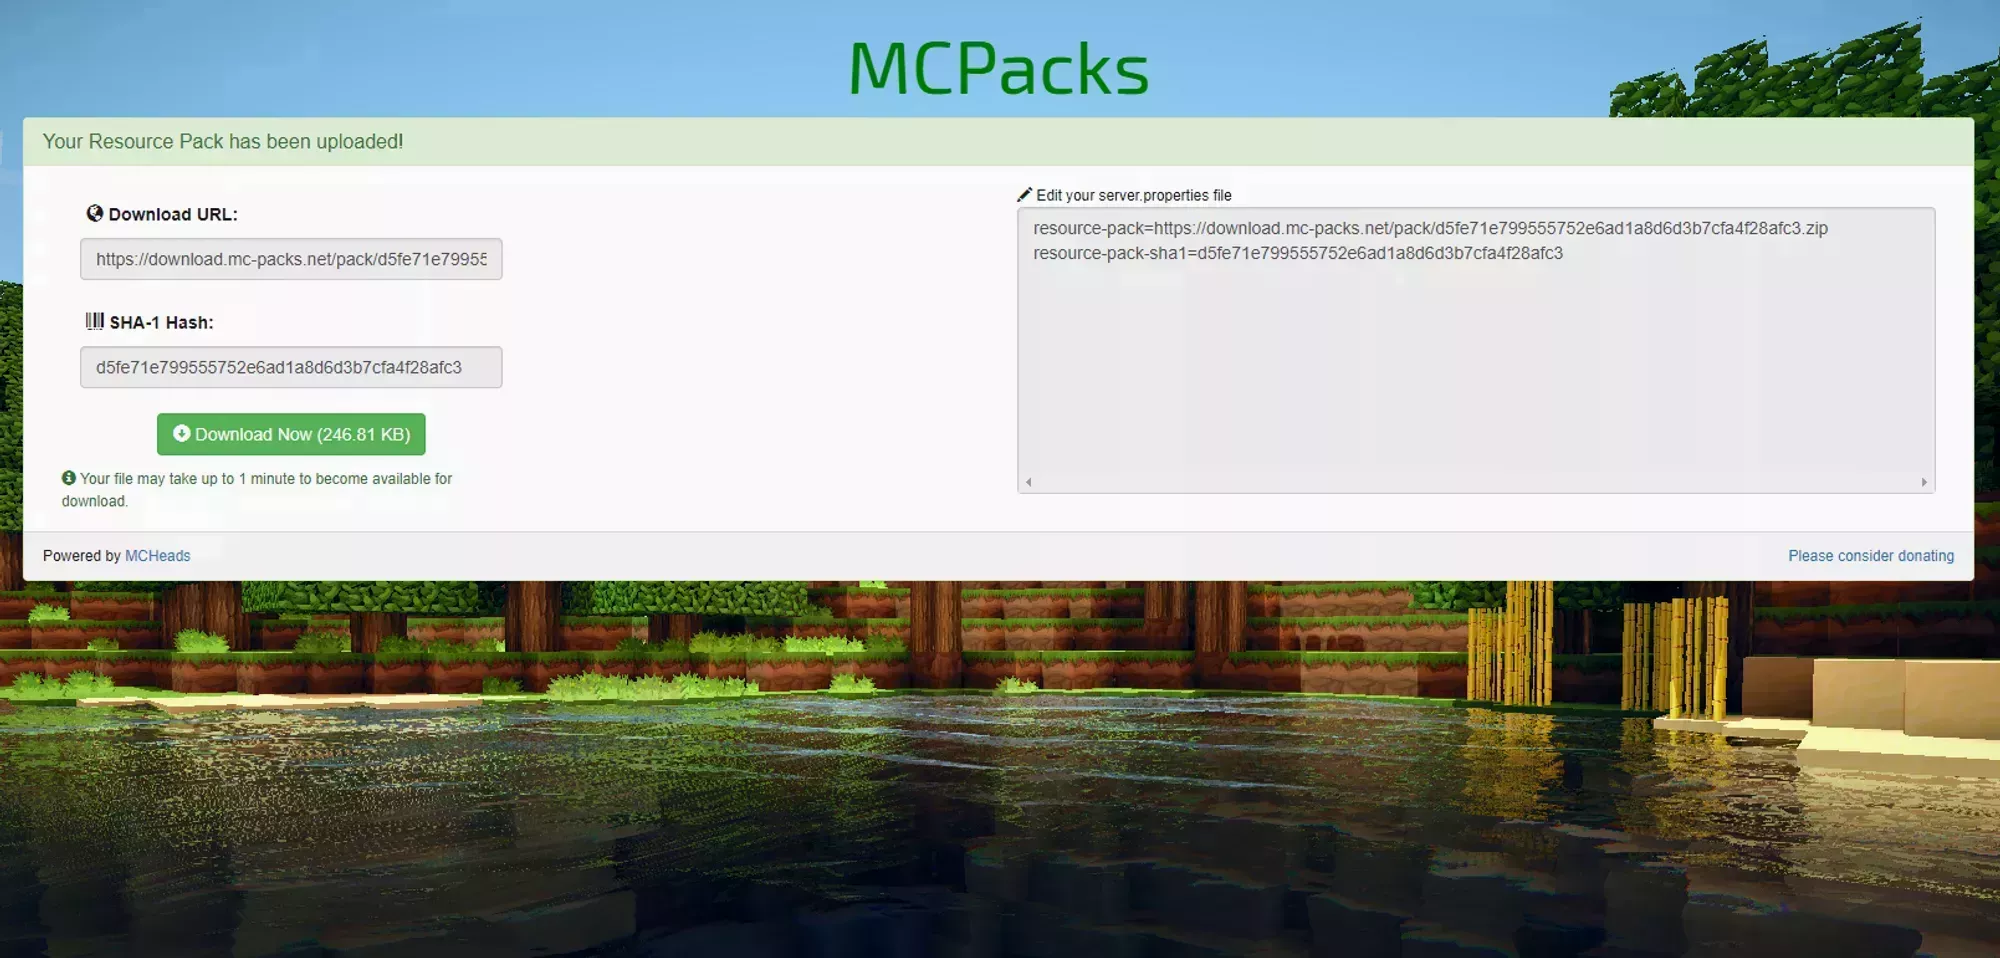
Open `server.properties` in the [File Manager](/help/game-control-panel/the-file-manager), find the `resource-pack` and `resource-pack-sha1` lines (press CTRL+F to search), and **replace** them with the pair MC-Packs generated.
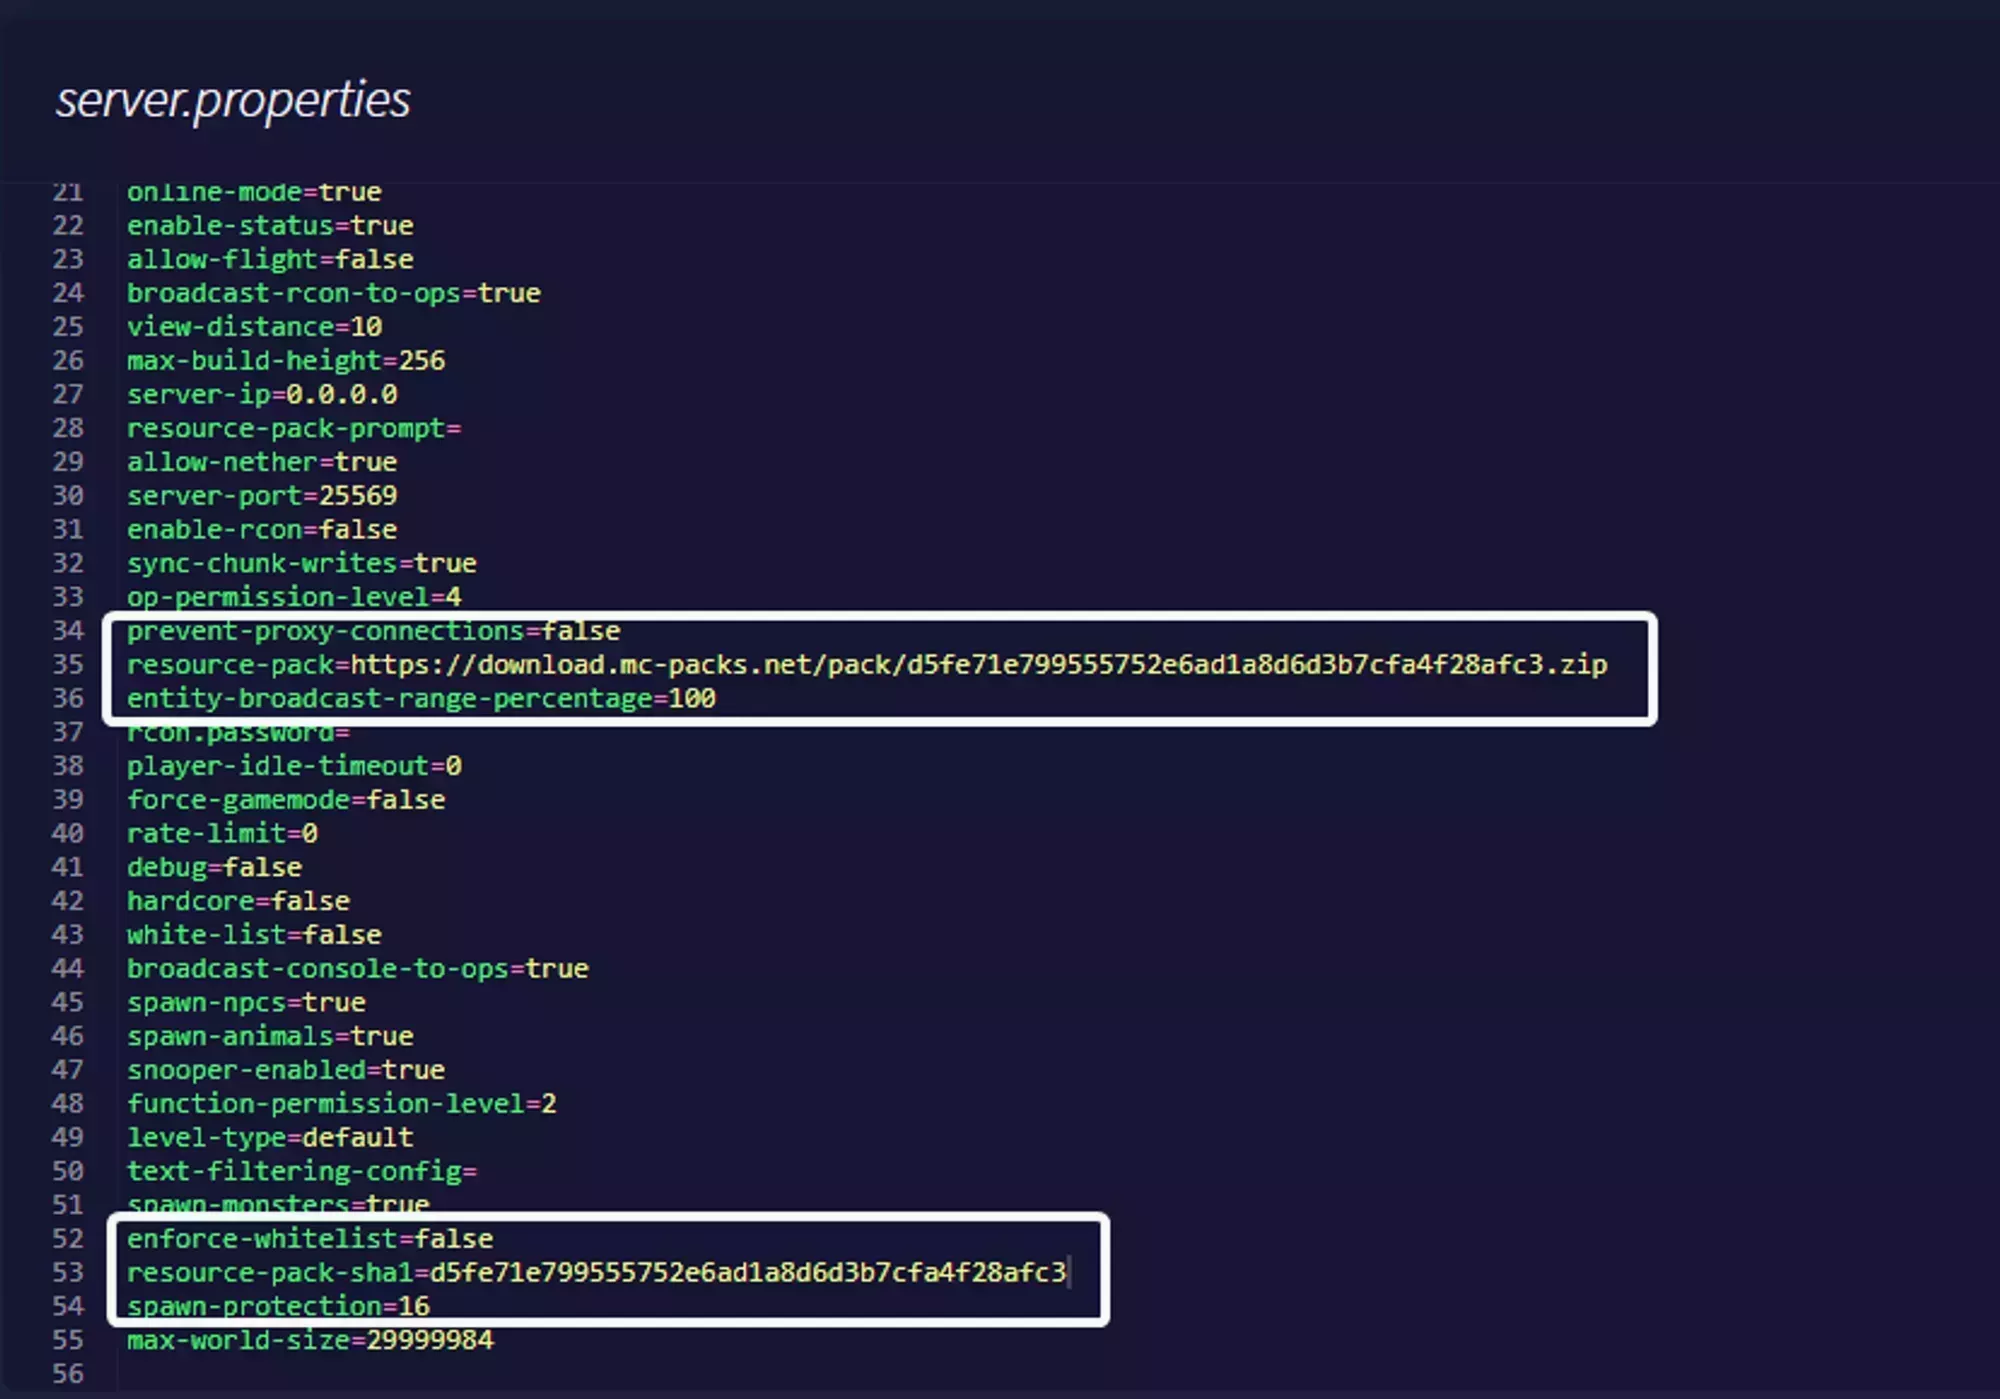
Restart your server. Players are offered the pack on their next join. To make the pack mandatory, see [Pack Enforcement](/help/games/minecraft-java/configuration/resource-packs#pack-enforcement).
## Uploading your Pack
If your pack is over 100MB, or you would rather use another service, the only requirement is a _direct_ and _public_ download link. Opening the link in a browser must start the file download immediately, with no waiting page and no preview page in between.
A normal Google Drive share link does not qualify, but Google Drive has a second link format that does. We cover Google Drive and OneDrive below and will add other services as they are requested.
### Google Drive
Google Drive blocks direct downloads over 100MB because of its virus scanning confirmation page, so this option only works for packs under that size.
Share the file publicly with **Viewer** access. For security, link users should only be able to view the file, never edit it.
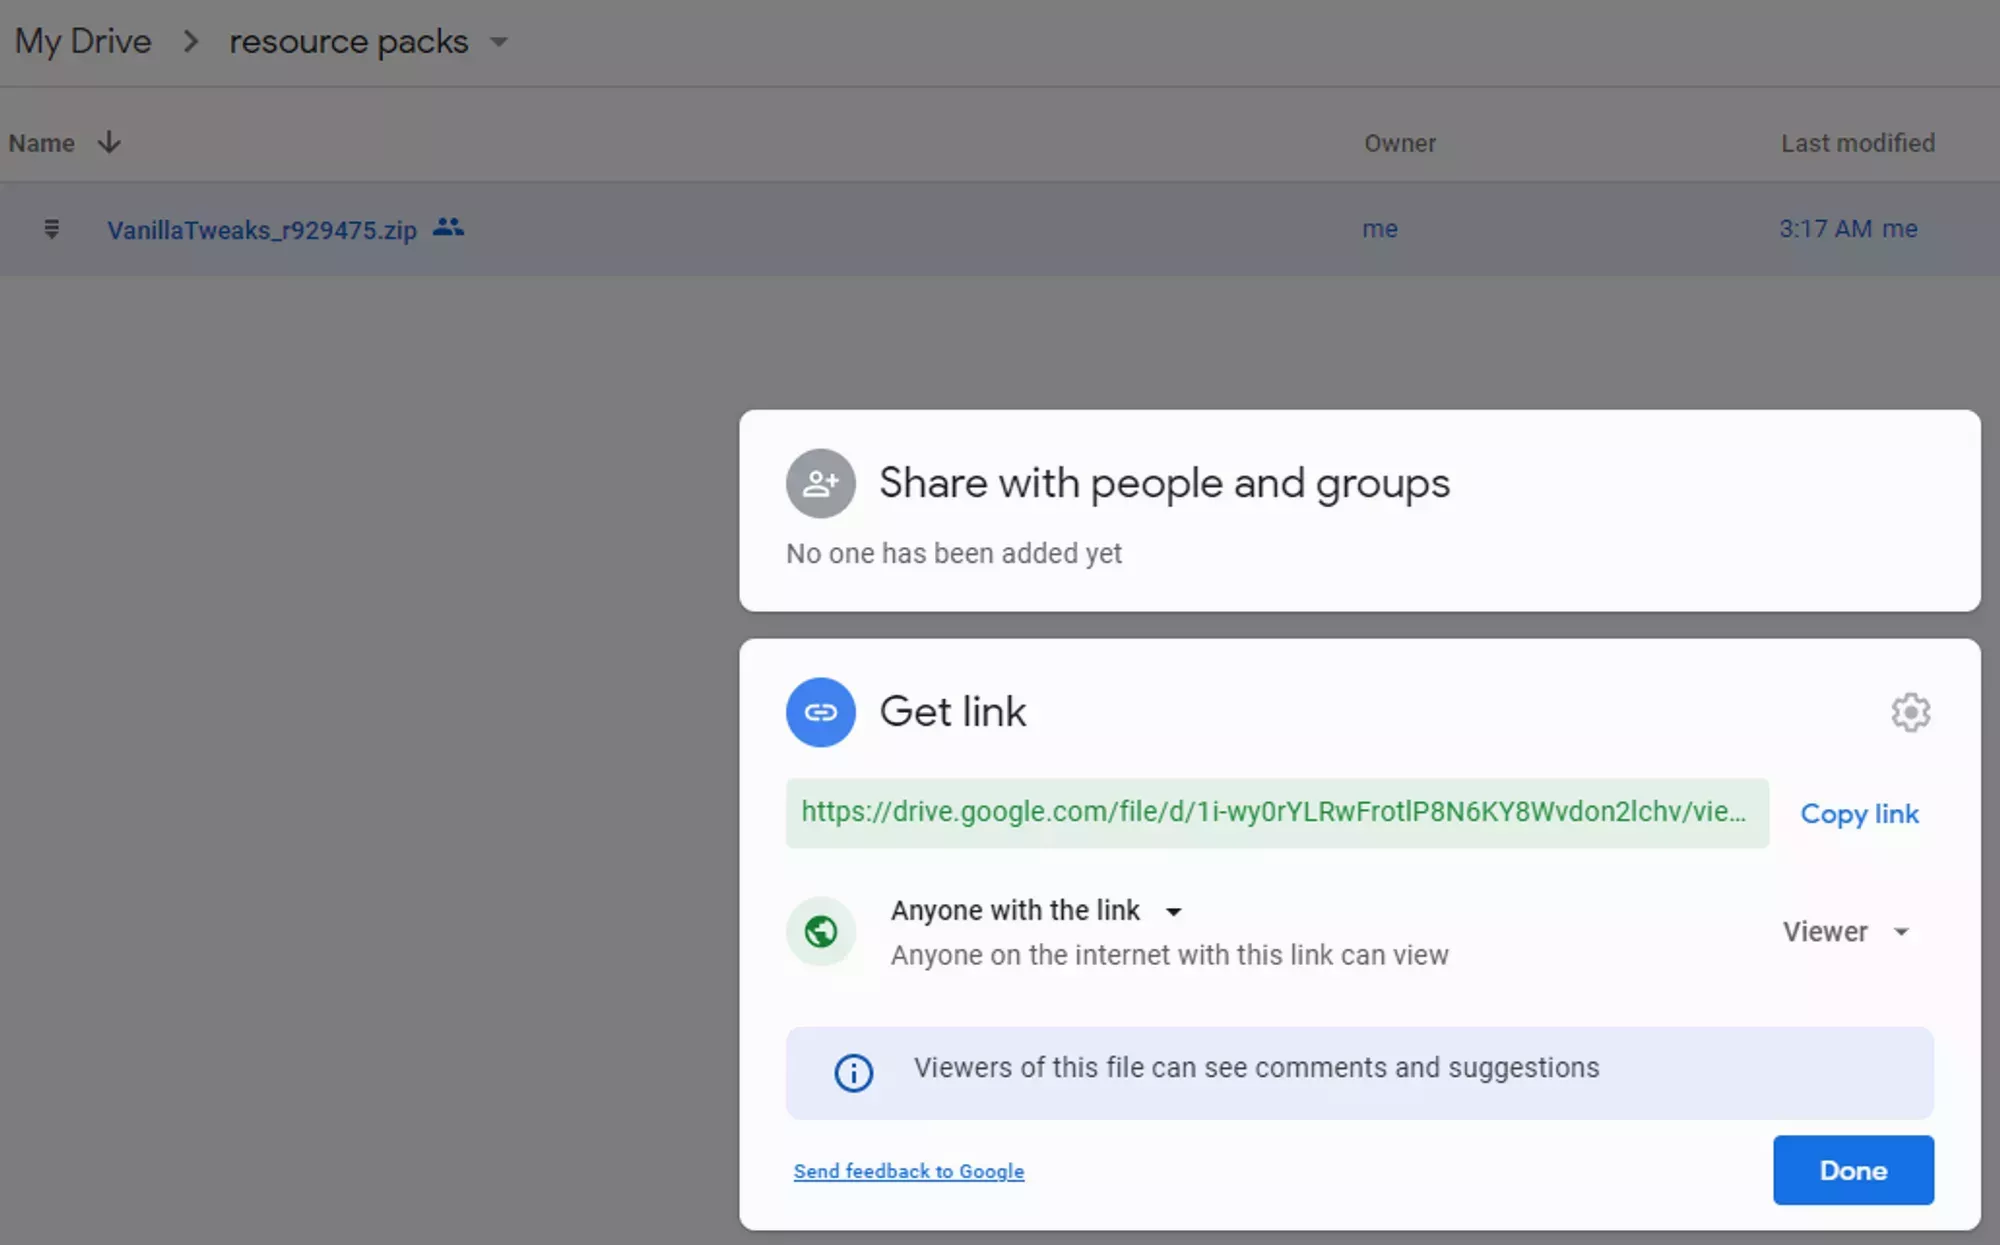
Your share link will look like this:
`https://drive.google.com/file/d/1i-wy0rYLRwFrotlP8N6KY8Wvdon2lchv/view?usp=sharing`
The only part you need is the ID, which sits between `file/d/` and `/view?usp=sharing`. In the example above that is `1i-wy0rYLRwFrotlP8N6KY8Wvdon2lchv`.
Drop your ID into this template:
`https://docs.google.com/uc?export=download&id=`
For the example above, the finished link is:
`https://docs.google.com/uc?export=download&id=1i-wy0rYLRwFrotlP8N6KY8Wvdon2lchv`
Put that link in the `resource-pack` property of your `server.properties` file.
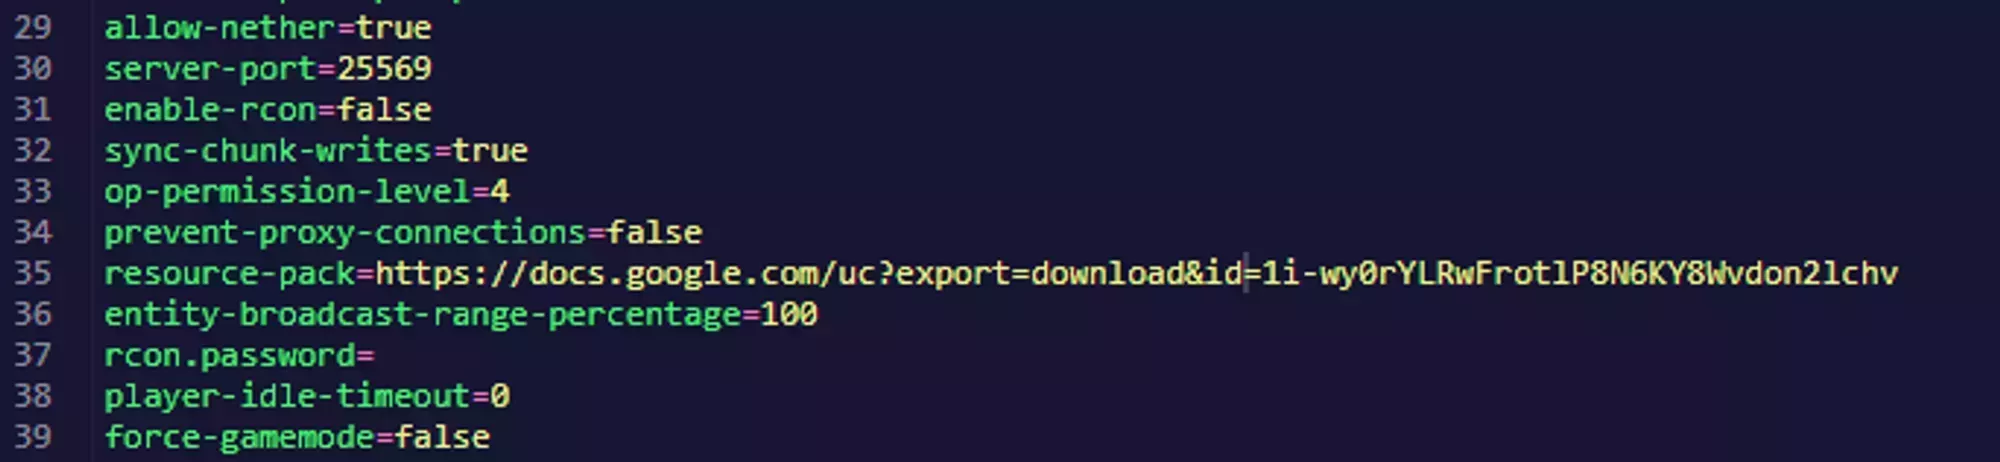
### OneDrive
OneDrive has no download size limit, so this is the best option if your pack is somehow over 100MB.
Select the file in OneDrive and click **Embed** on the top ribbon.
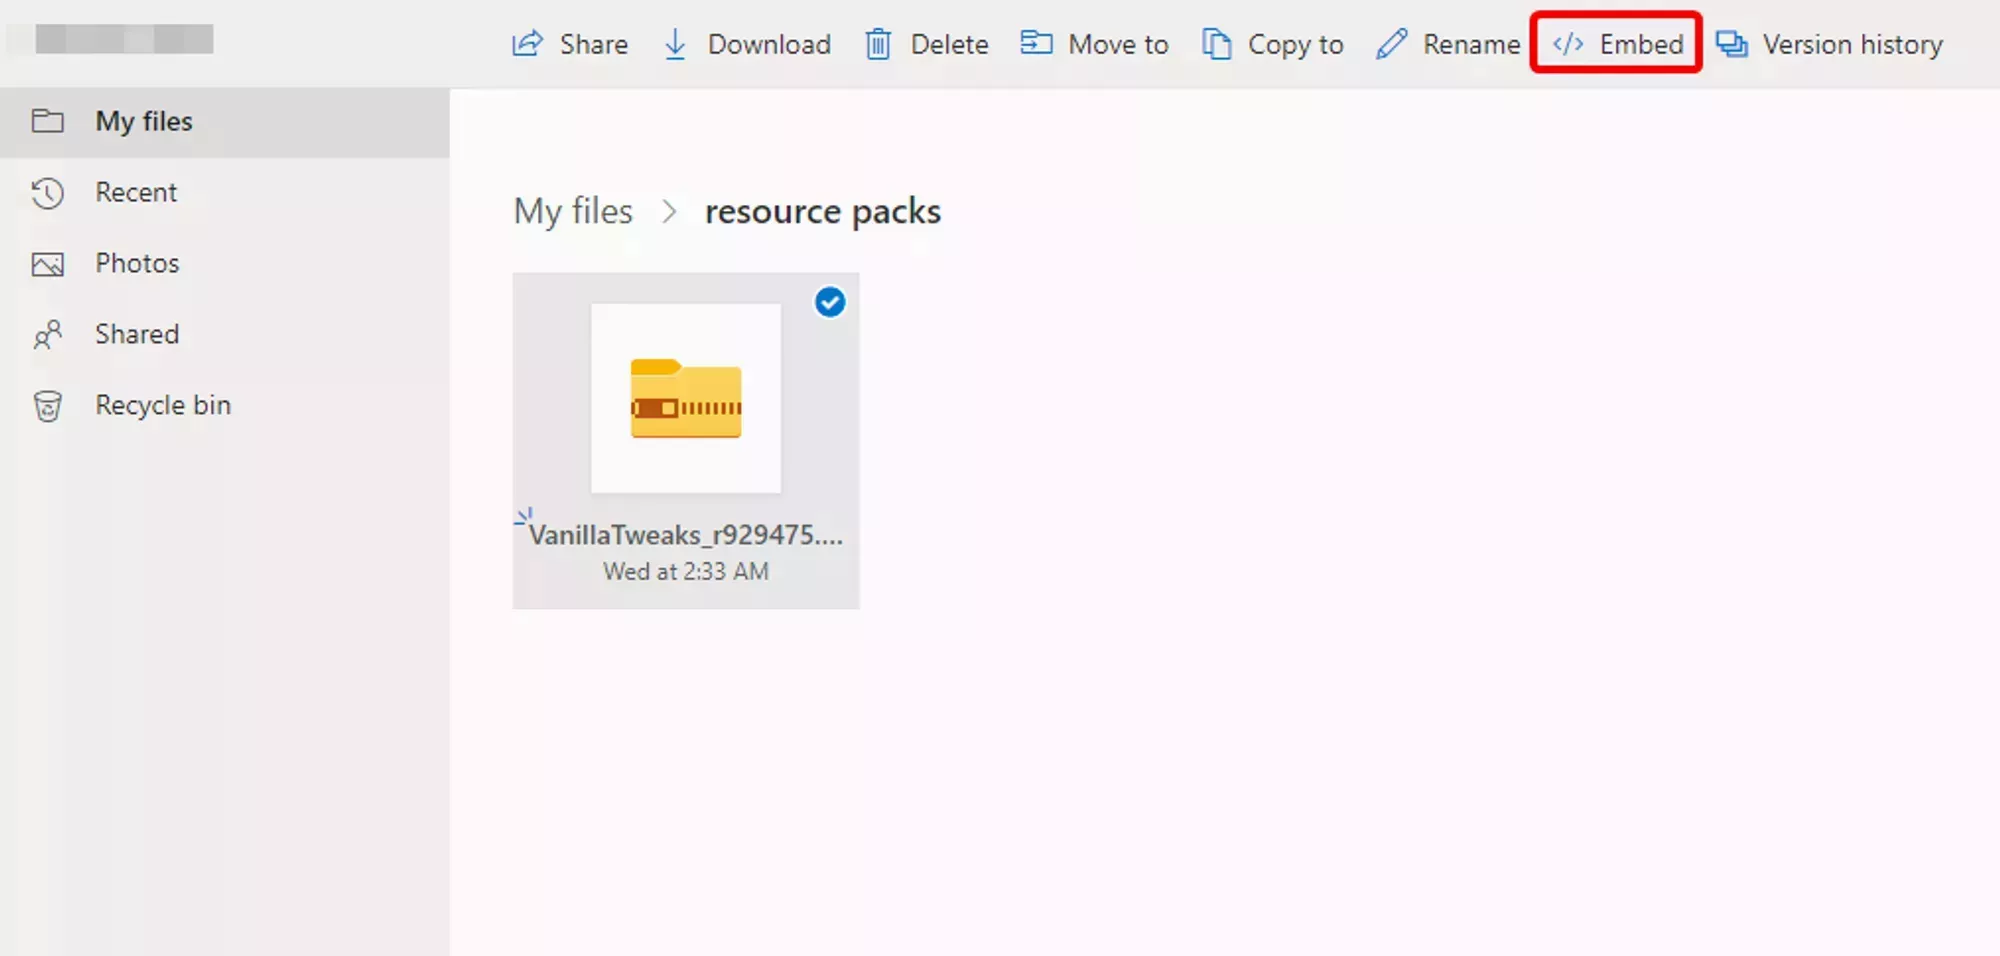
A side panel opens. Anyone holding the embed code (and the link inside it) can view the file, so there are no extra permissions to configure. Click **Generate** and you get code like this:
```html
```
Take the value of the `src` attribute and replace the word `embed` with `download`:
- **Before:** `https://onedrive.live.com/embed?cid=...`
- **After:** `https://onedrive.live.com/download?cid=...`
Put that link in the `resource-pack` property of your `server.properties` file.

## Generating SHA1
If you host the pack anywhere other than MC-Packs, you have to compute the SHA-1 hash of the zip yourself and paste it into `resource-pack-sha1`.
Drop your pack zip into our [SHA-1 Hash Generator](/tools/sha1) and copy the hash. The file is hashed locally in your browser via the Web Crypto API, nothing is uploaded. Any tool that outputs a SHA-1 hex hash works just as well, like emn178's [online SHA-1 checksum](https://emn178.github.io/online-tools/sha1_checksum.html) or `sha1sum` on Linux.
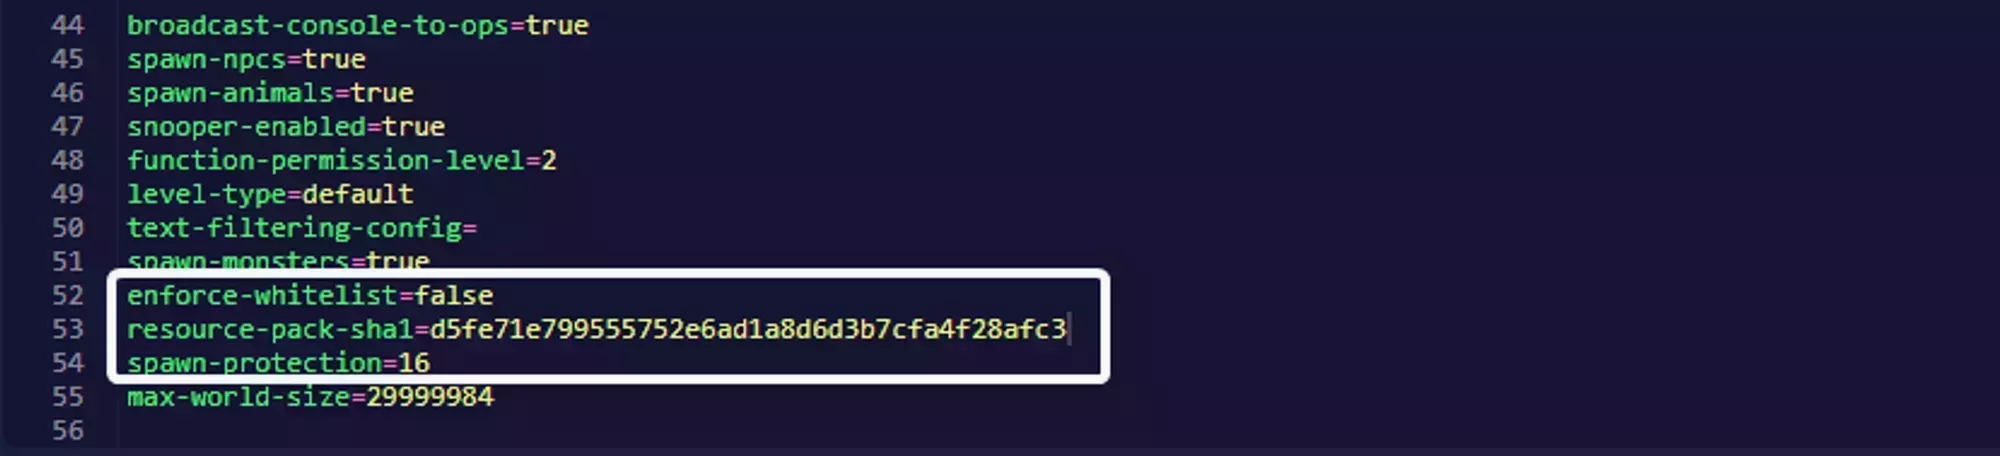
Recompute and update this value every time you re-upload the pack. Re-zipping a folder almost always produces a different hash even when the contents are identical, because ZIP timestamps, file order, and compression settings all change the bytes.
---
# How to Optimize Your Minecraft Server Performance
> Reduce lag on your Minecraft server with Paper settings, view distance tuning, entity limits, and Spark profiler. Covers spigot.yml and paper-world-defaults.yml.
Source: https://winternode.com/help/games/minecraft-java/configuration/server-optimization
Most server lag comes from a handful of settings, so a little tuning goes a long way. Hardware matters too, since [managed Minecraft hosting](/games/minecraft) from WinterNode runs with no CPU limits, so your server can act on the tuning below without being throttled. Two community guides cover the deep math behind every value, and we use their numbers throughout: [YouHaveTrouble](https://github.com/YouHaveTrouble/minecraft-optimization) and [Paper-chan](https://www.paper-chan.moe/paper-optimization).
## Quick wins
- **Run Paper** (or a fork like Purpur or Pufferfish). It keeps Bukkit/Spigot plugin support with big performance gains, and we recommend it even for vanilla servers. Switch with the [Edition Installer](/help/games/minecraft-java/setup/using-the-edition-installer).
- **Apply Aikar's flags** for tuned JVM garbage collection. See [Aikar's Flags](/help/games/minecraft-java/configuration/aikars-flags).
- **Tune the 6 key values** below. They are the highest-impact settings on the server.
- **Pre-generate your world** with [Chunky](/help/games/minecraft-java/plugins/chunky) so the server is not generating chunks while players explore.
- **Right-size your RAM.** 1.13+ needs 3GB minimum and 6GB is recommended (older versions like 1.12.2 run leaner; avoid 1.13 to 1.14, which have chunk/lighting issues fixed in 1.15). See the [RAM guide](/help/games/minecraft-java/quick-start/package-recommendation).
- **Profile with Spark** to find what is actually costing you TPS.
## The 6 key values
These matter most, and they must be tuned **together**. Lowering view or simulation distance without also tightening the despawn and spawn ranges leaves mobs that never despawn, and changing `mob-spawn-range` will break most YouTube farm designs.
| Setting | File | Default | Recommended |
|---|---|---|---|
| `view-distance` | server.properties | `10` | `7` |
| `simulation-distance` | server.properties | `10` | `4` |
| `mob-spawn-range` | spigot.yml | `8` | `3` |
| `despawn-ranges` hard | paper-world-defaults.yml | `128` | `56` |
| `despawn-ranges` soft | paper-world-defaults.yml | `32` | `30` |
The sixth, **`entity-activation-range`** (spigot.yml), is set per mob type: animals 32 → 16, monsters 32 → 24, misc 16 → 8, water 16 → 8, villagers 32 → 16. Raiders and flying-monsters stay at 48. Apply the despawn-range values above to every mob group.
## More settings worth changing
All recommended; open the guides above for the full reasoning, and skip any whose tradeoff you do not want.
**bukkit.yml**
- **`chunk-gc.period-in-ticks`** `600` → `300`. Unloads vacant chunks more often, with no player-facing downside.
- **`spawn-limits`** (mob caps), lowered per type: monsters 70 → 20, animals 10 → 5, water-animals 15 → 2, water-ambient 20 → 2, ambient 15 → 1, axolotls 5 → 3, water-underground-creature 5 → 35. Fewer mobs and slower vanilla farms; tune alongside the spawn ranges.
**spigot.yml**
- **`max-tick-time`** (tile and entity) `50` → `1000`. Effectively disables it. Paper disables it by default; set it anyway on Spigot.
- **`merge-radius`** exp `3.0` → `4.0`, item `2.5` → `3.5`. Merges nearby orbs and items into fewer entities (can merge through walls).
- **`tick-inactive-villagers`** `true` → `false`. Stops ticking villagers outside the activation range, which can delay restocks and iron farms if your range is tight.
**paper-world-defaults.yml**
- **`max-auto-save-chunks-per-tick`** `24` → `8`. Spreads chunk saves over more ticks.
- **`max-entity-collisions`** `8` → `2`. Caps collision processing per entity, so packed-together mobs stop causing lag.
- **`optimize-explosions`** `false` → `true`. Faster explosion algorithm; may affect ultra-technical machines like world eaters.
- **`anti-xray.enabled`** `false` → `true`. Blocks x-ray. Engine 1 is lighter, engine 2 is stronger.
- **`redstone-implementation`** `vanilla` → `eigencraft`. Much faster redstone, but can break bug-reliant technical builds.
- **`armorstands.tick`** `true` → `false`. Stops ticking armor stands, which breaks gravity, piston, and Frost Walker uses.
## Hub (lobby) servers
A hub is small and mostly decorative, so you can optimize harder and often run it on a smaller plan: disable [keep-spawn-loaded](https://docs.papermc.io/paper/reference/world-configuration#keep-spawn-loaded), raise the mob-spawn interval, disable [player collisions](https://docs.papermc.io/paper/reference/global-configuration#enable-player-collisions), raise the tick rates, and lower `simulation-distance`.
## Pre-generate your world
Generating chunks on the fly as players explore is one of the biggest sources of lag. Pre-generate a few thousand blocks (1000 to 2500 is a good start) with [Chunky](/help/games/minecraft-java/plugins/chunky). For a custom generator, [Terra](https://www.spigotmc.org/resources/terra-ultimate-world-generation.85151/) comes closest to vanilla generation speed.
## Plugins
Reducing entities is the biggest TPS lever, but you do **not** need anti-lag plugins. Avoid ClearLagg, Mob Stacker, and similar tools: they mostly delete dropped items (which Minecraft already clears after 5 minutes) and change how players interact with the game without fixing the real cause.
## Profile your server
- **[Spark](https://www.spigotmc.org/resources/spark.57242/)** is the go-to profiler for CPU, RAM, TPS, and disk usage. See its [command list](https://spark.lucko.me/docs/Command-Usage).
- **Timings:** run `/timings on`, leave it for at least 3 minutes, then `/timings report`. The report shows what is eating your tick (a high "Count natural mobs", for example, means too many entities).
## Need a hand?
Have a question, or want help dialing any of this in? [Reach out to our team](https://winternode.com/discord?utm_source=help&utm_medium=article&utm_campaign=minecraft-java-server-optimization) anytime. We are happy to walk you through it. If we can fix it for you, great; if the best answer is a guide or a tool, we will point you there. Either way, that is what the team is here for.
---
# Minecraft Server Properties
> Reference guide for server.properties settings on your Minecraft Java server, including gameplay, world, player, and network configuration options.
Source: https://winternode.com/help/games/minecraft-java/configuration/server-properties
The `server.properties` file controls core settings for your Minecraft server. You'll find it in your server's root directory.
## Editing server.properties
Stop your server from the console.
Open the [File Manager](/help/game-control-panel/the-file-manager) and locate server.properties in the root directory.
Click the file to open the editor.
Make your changes and click Save.
Start your server to apply the changes.
## Server Identity
**`motd`** · Default: `A Minecraft Server`
The message shown in the Minecraft server list. Supports two lines and color codes. Our free [MOTD Generator](/tools/minecraft/motd-generator) previews it as players see it and gives you a `motd=` line with the escapes already correct.
**`server-port`** · Default: `25565`
The port your server runs on. This is managed automatically by the panel. If your server is running on the wrong port, restarting it will resolve the issue.
## Players
**`max-players`** · Default: `20`
Maximum players allowed on the server. WinterNode doesn't limit player slots, so set this to whatever you need.
**`white-list`** · Default: `false`
When enabled, only players on the whitelist can join. Manage the whitelist with `/whitelist add `.
**`enforce-whitelist`** · Default: `false`
Kicks players not on the whitelist when you reload it, rather than waiting for them to disconnect.
**`player-idle-timeout`** · Default: `0`
Minutes before idle players get kicked. Set to `0` to disable.
## Gameplay
**`gamemode`** · Default: `survival`
Default gamemode for new players joining the server. Options: `survival`, `creative`, `adventure`, `spectator`.
**`difficulty`** · Default: `easy`
Server difficulty level affecting mob damage, hunger drain, and other mechanics. Options: `peaceful`, `easy`, `normal`, `hard`.
**`hardcore`** · Default: `false`
When enabled, players are set to spectator mode on death. Forces difficulty to hard.
**`pvp`** · Default: `true`
Whether players can damage each other.
**`allow-flight`** · Default: `false`
Controls the server's flight kick. Set to `true` if you use mods or plugins that enable flight, otherwise players may get kicked unexpectedly.
**`enable-command-block`** · Default: `false`
Whether command blocks function on the server. Required for most adventure maps and minigames.
**`spawn-protection`** · Default: `16`
Radius around spawn (in blocks) where non-ops cannot build or break. Set to `0` to disable.
## World
**`level-name`** · Default: `world`
The folder name for your world. Change this to load a different world folder.
**`level-seed`** · Default: blank
Seed for world generation. Only affects new worlds or ungenerated chunks. Leave blank for random.
**`level-type`** · Default: `minecraft:normal`
World generation type. Options: `minecraft:normal`, `minecraft:flat`, `minecraft:large_biomes`, `minecraft:amplified`, `minecraft:single_biome_surface`.
**`allow-nether`** · Default: `true`
Whether the Nether dimension is enabled.
**`view-distance`** · Default: `10`
How many chunks are sent to players. Lower values reduce bandwidth and improve performance. See [Server Optimization](/help/games/minecraft-java/configuration/server-optimization) for tuning recommendations.
**`simulation-distance`** · Default: `10`
How many chunks around players are actively ticked. Should be equal to or less than view-distance. See [Server Optimization](/help/games/minecraft-java/configuration/server-optimization) for details.
## Resource Packs
**`resource-pack`** · Default: blank
URL to a resource pack. Players are prompted to download it when joining. Must be a direct download link.
**`resource-pack-sha1`** · Default: blank
SHA1 hash of your resource pack, letting clients verify they have the correct version.
**`require-resource-pack`** · Default: `false`
Kicks players who decline the resource pack.
## Authentication and Offline Mode
**`online-mode`** · Default: `true`
When enabled, the server verifies players with Mojang's authentication servers. Set to `false` to allow cracked/offline clients.
WinterNode does not restrict offline mode servers. You can enable it by setting `online-mode=false` and restarting your server.
### Security in Offline Mode
With online-mode disabled, anyone can join with any username since there's no Mojang authentication. For public servers, use an authentication plugin like [AuthMe](https://www.spigotmc.org/resources/authmereloaded.6269/) to require players to register and log in with a password.
### UUID Changes in Offline Mode
Minecraft generates player UUIDs differently in offline mode. If you switch an existing server from online to offline mode:
- Players will have different UUIDs than before
- Whitelist entries need to be re-added (the old UUIDs won't match)
- Plugins that store player data by UUID (permissions, economy, etc.) will see players as new accounts
- Inventories and player data tied to the old UUID may be lost
If you plan to run offline mode, it's best to start fresh or migrate player data manually.
---
# Minecraft Server Startup Parameters
> Configure your Minecraft Java server's startup options: the server JAR, RAM allocation, JVM flags, and console timezone.
Source: https://winternode.com/help/games/minecraft-java/configuration/startup-parameters
**Server Options** in the [Game Control Panel](https://gcp.winternode.com) sidebar holds the four settings that control how your server launches: which jar file runs, how much RAM it gets, any extra JVM flags, and the timezone stamped on your console logs. You will not need to change these often.
In-game settings like `gamemode`, `difficulty`, `view-distance`, whitelist, and `motd` are not on this page. See the [server.properties guide](/help/games/minecraft-java/configuration/server-properties) for those.
### Startup Command
The Startup Command field shows the exact command used to launch your server. You do not edit it directly. It is built from the fields below, so change those instead.

| Piece | What it does | Where to change it |
|---|---|---|
| `-Xms128M` | The initial RAM pool. Aikar's recommends matching this to Xmx, but on our panel a low starting value that grows on demand works better. | Fixed |
| `-XX:MaxRAMPercentage=##` | The share of your plan's RAM handed to Minecraft. | [Max Ram Percentage](#max-ram-percentage) |
| `server.jar` | The jar file that is executed. | [Server Jar File](#server-jar-file) |
### Server Jar File
The **case sensitive** name of the jar file you want to run. Either rename your uploaded jar to `server.jar`, or set this field to match the file name you uploaded.
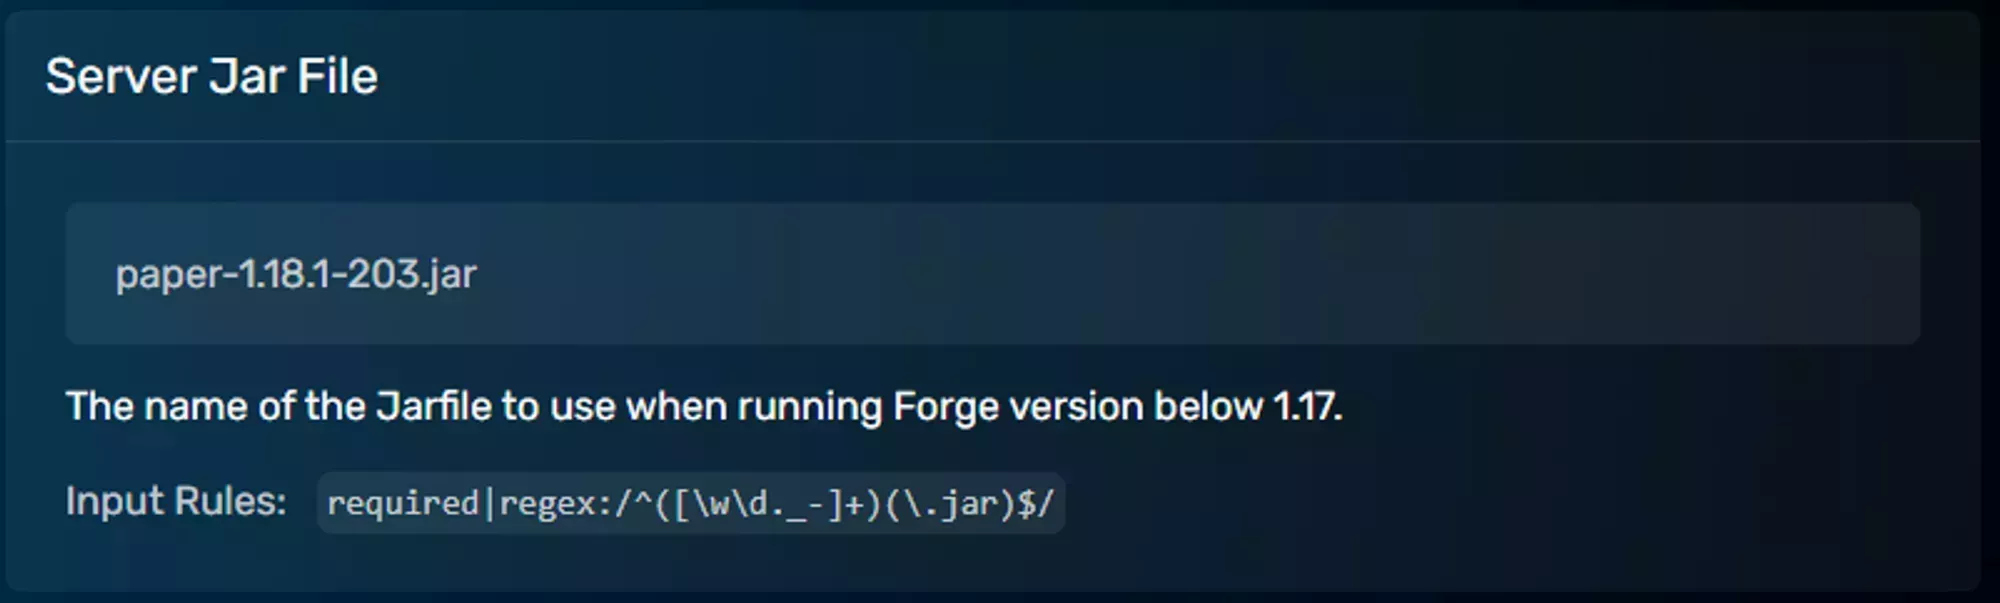
### Console Timezone
The timezone used for timestamps in your console log. Set it if you want console output to line up with your local clock.
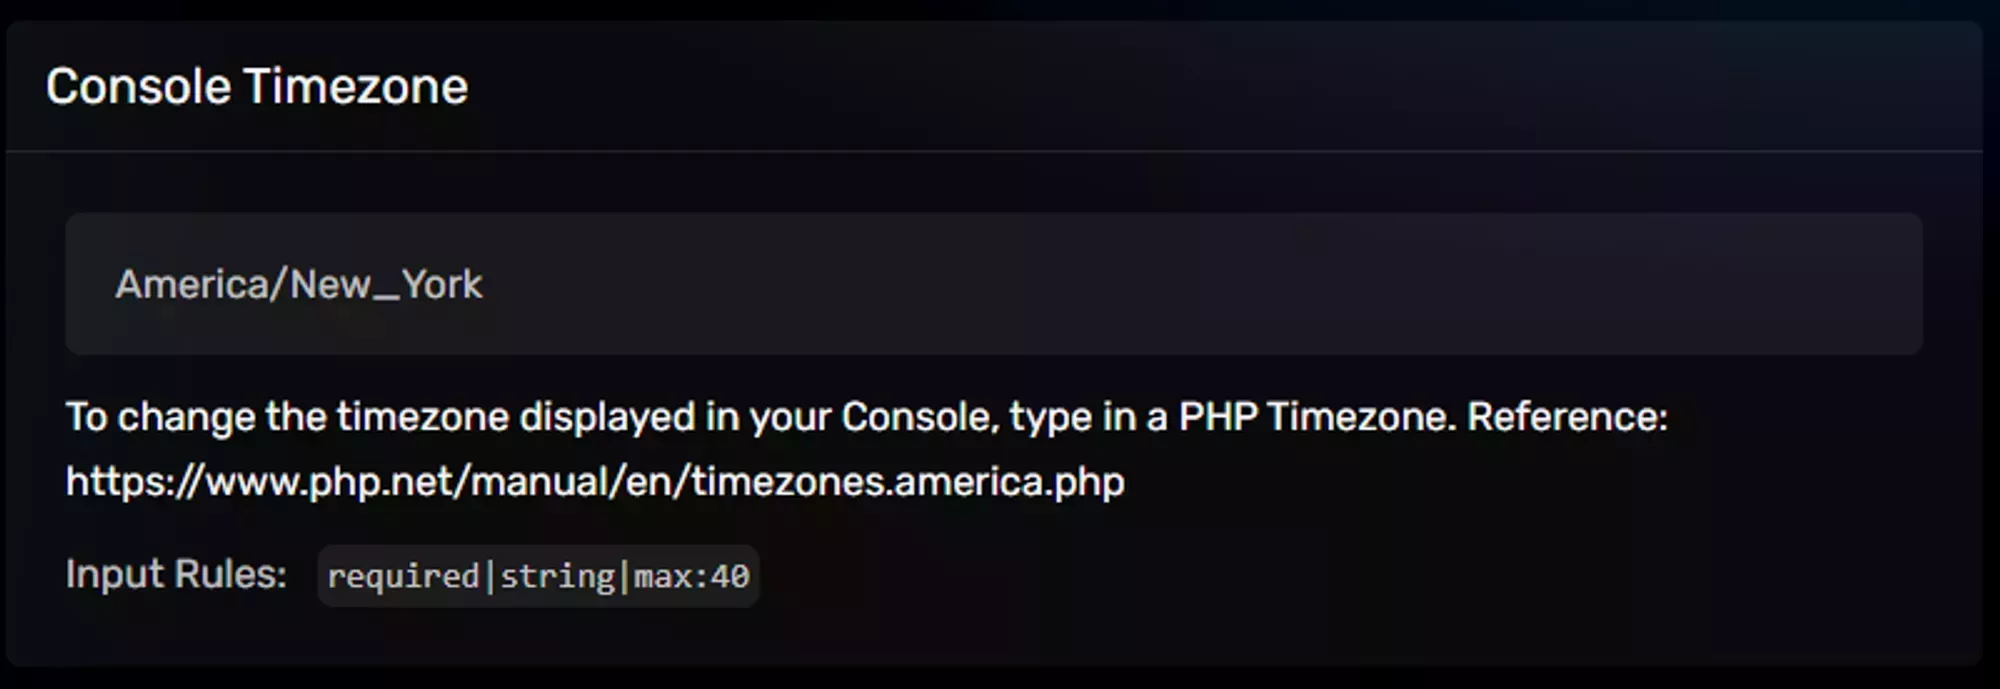
### Max Ram Percentage
How much of your plan's RAM goes to Minecraft, and how much is left free for the Java Virtual Machine (JVM) to work with. The JVM needs some headroom, and how much varies by Minecraft version and server software.
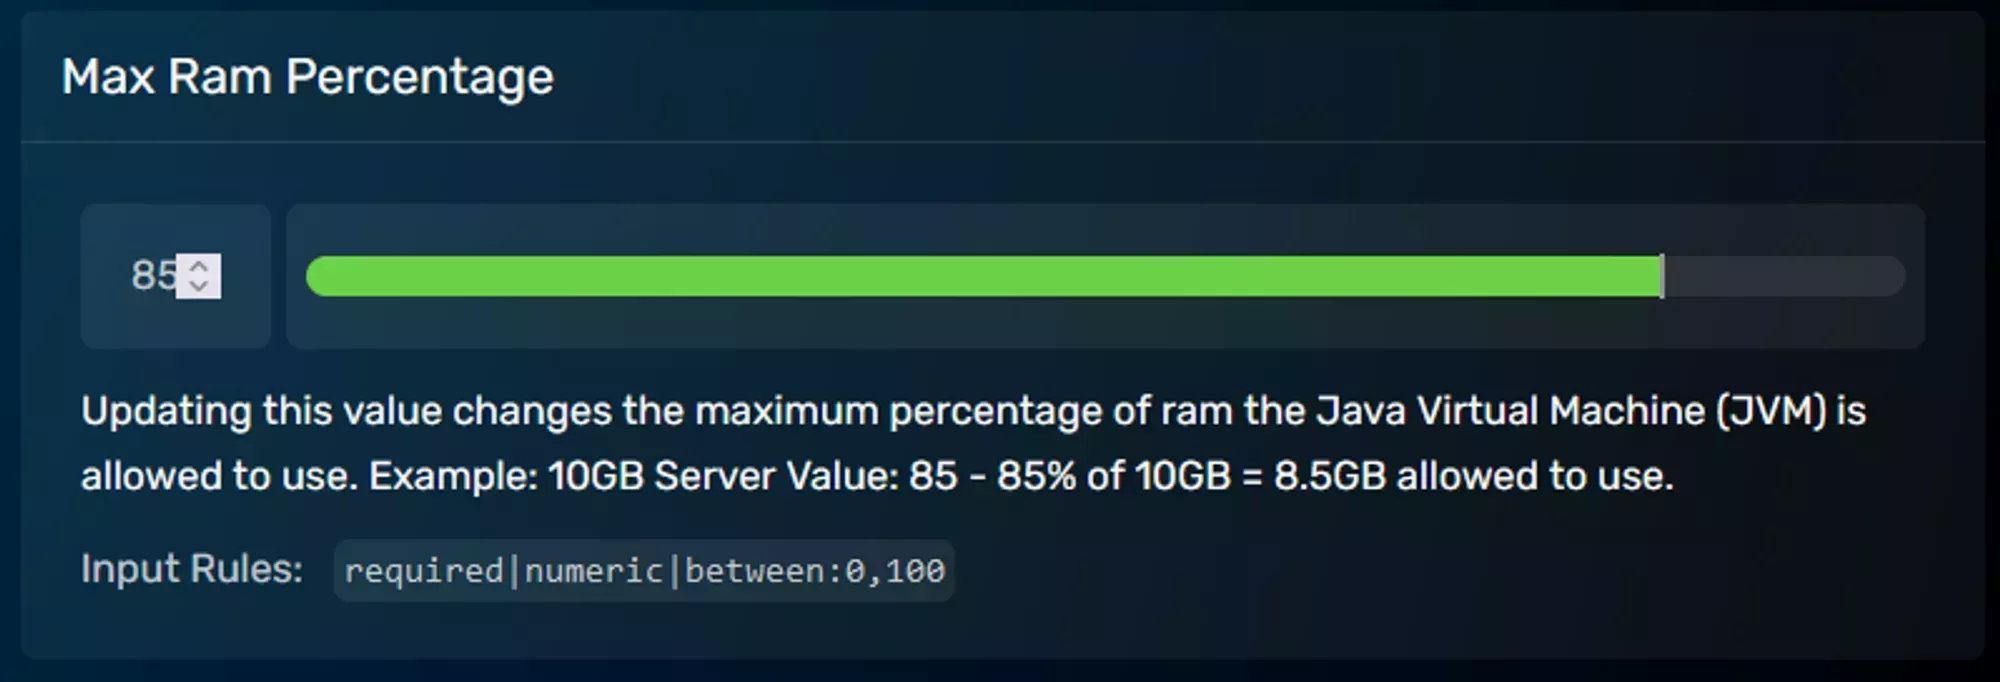
Our [Aikar's Flags article](/help/games/minecraft-java/configuration/aikars-flags) explains what that overhead is, why it exists, and why it shifts between versions.
### JVM Flags
Extra flags passed to the JVM to fine tune your server's behavior. They are added after the existing RAM flags and before the timezone flag, but position has no effect on how they run.
- **Aikar's flags** are the most common set. They are configured by default on all of our 8GB and larger packages, and you can add them manually on smaller plans. Our [Aikar's Flags article](/help/games/minecraft-java/configuration/aikars-flags) covers what they do and what WinterNode's policy on them is.
- **`-Dpaper.useLegacyPluginLoading=true`** enables the legacy plugin loader on Paper servers.
## `server.properties` file
Looking for in-game settings like `gamemode`, `difficulty`, `view-distance`, whitelist, or `motd`? Those live in the `server.properties` file, not the startup parameters. See the dedicated [server.properties guide](/help/games/minecraft-java/configuration/server-properties) for every option with current defaults and recommended values.
---
# How to Manually Upload Mods to Your Minecraft Server
> Upload mod JAR files to your Forge or Fabric Minecraft server using the File Manager or SFTP when the Modpack Manager isn't enough.
Source: https://winternode.com/help/games/minecraft-java/mods/manual-mod-upload
Add individual mods to your [Forge or Fabric](/help/games/minecraft-java/mods/overview) Minecraft server when you need mods that aren't part of your installed modpack.
Both Forge and Fabric (along with Fabric forks like Quilt) store mods in the `mods` folder and configuration files in the `config` folder, making this process consistent across most modern mod loaders.
## Uploading Mods via the File Manager
Use the [File Manager](/help/game-control-panel/the-file-manager) for uploading a single mod or a small number of mods:
1. Download the mod JAR file from a source like [Modrinth](https://modrinth.com) or [CurseForge](https://www.curseforge.com)
2. Open the **Game Control Panel** and go to the **File Manager**
3. Open the `mods` folder
4. Upload your mod JAR file
5. Restart your server
## Uploading Mods via SFTP
Use [SFTP](/help/game-control-panel/using-sftp) when adding several mods at once. SFTP is faster and more reliable for bulk transfers:
1. Connect to your server using an SFTP client like [FileZilla](https://filezilla-project.org/)
2. Navigate to the `mods` folder
3. Drag and drop your mod JAR files into the folder
4. Restart your server
## Troubleshooting
If your server fails to start after adding a mod, check the server logs for error messages. Common causes include:
- **Wrong Minecraft version.** The mod was built for a different version of Minecraft.
- **Wrong mod loader version.** The mod requires a specific version of Forge or Fabric.
- **Missing dependency.** The mod requires another library mod to be installed alongside it (look for a `required dependency` message in the logs).
- **Client-side only mod.** Some mods are designed to run on the player's client only and will crash a server if installed there. Check the mod's page to confirm it supports server-side installation.
---
# How to Manually Install a Modpack
> Manually install any Minecraft modpack: install the modloader with the Edition Installer, set the Java version, and upload your pack's files over SFTP.
Source: https://winternode.com/help/games/minecraft-java/mods/manual-modpack-installation
Manually install any Minecraft modpack by installing its modloader, setting the Java version, and uploading the pack's files. Use this when your pack isn't in the [Modpack Manager](/help/games/minecraft-java/mods/modpack-installation), or it didn't install cleanly.
The same four steps work for any pack and any modloader, no matter how the pack ships.
## Install Your Modpack
1. **Install the modloader.** Use the [Edition Installer](/help/games/minecraft-java/setup/using-the-edition-installer) to install your pack's modloader (Forge, NeoForge, or Fabric) and Minecraft version. This also sets the boot jar for you, so the server starts on the right file.
2. **Set the Java version.** The panel does not set this for you. Match it to your pack's Minecraft version, or the server crashes on startup. See [Java Version Selection](/help/games/minecraft-java/setup/java-version-selection).
3. **Upload your pack's files.** Upload the pack's content folders (`mods`, `config`, and any others like `scripts` or `kubejs`) over [SFTP](/help/game-control-panel/using-sftp). Do not upload a `libraries` folder or a loader jar. The Edition Installer already created those.
4. **Start your server.** It should show **Online** within 1 to 2 minutes.
## No Server Files? Build From the Client Pack
Some developers never release server files. Get them from the client pack instead:
1. Install the pack in a launcher like the [CurseForge app](https://www.curseforge.com/download/app), [MultiMC](https://multimc.org/), or [PolyMC](https://polymc.org/), then copy its files to a folder on your PC.
2. Remove the client-only mods. They crash a server. See [Common Errors](#common-errors) below for how to spot them.
3. Follow the [four steps above](#install-your-modpack): install the modloader, set Java, and upload your `mods` and `config` folders.
## Common Errors
Most modpack crashes come from one of these. Check your server log for the message.
### A Client-Side Mod Is Crashing the Server
Some mods only run on the player's PC and crash a server. The log shows:
```text
[main/FATAL] [ne.mi.fm.lo.RuntimeDistCleaner/DISTXFORM]: Attempted to load class
net/example/mod/mixin/SomeClientMixin for invalid dist DEDICATED_SERVER
```
The phrase `for invalid dist DEDICATED_SERVER` means a client-only mod is in your `mods` folder. Find the mod named in the class path, delete that jar, and repeat for any others. Players keep these mods on their own end.
### A Mod Is Missing a Dependency
A mod needs another mod (a library) that isn't installed. The log names it:
```text
[Server thread/FATAL] [FML]: MissingModsException: Mod tconstruct (Tinkers' Construct) requires [mantle@[1.12-1.3.3.49,)]
```
Download the exact version listed and add it to your `mods` folder. If it's already there, the version is wrong.
### The Server Runs as Vanilla, or "Unable to access jarfile"
The boot jar is wrong. This usually means the modloader wasn't installed, or a loader installer got uploaded instead of the server jar. Install the modloader with the [Edition Installer](/help/games/minecraft-java/setup/using-the-edition-installer), which sets the boot jar for you.
### The Server Won't Start With Obscure Errors
This is usually the wrong Java version. Older packs (Minecraft 1.12 to 1.16) often need Java 8. See [Java Version Selection](/help/games/minecraft-java/setup/java-version-selection).
## Pack Pinned to a Specific Build?
The Edition Installer carries every stable Forge and NeoForge build, so almost any pinned build is in the version list. Find the build in your pack's `manifest.json` (above) and select that exact version when you install the modloader.
If the Edition Installer doesn't list the build (rare), [contact our support team](https://winternode.com/discord?utm_source=help&utm_medium=article&utm_campaign=manual-modpack-installation) and we'll install it for you.
## Still Not Working?
If none of the above resolves your issue, [contact our support team](https://winternode.com/discord?utm_source=help&utm_medium=article&utm_campaign=manual-modpack-installation) with:
- Your [Server UUID](/help/getting-started/finding-your-server-uuid)
- The name and version of the modpack you're installing
- The last 50 lines of your console output
---
# How to Install a Modpack with the Modpack Manager
> Install a CurseForge modpack on your WinterNode server with the Modpack Manager, set the right Java version, and fix the common crashes that follow.
Source: https://winternode.com/help/games/minecraft-java/mods/modpack-installation
The **Modpack Manager** installs premade CurseForge packs in a few clicks. It is the easiest way to get a modpack running, and the path most players want. The Modpack Manager comes with every WinterNode [Minecraft server hosting plan](/games/minecraft), so you can install a CurseForge pack straight from the Game Panel.
## Install your modpack
The Modpack Manager pulls thousands of packs straight from [CurseForge](https://www.curseforge.com/minecraft/modpacks) and installs them in a few clicks.
1. In the [Game Panel](https://gcp.winternode.com), open **Tools** > **Modpack Manager**.
2. Search for your pack and click **Install**. Choose **Install Only** to keep your existing world and files, or **Format Server** to wipe everything and start fresh.
3. **Set the right Java version** for your pack's Minecraft version - the panel doesn't set this for you, and the wrong version crashes the server on startup. See [Java Version Selection](/help/games/minecraft-java/setup/java-version-selection).
4. Start your server.
## Common Issues
Most common first.
### Client-side mods crashing the server
Some mods only run on the client (your PC) and will crash a server if installed there. This is the most common reason a modded server will not start.
You will see this in the log:
```
[main/FATAL] [ne.mi.fm.lo.RuntimeDistCleaner/DISTXFORM]: Attempted to load class
net/example/mod/mixin/SomeClientMixin for invalid dist DEDICATED_SERVER
```
The phrase `for invalid dist DEDICATED_SERVER` means a client-only mod tried to load on the server. To fix it: find the mod name in the class path, remove that jar from the `mods/` folder, and repeat for any others. It is safe to remove them; players keep them on their own end.
Common client-only culprits: shader loaders (Oculus, Iris, OptiFine, Embeddium), FPS and rendering mods (Dynamic FPS, Entity Culling), HUD and minimap mods (Jade, WTHIT, Xaero's Minimap), and visual effects (Falling Leaves, Sound Physics).
### Server will not start (wrong jar)
If the server runs as vanilla, or reports **Unable to access jarfile**, the [Server Jar File](/help/games/minecraft-java/configuration/startup-parameters#server-jar-file) is set wrong. Point it at the installed `forge-*.jar` or `server.jar`, not `minecraft_server.*.jar` and not the `-installer.jar` (a Forge installer won't run as a server). If there is no modloader jar at all, the pack did not include one: [install the matching modloader with the Edition Installer](/help/games/minecraft-java/setup/using-the-edition-installer).
### Can't connect after installing
If the server starts but players get **Connection Lost** or an error on join:
- **Client version mismatch:** players must run the exact same pack and version as the server.
- **Faulty install:** if the log shows missing mods or classes, stop the server, delete the `mods/` folder and modpack configs, and reinstall through the Modpack Manager (or [manually](/help/games/minecraft-java/mods/manual-modpack-installation)).
- **Large-pack timeout:** big packs can kick players before they finish loading. Add [Packet Fixer](https://modrinth.com/mod/packet-fixer) (1.15 to 1.21+) or [RandomPatches](https://www.curseforge.com/minecraft/mc-mods/randompatches-forge) (1.12 to 1.19) to the server only to raise the timeout.
## Uninstalling a Modpack
### Switch to a different modpack
Archive your current files first so you can switch back later. See [Update or Switch Your Modpack](/help/games/minecraft-java/mods/updating-and-switching-modpacks).
### Go back to an unmodded server
1. [Take a manual backup](/help/game-control-panel/manual-backup) if you want to keep your world or configs.
2. In the Game Panel, go to **Advanced** > **Server Actions** and pick **Paper** or **Vanilla** from the **Edition** dropdown.
3. Enable **Format** to remove all modpack files, then click **Install Different Edition**.
4. Start your server.
For more on the Edition Installer and available server software, see [Using the Edition Installer](/help/games/minecraft-java/setup/using-the-edition-installer).
---
# Minecraft Mods and Modpacks: Where to Start
> Find the right guide for installing mods and modpacks on your Minecraft Java server. Pick a path based on whether you have a premade pack, a custom pack, or individual mods.
Source: https://winternode.com/help/games/minecraft-java/mods/overview
Mods extend Minecraft's functionality by adding new content, mechanics, or features. Unlike plugins (which only modify the server), mods typically require both the server and client to have matching installations.
Use the list below to find the guide that matches what you are doing.
## Which guide do I need?
- **Installing a ready-made pack from CurseForge** (for example Better MC or All the Mods): use the [Modpack Manager to install a premade modpack](/help/games/minecraft-java/mods/modpack-installation). This is the easiest path and works for most players.
- **Installing a custom pack, or a pack that does not ship server files:** [install a modpack manually](/help/games/minecraft-java/mods/manual-modpack-installation) - including building a server pack from a client-only pack when the developer never released one.
- **Adding a few individual mods** to an existing setup: [upload mods manually](/help/games/minecraft-java/mods/manual-mod-upload).
- **Updating a pack, or switching to a different one without losing your world:** [update or switch your modpack](/help/games/minecraft-java/mods/updating-and-switching-modpacks).
## Choosing a modloader
Every mod and modpack runs on a modloader, and each mod targets one of them. WinterNode supports both through the [Edition Installer](/help/games/minecraft-java/setup/using-the-edition-installer):
- **Fabric** - a lightweight, fast-updating modloader popular for performance mods and newer Minecraft versions.
- **Forge / NeoForge** - the original modloader with the largest mod ecosystem. **NeoForge** is its successor for Minecraft 1.20 and newer; some modern mods require it instead of Forge. They share a modding API but are installed separately.
If you are installing a premade pack, the Modpack Manager handles the modloader for you. You only need to pick one yourself when building a custom setup or adding individual mods - then [install it with the Edition Installer](/help/games/minecraft-java/setup/using-the-edition-installer).
### Client-side, server-side, or both?
Any mod is one of three types - check each mod's page before adding it:
- **Client-side only** - won't run on a server; install it in your own client, not here.
- **Server-side only** - needed on the server; connecting players don't need it installed.
- **Both** - required on the server *and* on every client that connects.
---
# How to Update or Switch Your Minecraft Modpack
> Update your Minecraft modpack to a newer version, or switch to a different pack without losing your world, using backups and the Modpack Manager.
Source: https://winternode.com/help/games/minecraft-java/mods/updating-and-switching-modpacks
Updating a modpack (a newer version of the same pack) and switching to a different pack are two related jobs. Both start with a backup, and neither needs the **Format Server** button - that wipes everything. If you haven't installed a pack yet, start with [Install a Modpack with the Modpack Manager](/help/games/minecraft-java/mods/modpack-installation).
## Update your modpack
Update server-side to stay in sync with your players' client version and avoid connection errors. The Modpack Manager handles most updates.
1. Back up your server, then **stop** it.
2. Delete the `mods` folder from the root directory.
3. Open **Tools → Modpack Manager**, find your installed pack, and click **Install**.
4. Select the new version. **Do not tick Format Server.**
5. Start your server, then connect with the updated client pack to verify.
### Server won't start after updating?
1. **Check the logs** - they usually name the cause: a missing mod, an incomplete extraction, or the wrong Java version.
2. **Check your Java version** - a newer pack may need a newer one. Verify it against the [Java version requirements](/help/games/minecraft-java/setup/java-version-selection).
3. **Re-run the update** - confirm you did not tick **Format Server**, delete the `mods` folder, and reinstall.
4. **Restore your backup** - if nothing else works, restore the backup you took before updating and start over.
## Switch to a different modpack
A single server runs one modpack at a time. To swap packs but keep your current world, **archive** the whole server first so you can restore it later - don't use Format Server.
### 1. Archive your current server
1. Stop your server.
2. In the [Game Panel](https://gcp.winternode.com), open **File Manager**.
3. Select **all** files and folders in the root directory and click **Compress** - this creates a `.tar.gz` archive in the root.
4. Optionally download the archive as an extra local backup.
### 2. Install the new modpack
1. In the **File Manager**, delete everything in the root directory **except** the archive you just made.
2. Open **Tools → Modpack Manager**, search for the new pack, and click **Install**.
3. **Do not tick Format Server** - your directory is already clear.
4. Start your server and connect with the matching client pack to confirm.
### 3. Switch back later
1. Stop your server.
2. In the **File Manager**, delete the current pack's files - keep everything **except** your archive from step 1.
3. Select the archive and click **Decompress**.
4. Start your server. It loads your previous pack and world exactly as you left it.
## Automatic backups
WinterNode automatically backs up your server every 12 hours, at roughly 2-3 AM and 2-3 PM Central. If you lost files - for example by ticking **Format Server** during a switch - contact support; we can often restore from a recent snapshot as long as the loss was within the backup window.
## Still not working?
[Contact our support team](https://winternode.com/discord?utm_source=help&utm_medium=article&utm_campaign=updating-and-switching-modpacks) with your [Server UUID](/help/getting-started/finding-your-server-uuid), roughly when the issue started (so we can match an automatic backup), and the names of the modpacks involved.
---
# Minecraft BlueMap
> BlueMap is a 3D world map plugin for Minecraft servers, offering browser-based viewing, easy installation, port setup, and support for multiple mod...
Source: https://winternode.com/help/games/minecraft-java/plugins/bluemap
BlueMap is a 3D world map plugin that renders your server's world on a browser and is served by an integrated web server on your Minecraft server. Compared to DynMap, it offers better performance and aesthetics. It renders an accurate 3D block-to-block map of the world, including full-resolution textures, which can be navigated as a spectator or from a pseudo-top-down view. If you prefer a simpler 2D map, see [SquareMap](/help/games/minecraft-java/plugins/squaremap) instead.
---
You can install BlueMap on any Forge, Fabric, Sponge, or Spigot based server, including any forks of Fabric or Spigot like Paper and Quilt.
The first step of the installation process is to identify what mod loader you’re using and the download the correct version of BlueMap from the [releases page on GitHub](https://github.com/BlueMap-Minecraft/BlueMap/releases). Each version will have the name of the mod loader attached to it. Then you’ll need to upload the file to your servers mod or plugin folder [Using SFTP](/help/game-control-panel/using-sftp) or [Using the File Manager](/help/game-control-panel/the-file-manager) and restart your server.
After you’ve restarted your server you’ll need to assign a port in the configuration file. The next section goes over details surrounding what the port does and how you can request one.
## port
BlueMap requires a port to serve the web server that your players will connect to. The port number will be appended to the end of your server IP or domain in a browsers address bar in order to view the web map. For example, 123.123.123.123:**8100** or example.com:**8100**. You can find more information about how to get a port to use for BlueMap by checking out our guide on [Additional Ports & Allocations](/help/getting-started/additional-allocations).
After getting the port assigned for BlueMap, you’ll need to make sure that the configuration file matches the port number you were assigned. If you’re on a dedicated IP, you should be able to get the default BlueMap port number of `8100` but if you’re on a shared IP you’ll likely need to use another port number. Check the `Management -> Allocations` tab for the port number you were assigned.
With the port number in hand, locate your configuration file for the mod/plugin loader using [this Guide](https://bluemap.bluecolored.de/wiki/getting-started/Installation.html#the-config-files) provided by BlueMap and change the `port` value in the `webserver.conf` file to the port you were assigned. After another server restart you should be able to access BlueMap from your Server IP + the port, IE ``.
---
# How to Pre-Generate Your Minecraft World with Chunky
> Set up Chunky on Paper, Fabric, or Forge to pre-generate your world and eliminate exploration lag. World border setup, size planning, and all commands included.
Source: https://winternode.com/help/games/minecraft-java/plugins/chunky
Pre-generate your world before players join: set a world border, point Chunky at it, then let it run with the server empty. This is the biggest single reduction in lag you can make without changing how your players play.
## Quick answer
- Set the border first: `execute in overworld run worldborder set 10000`. The vanilla command takes a **diameter**, so `10000` gives you the 5k world we recommend.
- Select the world: `chunky world overworld`.
- Use that border as the generation area: `chunky worldborder`.
- Start it: `chunky start`. Check the radius and center it echoes back before confirming.
- Repeat for `the_nether` and `the_end`.
- Stop or pause anytime with `chunky cancel` or `chunky pause `.
Keep players off the server while it runs. Chunky will use every resource it can get.
## Supported versions
| Platform | Supported from |
|----------|----------------|
| Spigot | 1.13 to latest |
| Fabric | 1.16.4 to latest |
| Forge | 1.16.5 to latest |
## Why pre-generate
World generation is one of the most intensive tasks a Minecraft server does. Generating it up front means players never pay that cost while exploring, which keeps resource use far more constant and the server far more stable no matter how far or how fast people travel.
It also gives you a clean upgrade path across game versions. Pre-generate inside a border, then expand the border when a new version drops so players have a clearly defined line where new content starts. If you plan to do this, start small: the world has to grow with every update, and storage adds up quickly.
## Picking a world size
Decide your size **before** you start generating. Talk it through with your team or players first, because changing your mind later means regenerating.
### Our recommendation
We recommend starting at 5k, meaning 5,000 blocks in each direction from 0,0. The map below was generated at that size with a random seed to give you a sense of scale. You can always expand later, and starting smaller keeps the world usable across more game versions.
### Going larger
Disk and generation time scale with the area of the border, roughly the square of your radius. As a rough guide, a 5,000-block world lands around 3 GB and an hour of generation, a 10,000-block world around 9 GB and a few hours, and each further jump grows disk and time almost exponentially. Very large radii (100,000+) are effectively infeasible on any hardware.
### The Nether
The Nether is 8 times smaller than the overworld, so you can set its border (and its file size) 8 times smaller and still cover the same overworld area. That's simple for players to reason about, but the result is a much smaller Nether than most are used to.
If you'd rather keep a full-size Nether, any portal built there that would put a player outside the overworld border pushes them back to the border instead. That can confuse players who aren't expecting it.
## Setting your world border
Players need a border, otherwise they'll walk straight out of the area you generated and you're back to on-demand generation. The vanilla `worldborder` command is the most widely supported option, and Chunky can read it directly as its generation area, so that's what we'll use.
Borders are set per dimension, so run each command through `execute in run ` using these world names. We recommend pre-generating all of your dimensions.
| Dimension | `` value |
|-----------|-----------------|
| Overworld | `overworld` |
| Nether | `the_nether` |
| End | `the_end` |
Start by checking the current border with `execute in run worldborder get`. On an untouched world it reports `59999968`:
```
execute in run worldborder get
[HH:MM:SS INFO]: The world border is currently 59999968 blocks wide
```
If you see a different number, the border has been set before, so double check your work.
That value is a **diameter**, but world size is usually discussed as a radius. A world reaching from -10 to +10 is a "10 block world" everywhere else in this article, but needs a `20` block border to cover it. So for our recommended 5k size, run `execute in run worldborder set 10000`, then run the `get` command again to confirm it took.
If your world isn't centered on `0,0`, move the border to match with `execute in run worldborder center `.
## Installing Chunky
Chunky ships a dedicated build for each of the three major platforms. Pick the one matching your mod loader and game version, drop it in the correct folder, and restart:
- [Chunky for Spigot](https://www.spigotmc.org/resources/chunky.81534/)
- [Chunky for Forge](https://www.curseforge.com/minecraft/mc-mods/chunky-pregenerator-forge)
- [Chunky for Fabric](https://www.curseforge.com/minecraft/mc-mods/chunky-pregenerator)
## Starting the pre-generation
### Using the vanilla world border (recommended)
Select the world you want to generate with `chunky world `, then run `chunky worldborder` to tell Chunky to use that world's border as the generation area instead of a shape you define by hand.
Chunky replies with the **radius** and center of its selection. **Make sure both match what you set before you go any further.** Remember the border was set as a diameter, so this radius should be exactly half of it.
Once the selection and center are confirmed, run `chunky start`. It warns you about the center and size one more time, which is your last chance to catch a mistake. It is impossible to overstate how important it is that those values are correct.
Chunky then loops through every chunk in the selection, generating them the same way a player would. Keep the server empty while this runs.
### Selecting the area manually
If you don't use the vanilla border, or you're using another world border plugin, define the selection yourself. It gives you more control over the shape than the vanilla border does.
Select the world with `chunky world ` and the center with `chunky center []`. Then set the radius, using one number for a square or two for a rectangle:
- `chunky radius 5k` gives a square 5k world.
- `chunky radius 5k 10k` gives a rectangle, 5k on one side and 10k on the other.
Radius values accept these operators:
- `c` reads the number as chunks instead of blocks.
- `k` reads the number as thousands of blocks.
- `+` / `-` adds to or subtracts from the current radius.
## Common issues
### Out of memory
Generation is intensive enough that you can run out of memory partway through. To reduce the odds or soften the impact:
- Close the server to players.
- Disable plugins you don't need by adding `.disabled` to the end of the file name.
- Confirm Aikar's flags are set in your [Server Options](/help/games/minecraft-java/configuration/startup-parameters#jvm-flags).
- Use a frequent [restart schedule](/help/game-control-panel/the-schedule-manager), every 10 to 30 minutes, to preempt crashes and clear memory. Set `continue-on-restart` to true in the Chunky config so it picks back up after each restart.
### Out of disk space
Worlds grow as they generate. We provide 10 GB of storage for every GB of RAM on your plan. If you need more, open a ticket in our Discord and we'll be happy to increase it.
## Utility commands
- `chunky pause ` pauses the task in that world, `chunky continue ` resumes it.
- `chunky silent` toggles all status output off (or back on).
- `chunky quiet ` changes how often status messages print, in seconds. Default is every second; `0` prints a message for every chunk generated.
---
# Minecraft CoreProtect
> Track, view, and revert player or game changes with CoreProtect on your Minecraft server. Learn installation, inspection, rollback, and lookup commands.
Source: https://winternode.com/help/games/minecraft-java/plugins/coreprotect
To undo grief, stand near the damage and run `/co rollback user: time:2h radius:20`. To see what happened without changing anything, swap `rollback` for `lookup`. CoreProtect logs almost every change a player (and much of what the game itself) makes, and is worth running on a server of any size.
## Quick answer
- **Install:** drop the jar in `plugins`, restart, done.
- **Investigate a block:** `/co i` to toggle inspector mode, then left-click to see who placed it, right-click to see what was removed.
- **See what happened:** `/co lookup user:Alex time:1d radius:50`
- **Undo it:** `/co rollback user:Alex time:1d radius:50`
- **Undo your undo:** `/co undo`, or `/co restore` with the same parameters.
- **Check before you commit:** add `#preview` to any rollback.
See also: [CoreProtect Events](/help/games/minecraft-java/plugins/coreprotect-events) for a full list of tracked actions, [Rolling Back Player Death](/help/games/minecraft-java/plugins/coreprotect-player-death) for item recovery after death, and [Database Corruption](/help/games/minecraft-java/plugins/coreprotect-database-corruption) for troubleshooting database issues.
## Installation
Download the latest [CoreProtect](https://www.spigotmc.org/resources/coreprotect.8631) release, import the `CoreProtect-XX.X.jar` file into your server's `plugins` folder, and restart the server. On restart it loads the plugin and generates a new `CoreProtect` folder with its config and database.
## Inspect
Once CoreProtect is running it starts logging immediately. Enable inspector mode with `/co inspect` (or `/co i`) and run the same command again to turn it off. While it's on:
- Left-click a block to see who placed it.
- Right-click a block to see what adjacent block was removed.
- Place a block somewhere to see what was removed at that spot.
- Place a block into water, lava, or similar to see who put the liquid there.
- Right-click a door, button, chest, or furnace to see who last used it.
## Basic rollback
`/co rollback user: time: